Home Blog Page 47

Zucchini Canning Recipe

0

As summer’s bounty of zucchini floods your garden, you might find yourself wondering how to make the most of this versatile and prolific vegetable.

One excellent way to enjoy zucchini all year round is by canning it. Canning zucchini not only preserves its freshness but also opens up a world of culinary possibilities when the colder months roll around.

We’ll explore some delightful zucchini canning recipes that will keep your pantry stocked with goodness.

Name:Zucchini Canning Recipe
Cuisine:Preserving
Prep Time:30 minutes
Cooking Time:20 minutes
Total Time:50 minutes
Servings:6
Yield:6

Ingredients

  • 4 cups zucchini, sliced
  • 1 onion, thinly sliced
  • 2 cups white vinegar
  • 1 ½ cups sugar
  • 1 ½ teaspoons celery seed
  • 1 ½ teaspoons mustard seed
  • 1 ½ teaspoons ground turmeric

Instructions:

1. Prepare Your Equipment:

Before you start canning, make sure you have all the necessary equipment cleaned and ready. You’ll need canning jars, lids, rings, a large canning pot, a canning rack, a funnel, a ladle, and a bubble remover tool.

2. Prepare the Zucchini:

Wash the zucchini and slice them into 1/4-inch rounds. Thinly slice the onions, mince the garlic, and dice the red and green bell peppers.

3. Combine Vegetables and Salt:

In a large non-reactive bowl, combine the sliced zucchini, onions, minced garlic, and diced bell peppers. Sprinkle the pickling salt over the mixture and toss everything together. Cover the bowl and let it sit for 2 hours or refrigerate overnight.

4. Rinse and Drain:

After the resting period, rinse the vegetable mixture thoroughly under cold water to remove the excess salt. Drain well.

5. Prepare the Canning Syrup:

In a large pot, combine the white vinegar, granulated sugar, mustard seeds, celery seeds, and ground turmeric. Bring the mixture to a boil, stirring until the sugar has dissolved.

6. Cook the Vegetables:

Add the drained vegetable mixture to the pot with the syrup. Simmer for about 10 minutes, or until the vegetables are tender-crisp.

7. Fill the Jars:

Using a funnel and a ladle, carefully fill the hot, sterilized canning jars with the zucchini mixture, leaving about 1/2-inch of headspace. Use a bubble remover tool to release any trapped air bubbles.

8. Seal the Jars:

Wipe the jar rims clean, place sterilized lids on top, and screw on the rings until they are fingertip tight.

9. Process the Jars:

Place the filled jars in a canning pot with a canning rack and enough boiling water to cover the jars by at least an inch. Bring the water to a boil, then process the jars in boiling water for 10 minutes (adjust processing time for altitude, if needed).

10. Cool and Store:

Carefully remove the jars from the canning pot and place them on a clean, dry towel. Allow them to cool at room temperature for 12 to 24 hours. Ensure the lids have sealed by pressing down on the center of each; if they don’t pop back, they’re sealed.

11. Enjoy:

Label your jars with the date and store them in a cool, dark place. Properly sealed jars can be stored for up to a year. Once opened, refrigerate and use within a few weeks.

Nutrition Facts (per serving)

Calories: 90

Total Fat: 0g

Sodium: 150mg

Total Carbohydrates: 23g

Dietary Fiber: 0g

Sugars: 22g

Protein: 0g

10 Simple Zucchini Canning Recipes

Preserve the bounty of your zucchini harvest with this straightforward canning recipe. Slice zucchini into jars, add a flavorful brine with vinegar and spices, then process for safe, long-lasting storage.

Enjoy the taste of summer all year round by having delicious zucchini at your fingertips for soups, stews, and side dishes. Canning has never been easier!

1. Zucchini and Tomato Pasta Sauce

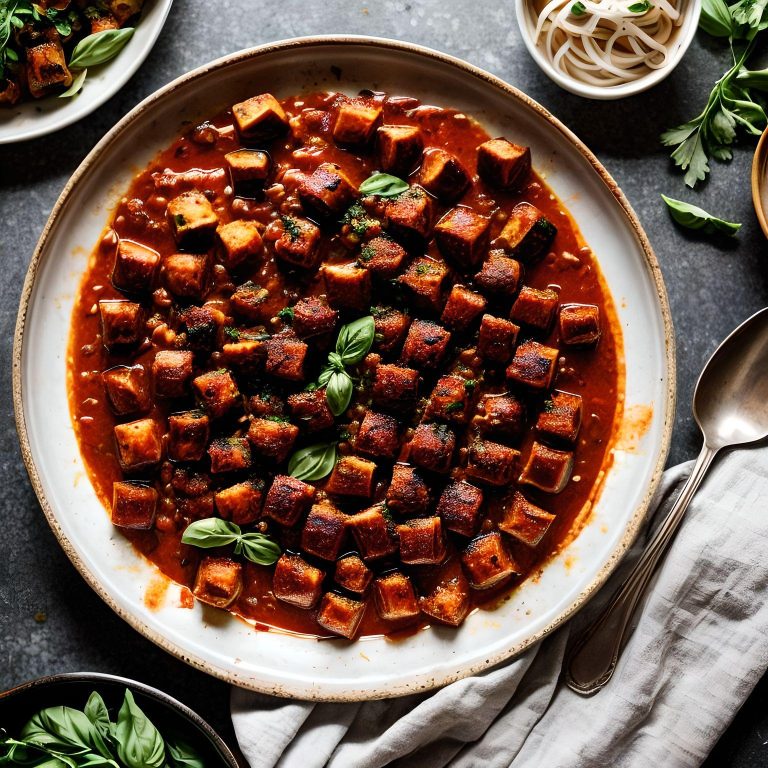
Create a flavorful pasta sauce by combining zucchini, tomatoes, onions, and a blend of Italian herbs. Simmer until thick, then can for future pasta nights. Each jar bursts with the essence of summer gardens.

2. Zucchini and Corn Relish

A sweet and tangy relish made from zucchini and fresh corn kernels, spiced with mustard seeds and turmeric. Perfect as a condiment for hot dogs, burgers, or as a side for grilled meats.

3. Zucchini and Red Onion Chutney

This zesty chutney combines zucchini, red onions, vinegar, and spices for a delightful condiment. It pairs wonderfully with cheeses, sandwiches, or as a glaze for roasted meats.

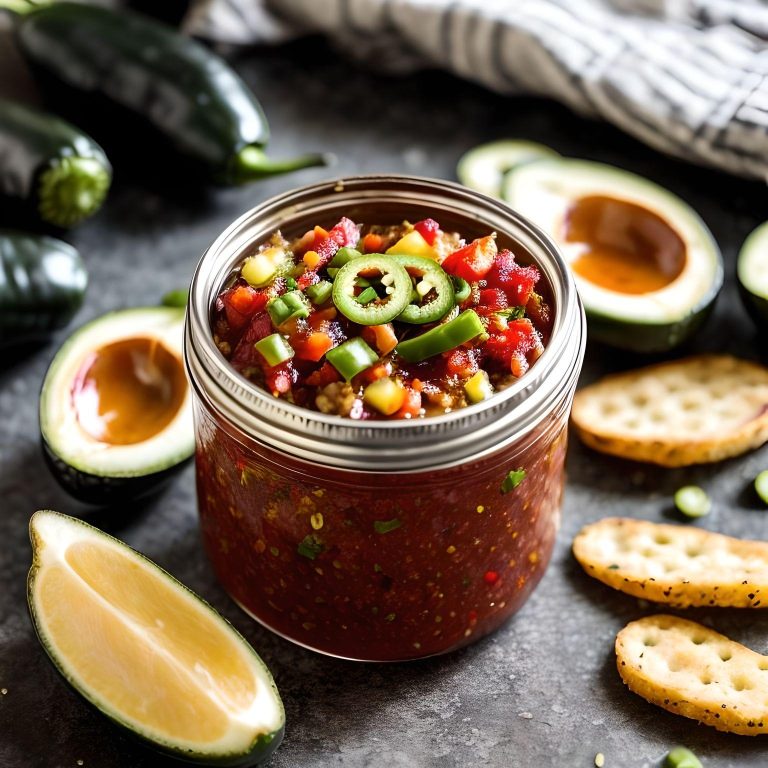
4. Zucchini and Green Chili Salsa

A zesty salsa with a kick! Zucchini, green chilies, tomatoes, and spices come together to create a versatile condiment perfect for tacos, nachos, or as a dip for tortilla chips.

5. Zucchini and Dill Pickle Spears

Turn zucchini into crispy dill pickle spears. Brined with dill, garlic, and vinegar, these spears are a crunchy and tangy snack or a tasty addition to your burger.

6. Zucchini and Basil Pesto

Capture the fresh taste of basil and zucchini in a pesto sauce. Blend with garlic, olive oil, pine nuts, and Parmesan cheese for a versatile sauce to toss with pasta, spread on sandwiches, or use as a pizza base.

7. Zucchini and Carrot Pickles

These colorful pickles combine zucchini and carrots in a sweet and tangy brine. A refreshing addition to salads or a crisp, crunchy snack.

8. Zucchini and Curry Pickles

Add a twist to your pickles with a hint of curry. Zucchini spears are pickled in a flavorful blend of spices and vinegar. They make a unique and spicy condiment.

9. Zucchini and Lemon Marmalade

Zucchini and lemon peel are cooked down with sugar to create a bright and citrusy marmalade. Spread it on toast or use it as a glaze for baked goods.

10. Zucchini and Cinnamon Apple Butter

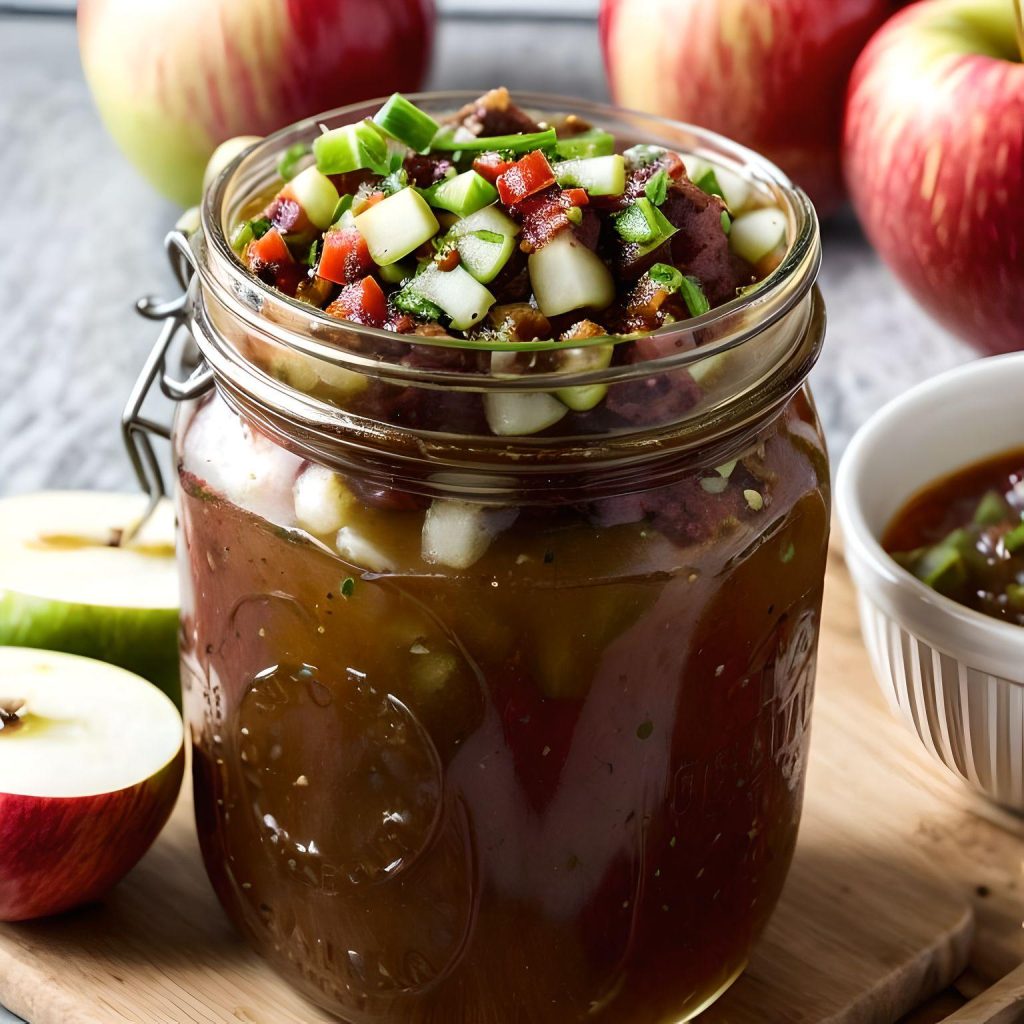
Create a comforting apple butter with a zucchini twist. Simmer zucchini with apples, cinnamon, and sugar until thick and aromatic. Enjoy on pancakes, toast, or as a filling for pastries.

When zucchini season is in full swing, make the most of it by canning these versatile veggies. From zucchini relish to pickles and chutneys, there’s a canning recipe for every taste.

These jars of goodness not only capture summer’s flavors but also provide delicious options for your pantry throughout the year. Explore the world of zucchini canning today!

Koeksisters Recipe

Koeksisters are a beloved South African delicacy, known for their sweet and syrupy goodness.

These twisted, deep-fried pastries are a staple in South African cuisine, often enjoyed with a cup of tea or coffee.

Below are two delightful recipes to create your own homemade koeksisters, along with their nutrition facts.

Name:Koeksisters Recipe
Cuisine:South Africa
Prep Time:30 minutes
Cooking Time:20 minutes
Total Time:2 hours (including resting time)
Servings:16 koeksisters
Yield:16 koeksisters

Ingredients

  • 4 cups all-purpose flour
  • 1/2 cup unsalted butter, softened
  • 1/2 cup milk
  • 2 large eggs
  • 1/4 cup sugar
  • 1/4 teaspoon salt
  • 2 teaspoons baking powder
  • Vegetable oil for frying

For the Syrup

2 cups sugar

1 cup water

1/2 teaspoon ground cinnamon

1/2 teaspoon ground ginger

Zest of 1 lemon

Nutrition Facts

Calories: 280

Carbohydrates: 52g

Fat: 6g

Protein: 5g

Sugar: 30g

Instructions

Prepare the Dough

In a mixing bowl, combine the flour, sugar, salt, and baking powder.

Add the softened butter and mix until the mixture resembles coarse crumbs.

In a separate bowl, whisk together the eggs and milk. Add this mixture to the dry ingredients and mix to form a dough.

Knead the dough on a floured surface until smooth, then cover and let it rest for 1 hour.

Shape the Koeksisters

Roll out the dough to about 1/2-inch thickness and cut into strips, about 4 inches long and 1/2 inch wide.

Make a lengthwise slit in each strip, but leave the top and bottom joined.

Carefully twist each strip and press the ends to seal.

Fry the Koeksisters

Heat vegetable oil in a deep frying pan to 350°F (175°C).

Fry the twisted dough strips until golden brown and crisp, about 2-3 minutes per side. Remove and drain on paper towels.

Prepare the Syrup

In a saucepan, combine the sugar, water, ground cinnamon, ground ginger, and lemon zest.

Bring to a boil and simmer for about 10-15 minutes until the syrup thickens slightly.

Coat the Koeksisters

Dip the warm koeksisters into the syrup, ensuring they are fully coated.

Allow them to soak for a few minutes, then remove and let excess syrup drip off.

Serve and Enjoy

Serve the koeksisters warm or at room temperature. They’re best enjoyed fresh with a hot cup of tea or coffee.

Nutritional Information

Calories: 280

Carbohydrates: 52g

Dietary Fiber: 1g

Sugars: 30g

Fat: 6g

Saturated Fat: 3g

Trans Fat: 0g

Protein: 5g

Sodium: 75mg

Vitamin D: 0mcg

Calcium: 50mg

Iron: 2.1mg

Potassium: 83mg

Enjoy the delightful flavors and cultural experience of homemade koeksisters with this simple yet delicious recipe. Experiment with different variations to suit your taste and savor the sweetness of South African cuisine!

10 Simple Delightful Koeksisters Recipes

Koeksisters, a popular South African delicacy, are sweet and syrupy deep-fried dough twists. To make them, mix flour, baking powder, and milk, shape the dough, deep-fry until golden, and soak in a syrup infused with cinnamon and ginger. Enjoy this delicious treat!

Coconut-Infused Koeksisters

Coconut-Infused Koeksisters

Elevate your koeksisters by adding a tropical twist. After the traditional frying and soaking process, roll them in desiccated coconut for a delightful crunch and a hint of exotic flavor.

Chocolate-Drizzled Koeksisters

Chocolate-Drizzled Koeksisters

Take a classic koeksister and give it a chocolatey makeover. After soaking in syrup, drizzle them with melted chocolate for a delightful blend of sweet and rich indulgence.

Almond-Pistachio Koeksisters

Almond-Pistachio Koeksisters

Incorporate a nutty dimension by sprinkling crushed almonds and pistachios over the syrup-drenched koeksisters. The crunch and flavor of the nuts perfectly complement the sweetness.

Cardamom-Infused Koeksisters

Cardamom-Infused Koeksisters

Add a touch of the Middle East by infusing the syrup with cardamom. The aromatic and slightly spicy notes of cardamom enhance the overall flavor of the koeksisters.

Orange-Zest Koeksisters

Orange-Zest Koeksisters

Infuse a zesty citrus flavor by adding orange zest to the syrup. The bright and tangy notes of orange zest bring a refreshing twist to the traditional sweet syrup.

Vanilla-Cinnamon Koeksisters

Vanilla-Cinnamon Koeksisters

Enhance the syrup with a splash of vanilla extract and a pinch of ground cinnamon. The warm, comforting flavors of vanilla and cinnamon complement the sweetness of the koeksisters.

Ginger-Spiced Koeksisters

Ginger-Spiced Koeksisters

For a bit of heat and complexity, infuse the syrup with grated ginger. The spicy kick of ginger adds a unique and invigorating element to the sweet koeksisters.

Lemon-Poppy Seed Koeksisters

Lemon-Poppy Seed Koeksisters

Introduce a burst of citrusy flavor by adding lemon zest to the dough and syrup. Sprinkle some poppy seeds over the soaked koeksisters for a delightful crunch.

Honey-Glazed Koeksisters

Honey-Glazed Koeksisters

Substitute part of the sugar in the syrup with honey for a different sweetness. The natural richness of honey gives the koeksisters a distinctive taste.

Rooibos-Infused Koeksisters

Rooibos-Infused Koeksisters

Create a South African fusion by infusing the syrup with brewed rooibos tea. The earthy and slightly sweet rooibos flavor enhances the authenticity of this beloved South African treat.

Discover the joy of making koeksisters with these 10 delightful recipes. From traditional to modern twists, these simple recipes will have you creating this beloved South African treat in no time. Whether you prefer a crispy or syrupy finish, there’s a recipe here to satisfy every palate. Embrace the sweet, cinnamon-infused goodness of koeksisters today.

Effective Elimination Diet Recipe

0

Are you considering an elimination diet to identify food sensitivities, allergies, or improve your overall health? This dietary approach involves temporarily removing specific foods from your diet and then systematically reintroducing them to pinpoint any adverse reactions.

While an elimination diet can be challenging, it doesn’t mean you have to sacrifice flavor and variety in your meals. In fact, there are plenty of delicious recipes that align with the principles of an elimination diet.

We’ll explore some tasty and nutritious recipes that you can enjoy while on this journey to better understand your body’s relationship with food.

NameEffective Elimination Diet Recipe
CuisineFusion
Prep Time15 minutes 
Cooking Time0 minutes
Total Time15 minutes 
Servings2
Yield2 servings

Ingredients

  • 2 medium zucchinis
  • 1 ripe avocado
  • 1/4 cup fresh basil leaves
  • 2 cloves garlic
  • 2 tablespoons olive oil
  • Juice of 1 lemon
  • Salt and pepper to taste

Instructions

Spiralize the zucchinis into noodles.

In a blender or food processor, combine the avocado, basil, garlic, olive oil, lemon juice, salt, and pepper. Blend until smooth.

Toss the zucchini noodles with the avocado pesto sauce.

Serve chilled, garnished with additional basil leaves if desired.

Nutrition Facts (per serving)

  • Calories: 320
  • Total Fat: 28g
  • Saturated Fat: 4g
  • Cholesterol: 0mg
  • Sodium: 15mg
  • Total Carbohydrates: 17g
  • Dietary Fiber: 10g
  • Sugars: 3g
  • Protein: 5g

10 Simple Effective Elimination Diet Recipes

Discover delicious elimination diet recipes to identify food sensitivities and improve your health. Try zucchini noodles with avocado pesto, baked salmon with roasted veggies, quinoa salad with lemon-tahini dressing, or chicken and vegetable stir-fry. These flavorful dishes are designed to align with elimination diet principles, helping you on 

1. Roasted Butternut Squash Soup

Roasted Butternut Squash Soup

This creamy soup is both comforting and nutritious. Simply roast butternut squash with olive oil, salt, and pepper until tender. Blend it with a bit of vegetable broth until smooth. Add a dash of coconut milk for creaminess if tolerated. Season with fresh herbs like rosemary or thyme.

2. Spinach and Strawberry Salad

Spinach and Strawberry Salad

Combine fresh baby spinach, sliced strawberries, and chopped cucumber. Dress with a zesty lemon and olive oil vinaigrette. Optionally, add grilled chicken or tofu for protein. This salad is bursting with flavor and vitamins.

3. Baked Sweet Potato Fries

Baked Sweet Potato Fries

Cut sweet potatoes into fries, toss with a touch of olive oil, salt, and paprika. Bake until crispy. These fries make a delicious, guilt-free side dish.

4. Grilled Lemon Herb Chicken

Marinate chicken breasts in lemon juice, olive oil, garlic, and your choice of fresh herbs. Grill until cooked through and serve with a side of steamed broccoli.

5. Quinoa-Stuffed Bell Peppers

Grilled Lemon Herb Chicken

Cook quinoa and mix it with sautéed vegetables, like zucchini, tomatoes, and onions. Stuff the mixture into halved bell peppers and bake until peppers are tender.

6. Cucumber and Dill Salad

Cucumber and Dill Salad

Combine thinly sliced cucumbers with fresh dill and a dressing made of lemon juice, olive oil, and a pinch of salt. This refreshing salad is a perfect side dish.

7. Grilled Shrimp Skewers

Grilled Shrimp Skewers

Thread shrimp onto skewers, brush with a mixture of olive oil, lemon juice, and garlic, and grill until they turn pink and slightly charred. Serve with a side of quinoa.

8. Mashed Cauliflower

Steam cauliflower until soft, then mash it with a bit of olive oil and season with salt and pepper. This creamy alternative to mashed potatoes is both comforting and healthy.

9. Sautéed Greens with Garlic

Sautéed Greens with Garlic

Sauté a mix of your favorite greens, like spinach, kale, and Swiss chard, with minced garlic and a touch of olive oil. Add a squeeze of lemon juice for brightness.

10.Berry Smoothie Bowl

Berry Smoothie Bowl

Blend mixed berries, a ripe banana, and a bit of almond milk until smooth. Pour into a bowl and top with sliced banana, shredded coconut, and chia seeds. This colorful bowl is a delightful way to start your day.

These recipes are designed to help you navigate an elimination diet while enjoying a variety of delicious and allergen-friendly meals. Always remember to tailor them to your specific dietary needs and consult with a healthcare professional or dietitian for personalized guidance.

Chili’s Potato Soup Recipe

0

Warm, comforting, and full of flavor, Chili’s Potato Soup is a favorite at the popular restaurant chain.

But did you know that you can recreate this delicious dish in the comfort of your own kitchen?

We’ll walk you through the steps to make Chili’s Potato Soup from scratch, so you can enjoy its creamy goodness anytime you like.

NameChili’s Potato Soup Recipe
CuisineAmerican
Prep Time20 minutes
Cooking Time30 minutes
Total Time50 minutes
Servings6 servings
Yield6 bowls of soup

Ingredients

  • 4 large russet potatoes, peeled and diced
  • 1 small onion, finely chopped
  • 2 cloves garlic, minced
  • 4 cups chicken broth
  • 1 cup whole milk
  • 1 cup heavy cream
  • 1/4 cup unsalted butter
  • 1/4 cup all-purpose flour
  • 1 cup shredded cheddar cheese
  • 1/2 cup sour cream
  • Salt and pepper to taste
  • 1/4 cup chopped fresh chives (for garnish)
  • Crumbled bacon (optional, for garnish)

Instructions

1. Prepare the Potatoes

Start by peeling and dicing the russet potatoes into small cubes. Set them aside.

2. Sauté the Onions and Garlic

In a large pot, melt the unsalted butter over medium heat.

Add the finely chopped onion and minced garlic to the pot and sauté until they become translucent and fragrant.

3. Make the Roux

Sprinkle the all-purpose flour over the sautéed onions and garlic.

Stir constantly for a couple of minutes to create a roux, which will help thicken the soup.

4. Add Potatoes and Broth

Toss in the diced potatoes and pour in the chicken broth.

Bring the mixture to a boil, then reduce the heat and let it simmer until the potatoes are tender (usually about 10-15 minutes).

5. Blend the Soup

Using an immersion blender or a regular blender, carefully blend the soup until it reaches your desired consistency. You can leave it slightly chunky or make it smooth – it’s your choice!

6. Add Cream and Milk

Return the blended soup to the pot and add the heavy cream and whole milk. Stir well to combine.

7. Season and Simmer

Season the soup with salt and pepper to taste. Remember that you can always adjust the seasoning later.

Let the soup simmer for another 10 minutes, allowing all the flavors to meld together.

8. Add Cheese and Sour Cream

Stir in the shredded cheddar cheese until it’s fully melted into the soup.

Then, mix in the sour cream, which adds a wonderful creaminess to the soup.

9. Serve and Garnish

Ladle the hot Chili’s Potato Soup into bowls.

Garnish each serving with a sprinkle of chopped fresh chives and crumbled bacon if you desire that extra indulgence.

Now that you have this Chili’s Potato Soup recipe in your arsenal, you can enjoy a restaurant-quality meal right at home.

This hearty and creamy soup is perfect for chilly days or when you simply crave some comforting goodness.

Serve it with a slice of crusty bread, and you have a satisfying meal that your family and friends will love.

Nutrition Facts

  • Calories: 400-450 calories
  • Total Fat: 25-30 grams
  • Saturated Fat: 15-20 grams
  • Cholesterol: 80-100 milligrams
  • Sodium: 800-1000 milligrams
  • Total Carbohydrates: 35-40 grams
  • Dietary Fiber: 3-4 grams
  • Sugars: 4-6 grams
  • Protein: 10-12 grams

10 Simple Chili’s Potato Soup Recipes

A hearty and creamy delight, Chili’s Potato Soup is easy to make at home. Combine potatoes, onions, bacon, and cheese for a comforting bowl of this restaurant favorite. Perfect for chilly evenings!

1. Cheesy Bacon Potato Soup

Create a rich and indulgent version of Chili’s Potato Soup by adding extra shredded cheddar cheese and crispy crumbled bacon. The creamy base combined with the smoky bacon and cheese creates a heavenly combination.

2. Loaded Baked Potato Soup

Turn your Chili’s Potato Soup into a loaded baked potato experience by topping each serving with sour cream, chopped green onions, shredded cheese, and bacon bits. It’s like a baked potato in a bowl!

3. Spicy Southwest Potato Soup

Give your potato soup a spicy twist by adding diced jalapeños, cayenne pepper, and a touch of chili powder. Top it with chopped cilantro and a squeeze of lime for a southwestern flair.

4. Potato Leek Soup

Create a classic Potato Leek Soup by substituting the onion in the recipe with leeks. The mild, sweet flavor of leeks pairs perfectly with the creamy potatoes.

5. Garlic Herb Potato Soup

Enhance the flavor of your potato soup by adding minced garlic and a medley of fresh herbs such as thyme, rosemary, and parsley. It’s a fragrant and comforting delight.

6. Loaded Veggie Potato Soup

Boost the nutritional value of your soup by adding diced carrots, celery, and corn. This veggie-packed version is both hearty and wholesome.

7. Potato and Sausage Soup

Incorporate slices of your favorite sausage, such as smoked sausage or kielbasa, into the soup for a savory twist. The sausage adds depth of flavor and a satisfying bite.

8. Potato and Broccoli Cheese Soup

Combine the creamy goodness of potato soup with the vibrant green of broccoli. Add plenty of sharp cheddar cheese for a delightful flavor fusion.

9. Creamy Potato and Mushroom Soup

Introduce earthy richness to your potato soup with sliced mushrooms. Sauté them with the onions and garlic before adding them to the pot.

10. Vegan Potato Soup

For a dairy-free and vegan option, replace the milk, cream, and cheese with plant-based alternatives such as almond milk, coconut cream, and vegan cheese. It’s a creamy and compassionate take on the classic.

These 10 variations on Chili’s Potato Soup will keep your taste buds excited with every bowl, offering a diverse range of flavors to suit your preferences. Enjoy experimenting in the kitchen!

Meyer Lemon Cake Recipe

Meyer lemons are a delightful citrus variety known for their sweeter and more fragrant flavor compared to traditional lemons.

This Meyer Lemon Cake recipe combines the bright, zesty notes of Meyer lemons with the moist and tender crumb of a classic cake.

Whether you’re celebrating a special occasion or simply craving a slice of sunshine, this recipe will surely brighten your day.

NameMeyer Lemon Cake Recipe
CuisineAmerican
Prep Time15 minutes
Cooking Time25-30 minutes
Total TimeApproximately 40-45 minutes
Servings12 slices
Yield1 9-inch round cake

Ingredients

For the Cake

  • 2 cups all-purpose flour
  • 1 1/2 teaspoons baking powder
  • 1/2 teaspoon baking soda
  • 1/2 teaspoon salt
  • 1 1/2 cups granulated sugar
  • 1/2 cup unsalted butter, softened
  • 3 large eggs
  • 1 teaspoon vanilla extract
  • Zest of 2 Meyer lemons
  • 1/4 cup fresh Meyer lemon juice
  • 1 cup buttermilk

For the Meyer Lemon Glaze

  • 1 cup powdered sugar
  • 2-3 tablespoons fresh Meyer lemon juice

Instructions

Preheat the Oven

Preheat your oven to 350°F (175°C). Grease and flour a 9×2-inch round cake pan.

Mix Dry Ingredients

In a bowl, whisk together the flour, baking powder, baking soda, and salt. Set aside.

Cream Butter and Sugar

In a separate large mixing bowl, cream together the softened butter and granulated sugar until light and fluffy, which should take about 2-3 minutes.

Add Eggs and Flavorings

Beat in the eggs, one at a time, ensuring each egg is fully incorporated before adding the next. Add the vanilla extract, Meyer lemon zest, and fresh Meyer lemon juice, mixing until well combined.

Alternate Dry and Wet Ingredients

Gradually add the dry ingredients mixture to the wet ingredients, alternating with the buttermilk, starting and ending with the dry ingredients. Mix until just combined; do not overmix.

Bake

Pour the cake batter into the prepared cake pan and spread it evenly. Bake in the preheated oven for 25-30 minutes or until a toothpick inserted into the center comes out clean.

Make the Meyer Lemon Glaze

While the cake is baking, prepare the Meyer Lemon Glaze by whisking together the powdered sugar and fresh Meyer lemon juice. Adjust the consistency by adding more juice for a thinner glaze or more sugar for a thicker glaze.

Glaze the Cake

Once the cake has cooled for about 10 minutes, remove it from the pan and place it on a wire rack. Drizzle the Meyer Lemon Glaze over the warm cake, allowing it to soak in and set.

Serve and Enjoy

Let the cake cool completely before slicing. Serve each slice with a dollop of whipped cream or a scoop of vanilla ice cream for an extra treat.

This Meyer Lemon Cake is a delightful dessert that captures the essence of Meyer lemons with its sweet, tangy flavor and moist texture. Whether you enjoy it with a cup of tea or as the centerpiece of a special occasion, this cake is sure to brighten your day with its citrus sunshine.Give this recipe a try, and savor the unique taste of Meyer lemons in every bite. Enjoy!Feel free to customize this article as needed, and don’t forget to include any additional details or tips you’d like to share with your readers.

Nutrition Facts (per slice)

  • Calories: 280
  • Total Fat: 10g
  • Saturated Fat: 6g
  • Trans Fat: 0g
  • Cholesterol: 65mg
  • Sodium: 240mg
  • Total Carbohydrates: 46g
  • Dietary Fiber: 0g
  • Sugars: 31g
  • Protein: 4g

Please note that these nutrition facts are approximate and can vary based on specific brands of ingredients used and portion sizes.

10 Simple Meyer Lemon Cake Recipes

Indulge in the vibrant flavor of Meyer lemons with these 10 easy cake recipes. From classic lemon pound cake to zesty citrus bundt cake, these treats are perfect for any occasion.

Meyer Lemon Blueberry Cake

Meyer Lemon Blueberry Cake

Elevate your Meyer Lemon Cake by adding fresh blueberries to the batter. Fold in 1 cup of blueberries before baking for a burst of juicy sweetness in every bite.

Meyer Lemon Pound Cake

Meyer Lemon Pound Cake

Create a denser and richer Meyer Lemon Cake by adapting it into a pound cake. Add an extra egg and an additional 1/4 cup of butter for that classic pound cake texture.

Meyer Lemon Poppy Seed Cake

Meyer Lemon Poppy Seed Cake

For a delightful crunch and added flavor, mix in 2 tablespoons of poppy seeds into the Meyer Lemon Cake batter before baking.

Gluten-Free Meyer Lemon Cake

Gluten-Free Meyer Lemon Cake

Make this cake gluten-free by using a gluten-free flour blend and confirming that all other ingredients are gluten-free. The result is a delicious gluten-free Meyer Lemon Cake for those with dietary restrictions.

Meyer Lemon Cupcakes

Meyer Lemon Cupcakes

Turn the Meyer Lemon Cake into cupcakes for individual servings. Adjust the baking time to approximately 15-20 minutes for cupcakes.

Meyer Lemon Almond Cake

Meyer Lemon Almond Cake

Incorporate almond flour into the cake batter for a nutty twist. Substitute 1/2 cup of almond flour for an equal amount of all-purpose flour.

Vegan Meyer Lemon Cake

Vegan Meyer Lemon Cake

Create a vegan version of this cake by substituting eggs with flax or chia seed eggs and using plant-based butter and buttermilk. Ensure all ingredients are dairy-free for a vegan delight.

Meyer Lemon Yogurt Cake

Meyer Lemon Yogurt Cake

Enhance the moisture and tanginess of your Meyer Lemon Cake by adding 1/2 cup of plain yogurt to the batter.

Meyer Lemon Drizzle Cake

Meyer Lemon Drizzle Cake

Prepare a sweet and tangy Meyer Lemon Drizzle by mixing powdered sugar and lemon juice. Drizzle it over the cooled cake for an extra burst of citrus flavor.

Meyer Lemon Layer Cake

Meyer Lemon Layer Cake

Double the recipe to make two cake layers and create a stunning Meyer Lemon Layer Cake. Spread lemon curd or buttercream frosting between the layers for a decadent treat.

Indulge in the vibrant flavor of Meyer lemons with these 10 simple and delightful cake recipes. From classic lemon pound cakes to zesty lemon-blueberry delights, these treats offer a burst of citrusy goodness in every bite. Whether you’re a seasoned baker or a novice in the kitchen, these recipes are perfect for elevating your dessert game with the unique charm of Meyer lemons.

Lima Bean Soup Recipe

0

Warm, comforting, and packed with nutrients, lima bean soup is a classic dish that never goes out of style.

Whether you’re a long-time fan or new to the world of lima beans, this recipe will have you savoring every spoonful.

Lima beans are not only delicious but also incredibly nutritious, providing a good dose of protein, fiber, and essential vitamins and minerals. So, let’s dive into the world of this hearty and healthy Lima Bean Soup!

NameLima Bean Soup Recipe
CuisineAmerican cuisine
Prep Time10 minutes
Cook Time2 hours
Total Time1 hour and 40 minutes to 2 hours and 10 minutes (including prep time)
Servings6 servings
Yield6

Ingredients

  • 2 cups dried lima beans
  • 1 onion, chopped
  • 2 carrots, diced
  • 2 celery stalks, chopped
  • 4 cloves garlic, minced
  • 8 cups vegetable broth
  • 1 bay leaf
  • 1 teaspoon dried thyme
  • 1 teaspoon dried rosemary
  • Salt and pepper to taste
  • 2 tablespoons olive oil
  • Fresh parsley for garnish (optional)

Instructions

Prepare the Lima Beans

Start by rinsing the dried lima beans under cold water and picking out any debris or discolored beans. Place the beans in a large bowl, cover them with water, and let them soak overnight. If you’re short on time, you can also use the quick soak method by boiling the beans for 2 minutes, then letting them sit for an hour.

Sauté the Aromatics

In a large soup pot, heat the olive oil over medium heat. Add the chopped onion, carrots, and celery, and sauté for about 5 minutes, until the vegetables begin to soften. Add the minced garlic and continue to sauté for another minute or until fragrant.

Add Beans and Herbs

Drain the soaked lima beans and add them to the pot. Pour in the vegetable broth, then add the bay leaf, dried thyme, and dried rosemary. Stir everything together and bring the mixture to a boil.

Simmer

Once boiling, reduce the heat to low, cover the pot, and let the soup simmer for about 1.5 to 2 hours, or until the lima beans are tender and creamy.

Season and Serve

Season the soup with salt and pepper to taste. Remember to remove the bay leaf before serving. Ladle the hot Lima Bean Soup into bowls, and if you like, garnish with fresh parsley for a burst of color and flavor.

This Lima Bean Soup recipe is a wholesome and satisfying meal on its own or as a side dish. It’s a perfect choice for chilly days when you need something comforting and nourishing. Lima beans provide a creamy texture and are a great source of plant-based protein and dietary fiber. Plus, they’re loaded with vitamins and minerals, making this soup as nutritious as it is delicious.

Nutrition Facts (per serving)

  • Calories: 300 calories
  • Protein: 12 grams
  • Carbohydrates: 50 grams
  • Dietary Fiber: 15 grams
  • Fat: 6 grams
  • Sodium: Varies depending on the vegetable broth used, but you can control this by choosing low-sodium broth.
  • Vitamins and Minerals: This Lima Bean Soup is a good source of dietary fiber, protein, and various vitamins and minerals, including potassium, iron, and folate.

10 Simple Lima Bean Soup Recipes

Lima bean soup is a hearty and nutritious dish perfect for chilly days. To make it, sauté onions and garlic, add diced carrots and celery, then toss in dried or canned lima beans.

Pour in vegetable broth, season with herbs and spices, and simmer until beans are tender. Finish with a splash of lemon juice for a delightful, comforting meal. Enjoy!

1. Classic Lima Bean Soup

Start with the timeless recipe outlined earlier. Lima beans, aromatic vegetables, and herbs come together for a hearty and comforting soup.

2. Creamy Vegan Lima Bean Soup

Make it vegan by using vegetable broth and replacing dairy with coconut milk for a rich and creamy texture. Add a touch of smoked paprika for depth of flavor.

3. Smoky Bacon Lima Bean Soup

Enhance the classic recipe by crisping up some bacon and adding it for a smoky, savory twist. Top with grated cheddar cheese for extra indulgence.

4. Spicy Southwest Lima Bean Soup

Spice up your soup by adding diced green chilies, cumin, and chili powder. Finish with fresh cilantro and a squeeze of lime for a Southwestern flair.

5. Tomato and Lima Bean Soup

Introduce a tomato base by adding canned diced tomatoes and tomato paste. This gives the soup a tangy and slightly sweet dimension.

6. Italian Lima Bean Soup

Bring Mediterranean flavors into your bowl by adding Italian seasoning, diced tomatoes, and a handful of fresh basil leaves. Top with grated Parmesan cheese.

7. Lemon Herb Lima Bean Soup

Brighten the soup with the zest and juice of a lemon. Add fresh thyme and parsley for a refreshing and aromatic twist.

8. Curry Lima Bean Soup

Create an exotic fusion by incorporating curry powder, coconut milk, and a squeeze of lime. Garnish with chopped cilantro and toasted coconut.

9. Ham and Lima Bean Soup

Elevate your soup with chunks of ham. The smoky and salty ham complements the creamy lima beans perfectly.

10. Mexican Lima Bean Soup

Give your soup a Mexican touch with the addition of diced green chilies, corn kernels, and a dash of cayenne pepper. Top with avocado slices and a dollop of sour cream for richness.

These versatile Lima Bean Soup variations allow you to explore different flavors and ingredients while enjoying the comfort of a warm and nutritious bowl of soup.

Coffee Milk Recipe

Coffee milk is more than just a beverage; it’s a beloved tradition in Rhode Island, where it’s considered the official state drink.

This creamy, sweet concoction combines the rich flavor of coffee with the sweetness of sweetened condensed milk, resulting in a delightful treat that’s perfect for any time of day.

Whether you’re a Rhode Island native or simply looking to explore a unique coffee experience, here’s how to make the perfect cup of coffee milk.

Name:Coffee Milk Recipe
Cuisine:Mixed Cuisine
Prep Time:5 minutes
Cooking Time:5 minutes
Total Time:10 minutes
Servings:1
Yield:1 cup of Coffee Milk

Ingredients

  • 1 cup of freshly brewed coffee (preferably a dark roast)
  • 1/4 cup of coffee syrup (such as Autocrat or Eclipse, readily available in Rhode Island stores)
  • 1/4 cup of whole milk or half-and-half
  • Ice cubes (optional, for iced coffee milk)

Instructions

Brew the Coffee:

Start by brewing a strong cup of coffee using your preferred method. Dark roast coffee works best for coffee milk, as it stands up well to the sweetness of the syrup.

Warm the Milk:

In a small saucepan, heat the milk over low heat until it’s warm but not boiling. You can also heat it in the microwave for about 30 seconds.

Mix the Syrup:

In a separate container, measure out 1/4 cup of coffee syrup. Coffee syrup is a sweet syrup made from coffee extract and sugar. It’s what gives coffee milk its distinctive flavor. If you can’t find pre-made coffee syrup, you can make your own by simmering equal parts strong coffee and granulated sugar until it thickens into a syrup-like consistency.

Combine:

In a coffee mug, pour the freshly brewed coffee, followed by the warm milk. Stir well to combine the coffee and milk.

Sweeten:

Add the 1/4 cup of coffee syrup to the coffee-milk mixture. Stir until the syrup is fully dissolved and the coffee milk is sweet and well-mixed.

Serve:

Coffee milk can be enjoyed hot or cold. For a classic hot coffee milk, serve immediately. If you prefer it iced, allow the mixture to cool and then add ice cubes.

Coffee milk is a delightful and unique treat that captures the essence of Rhode Island. Its sweet, creamy flavor makes it a favorite among locals and an intriguing discovery for visitors. With this simple recipe, you can savor the taste of this Rhode Island tradition in the comfort of your own home. So brew a cup, sweeten it to your liking, and enjoy the magic of coffee milk!

Nutrition Facts (Approximate per serving)

Calories: 200 kcal

Total Fat: 5g

Saturated Fat: 2-3g

Cholesterol: 10-15mg

Sodium: 30-40mg

Total Carbohydrates: 25-30g

Dietary Fiber: 0g

Sugars: 25-30g

Protein: 2-3g

10 Simple Coffee Milk Recipes

Coffee milk is a delightful treat that combines the boldness of coffee with the sweetness of milk. Here are 10 easy recipes to enjoy this delightful beverage.

From classic coffee syrup to creative flavored versions, these recipes will satisfy your coffee cravings and sweet tooth. Try them all and find your favorite coffee milk concoction. Cheers!

1. Classic Coffee Milk

Prepare a strong cup of coffee and mix with 1/4 cup of coffee syrup and 1/4 cup of whole milk. Enjoy hot or iced.

2. Vanilla Coffee Milk

Add a touch of elegance by stirring in a teaspoon of pure vanilla extract to your coffee milk for a fragrant twist.

3. Caramel Coffee Milk

Elevate your coffee milk with caramel syrup. Mix 1/4 cup of coffee syrup, 1/4 cup of milk, and a drizzle of caramel syrup for a sweet treat.

4. Mocha Coffee Milk

Create a mocha masterpiece by adding a tablespoon of cocoa powder to your coffee milk mixture. It’s a delightful combination of coffee and chocolate.

5. Almond Coffee Milk

Replace regular milk with almond milk for a nutty flavor. Add a sprinkle of cinnamon for extra warmth.

6. Coconut Coffee Milk

Enjoy a tropical twist by mixing 1/4 cup of coconut milk with your coffee and coffee syrup. Top with coconut flakes for a finishing touch.

7. Irish Coffee Milk

For a spirited version, add a shot of Irish cream liqueur to your coffee milk. It’s perfect for a cozy evening.

8. Mint Chocolate Coffee Milk

Combine the refreshing taste of mint with rich chocolate by adding a drop of mint extract and a sprinkle of cocoa powder to your coffee milk.

9. Hazelnut Coffee Milk

Infuse your coffee milk with the delightful flavor of hazelnuts. Stir in a teaspoon of hazelnut syrup or use hazelnut-flavored coffee.

10. Iced Coffee Milkshake

Blend ice cream, coffee, coffee syrup, and milk for a delightful coffee milkshake. Top with whipped cream and a drizzle of syrup for an indulgent treat.

If you’re a coffee lover seeking a delightful twist, here are 10 simple recipes for coffee milk. From classic sweetened coffee milk to creative concoctions like caramel macchiato, vanilla cold brew, and mocha madness, these recipes are easy to make and offer a caffeinated pick-me-up with a touch of indulgence. Explore these coffee milk creations and elevate your daily brew.

Savor the Flavor: Homemade Carne Asada Seasoning Recipe

Carne Asada, a beloved dish in Mexican cuisine, is all about the perfect blend of marinated, grilled beef. To truly master this dish, you need a well-balanced and flavorful seasoning.

The secret lies in a homemade Carne Asada seasoning that captures the essence of authentic Mexican flavors.

We’ll guide you through crafting the ideal seasoning for your next carne asada adventure.

NameHomemade Carne Asada Seasoning
CuisineMexican
Prep Time5 minutes
Cooking Time0
Total Time5 minutes
Servings12 servings
Yield2 cup

Ingredients

  • 2 tablespoons chili powder
  • 1 tablespoon cumin
  • 1 tablespoon smoked paprika
  • 1 tablespoon garlic powder
  • 1 tablespoon onion powder
  • 1 teaspoon dried oregano
  • 1 teaspoon black pepper
  • 1 teaspoon salt
  • 1/2 teaspoon cayenne pepper (adjust for spice preference)
  • Zest and juice of 1 lime
  • 2 tablespoons vegetable oil

Instructions

Gather Your Ingredients:

Before you start, ensure you have all the necessary ingredients measured and ready.

Combine Dry Ingredients:

In a small bowl, mix together the chili powder, cumin, smoked paprika, garlic powder, onion powder, dried oregano, black pepper, salt, and cayenne pepper. This combination of spices will be the heart of your Carne Asada seasoning.

Zest and Juice the Lime:

Grate the zest from the lime, and then squeeze out its juice. The lime will add a bright, citrusy flavor to your seasoning.

Add Lime and Oil:

Combine the lime zest, lime juice, and vegetable oil with your dry spice mixture. Stir well until you have a uniform, slightly wet seasoning blend.

Marinate Your Meat:

For the best results, rub your Carne Asada seasoning generously onto your choice of meat, typically flank steak or skirt steak. Make sure to coat all sides evenly. Place the seasoned meat in a resealable plastic bag or a covered dish and refrigerate for at least 30 minutes, but marinating overnight is ideal for maximum flavor.

Grill to Perfection:

Preheat your grill to high heat. Remove the marinated meat from the fridge and allow it to come to room temperature. Grill the meat to your preferred level of doneness, typically about 5-7 minutes per side for medium-rare.

Rest and Slice:

Let the grilled meat rest for a few minutes before slicing it thinly against the grain. This ensures tender, juicy slices.

Serve and Enjoy:

Now that your Carne Asada is perfectly seasoned and cooked, it’s time to serve it up! Enjoy your Carne Asada in tacos, burritos, or simply as a delicious main dish.

The homemade Carne Asada seasoning adds a burst of flavor to your grilled meat, making it a delightful and memorable meal. Feel free to adjust the level of spiciness to suit your taste buds, and don’t be afraid to experiment with this seasoning to make it your own. Whether it’s a family gathering or a casual dinner, Carne Asada seasoned to perfection is always a crowd-pleaser. So, fire up that grill and savor the incredible flavors of this classic Mexican dish. ¡Buen provecho!

Nutrition Facts (per serving)

Please note that the following nutrition facts are approximate and can vary depending on the specific meat used and the amount of seasoning applied.

  • Calories: 20
  • Total Fat: 2g
  • Saturated Fat: 0g
  • Cholesterol: 0mg
  • Sodium: 400mg
  • Total Carbohydrates: 2g
  • Dietary Fiber: 1g
  • Sugars: 0g
  • Protein: 0g

10 simple Carne Asada Seasoning Recipes

Creating your own Carne Asada seasoning is a delightful journey into Mexican cuisine. This blend of chili, cumin, zesty citrus, and a hint of heat will transform ordinary dishes. Homemade seasoning ensures fresh, flavorful results tailored to your taste. Elevate your culinary adventures with this versatile and authentic spice blend.

1. Carne Asada Tacos

Carne Asada Tacos

Create mouthwatering Carne Asada Tacos by marinating thin slices of beef in the seasoning, grilling to perfection, and serving them in warm tortillas. Top with fresh salsa, onions, and cilantro for an authentic street taco experience.

2. Carne Asada Burrito Bowl

Carne Asada Burrito Bowl

For a low-carb twist, make a Carne Asada Burrito Bowl. Grill your seasoned meat, then serve it over a bed of lettuce, rice, or cauliflower rice. Add black beans, guacamole, and sour cream for a satisfying meal.

3. Carne Asada Fajitas

Slice the marinated Carne Asada into strips and sauté with bell peppers and onions. Serve in warm tortillas, and garnish with your favorite toppings, like cheese, sour cream, and avocado.

4. Carne Asada Skewers

Carne Asada Skewers

Thread marinated beef onto skewers with colorful bell peppers and onions. Grill to perfection for a fun and flavorful skewer dish perfect for gatherings.

5. Carne Asada Salad

Carne Asada Salad

For a lighter option, toss grilled Carne Asada slices with mixed greens, cherry tomatoes, and avocado. Drizzle with your favorite dressing for a refreshing Carne Asada Salad.

6. Carne Asada Quesadillas

Carne Asada Quesadillas

Make savory Carne Asada Quesadillas by placing seasoned meat between tortillas with cheese. Grill until the cheese is melted and the tortillas are crispy. Slice into wedges and serve with salsa.

7. Carne Asada Breakfast Burritos

Carne Asada Breakfast Burritos

Start your day with a kick by adding Carne Asada seasoned meat to your breakfast burrito. Combine with scrambled eggs, cheese, and salsa, then wrap in a tortilla for a hearty morning meal.

8. Carne Asada Loaded Potatoes

Carne Asada Loaded Potatoes

Bake or grill potatoes until crispy, then top with seasoned Carne Asada, cheese, sour cream, and green onions for a filling and satisfying dish.

9. Carne Asada Rice Bowl

Carne Asada Rice Bowl

Serve grilled Carne Asada over a bed of fluffy white or brown rice. Add steamed veggies and drizzle with a sauce made from lime juice, garlic, and olive oil for a flavorful rice bowl.

10. Carne Asada Nachos

Create the ultimate appetizer by piling tortilla chips with seasoned Carne Asada, cheese, jalapeños, and black beans. Bake until the cheese is bubbly, and serve with guacamole and sour cream for the perfect party snack.

These recipes offer a variety of ways to enjoy the delicious flavors of Carne Asada seasoning, from tacos to salads and even breakfast burritos. Get creative and savor the taste of Mexico in your own kitchen!

Pineapple Filling For Cake Recipe

When it comes to adding a burst of tropical flavor to your cakes, there’s nothing quite like homemade pineapple filling. This sweet and tangy filling not only adds a vibrant touch to your desserts but also elevates the taste to a whole new level.

Whether you’re making a pineapple upside-down cake, a fruity layer cake, or just want to surprise your taste buds, this pineapple filling recipe is a must-try.

So, let’s dive into how to make this delectable pineapple filling from scratch.

NamePineapple Filling For Cake
CuisineFusion
Prep Time5 minutes
Cooking Time10 minutes
Total Time15 minutes
Servings8 servings (1/4 cup per serving)
Yield2 cups of pineapple filling

Ingredients:

  • 1 can (20 ounces) crushed pineapple in juice
  • 1/2 cup granulated sugar
  • 2 tablespoons cornstarch
  • 1/4 cup water
  • 1 teaspoon lemon juice
  • A pinch of salt

Instructions

1. Drain the Pineapple

Start by draining the crushed pineapple using a fine-mesh sieve or a colander. Press down with a spoon to remove excess juice. Set aside.

2. Create the Pineapple Syrup

In a medium-sized saucepan, combine the granulated sugar, cornstarch, and a pinch of salt. Mix them together until well combined.

3. Add Pineapple and Water

Add the drained crushed pineapple and 1/4 cup of water to the saucepan with the sugar mixture. Stir everything well.

4. Cook Over Medium Heat

Place the saucepan over medium heat and bring the mixture to a gentle boil, stirring constantly. This should take about 5-7 minutes. Keep a close eye on it to avoid burning.

5. Simmer and Thicken

Once it starts boiling, reduce the heat to low and let it simmer for another 2-3 minutes or until the mixture thickens. Continue stirring to prevent lumps from forming.

6. Add Lemon Juice

Remove the saucepan from the heat and stir in the lemon juice. The lemon juice adds a refreshing zing to balance the sweetness of the pineapple.

7. Cool and Use

Allow the pineapple filling to cool completely. It will continue to thicken as it cools. Once cooled, your homemade pineapple filling is ready to use.

Now that you have your homemade pineapple filling, the possibilities are endless. Spread it between layers of a vanilla or coconut cake, use it as a topping for cheesecake, or even fill cupcakes with this tropical delight.

The sweet and tangy flavors of pineapple will transport your taste buds to a sunny paradise with every bite. So, go ahead and make your cakes taste like a slice of the tropics by adding this easy-to-make pineapple filling.

Nutrition Facts (Approximate)

  • Serving Size: 1/4 cup
  • Calories: 70
  • Total Fat: 0g
  • Saturated Fat: 0g
  • Trans Fat: 0g
  • Cholesterol: 0mg
  • Sodium: 5mg
  • Total Carbohydrates: 18g
  • Dietary Fiber: 0g
  • Sugars: 15g
  • Protein: 0g

10 Simple Pineapple Filling For Cake Recipe

Transform your cakes with this delectable pineapple filling! Simple and versatile, it adds a burst of tropical sweetness. Mix pineapple, sugar, and cornstarch, then layer between cakes for a mouthwatering treat. Perfect for any occasion!

1. Pineapple Coconut Cake

Create a tropical delight by layering a moist coconut cake with our homemade pineapple filling. Top it off with whipped cream and toasted coconut flakes for a heavenly treat.

2. Pineapple Filled Cupcakes

Fill your favorite cupcakes with pineapple filling for a surprise burst of fruity goodness in every bite. Top them with cream cheese frosting for the perfect balance of flavors.

3. Pineapple Thumbprint Cookies

Make thumbprint cookies with a twist. Fill the thumbprints with pineapple filling before baking, adding a fruity center to your buttery, crumbly cookies.

4. Pineapple Danish Pastries

Elevate your breakfast game by using pineapple filling in your danish pastries. These flaky, sweet pastries will be a hit at brunch.

5. Pineapple-Filled Crepes

Fill delicate crepes with pineapple filling and a dollop of whipped cream. Roll them up for a delicious breakfast or dessert option.

6. Pineapple-Filled Doughnuts

Inject pineapple goodness into your homemade doughnuts. Roll them in powdered sugar or glaze for an irresistible treat.

7. Pineapple-Filled Pancakes

Add a twist to your morning pancakes by spreading pineapple filling between layers. Stack them high and drizzle with maple syrup.

8. Pineapple-Filled Muffins

Make breakfast muffins with a delightful surprise inside. These moist and flavorful muffins are perfect for on-the-go snacking.

9. Pineapple-Filled Puff Pastry Tart

Create an elegant dessert by filling puff pastry with pineapple goodness. Serve with a dusting of powdered sugar or a scoop of vanilla ice cream.

10. Pineapple-Filled French Toast

Make your French toast extra special by sandwiching pineapple filling between slices of bread. Dip in egg mixture, cook until golden brown, and enjoy a sweet and fruity breakfast.

These pineapple filling variations can elevate your cakes with a burst of tropical flavor and creativity. Enjoy experimenting with these delightful recipes!

Chipotle Corn Salsa Recipe

Chipotle corn salsa is a delightful medley of smoky chipotle peppers, sweet corn, and vibrant spices.

We’ll guide you through creating this delectable chipotle corn salsa that’s sure to become a favorite at your gatherings and meals.

This zesty salsa adds a burst of flavor to any dish, making it a perfect accompaniment for tacos, nachos, grilled meats, or even as a dip for tortilla chips.

NameChipotle Corn Salsa Recipe
CuisineMexican
Prep Time15 minutes
Cooking Time10 minutes
Total Time25 minutes
Servings6 servings
YieldAbout 3 cups

Ingredients

  • 2 cups corn kernels (fresh or frozen)
  • 1 can (14 ounces) black beans, rinsed and drained
  • 1 red bell pepper, finely chopped
  • 1/2 red onion, finely chopped
  • 1-2 chipotle peppers in adobo sauce, finely chopped
  • 1/4 cup fresh cilantro, chopped
  • Juice of 2 limes
  • 1 tablespoon olive oil
  • Salt and pepper to taste

Instructions

Prepare the Corn

If using fresh corn, carefully cut the kernels off the cob. If using frozen corn, thaw and drain any excess moisture.

Cook the Corn

In a skillet over medium heat, sauté the corn kernels until they develop a slightly charred appearance, stirring occasionally. This adds a lovely roasted flavor. Set aside to cool.

Combine Ingredients

In a large mixing bowl, combine the roasted corn, black beans, chopped red bell pepper, finely chopped red onion, and chipotle peppers.

Add Cilantro and Lime Juice

Gently fold in the fresh cilantro and squeeze the juice of two limes over the mixture. Mix well.

Drizzle with Olive Oil

Pour the olive oil over the salsa and toss until all the ingredients are evenly coated.

Season to Taste

Add salt and pepper to taste, adjusting the seasoning as needed to suit your preference.

Chill and Serve

Allow the flavors to meld by refrigerating the chipotle corn salsa for at least 30 minutes before serving. This also helps to enhance the taste.

Serve and Enjoy

Serve the chipotle corn salsa as a side, a topping for tacos or nachos, or as a delicious dip for tortilla chips. Enjoy the burst of flavors and the spicy kick from the chipotle peppers!

Creating chipotle corn salsa is a wonderful way to infuse your meals with a burst of flavor and a hint of heat. With its vibrant colors and diverse textures, this salsa is a crowd-pleaser and a must-have for any fiesta or gathering.

Experiment with the spice levels and ingredient quantities to suit your taste, and make every bite a fiesta of flavors!

Nutrition Facts (Per Serving)

Calories: 165 kcal

Total Fat: 4.8g

Saturated Fat: 0.6g

Trans Fat: 0g

Cholesterol: 0mg

Sodium: 241mg

Total Carbohydrates: 28.7g

Dietary Fiber: 7.2g

Sugars: 2.7g

Protein: 6.6g

Vitamin D: 0%

Calcium: 4%

Iron: 13%

Potassium: 329mg

10 Simple Chipotle Corn Salsa Recipes

Discover the zest of Chipotle Corn Salsa! Whether classic, fruity, or protein-packed, these easy recipes deliver a burst of smoky, spicy flavor. Elevate your dishes with this versatile, crowd-pleasing delight!

Classic Chipotle Corn Salsa

Classic Chipotle Corn Salsa

Combine canned corn, diced red onion, chopped fresh cilantro, minced jalapeños, lime juice, and a pinch of salt. Mix well and let it chill for 30 minutes before serving.

Spicy Mango Chipotle Corn Salsa

Spicy Mango Chipotle Corn Salsa

Mix canned corn, diced mango, red onion, chopped cilantro, chipotle peppers in adobo sauce, lime juice, and salt. Adjust the spice level to your liking and refrigerate before serving.

Avocado Chipotle Corn Salsa

Avocado Chipotle Corn Salsa

Combine corn, diced avocado, red onion, cilantro, chipotle peppers, lime juice, and salt. Gently mix and refrigerate to allow flavors to meld.

Black Bean Chipotle Corn Salsa

Black Bean Chipotle Corn Salsa

Mix corn, black beans, diced tomatoes, red onion, chipotle peppers, cilantro, lime juice, and salt. Let it sit in the fridge for an hour for the flavors to blend.

Pineapple Chipotle Corn Salsa

Pineapple Chipotle Corn Salsa

Combine corn, diced pineapple, red onion, chipotle peppers, cilantro, lime juice, and a pinch of salt. Refrigerate for a refreshing twist.

Cucumber Chipotle Corn Salsa

Cucumber Chipotle Corn Salsa

Mix corn, diced cucumber, red onion, chipotle peppers, cilantro, lime juice, and salt. Chill and serve for a cool, crunchy salsa.

Tomato Chipotle Corn Salsa

Tomato Chipotle Corn Salsa

Combine corn, diced tomatoes, red onion, chipotle peppers, cilantro, lime juice, and salt. Refrigerate to enhance the flavors.

Fruit Medley Chipotle Corn Salsa

Fruit Medley Chipotle Corn Salsa

Mix corn, diced watermelon, mango, red onion, chipotle peppers, cilantro, lime juice, and salt. Chill for a unique and sweet-spicy salsa.

Peach Chipotle Corn Salsa

Peach Chipotle Corn Salsa

Combine corn, diced peaches, red onion, chipotle peppers, cilantro, lime juice, and a pinch of salt. Refrigerate for a sweet and smoky salsa.

Jicama Chipotle Corn Salsa

Jicama Chipotle Corn Salsa

Mix corn, diced jicama, red onion, chipotle peppers, cilantro, lime juice, and salt. Let it chill to enjoy a crunchy and tangy salsa.

Discover a flavor fiesta with our 10 simple chipotle corn salsa recipes. From the classic blend to tropical mango or creamy avocado infusions, there’s a salsa for every palate.

Try a pineapple twist or add a zesty kick with tomato. Explore these vibrant variations for a salsa sensation that elevates any meal. Spice up your table today!