Scarlet Runner Beans, known for their stunning red and purple blossoms, are more than just a pretty face in your garden.
These vibrant beans also make for a delicious and nutritious addition to your plate. Packed with protein, fiber, and a rich, nutty flavor, they are a versatile ingredient that can be used in a variety of dishes.
In this article, we’ll explore a scrumptious Scarlet Runner Beans recipe that will delight your taste buds and provide you with a wholesome me
| Name: | Scarlet Runner Beans Recipe |
| Cuisine: | Classic American |
| Prep Time: | 15 minutes |
| Cooking time: | 1 hour |
| Total time: | 1 hour |
| Serving: | 6 |
| Yield: | 6 |
Ingredients
- 2 cups Scarlet Runner Beans, dried
- 1 onion, finely chopped
- 2 cloves garlic, minced
- 2 tomatoes, diced
- 1 bell pepper (red or green), chopped
- 2 tablespoons olive oil
- 1 teaspoon cumin
- 1 teaspoon paprika
- 1/2 teaspoon chili powder (adjust to taste)
- Salt and black pepper to taste
- Fresh cilantro or parsley for garnish
- Lemon wedges for serving (optional)
Instructions
Prepare the Beans
Start by rinsing the dried Scarlet Runner Beans thoroughly and removing any debris. Soak the beans in a large bowl of water overnight. This helps to reduce cooking time and improve the beans’ texture.
Cook the Beans
Drain and rinse the soaked beans. In a large pot, add the beans and enough water to cover them. Bring to a boil, then reduce the heat to a simmer. Cook for 45 minutes to 1 hour, or until the beans are tender but not mushy. Drain and set aside.
Sauté the Aromatics
In a large skillet, heat the olive oil over medium heat. Add the chopped onions and garlic, sautéing until they become translucent and fragrant.
Add the Spices
Stir in the cumin, paprika, and chili powder. This will create a flavorful base for your dish. Cook for another minute to release the spices’ aromas.
Combine the Ingredients
Add the diced tomatoes and bell pepper to the skillet. Cook for 5-7 minutes, or until the vegetables have softened and the tomatoes break down, forming a rich sauce.
Incorporate the Beans
Gently fold in the cooked Scarlet Runner Beans, ensuring they are well coated with the tomato and spice mixture. Allow everything to simmer together for an additional 5-10 minutes to meld the flavors.
Season to Perfection
Season your Scarlet Runner Beans dish with salt and black pepper to taste. Adjust the spice level by adding more chili powder if you like it spicier.
Garnish and Serve
Remove the skillet from heat. Garnish your dish with fresh cilantro or parsley for a burst of color and flavor. For a citrusy twist, serve with lemon wedges on the side.
Enjoy Your Scarlet Runner Beans!
This Scarlet Runner Beans recipe is a wonderful way to enjoy the unique flavor and texture of these beans. Whether served as a hearty side dish or a vegetarian main course, it’s sure to become a favorite in your culinary repertoire.
Scarlet Runner Beans not only bring a pop of color to your plate but also a healthy dose of nutrition, making this recipe a win-win for both your taste buds and your well-being.
So, next time you spot those vibrant scarlet flowers in your garden, remember that they hold the key to a delectable and nutritious meal. Give this recipe a try and savor the rich flavors of tradition!
Nutrition Facts
- Calories: 245
- Total Fat: 7g
- Saturated Fat: 1g
- Trans Fat: 0g
- Cholesterol: 0mg
- Sodium: 170mg
- Total Carbohydrates: 38g
- Dietary Fiber: 11g
- Sugars: 3g
- Protein: 10g
- Vitamin D: 0%
- Calcium: 7%
- Iron: 22%
- Potassium: 20%
Please note that these nutrition facts are approximate and may vary based on the specific ingredients and brands you use in your recipe. Additionally, the serving size can be adjusted according to your preferences and dietary requirements.
Enjoy your delicious and nutritious Scarlet Runner Beans dish
10 Simple Scarlet Runner Beans Recipes
Cooked Scarlet Runner Beans shine in a zesty salad with tomatoes, onions, and fresh herbs. Drizzle with a tangy vinaigrette for a vibrant and nutritious dish bursting with flavors.
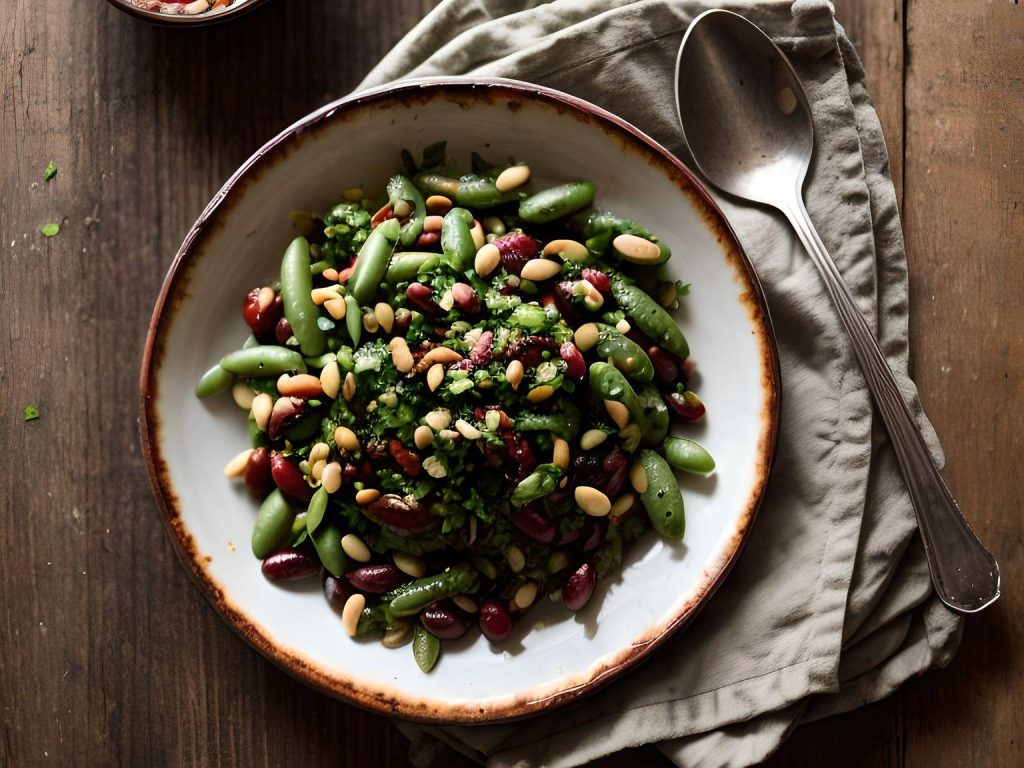
1.Scarlet Runner Bean Salad:
Toss cooked Scarlet Runner Beans with diced tomatoes, red onion, cucumber, and a zesty vinaigrette dressing. Garnish with fresh basil and feta cheese for a refreshing summer salad.
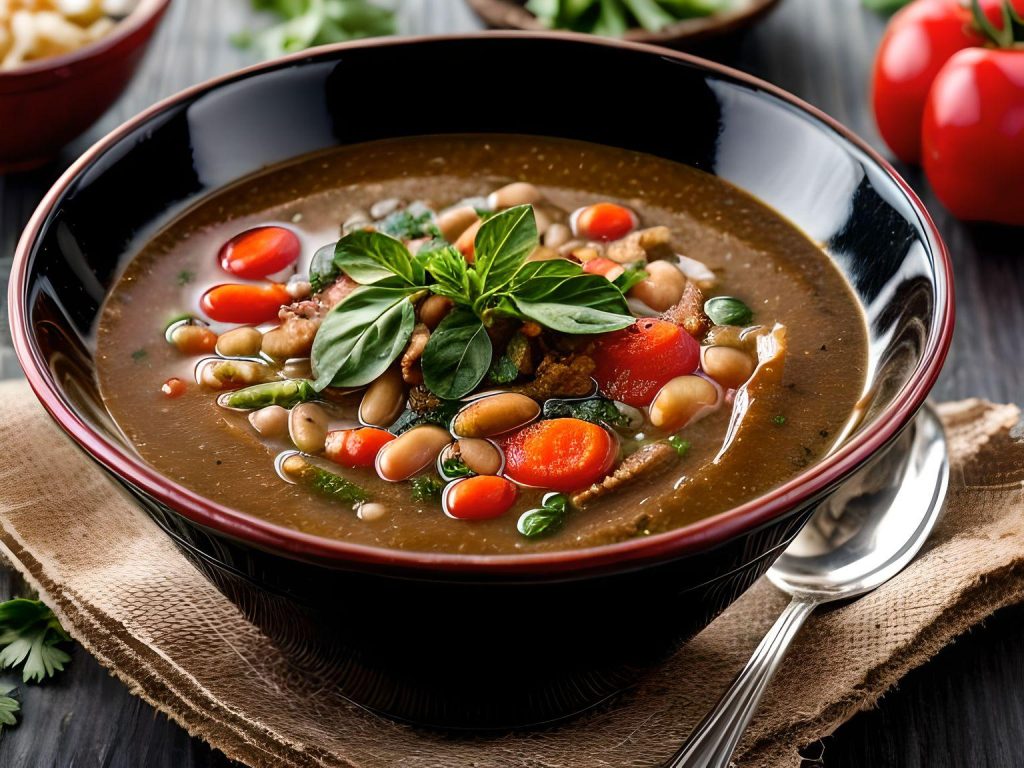
2.Scarlet Runner Bean Soup:
Simmer Scarlet Runner Beans with vegetable broth, carrots, celery, and spices to create a hearty and nutritious bean soup. Serve hot with a sprinkle of grated Parmesan.
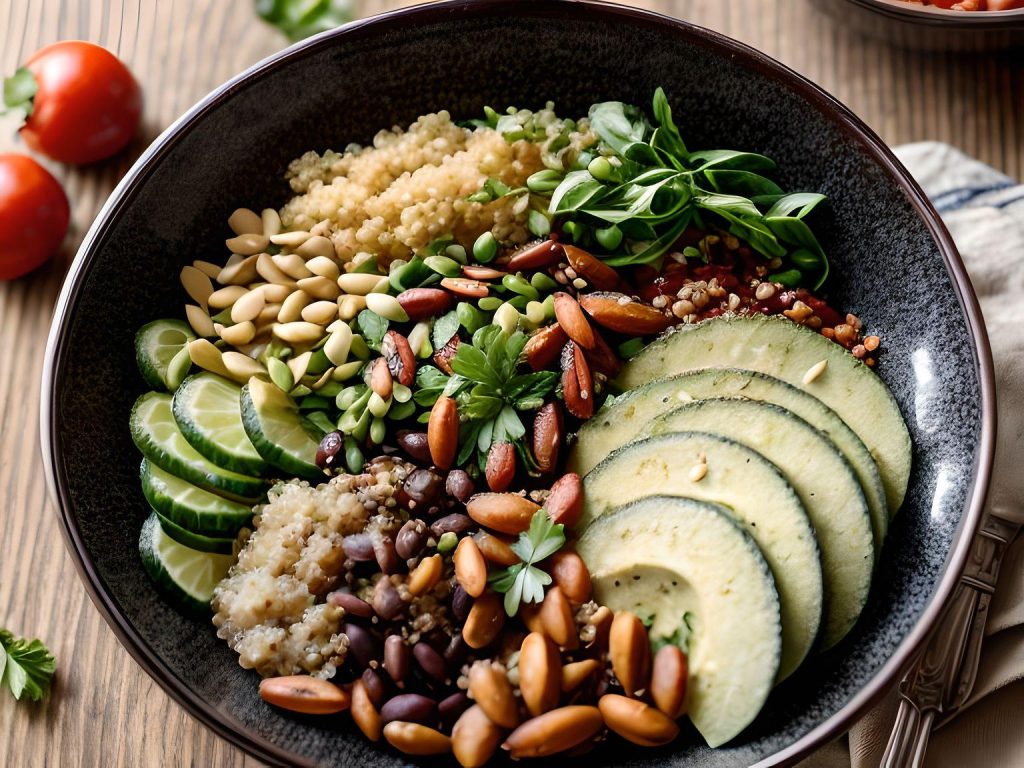
3.Scarlet Runner Bean and Quinoa Bowl:
Mix cooked Scarlet Runner Beans with cooked quinoa, roasted vegetables, and a lemon-tahini dressing. This protein-packed bowl is perfect for a quick and healthy lunch.
4.Spicy Scarlet Runner Bean Stir-Fry:
Sauté Scarlet Runner Beans with colorful bell peppers, garlic, ginger, and a spicy stir-fry sauce. Serve over steamed rice for a satisfying meal.

.
5.Scarlet Runner Bean Dip:
Blend cooked Scarlet Runner Beans with roasted red pepper, garlic, lemon juice, and tahini to make a creamy and nutritious bean dip. Great for snacking or as an appetizer.

6.Scarlet Runner Bean and Tomato Bruschetta:
Top toasted baguette slices with a mixture of Scarlet Runner Beans, diced tomatoes, garlic, basil, and a drizzle of balsamic vinegar. A delightful and easy-to-make appetizer.

7.Scarlet Runner Bean and Spinach Quesadillas:
Fill tortillas with cooked Scarlet Runner Beans, sautéed spinach, shredded cheese, and a touch of salsa. Grill until golden brown for a cheesy and satisfying meal.

8.Scarlet Runner Bean and Avocado Wrap:
Wrap cooked Scarlet Runner Beans, avocado slices, lettuce, and your favorite dressing in a whole-grain tortilla. A quick and nutritious lunch option.

9.Lemon-Garlic Scarlet Runner Beans:
Sauté cooked Scarlet Runner Beans with minced garlic, lemon zest, and a drizzle of olive oil. This simple side dish adds brightness to any meal.

10.Scarlet Runner Bean and Corn Salsa:
Combine cooked Scarlet Runner Beans with fresh corn, red onion, cilantro, and lime juice. Serve as a topping for grilled chicken or fish or enjoy it with tortilla chips.

These 10 recipes showcase the versatility of Scarlet Runner Beans from salads and soups to dips and wraps. They offer a variety of flavors and are suitable for different occasions and preferences. Enjoy exploring the world of Scarlet Runner Beans in your culinary adventures!