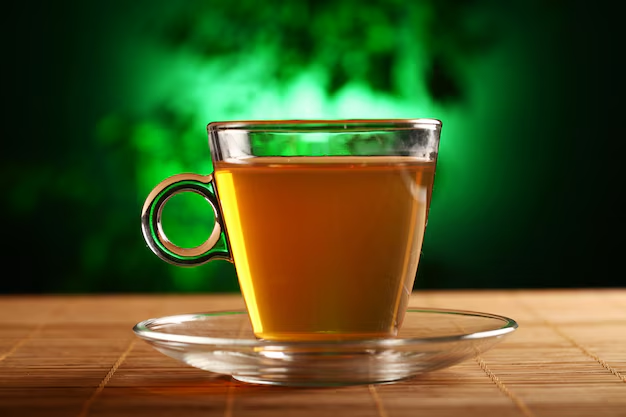
Home Blog Page 42

Satisfy Your Sweet Tooth with a Mexican Candy Shot Recipe

0

Are you ready to embark on a flavorful and vibrant journey to Mexico with a tantalizing Mexican Candy Shot?

This delightful concoction not only captures the essence of Mexican candies but also packs a punch of flavor that will leave your taste buds dancing.

Get ready to indulge in a shot that brings together the zing of spices and the sweetness of candy, all in one tiny glass.

NameRecipe Mexican Candy Shot
CuisineMexican
Prep Time5 minutes
Cooking Time0 minutes
Total Time5 minutes
Servings1 shot
Yield1 shot

Ingredients

  • 1 ½ oz of your favorite tequila
  • ½ oz of lime juice
  • ½ oz of orange liqueur (such as triple sec)
  • ¼ oz of grenadine syrup
  • ¼ oz of hot sauce (adjust to taste)
  • Tajín or chili powder for rimming the glass
  • Assorted Mexican candies for garnish (such as tamarind candies or chili gummies)
  • Ice

Instructions

1. Prepare the Glass:

Begin by rimming a shot glass with Tajín or chili powder. To do this, you can rub a lime wedge around the rim of the glass and then dip it into a plate filled with Tajín or chili powder until the rim is nicely coated. This will give your Mexican candy shot a delightful spicy kick.

2. Mix the Ingredients:

In a cocktail shaker, add ice cubes, tequila, lime juice, orange liqueur, grenadine syrup, and hot sauce. The hot sauce is what gives this shot its unique and spicy flavor, so feel free to adjust the amount to your preferred level of spiciness.

3. Shake and Strain:

Secure the lid on the cocktail shaker and shake vigorously for about 15 seconds. This will thoroughly mix the ingredients and chill the drink.

4. Strain into the Glass:

Carefully strain the mixture into your prepared shot glass. The Tajín-rimmed rim will add an extra layer of flavor with each sip.

5. Garnish:

To enhance the visual appeal and authenticity of your Mexican candy shot, garnish it with assorted Mexican candies. Tamarind candies, chili gummies, or any other favorite Mexican candies can be added to the drink or placed on the rim.

6. Serve and Enjoy:

Present your Mexican candy shot to your guests, and watch their faces light up with excitement. The combination of sweet, sour, and spicy flavors will tantalize their taste buds and make this shot an unforgettable experience.

Mexican candy shots are a delightful and unique addition to any celebration. With the perfect balance of sweet, sour, and spicy flavors, they are sure to be a crowd-pleaser. Whether you’re celebrating a special occasion or simply want to spice up your evening, this flavorful shot will transport your taste buds south of the border.

Nutrition Facts: Approximate values per serving

NutrientAmount
Calories120
Total Fat0g
Saturated Fat0g
Trans Fat0g
Cholesterol0mg
Sodium490mg
Total Carbohydrates9g
Dietary Fiber0g
Sugars6g
Protein0g

Percent Daily Values are based on a 2,000 calorie diet.

Please note that the actual nutritional values may vary based on the specific brands and quantities of ingredients used, so it’s essential to calculate the nutrition facts using the exact products you choose for the recipe.

10 simple recipe for mexican candy shot

Discover the vibrant world of Mexican Candy Shots with these 10 easy recipes. From sweet watermelon notes to spicy chili kicks, elevate your gatherings with these delightful concoctions, bringing a taste of Mexico to your glass. Cheers!

1. Classic Watermelon Fiesta Shot

Classic Watermelon Fiesta Shot

A blend of tequila, watermelon liqueur, lime juice, chili powder, and a salted rim. The sweetness of watermelon liqueur perfectly complements the fiery chili kick.

2. Spicy Mango Madness Shot

Spicy Mango Madness Shot

Combine tequila, mango liqueur, lime juice, chili powder, and a chili-salt rim for a spicy-sweet delight. The tangy mango balances the heat for an exotic taste.

3. Tamarind Tango Shot

Tamarind Tango Shot

Tequila, tamarind liqueur, lime juice, and a tamarind-sugar rim offer a tangy twist. This shot is a fiesta of traditional Mexican flavors in your glass.

4. Pineapple Jalapeño Fiesta Shot

Pineapple Jalapeño Fiesta Shot

Tequila, pineapple liqueur, lime juice, jalapeño slices, and a chili-salt rim for a spicy and fruity blend. It’s a party for your taste buds!

5. Coconut Chili Explosion Shot

Coconut Chili Explosion Shot

Tequila, coconut liqueur, lime juice, chili powder, and a coconut-chili rim create a tropical explosion of flavors, combining creamy coconut with a kick of spice.

6. Cucumber Mint Surprise Shot

Cucumber Mint Surprise Shot

A refreshing shot made with tequila, cucumber liqueur, lime juice, fresh mint leaves, and a salted rim. Cool cucumber and mint make for a revitalizing treat.

7. Guava Heatwave Shot

Guava Heatwave Shot

Tequila, guava liqueur, lime juice, chili powder, and a chili-salt rim for a delightful blend of sweetness and spice. The guava adds a tropical twist to this shot.

8. Strawberry Sizzle Shot

Strawberry Sizzle Shot

Tequila, strawberry liqueur, lime juice, chili powder, and a sugar-chili rim for a spicy-sweet explosion of strawberry goodness.

9. Passionfruit Firecracker Shot

Passionfruit Firecracker Shot

Tequila, passionfruit liqueur, lime juice, chili powder, and a chili-sugar rim for a passionate burst of tropical flavors with a spicy kick.

10. Raspberry Jalapeño Rendezvous Shot

Raspberry Jalapeño Rendezvous Shot

Tequila, raspberry liqueur, lime juice, jalapeño slices, and a chili-sugar rim combine to create a sweet and spicy rendezvous for your taste buds.

Indulge in the vibrant flavors of Mexico with these 10 easy-to-make Mexican Candy Shot recipes. From classic tequila infusions to fruity watermelon twists, these shots are a delight for your taste buds. Embrace the zing of spices and the sweetness of Mexican candies—all in one tiny glass. Get ready to fiesta with every sip!

Ting A Lings Recipe

0

Ting-a-Lings are a delightful and addictive treat that combines the irresistible flavors of chocolate, butterscotch, and peanut butter into one mouthwatering bite-sized delight.

If you’re a fan of sweet and crunchy snacks, Ting-a-Lings are bound to become your new favorite indulgence. They are incredibly easy to make and are perfect for any occasion.

We’ll walk you through a simple and delicious recipe for Ting-a-Lings that you can whip up in no time.

NameTing A Lings Recipe
CuisineFusuion
Prep Time15 minutes
Cooking Time5 minutes (for melting the ingredients)
Total Time20 minutes
Servings24
Yield24

Ingredients

  • 1 cup of semi-sweet chocolate chips
  • 1 cup of butterscotch chips
  • 1 cup of creamy peanut butter
  • 4 cups of crispy rice cereal
  • 1 cup of mini marshmallows
  • 1/2 cup of chopped peanuts (optional, for extra crunch)

Instructions

Prepare Your Workspace

Before you start, make sure you have all your ingredients measured out and ready to go. Line a baking sheet with parchment paper or wax paper for easy cleanup.

Melt the Chocolate and Butterscotch

In a microwave-safe bowl, combine the semi-sweet chocolate chips and butterscotch chips. Heat them in the microwave in 30-second intervals, stirring after each interval, until the chips are completely melted and smooth. Be careful not to overheat, as chocolate can easily burn.

Add Peanut Butter

Stir in the creamy peanut butter into the melted chocolate and butterscotch mixture until well combined. The mixture should be silky and creamy.

Mix in the Crispy Rice Cereal

Gently fold in the crispy rice cereal until it’s evenly coated with the chocolate, butterscotch, and peanut butter mixture. This will create a sticky, delicious concoction.

Add Mini Marshmallows (and Chopped Peanuts, if desired)

If you’re using mini marshmallows and chopped peanuts, fold them into the mixture at this stage. The mini marshmallows will add a delightful gooey texture, while the peanuts provide an extra crunch.

Form Ting-a-Lings

Using a spoon or your hands, scoop out portions of the mixture and drop them onto the prepared baking sheet. You can make them as small or large as you like, but bite-sized portions are often the most enjoyable.

Let Them Set

Allow the Ting-a-Lings to cool and set for at least 30 minutes at room temperature or, for a faster setting, place them in the refrigerator for about 15 minutes.

Enjoy Your Ting-a-Lings

Once they have set, your Ting-a-Lings are ready to be devoured! They are perfect for sharing with friends and family or keeping all to yourself.

Ting-a-Lings are a delightful treat that combines the rich flavors of chocolate and butterscotch with the creamy goodness of peanut butter.

This simple recipe allows you to create these delectable morsels in no time, making them an ideal choice for satisfying your sweet cravings or impressing guests at gatherings.

So go ahead, give this Ting-a-Lings recipe a try, and enjoy the sweet, crunchy, and irresistible goodness it brings to your taste buds.

Nutrition Facts (per serving)

  • Calories: 130
  • Total Fat: 7g
  • Saturated Fat: 2g
  • Trans Fat: 0g
  • Cholesterol: 0mg
  • Sodium: 70mg
  • Total Carbohydrates: 16g
  • Dietary Fiber: 1g
  • Sugars: 10g
  • Protein: 2g

10 Simple For Ting A Lings Recipes

Indulge in the sweet delight of Ting-a-Lings! Combine crunchy chow mein noodles, creamy peanut butter, and rich chocolate for a mouthwatering treat. Quick and easy, they’re perfect for satisfying your sweet cravings.

Classic Ting-a-Lings

Classic Ting-a-Lings

The original recipe we discussed earlier, combining semi-sweet chocolate, butterscotch, peanut butter, crispy rice cereal, mini marshmallows, and optional chopped peanuts for an irresistible treat.

White Chocolate Ting-a-Lings

White Chocolate Ting-a-Lings

Swap out the semi-sweet chocolate for white chocolate chips to create a sweeter, creamier version of Ting-a-Lings.

Nutty Ting-a-Lings

Nutty Ting-a-Lings

Enhance the crunch by adding a mix of chopped nuts like almonds, pecans, and cashews to the classic recipe for a nutty twist.

Fruity Ting-a-Lings

Fruity Ting-a-Lings

Mix in dried fruits like cranberries, raisins, or apricots to the classic recipe for a delightful sweet and tangy flavor.

Spicy Ting-a-Lings

Spicy Ting-a-Lings

Add a pinch of cayenne pepper or a dash of chili powder to the melted mixture to create a sweet and spicy Ting-a-Ling with a kick.

Mint Chocolate Ting-a-Lings

Mint Chocolate Ting-a-Lings

Infuse the mixture with a few drops of peppermint extract and add crushed peppermint candies on top for a refreshing minty twist.

Almond Joy Ting-a-Lings

Almond Joy Ting-a-Lings

Incorporate shredded coconut and slivered almonds into the classic recipe to capture the essence of the beloved candy bar.

Peanut Butter Cup Ting-a-Lings

Peanut Butter Cup Ting-a-Lings

Insert miniature peanut butter cups into each Ting-a-Ling for a delightful surprise in every bite.

Dark Chocolate Ting-a-Lings

Dark Chocolate Ting-a-Lings

Opt for dark chocolate chips instead of semi-sweet for a richer, less sweet variation.

M&M’s Ting-a-Lings

M&M's Ting-a-Lings

Mix in colorful M&M’s candies for a playful and vibrant take on the classic recipe.

Ting-a-lings, a delightful treat loved by all, are not just a sweet memory from childhood but a timeless dessert. Here are 10 simple recipes to relish these crunchy, chocolatey goodies.

From classic peanut butter to fruity variations, these ting-a-ling recipes are easy to follow, making them perfect for a quick snack or a fun baking project with the kids. Enjoy the sweet nostalgia!

Long Hot Peppers Recipe

0

Long hot peppers, also known as chili peppers or chilies, are a staple ingredient in many cuisines around the world.

Their distinct spicy flavor and vibrant color make them a popular choice for adding a kick to various dishes.

We’ll explore delightful recipes that showcase the unique taste and versatility of long hot peppers.

NameLong Hot Peppers Recipe
CuisineFusution
Prep Time20 minutes
Cook Time25 minutes
Total Time45 minutes
Servings4
Yield8 stuffed peppers

Ingredients

  • Long hot peppers
  • Ground meat (beef, chicken, or turkey)
  • Onion, finely chopped
  • Garlic, minced
  • Tomato sauce
  • Bread crumbs
  • Parmesan cheese, grated
  • Salt and pepper to taste

Instructions

Prepare the Dough

In a mixing bowl, combine the flour, salt, and sugar. Gradually add the water while kneading the mixture until a smooth dough forms. Let it rest for about 15-20 minutes, covered with a clean kitchen towel.

Shape the Tequeños

After resting, roll out the dough into a thin rectangular sheet, around 1/8 inch thick. Cut the dough into strips, about 2 inches wide and 4-5 inches long.

Wrap the Cheese

Place a strip of queso blanco or queso de mano at one end of each dough strip. Roll the dough around the cheese, making sure to seal the edges to prevent any cheese from leaking during frying.

Heat the Oil

In a deep frying pan, heat vegetable oil over medium-high heat until it reaches around 350°F (175°C).

Fry the Tequeños

Carefully place the tequeños in the hot oil, a few at a time, and fry until they turn golden brown, usually about 2-3 minutes. Ensure you don’t overcrowd the pan, as it can lower the oil temperature and affect the texture.

Drain and Serve

Once fried, remove the tequeños and place them on paper towels to drain any excess oil. Serve them hot and crispy.

Dipping Sauce:

Tequeños are often served with various dipping sauces like guasacaca (avocado sauce) or ketchup. Feel free to get creative with your dipping choices!

Now that you know what Venezuelan tequeños are made of and how to make them, you can whip up a batch of these delicious treats to enjoy with friends and family. Whether you’re hosting a party or simply craving a savory snack, tequeños are sure to delight your taste buds with their crispy exterior and gooey, cheesy interior. Don’t be surprised if they become your new favorite snack!

Nutrition Facts

Calories: 180 per serving

Total Fat: 8g

Saturated Fat: 3g

Cholesterol: 45mg

Sodium: 350mg

Total Carbohydrates: 15g

Dietary Fiber: 3g

Sugars: 4g

Protein: 15g

Long hot peppers are a versatile ingredient that can add a spicy and flavorful element to a wide range of dishes. These recipes showcase the diversity of ways you can incorporate long hot peppers into your meals, from stuffing them to making a fiery pasta sauce. Enjoy the vibrant and bold flavors that long hot peppers bring to your culinary creations!

10 simple long hot peppers recipes 

The category of the above recipes is “Spicy Long Hot Pepper Recipes.” Here are 10 more simple and flavorful recipes to make the most of long hot peppers:

Spicy Long Hot Pepper Omelette

Spicy Long Hot Pepper Omelette

Spice up your morning with this zesty omelette! Sautee long hot pepper slices with onions, then pour beaten eggs over the mixture. Cook until the eggs are set, and enjoy a fiery, satisfying breakfast.

Long Hot Pepper Salsa

Long Hot Pepper Salsa

Create a vibrant salsa by combining chopped long hot peppers with tomatoes, onions, cilantro, lime juice, and salt. This zesty salsa is perfect as a dip or topping for tacos and grilled meats.

Long Hot Pepper Pickles

Long Hot Pepper Pickles

Preserve the heat and flavor of long hot peppers by pickling them with vinegar, garlic, and spices. Let the flavors meld, and you’ll have a tangy, spicy condiment to accompany your meals.

Long Hot Pepper Stir-Fry

Long Hot Pepper Stir-Fry

Stir-fry long hot peppers with your favorite vegetables, protein, and a savory sauce for a quick and spicy dish that’s bursting with flavor and color.

Long Hot Pepper and Cheese Quesadillas

Long Hot Pepper and Cheese Quesadillas

Stuffed long hot pepper slices and cheese between tortillas, then grill until the cheese melts and the peppers are tender. A simple yet satisfying snack or meal!

Long Hot Pepper and Shrimp Skewers

Long Hot Pepper and Shrimp Skewers

Alternate long hot pepper slices with shrimp on skewers and grill them for a delicious and spicy appetizer or main course.

Long Hot Pepper Hummus

Long Hot Pepper Hummus

Blend long hot peppers with chickpeas, garlic, lemon juice, and olive oil to create a fiery twist on traditional hummus. Perfect for dipping or spreading on sandwiches and wraps.

Long Hot Pepper Pizza

Long Hot Pepper Pizza

Top your pizza with thinly sliced long hot peppers for an added kick of heat and flavor. Combine them with other favorite toppings for a spicy pizza sensation.

Long Hot Pepper Cornbread

Long Hot Pepper Cornbread

Incorporate chopped long hot peppers into your cornbread batter for a spicy twist on a classic side dish. Enjoy the heat and flavor with every bite.

Long Hot Pepper Guacamole

Long Hot Pepper Guacamole

Mash ripe avocados and mix in chopped long hot peppers, tomatoes, onions, cilantro, lime juice, and salt. This spicy guacamole is a delightful dip or spread for your favorite snacks and meals.

These recipes fall under the category of “Spicy Long Hot Pepper Recipes,” showcasing the versatility and spiciness of long hot peppers in various dishes.

Enjoy experimenting with these fiery creations!

Carrabba’s Minestrone Soup Recipe

0

Carrabba’s Italian Grill is renowned for its delicious and authentic Italian cuisine.

One of their most beloved dishes is the Minestrone Soup, a hearty and flavorful bowl of Italian comfort food.

If you’ve ever wondered how to recreate this classic soup at home, you’re in luck. We’ll guide you through the steps to prepare Carrabba’s Minestrone Soup in your own kitchen.

Get ready to savor the flavors of Italy right at your dining table.

NameCarrabba’s Minestrone Soup Recipe
CuisineItalian
Prep Time20 minutes
Cooking Time50 minutes
Total Time1 hour 10 minutes
Servings6-8 servings
Yield2 quarts of soup

Ingredients

  • 2 tablespoons olive oil
  • 1 cup diced yellow onion
  • 1/2 cup diced celery
  • 1/2 cup diced carrots
  • 1/2 cup diced zucchini
  • 1/2 cup diced yellow squash
  • 1 tablespoon minced garlic
  • 1 cup canned crushed tomatoes
  • 4 cups vegetable broth
  • 1 cup water
  • 1/2 cup cooked small pasta (like ditalini or small shells)
  • 1 cup canned kidney beans, drained and rinsed
  • 1 cup canned cannellini beans, drained and rinsed
  • 1/2 cup chopped fresh spinach
  • 1/4 cup grated Parmesan cheese
  • Salt and pepper to taste
  • 1 teaspoon dried basil
  • 1 teaspoon dried oregano
  • 1/2 teaspoon dried thyme
  • 1/2 teaspoon dried rosemary
  • 1 bay leaf

Instructions

Sauté the Aromatics:

In a large soup pot, heat the olive oil over medium heat. Add the diced onions, celery, and carrots. Sauté for about 5 minutes until the vegetables start to soften.

Add Garlic and Seasonings:

Stir in the minced garlic, dried basil, dried oregano, dried thyme, dried rosemary, and the bay leaf. Continue cooking for another minute until the garlic becomes fragrant.

Add Zucchini and Yellow Squash:

Add the diced zucchini and yellow squash to the pot. Sauté for another 3-4 minutes until they begin to soften.

Incorporate Tomatoes and Broth:

Pour in the canned crushed tomatoes, vegetable broth, and water. Stir well to combine all the ingredients. Bring the mixture to a boil, then reduce the heat to low, cover, and simmer for about 20-25 minutes.

Add Beans and Pasta:

After simmering, add the kidney beans, cannellini beans, and the cooked pasta to the pot. Continue simmering for an additional 10-15 minutes, allowing the flavors to meld together.

Stir in Spinach:

Just before serving, add the chopped fresh spinach to the soup and cook for another 2-3 minutes until the spinach wilts.

Season and Serve:

Remove the bay leaf and discard it. Season the soup with salt and pepper to taste. Ladle the hot Minestrone Soup into bowls and top each serving with a sprinkle of grated Parmesan cheese.

Carrabba’s Minestrone Soup is a delightful and hearty Italian classic that you can now prepare in the comfort of your own kitchen. This homemade version captures all the rich flavors and warmth of the original dish, making it perfect for a cozy family dinner or a gathering with friends. So, go ahead and whip up a batch of this comforting soup, and enjoy a taste of Italy without leaving your home. Buon appetito!

Nutrition Facts (per serving, based on 6 servings)

  • Calories: Approximately 215 kcal
  • Protein: 8 g
  • Carbohydrates: 32 g
  • Dietary Fiber: 8 g
  • Sugars: 5 g
  • Fat: 6 g
  • Saturated Fat: 1.5 g
  • Cholesterol: 4 mg
  • Sodium: 610 mg
  • Potassium: 625 mg
  • Vitamin A: 60% DV
  • Vitamin C: 21% DV
  • Calcium: 12% DV
  • Iron: 20% DV

Please note that these nutrition facts are estimated values and can vary based on the specific brands and quantities of ingredients you use. It’s always a good idea to calculate the exact nutrition facts using a nutrition calculator based on the ingredients you choose for your recipe.

10 Simple Carrabba’s Minestrone Soup Recipes

Carrabba’s Minestrone Soup is a heartwarming Italian classic. This hearty, vegetable-packed soup boasts a rich tomato base, tender pasta, and a medley of beans, all harmonizing with aromatic herbs. With our homemade recipe, you can savor the comforting flavors of Italy in your own kitchen, a true taste of Carrabba’s culinary mastery.

1. Classic Carrabba’s Minestrone Soup

Classic Carrabba's Minestrone Soup

Experience the timeless flavors of Carrabba’s with this classic minestrone soup. It’s loaded with fresh vegetables, ditalini pasta, and cannellini beans in a savory tomato broth. Perfect for a comforting and nutritious meal.

2. Vegetarian Minestrone Soup

Vegetarian Minestrone Soup

For a meatless twist, try this vegetarian version of Carrabba’s Minestrone Soup. Simply omit the meat and enhance the flavors with extra veggies, herbs, and a sprinkle of Parmesan cheese for added richness.

3. Minestrone with Italian Sausage

 Minestrone with Italian Sausage

Add a zesty kick to your minestrone by including slices of Italian sausage. The sausage infuses the soup with a delightful spiciness, taking the classic recipe to a whole new level of deliciousness.

4. Minestrone with Pesto Drizzle

Minestrone with Pesto Drizzle

Elevate your minestrone by drizzling a fragrant basil pesto over each bowl. The pesto adds a burst of fresh herb flavor, making every spoonful a gourmet delight.

5. Minestrone with Spinach and Kale

Minestrone with Spinach and Kale

Boost the nutritional value of your minestrone by incorporating nutrient-rich greens like spinach and kale. These leafy vegetables provide a vibrant color and a hearty dose of vitamins.

6. Lemon-Herb Minestrone

Lemon-Herb Minestrone

Give your minestrone a refreshing twist by adding a squeeze of lemon juice and a dash of fresh herbs. The citrusy notes and aromatic herbs create a light and vibrant flavor profile.

7. Minestrone with Roasted Garlic

Minestrone with Roasted Garlic

Roast garlic cloves and add them to the soup for a deep, caramelized garlic flavor. It’s a subtle yet delightful twist that pairs perfectly with the other ingredients.

8. Minestrone with Pesto Croutons

Minestrone with Pesto Croutons

Take your soup to the next level by serving it with homemade pesto croutons. Crispy on the outside and soft on the inside, these croutons soak up the soup’s flavors, making each bite extraordinary.

9. Minestrone with a Kick

Minestrone with a Kick

Spice up your minestrone with a pinch of red pepper flakes or a drizzle of hot sauce. The heat adds a fiery dimension to the soup, awakening your taste buds with each spoonful.

10. Minestrone with Shaved Parmesan

Minestrone with Shaved Parmesan

Finish your minestrone with a generous shaving of Parmesan cheese. The sharp, salty notes of the cheese beautifully complement the rich, savory broth and hearty ingredients.

Each of these variations allows you to personalize Carrabba’s Minestrone Soup to your taste and dietary preferences, offering a range of options to suit your cravings and dietary needs.

Chick Fil A Brownies Recipe

0

If you’re a fan of Chick-fil-A’s delightful menu, you’re probably familiar with their mouthwatering brownies.

These chocolatey treats are a perfect way to satisfy your sweet tooth.

While you can’t always swing by your local Chick-fil-A, you can recreate the magic at home with this easy-to-follow recipe.

NameChick Fil A Brownies Recipe
CuisineAmerican
Prep Time15 minutes
Cooking Time25-30 minutes
Total Time40-45 minutes
Servings12-16 brownies
Yield1 9×13-inch pan of brownies

Ingredients You’ll Need

  • 1 cup unsalted butter (2 sticks)
  • 2 cups granulated sugar
  • 4 large eggs
  • 1 teaspoon vanilla extract
  • 1/2 cup cocoa powder
  • 1 1/2 cups all-purpose flour
  • 1/2 teaspoon salt
  • 1/2 teaspoon baking powder
  • 1/2 cup semi-sweet chocolate chips

Instructions

1. Preheat Your Oven

Start by preheating your oven to 350°F (175°C). Grease and flour a 9×13-inch baking pan or line it with parchment paper for easy removal.

2. Melt the Butter

In a microwave-safe bowl, melt the two sticks of butter. You can do this in the microwave in 30-second intervals, stirring between each interval until the butter is completely melted.

3. Combine Sugar and Eggs

In a large mixing bowl, combine the melted butter and granulated sugar. Mix until the sugar is well incorporated into the butter.

4. Add Eggs and Vanilla

Beat in the four large eggs and vanilla extract until the mixture is smooth and creamy.

5. Sift Dry Ingredients

In a separate bowl, sift together the cocoa powder, all-purpose flour, salt, and baking powder. Sifting ensures a smoother texture in your brownies and helps eliminate lumps.

6. Combine Wet and Dry Ingredients

Gradually add the dry ingredients to the wet mixture, stirring until everything is well combined. Be careful not to overmix; just mix until no streaks of flour remain.

7. Fold in Chocolate Chips

Gently fold in the semi-sweet chocolate chips into the brownie batter.

8. Bake

Pour the brownie batter into the prepared baking pan and spread it out evenly. Bake in the preheated oven for approximately 25-30 minutes. You can check for doneness by inserting a toothpick into the center; it should come out with a few moist crumbs, but not wet batter.

9. Cool and Cut

Allow the brownies to cool in the pan for about 10-15 minutes, then transfer them to a wire rack to cool completely. Once cooled, cut them into squares or rectangles as desired.

10. Enjoy!

Now, the best part – dig in and enjoy your homemade Chick-fil-A inspired brownies! They’re perfect for sharing with family and friends or for indulging in a sweet solo treat.

These Chick-fil-A brownies are a delightful blend of chocolatey goodness and are sure to satisfy your dessert cravings. Whether you enjoy them with a glass of milk or a hot cup of coffee, these brownies are bound to be a hit. So, go ahead and give this recipe a try and delight in the rich, fudgy goodness of homemade Chick-fil-A brownies!

Nutrition Facts (per brownie)

  • Calories: 275 kcal
  • Fat: 15g
  • Saturated Fat: 9g
  • Cholesterol: 75mg
  • Sodium: 126mg
  • Potassium: 94mg
  • Carbohydrates: 34g
  • Fiber: 1g
  • Sugar: 23g
  • Protein: 3g

10 Simple Chick Fil A Brownies Recipe

Indulge in the delightful taste of homemade Chick-fil-A brownies with this simple recipe. These rich, chocolatey treats capture the essence of the beloved restaurant’s dessert.

With just a few basic ingredients and easy steps, you can recreate the magic in your own kitchen. Enjoy the perfect balance of fudgy goodness and a hint of sweetness, all in a convenient homemade package.

1. Double Chocolate Brownies

Double Chocolate Brownies

Take your Chick-fil-A brownies to the next level by adding an extra layer of chocolate. After pouring the batter into the pan, sprinkle a generous handful of white chocolate chips on top. As the brownies bake, they’ll become a divine blend of rich, fudgy cocoa and creamy white chocolate, creating a delightful contrast in flavors and textures.

2. Peanut Butter Swirl Brownies

Peanut Butter Swirl Brownies

Elevate your brownies by swirling in smooth, creamy peanut butter before baking. Dollop spoonfuls of peanut butter onto the brownie batter, then use a knife to create a beautiful marbled effect. The result? Irresistible brownies with a hint of nutty goodness in every bite.

3. Mint Chocolate Brownies

Mint Chocolate Brownies

For a refreshing twist, add a teaspoon of peppermint extract to your brownie batter. This will infuse a cool, minty flavor that pairs perfectly with the deep chocolatey goodness. Top them off with crushed mint chocolate candies for extra flair.

4. Nutty Brownie Bars

Nutty Brownie Bars

Enhance the texture of your brownies by mixing in your favorite chopped nuts, such as walnuts or pecans. Fold the nuts into the batter before baking to add a satisfying crunch to your brownie experience.

5. Caramel Swirl Brownies

Caramel Swirl Brownies

Drizzle warm caramel sauce over the brownie batter before baking. As the brownies cook, the caramel will swirl throughout, creating a sweet, gooey surprise in every bite.

6. Raspberry Ripple Brownies

Raspberry Ripple Brownies

Add a fruity twist to your brownies by swirling in raspberry preserves before baking. This creates a delightful tangy contrast to the rich chocolate flavor, making each bite a burst of deliciousness.

7. Cookie Dough Brownies

Cookie Dough Brownies

To satisfy your cookie cravings, add chunks of your favorite cookie dough to the brownie batter. Gently fold them in, ensuring you get bites of soft, gooey cookie dough alongside the fudgy brownie.

8. Salted Caramel Pretzel Brownies

Salted Caramel Pretzel Brownies

Combine sweet and salty flavors by adding crushed pretzels on top of your brownie batter. Drizzle with caramel sauce and a sprinkle of sea salt before baking for an irresistible sweet-savory treat.

9. Mocha Espresso Brownies

Mocha Espresso Brownies

Boost your brownies with a shot of espresso. Add a teaspoon of instant coffee or espresso powder to the batter for a rich coffee flavor that complements the chocolate perfectly. Dust with cocoa powder for an elegant finish.

10. Toasted Coconut Brownies

Toasted Coconut Brownies

For a tropical twist, sprinkle shredded coconut over the brownie batter before baking. The coconut toasts to a lovely golden brown, adding a delightful crunch and a hint of exotic flavor to your brownies.

Indulge in the delectable world of homemade Chick-fil-A brownies with our easy-to-follow recipes. These 10 simple variations allow you to recreate the beloved taste of Chick-fil-A’s famous brownies right in your own kitchen. From classic fudge brownies to exciting twists like peanut butter swirl, these recipes promise a delightful treat for your taste buds. Discover the joy of baking and savoring these irresistible brownies today!

Low-Calorie Cheesecake Recipe

0

Indulging in a creamy, decadent cheesecake doesn’t have to derail your diet.

This low-calorie cheesecake recipe is a guilt-free way to satisfy your sweet tooth while keeping your calorie intake in check.

With a few smart ingredient swaps and a whole lot of flavor, you can enjoy a slice of heaven without compromising your health goals.

NameLow-Calorie Cheesecake Recipe
CuisineFusion cuisine
Prep Time15 minutes
Cooking Time50 minutes
Total Time5 hours (includes cooling and chilling time)
Servings10 slices
Yield1 cheesecake

Ingredients

  • 1 1/2 cups graham cracker crumbs (you can use whole wheat or gluten-free for a healthier option)
  • 1/4 cup unsalted butter, melted (or coconut oil for a lighter choice)
  • 2 cups low-fat cream cheese, softened
  • 1/2 cup plain Greek yogurt
  • 2/3 cup granulated sugar substitute (like Stevia or Erythritol)
  • 2 large eggs
  • 1 teaspoon vanilla extract
  • 1/4 cup fresh lemon juice
  • Zest of one lemon
  • A pinch of salt

Instructions

Preheat the Oven

Preheat your oven to 325°F (160°C).

Prepare the Crust

In a mixing bowl, combine the graham cracker crumbs and melted butter (or coconut oil). Press this mixture into the bottom of a 9-inch (23 cm) springform pan to create the crust. Place it in the fridge while you prepare the filling.

Make the Cheesecake Filling

In a separate mixing bowl, beat the softened cream cheese until it becomes smooth and creamy.

Add the Greek yogurt, sugar substitute, eggs, vanilla extract, lemon juice, lemon zest, and a pinch of salt. Mix until all the ingredients are well combined and the filling is smooth.

Assemble and Bake

Pour the cheesecake filling over the chilled graham cracker crust in the springform pan. Smooth the top with a spatula.

Bake

Place the pan in the preheated oven and bake for approximately 45-50 minutes, or until the edges are set, and the center still has a slight jiggle.

Cool and Chill

Turn off the oven and crack the oven door. Let the cheesecake cool in the oven for about an hour. Afterward, remove it from the oven and let it cool completely at room temperature. Then, refrigerate the cheesecake for at least 4 hours or overnight to set.

Serve

When you’re ready to serve, remove the cheesecake from the springform pan, slice, and enjoy! You can garnish with fresh berries or a drizzle of sugar-free fruit sauce for added flavor.

With this low-calorie cheesecake recipe, you can savor the creamy goodness of cheesecake without the guilt. It’s a delightful treat for those looking to maintain a balanced diet while satisfying their sweet cravings. So go ahead, take a slice, and relish in this guilt-free indulgence!

Nutrition Facts (per serving)

  • Calories: 250 calories
  • Total Fat: 15g
  • Saturated Fat: 7g
  • Trans Fat: 0g
  • Cholesterol: 70mg
  • Sodium: 280mg
  • Total Carbohydrates: 22g
  • Dietary Fiber: 1g
  • Sugars: 14g
  • Protein: 8g

10 Simple Low-Calorie Cheesecake Recipes

Satisfy your sweet tooth without the guilt with this low-calorie cheesecake recipe. By swapping out traditional ingredients for lighter alternatives, you can enjoy the creamy goodness of cheesecake without compromising your calorie goals.

This dessert is a perfect balance of indulgence and health, making it an ideal treat for those looking to savor something sweet while keeping an eye on their calorie intake.

1. Strawberry Swirl Cheesecake

Create a low-calorie cheesecake with a burst of summer flavor. Mix fresh strawberry puree into the filling before baking, creating a delightful strawberry swirl pattern. Top with sliced strawberries for added freshness.

2. Chocolate Chip Cheesecake Bites

Indulge your sweet tooth with these mini cheesecake bites. Fold in dark chocolate chips into the batter and bake them in a mini muffin tin. Perfect for portion control and satisfying your chocolate cravings.

3. Raspberry Lemon Cheesecake Bars

Combine the tangy zest of lemon with sweet raspberries in a bar format. Bake your cheesecake mixture on a graham cracker crust, then cut into bars for a tasty and visually appealing treat.

4. Blueberry Almond Cheesecake Cups

Add a healthy twist with almond meal in the crust. Top your mini cheesecakes with a handful of fresh blueberries for a burst of antioxidants.

5. Pumpkin Spice Cheesecake

Celebrate the fall season with this pumpkin-spiced delight. Incorporate canned pumpkin puree and warm spices into your cheesecake filling. Serve with a dollop of light whipped cream.

6. Mocha Cheesecake

Combine the richness of coffee and the sweetness of cheesecake in this mocha-inspired recipe. Add instant coffee or espresso powder to the filling and garnish with a dusting of cocoa powder.

7. Coconut Mango Cheesecake

Transport yourself to a tropical paradise with this exotic twist. Mix shredded coconut into the crust and blend ripe mangoes into the filling for a taste of the tropics.

8. Cinnamon Apple Cheesecake

Infuse cozy flavors into your cheesecake by incorporating cinnamon and diced apples into the filling. Serve with a drizzle of honey for an extra touch of sweetness.

9. Mixed Berry Cheesecake Parfait

Create individual cheesecake parfaits by layering low-calorie cheesecake with a mix of fresh berries and a sprinkle of granola. A delightful and guilt-free dessert.

10. Pomegranate Cheesecake Tart

Embrace the antioxidant-rich pomegranate in this unique tart variation. Add pomegranate juice and arils to your cheesecake filling, and garnish with extra arils for a burst of flavor and color.

These low-calorie cheesecake recipes offer a variety of flavors and options to suit your preferences while keeping your calorie count in check. Enjoy experimenting with these delicious and healthier dessert choices!

Power XL Air Fryer Recipes for Beginners

0

The Power XL Air Fryer has become a kitchen staple for many, revolutionizing the way we cook by providing a healthier alternative to deep frying.

If you’re a beginner looking to unlock the full potential of your Power XL Air Fryer, you’re in the right place.We’ll explore some delicious and easy-to-follow recipes that are perfect for those just starting their air frying journey.

From crispy chicken tenders to mouthwatering sweet potato fries, get ready to elevate your cooking game and impress your taste buds.

NamePower XL Air Fryer Recipes for Beginners
CuisineFusion
Prep Time15-20 minutes.
Cooking Time10-18 minutes.
Total Time25 minutes to 38 minutes.
Servings2-4 people.
Yield2-4 servings of each dish.

Crispy Air-Fried Chicken Tenders

Ingredients

  • 1 lb chicken tenders
  • 1 cup breadcrumbs
  • 1/2 cup grated Parmesan cheese
  • 1/2 tsp paprika
  • 1/2 tsp garlic powder
  • Salt and pepper to taste
  • Cooking spray

Instructions

In a bowl, mix breadcrumbs, Parmesan cheese, paprika, garlic powder, salt, and pepper.

Coat each chicken tender with the breadcrumb mixture.

Preheat your Power XL Air Fryer to 375°F (190°C).

Place the chicken tenders in the air fryer basket.

Spray them lightly with cooking spray.

Air fry for 10-12 minutes or until they’re golden brown and crispy.

Crispy Air-Fried Sweet Potato Fries

Ingredients

  • 2 sweet potatoes, cut into fries
  • 2 tbsp olive oil
  • 1/2 tsp paprika
  • 1/2 tsp garlic powder
  • Salt and pepper to taste

Instructions

In a large bowl, toss sweet potato fries with olive oil, paprika, garlic powder, salt, and pepper.

Preheat your Power XL Air Fryer to 375°F (190°C).

Place the sweet potato fries in the air fryer basket.

Air fry for 15-18 minutes, shaking the basket halfway through, until they’re crispy and golden.

Healthy Air-Fried Salmon

Ingredients

  • 2 salmon fillets
  • 1 tbsp olive oil
  • 1 tsp lemon juice
  • 1/2 tsp garlic powder
  • Salt and pepper to taste

Instructions

In a small bowl, mix olive oil, lemon juice, garlic powder, salt, and pepper.

Brush the salmon fillets with the olive oil mixture.

Preheat your Power XL Air Fryer to 400°F (200°C).

Place the salmon fillets in the air fryer basket.

Air fry for 10-12 minutes or until the salmon flakes easily with a fork.

With these beginner-friendly Power XL Air Fryer recipes, you can enjoy crispy, delicious meals with less oil and fewer calories. Whether you’re cooking up chicken tenders, sweet potato fries, or succulent salmon, your air fryer is your secret weapon for healthier, flavorful dishes. So, fire up your Power XL Air Fryer and start exploring the world of air frying today!

Nutrition Facts (per serving)

  • Calories: 280
  • Protein: 24g
  • Carbohydrates: 17g
  • Fat: 12g
  • Saturated Fat: 3g
  • Fiber: 1g
  • Sugars: 1g
  • Sodium: 550mg

10 simple power xl air fryer recipes for beginners

The Power XL Air Fryer is a game-changer for those new to air frying. With its ease of use and versatility, beginners can whip up delicious, healthier meals in no time. Try simple recipes like crispy chicken tenders, roasted vegetables, or even guilt-free sweet potato fries. With this kitchen appliance, anyone can enjoy the benefits of air frying with minimal effort.

1. Air-Fried Mozzarella Sticks

Air-Fried Mozzarella Sticks

Transform ordinary mozzarella sticks into crispy, gooey delights. Coat them with breadcrumbs, freeze briefly, then air-fry until golden brown. Serve with marinara sauce for dipping.

2. Air-Fried Teriyaki Chicken Skewers

Air-Fried Teriyaki Chicken Skewers

Create flavorful chicken skewers by marinating chicken pieces in teriyaki sauce. Thread them onto skewers and air-fry for a quick and savory appetizer or meal.

3. Air-Fried Veggie Chips

Air-Fried Veggie Chips

Slice your favorite vegetables like sweet potatoes, beets, or zucchini, coat them with olive oil and seasoning, then air-fry until they become crunchy, healthy chips.

4. Air-Fried Bacon-Wrapped Asparagus

Wrap asparagus spears with bacon, secure with toothpicks, and air-fry until the bacon is crispy and the asparagus is tender. A delightful side dish with a savory twist.

5. Air-Fried Coconut Shrimp

Air-Fried Coconut Shrimp

Dipped in a coconut and breadcrumb mixture, these shrimp turn into tropical delights when air-fried. Serve with a sweet chili dipping sauce for a taste of the islands.

6. Air-Fried Stuffed Bell Peppers

Air-Fried Stuffed Bell Peppers

Hollowed-out bell peppers are filled with a mixture of ground meat, rice, and seasonings, then air-fried until they’re tender and the filling is cooked to perfection.

7. Air-Fried Chocolate Chip Cookies

Air-Fried Chocolate Chip Cookies

Yes, you can even make cookies in your air fryer! Place cookie dough balls in the air fryer basket and air-fry until they’re golden and chewy on the inside.

8. Air-Fried Pork Chops

Air-Fried Pork Chops

Seasoned pork chops are air-fried to juicy perfection. They’re a quick and easy dinner option, perfect for busy weeknights.

9. Air-Fried Cinnamon Apple Rings

Air-Fried Cinnamon Apple Rings

Slice apples into rings, coat them with cinnamon and sugar, and air-fry until they’re soft and caramelized. Enjoy as a healthier dessert or snack.

10. Air-Fried Garlic Knots

Air-Fried Garlic Knots

Make soft and garlicky knots using store-bought pizza dough. Brush with a mixture of garlic, butter, and herbs, then air-fry until they’re golden brown and irresistible.

These beginner-friendly Power XL Air Fryer recipes offer a diverse range of flavors and options, making your air frying experience both fun and delicious. Happy cooking!

Shoepeg Corn Recipe

0

Shoepeg corn, with its small, sweet, and tender kernels, is a delightful twist on traditional corn varieties.

This unique variety of white sweetcorn is a favorite among food enthusiasts for its sweet flavor and crisp texture.

Whether you’re serving it as a side dish for a family dinner or incorporating it into a potluck dish, shoepeg corn never fails to impress.we’ll walk you through a simple yet delicious shoepeg corn recipe that will elevate your next meal.

NameShoepeg Corn Recipe
CuisineAmerican
Prep Time10 minutes
Cooking Time15 minutes
Total Time25 minutes
Servings6 servings
YieldApproximately 4 cups of Shoepeg Corn

Ingredients

  • 4 cups shoepeg corn (fresh or frozen)
  • 1/4 cup unsalted butter
  • 1/4 cup diced red bell pepper
  • 1/4 cup diced green bell pepper
  • 1/4 cup diced red onion
  • 2 cloves garlic, minced
  • 1/2 teaspoon salt (adjust to taste)
  • 1/4 teaspoon black pepper
  • 1/4 teaspoon paprika
  • 1/4 cup fresh cilantro, chopped (optional for garnish)

Instructions

1. Prep the Shoepeg Corn

If using fresh corn, shuck the ears and remove the silk. Carefully cut the kernels from the cobs.

2. Sauté the Vegetables

In a large skillet, melt the unsalted butter over medium heat.

Add the diced red bell pepper, green bell pepper, and red onion to the skillet. Sauté them for about 5 minutes or until they become tender and slightly caramelized.

3. Add the Shoepeg Corn

Stir in the minced garlic and sauté for an additional minute, allowing the garlic to become fragrant.

4. Season and Cook

Add the shoepeg corn kernels to the skillet and stir to combine with the sautéed vegetables.

Season the mixture with salt, black pepper, and paprika. Adjust the seasonings to your taste preferences.

Continue cooking for 5-7 minutes, or until the shoepeg corn is heated through and has a slightly crispy texture.

5. Serve

Transfer the shoepeg corn to a serving dish.

Garnish with fresh cilantro for a burst of color and flavor.

Serve hot as a side dish alongside your favorite main course.

This shoepeg corn recipe is a delightful way to enjoy the unique flavor and texture of this sweet and tender corn variety. Its crispness, combined with the colorful bell peppers and the savory sautéed onions and garlic, makes it a perfect side dish for any occasion. The addition of paprika and fresh cilantro adds an extra layer of flavor that will impress your family and guests. Give this recipe a try and discover the joy of shoepeg corn for yourself. Enjoy!

Nutrition Facts (per serving):

  • Calories: 150
  • Total Fat: 8g
  • Saturated Fat: 5g
  • Cholesterol: 20mg
  • Sodium: 260mg
  • Total Carbohydrates: 20g
  • Dietary Fiber: 3g
  • Sugars: 6g
  • Protein: 3g

Please note that these nutrition facts are approximate and may vary depending on the specific brands and quantities of ingredients used. Adjustments can also be made based on individual dietary preferences and needs. Enjoy your shoepeg corn!

10 Simple Shoepeg Corn Recipes

Indulge in the sweet, crisp goodness of shoepeg corn with this simple recipe. Sautéed to perfection with bell peppers, onions, and a hint of garlic, it’s a delightful side dish that complements any meal. Enjoy the unique flavor and tender texture in just 25 minutes. A twist on classic corn that’s sure to please!

1. Shoepeg Corn Salad

Shoepeg Corn Salad

Start with two cans of shoepeg corn, drained and rinsed. Add diced red bell pepper, red onion, and cucumber for color and crunch. Toss with a simple dressing made from olive oil, red wine vinegar, honey, and a pinch of salt and pepper. Finish with fresh chopped cilantro. This refreshing salad is perfect for picnics and potlucks.

2. Shoepeg Corn Chowder

Shoepeg Corn Chowder

In a large pot, sauté diced onions and celery in butter until softened. Add shoepeg corn, chicken broth, diced potatoes, and a touch of cream. Simmer until the potatoes are tender, then season with salt, pepper, and fresh thyme. Serve with crusty bread for a comforting meal.

3. Shoepeg Corn Salsa

Shoepeg Corn Salsa

Combine shoepeg corn with diced tomatoes, red onion, jalapeño, cilantro, lime juice, and a pinch of salt. Let it sit for an hour to let the flavors meld. Serve with tortilla chips as an appetizer or topping for grilled chicken or fish.

4. Shoepeg Corn Casserole

Shoepeg Corn Casserole

Mix shoepeg corn with sour cream, creamed corn, melted butter, and Jiffy cornbread mix. Bake in a casserole dish until golden brown and set. This creamy, slightly sweet side dish is a crowd-pleaser.

5. Shoepeg Corn and Black Bean Salad

Shoepeg Corn and Black Bean Salad

Combine shoepeg corn with black beans, diced tomatoes, red onion, and cilantro. Toss with a lime vinaigrette made from lime juice, olive oil, cumin, and a touch of honey. Serve as a side dish or a light lunch.

6. Shoepeg Corn Fritters

 Shoepeg Corn Fritters

Make a batter by mixing shoepeg corn, flour, eggs, baking powder, salt, and pepper. Drop spoonfuls of the batter into hot oil and fry until golden brown. These crispy fritters make a delightful snack or side dish.

7. Shoepeg Corn and Bacon Hash

Shoepeg Corn and Bacon Hash

Cook diced bacon until crispy, then sauté shoepeg corn with onions and bell peppers in the bacon fat. Season with salt, pepper, and a dash of paprika. Top with a fried egg for a hearty breakfast.

8. Shoepeg Corn Relish

 Shoepeg Corn Relish

Combine shoepeg corn with diced red and green bell peppers, celery, and onions. Simmer with vinegar, sugar, and mustard seeds until the mixture thickens. This tangy relish is great on hot dogs, burgers, or as a condiment for grilled meats.

9. Shoepeg Corn and Crab Salad

Shoepeg Corn and Crab Salad

Mix shoepeg corn with lump crab meat, diced avocado, red onion, and a squeeze of lemon juice. Season with salt, pepper, and a bit of Old Bay seasoning for a taste of the coast.

10. Shoepeg Corn and Cheese Dip

Shoepeg Corn and Cheese Dip

Blend shoepeg corn with cream cheese, shredded cheddar, and diced green chiles. Bake until bubbly and serve with tortilla chips. This cheesy dip is perfect for game day.

These shoepeg corn recipes offer a variety of flavors and are sure to please your taste buds. Enjoy experimenting with these delicious dishes!

The Taco Ring Recipe: A Tasty Twist

0

When it comes to quick and crowd-pleasing dinner options, the Taco Ring is a standout star.

This delightful dish combines the beloved flavors of tacos with the elegance of a crescent roll ring.

Perfect for parties, family dinners, or even just a casual night in, the Taco Ring is a versatile recipe that never disappoints.

NameThe Taco Ring Recipe: A Tasty Twist
CuisineMexican
Prep Time15 minutes
Cooking Time25 minutes
Total Time40 minutes
Servings8
Yield1 Taco Ring

Ingredients

For the Taco Filling:

  • 1 pound ground beef (or ground turkey for a leaner option)
  • 1 small onion, finely chopped
  • 1 packet taco seasoning mix
  • 1/4 cup water
  • 1 cup shredded cheddar cheese
  • 1 cup diced tomatoes
  • 1/2 cup sliced black olives (optional)
  • 1/2 cup diced green bell pepper (optional)

For the Taco Ring:

  • 2 cans refrigerated crescent rolls
  • 1 cup shredded lettuce
  • Sour cream and salsa for serving

Instructions

Preheat the Oven

Start by preheating your oven to 375°F (190°C).

Prepare the Taco Filling

In a skillet over medium heat, cook the ground beef (or turkey) until browned and crumbled. Drain any excess fat. Add the chopped onion and cook for a few more minutes until the onion is translucent.

Season the Filling

Stir in the taco seasoning mix and water. Simmer for about 5 minutes or until the mixture thickens and becomes flavorful. Remove from heat and set aside.

Assemble the Taco Ring

Unroll the crescent roll dough and separate it into triangles. Arrange them on a round pizza pan or baking sheet with the wide ends of the triangles overlapping in a circle, forming a ring.

Add the Filling

Spoon the taco meat mixture onto the wide part of each crescent triangle. Sprinkle shredded cheese on top of the meat.

Fold and Bake

Fold the pointed ends of the crescent rolls over the filling and tuck them under to secure. The filling will be partly visible, resembling a ring. Place it in the preheated oven and bake for 20-25 minutes, or until the crescent roll ring turns golden brown.

Garnish and Serve

Once out of the oven, let the Taco Ring cool for a few minutes. After cooling slightly, garnish the ring with shredded lettuce, diced tomatoes, and sliced olives or green peppers if desired. You can also add a dollop of sour cream and salsa in the center for dipping.

Slice and Enjoy

To serve, simply slice the Taco Ring between each crescent roll section. Each slice will reveal the delicious layers of taco meat and melted cheese inside the crispy crescent roll

Nutrition Facts (Approximate per Serving)

  • Calories: 290
  • Total Fat: 16g
    • Saturated Fat: 7g
    • Trans Fat: 0g
  • Cholesterol: 50mg
  • Sodium: 660mg
  • Total Carbohydrates: 21g
    • Dietary Fiber: 1g
    • Sugars: 3g
  • Protein: 14g

10 Simple The Taco Ring Recipes

Looking to elevate your Taco Tuesday game? Try the Taco Ring recipe—a delicious twist on traditional tacos! This creative dish features seasoned ground beef, zesty salsa, and gooey cheese, all neatly wrapped in crescent roll dough. It’s quick, easy, and perfect for sharing. Enjoy a delightful fusion of flavors and textures in every bite with this fun and flavorful recipe!

1. Chicken Taco Ring

Chicken Taco Ring

Swap ground beef for shredded cooked chicken. Season with taco seasoning and mix with

diced onions and bell peppers. Follow the same steps as the classic recipe for a tasty chicken twist.

2. Vegetarian Taco Ring

Vegetarian Taco Ring

Replace the meat with black beans, corn, and sautéed veggies like bell peppers and onions. Season with taco seasoning and create a flavorful vegetarian option.

3. Taco Ring Bites

Taco Ring Bites

Make mini Taco Ring Bites by using smaller crescent roll triangles. Perfect for appetizers or snacks at parties.

4. Breakfast Taco Ring

Breakfast Taco Ring

Fill the ring with scrambled eggs, cooked breakfast sausage, and shredded cheddar cheese.

Top with salsa and sour cream for a breakfast treat.

5. Taco Ring Pizza

Taco Ring Pizza

Transform your Taco Ring into a Mexican-inspired pizza by adding pizza sauce, shredded cheese, and your favorite pizza toppings.

6. Seafood Taco Ring

Seafood Taco Ring

Use cooked shrimp or crab meat seasoned with taco spices for a delightful seafood taco ring. Add diced tomatoes and cilantro for freshness.

7. BBQ Taco Ring

BBQ Taco Ring

Incorporate BBQ pulled pork, coleslaw, and cheddar cheese for a BBQ-flavored Taco Ring. Drizzle with BBQ sauce before serving.

8. Tex-Mex Taco Ring

 Tex-Mex Taco Ring

Enhance the flavors with Tex-Mex ingredients like jalapeños, Monterey Jack cheese, and avocado slices. Top with salsa and sour cream.

9. Mini Taco Ring Empanadas

Mini Taco Ring Empanadas

Create mini empanadas by folding the crescent rolls in half over the taco filling. Seal the edges and bake for a portable snack.

10. Taco Ring with Guacamole

Taco Ring with Guacamole

Serve the Taco Ring with a side of homemade guacamole, made from ripe avocados, tomatoes, onions, lime juice, and cilantro, for a fresh and creamy dip.

Chocolate Chip Mini Muffins Recipe

0

When it comes to satisfying your sweet tooth or delighting your kids with a tasty treat, nothing beats the charm of chocolate chip mini muffins. These bite-sized wonders are not only adorable but also incredibly delicious.

Whether you’re a seasoned baker or just starting out in the world of baking, this recipe is a surefire way to create a batch of mini muffins that will disappear faster than you can say Chocolate.

Recipe NameChocolate Chip Mini Muffins Recipe
CuisineAmerican
Prep Time10 minutes
Cooking Time12 minutes
Total Time22 minutes
Servings12
Yield24

Ingredients

  • 1 cup all-purpose flour
  • 1/2 cup granulated sugar
  • 1/4 cup unsalted butter, melted
  • 1/4 cup whole milk
  • 1 egg
  • 1 tsp baking powder
  • 1/2 tsp vanilla extract
  • 1/4 tsp salt
  • 1/2 cup mini chocolate chips

Instructions

1. Preheat Your Oven

Preheat your oven to 350°F (175°C). Line a mini muffin tin with paper liners or grease it lightly to prevent sticking.

2. Mix Dry Ingredients

In a mixing bowl, whisk together the all-purpose flour, sugar, baking powder, and salt. Make sure the ingredients are well combined.

3. Combine Wet Ingredients

In another bowl, beat the egg lightly, and then add the melted butter, milk, and vanilla extract. Mix until everything is well combined.

4. Combine Wet and Dry Mixtures

Pour the wet mixture into the dry mixture and gently stir until just combined. Be careful not to overmix; a few lumps are perfectly fine.

5. Add Chocolate Chips

Gently fold in the mini chocolate chips. The batter will now have that irresistible chocolatey goodness.

6. Fill the Muffin Tin

Using a spoon or a cookie scoop, fill each mini muffin cup about 2/3 full with the batter. This should make approximately 24 mini muffins.

7. Bake to Perfection

Place the muffin tin in the preheated oven and bake for about 10-12 minutes, or until the muffins are golden brown and a toothpick inserted into the center comes out clean.

8. Cool and Enjoy

Once done, remove the mini muffins from the oven and allow them to cool in the tin for a few minutes. Then transfer them to a wire rack to cool completely.

These chocolate chip mini muffins are the perfect treat for any occasion. They’re great for breakfast, snack time, or even as a dessert. The mini size makes them irresistibly cute, and the combination of fluffy muffin and melty chocolate chips is pure bliss. Share them with family and friends, or savor them all to yourself. Either way, you’re in for a delightful culinary experience!

Nutrition Facts

  • Calories: 180
  • Total Fat: 8g
  • Saturated Fat: 5g
  • Trans Fat: 0g
  • Cholesterol: 35mg
  • Sodium: 110mg
  • Total Carbohydrates: 25g
  • Dietary Fiber: 1g
  • Sugars: 15g
  • Protein: 2g

10 Simple Chocolate Chip Mini Muffins Recipes

Indulge your sweet tooth with these 10 simple recipes for chocolate chip mini muffins. These bite-sized delights are perfect for a quick snack or dessert, and they’re sure to satisfy your chocolate cravings. Try them today!

1. Double Chocolate Bliss Mini Muffins

Double Chocolate Bliss Mini Muffins

Add 2 tablespoons of cocoa powder to the batter for an extra chocolatey kick. Fold in mini chocolate chips as usual. Bake and enjoy the rich, double chocolate flavor.

2. Banana Chocolate Chip Mini Muffins

Banana Chocolate Chip Mini Muffins

Mash a ripe banana and incorporate it into the batter. The natural sweetness of the banana pairs perfectly with the chocolate chips. Bake for a fruity twist.

3. Peanut Butter Chocolate Chip Mini Muffins

Peanut Butter Chocolate Chip Mini Muffins

Mix 1/4 cup of creamy peanut butter into the wet ingredients for a delightful nutty flavor. The combination of peanut butter and chocolate chips is heavenly.

4. Gluten-Free Chocolate Chip Mini Muffins

Gluten-Free Chocolate Chip Mini Muffins

Use gluten-free all-purpose flour in the recipe to make these mini muffins accessible to those with gluten sensitivities. Ensure all other ingredients are gluten-free too.

5. Vegan Chocolate Chip Mini Muffins

Vegan Chocolate Chip Mini Muffins

Replace the egg with a flaxseed or chia seed egg (1 tablespoon of ground flaxseed or chia seeds mixed with 2.5 tablespoons of water). Use a Dairy-Free milk and vegan chocolate chips for a delicious vegan treat.

6. Almond Joy Mini Muffins

Almond Joy Mini Muffins

Add chopped almonds and shredded coconut to the batter, along with the chocolate chips, to create mini muffins reminiscent of the classic candy bar.

7. Zucchini Chocolate Chip Mini Muffins

 Zucchini Chocolate Chip Mini Muffins

Grate a small zucchini and fold it into the batter for added moisture and a hint of green. A sneaky way to incorporate veggies into a sweet treat!

8. Orange Chocolate Chip Mini Muffins

Orange Chocolate Chip Mini Muffins

Add the zest of one orange to the wet ingredients and a teaspoon of orange extract for a delightful citrus twist. The orange complements the chocolate beautifully.

9. Mini Muffin Ice Cream Sandwiches

Mini Muffin Ice Cream Sandwiches

Bake mini muffins and let them cool. Then slice them in half horizontally and sandwich a scoop of your favorite ice cream between the halves. Roll the edges in mini chocolate chips for a delightful dessert.

10. Mini Muffin Parfait

Mini Muffin Parfait

Crumble mini muffins and layer them with Greek yogurt and fresh berries in a glass for a wholesome breakfast parfait. Drizzle with honey for extra sweetness.

If you’re craving a sweet treat in a hurry, try these 10 simple recipes for chocolate chip mini muffins. They’re quick, easy, and oh-so-delicious! From classic chocolate chip to creative variations like banana chocolate Chip or peanut butter chocolate chip, there’s a flavor for everyone. These bite-sized delights make the perfect snack or breakfast on-the-go. Enjoy homemade goodness in minutes!