If you’re a fan of Starbucks Refreshers, you might be wondering: do these fruity, vibrant beverages contain caffeine? The short answer is yes—Starbucks Refreshers do have caffeine, but in a lighter dose compared to traditional coffee drinks. These refreshing beverages owe their energy-boosting properties to green coffee extract, which provides a subtle caffeine kick without the boldness of coffee.
In this article, we’ll explore the caffeine content of Starbucks Refreshers, how they compare to other drinks on the Starbucks menu, and whether there are options for those looking to avoid caffeine altogether. Whether you’re seeking a pick-me-up or just curious about what’s in your favorite Refresher, keep reading to learn everything you need to know!
What Are Starbucks Refreshers?
Starbucks Refreshers are fruit-based iced beverages made with green coffee extract. Unlike traditional coffee, green coffee extract provides caffeine without the strong, roasted flavor. This gives Refreshers their light, fruity taste while still offering a mild pick-me-up.
What Is in Starbucks Refreshers?
Refreshers typically include:
Green Coffee Extract: Provides natural caffeine.
Fruit Juices: These form the base of the drink, giving it a vibrant flavor.
Freeze-Dried Fruit Pieces: These add texture and enhance the fruity theme.
Water or Lemonade (Optional): Customize the drink’s sweetness and tartness.
The appeal lies in their balance—refreshing, slightly sweet, and less intense than coffee. They’re a great choice for hot days or when you want something lighter than a latte.
Do Starbucks Refreshers Have Caffeine?
Yes, Starbucks Refreshers do have caffeine. The caffeine comes from green coffee extract, a natural source derived from unroasted coffee beans. However, the amount of caffeine in these drinks is lower than traditional coffee, making them a lighter option for those seeking a gentle energy boost. These fruit-based iced drinks are popular for their refreshing flavors and mild caffeine levels.
Caffeine Content in Starbucks Refreshers
Starbucks Refreshers have moderate caffeine levels, which vary depending on the drink size and flavor. Let’s break it down.
For comparison, a standard cup of brewed coffee contains around 235 mg of caffeine in a Grande size. This means Refreshers offer significantly less caffeine, making them ideal for those seeking a milder boost.
Yes, but they fall into the “low caffeine” category. Their gentle energy boost makes them perfect for people sensitive to caffeine or those who want a mid-afternoon refreshment without the jitters.
Starbucks Drinks With Low Caffeine
If you’re seeking alternatives with low caffeine, consider iced teas, decaf lattes, or steamed milk beverages. Refreshers strike a good balance by being flavorful and lightly caffeinated.
Are There Any Caffeine-Free Starbucks Refreshers?
All Starbucks Refreshers contain caffeine because they are made with green coffee extract, a natural source of caffeine. This extract is an essential ingredient, giving the drinks their mild energy boost. Unfortunately, Starbucks does not offer caffeine-free Refreshers.
Caffeine-Free Starbucks Options
If you’re looking for caffeine-free alternatives, consider these options:
Iced Passion Tango Tea: A herbal tea blend with zero caffeine.
Steamed Milk or Lemonade: Perfect for a cozy or refreshing option.
Caffeine-Free Frappuccinos: Try crème-based options like Vanilla Bean or Strawberries & Crème.
These choices let you enjoy delicious beverages without caffeine while exploring Starbucks’ diverse menu.
Benefits of Choosing Starbucks Refreshers
Starbucks Refreshers are a favorite for many reasons. Here are some key benefits:
Low-Caffeine Option
Refreshers are a lighter choice compared to regular coffee. With just 45 mg of caffeine in a Grande size, they provide a gentle energy boost without overwhelming effects.
Light and Hydrating
Made with fruit juices, water, and green coffee extract, Refreshers are hydrating and easy to sip on hot days. They feel lighter on the stomach than milk-based drinks.
Fruity and Customizable Flavors
Refreshers come in vibrant flavors like Mango Dragonfruit, Strawberry Açaí, and Pineapple Passionfruit. They cater to various taste preferences and offer a refreshing alternative to traditional coffee-based drinks.
Tips for Customizing Your Starbucks Refresher
Starbucks Refreshers are highly customizable. Here’s how you can tweak them to suit your preferences:
Reduce Caffeine Content
You can ask your barista to use half the amount of green coffee extract to lower the caffeine content. This is a good option if you’re sensitive to caffeine but still want the refreshing taste.
Add Lemonade
Swap water for lemonade to give your Refresher a tangy and slightly sweeter profile. This option pairs well with Strawberry Açaí and Mango Dragonfruit flavors.
Try Coconut Milk
Adding coconut milk makes your Refresher creamier and enhances the tropical vibe. It’s an excellent choice for Pineapple Passionfruit Refreshers.
Adjust Sweetness
Ask for fewer pumps of liquid cane sugar if you prefer a less sweet drink. You can also request sugar-free syrups to modify the taste.
FAQs
Do all Starbucks Refreshers have caffeine?
Yes, all Starbucks Refreshers contain caffeine due to the green coffee extract in their base. This ingredient provides a mild energy boost while maintaining the drink’s fruity flavor.
What is the lowest-caffeine drink at Starbucks?
Herbal teas like Iced Passion Tango Tea are caffeine-free. For drinks with minimal caffeine, try decaf coffee or low-caffeine options like hot chocolate or steamed milk.
Can I reduce the caffeine in a Starbucks Refresher?
Yes, you can request your barista to use half the amount of green coffee extract. This adjustment lowers the caffeine content without affecting the drink’s core flavors.
What’s the most popular Starbucks Refresher flavor?
Strawberry Açaí Refresher is the most popular choice. Its sweet and tangy flavor, combined with freeze-dried strawberry pieces, makes it a refreshing favorite for many customers.
Conclusion
Starbucks Refreshers do have caffeine, thanks to the green coffee extract in their formula. With about 45 mg of caffeine in a Grande size, Refreshers are much less caffeinated than brewed coffee or lattes, making them an excellent choice for those wanting a mild energy boost. Their fruity flavors, refreshing texture, and customizable options make them a versatile and enjoyable drink.
Whether you’re cutting back on caffeine or just looking for a flavorful alternative to traditional coffee, Starbucks Refreshers offer the perfect middle ground. Explore their variety and find the one that suits your taste and caffeine needs!
DayQuil is a popular over-the-counter medication designed to ease cold and flu symptoms like fever, cough, and nasal congestion. Its non-drowsy formula makes it a convenient choice for daytime relief, allowing users to stay productive. However, some people wonder: Does DayQuil keep you awake?
This question arises due to the potential stimulating effects of certain ingredients. Understanding how DayQuil works and how it may impact your sleep can help you make informed decisions about its use.
Does DayQuil Keep You Awake?
DayQuil is a popular over-the-counter medication used to relieve symptoms of colds and flu, such as nasal congestion, cough, and mild aches or fever. It does not contain any sedating ingredients, which means it is designed to be non-drowsy and safe to take during the day. However, whether or not it keeps you awake depends on individual sensitivity to its components.
What Ingredients Are in DayQuil?
DayQuil contains three main active ingredients, each serving a specific purpose. Let’s break them down:
Acetaminophen
Acetaminophen is a pain reliever and fever reducer. It helps alleviate headaches, muscle aches, and fever associated with colds or the flu. This ingredient is generally considered neutral in terms of its impact on sleep. It doesn’t stimulate or sedate, making it safe for daytime use.
Dextromethorphan
Dextromethorphan is a cough suppressant. It reduces the urge to cough by acting on the brain’s cough center. While effective, it’s important to note that dextromethorphan can sometimes cause mild dizziness or drowsiness in sensitive individuals. However, this effect is rare and not strong enough to significantly disrupt daytime activities.
Phenylephrine
Phenylephrine is a decongestant that shrinks swollen blood vessels in the nasal passages. This action helps reduce nasal congestion, allowing you to breathe more easily. Phenylephrine’s stimulating effects are often the reason people question whether DayQuil might keep them awake. In some individuals, this ingredient may cause restlessness or a slight increase in energy.
Can DayQuil Affect Your Sleep Patterns?
DayQuil’s ingredients are designed for daytime use, but individual reactions can vary.
The Role of Phenylephrine
Phenylephrine, as a decongestant, can sometimes stimulate the nervous system. This stimulation may lead to restlessness or difficulty falling asleep in sensitive people. It’s worth noting, though, that these effects are not universal. Many people use DayQuil without experiencing any sleep disturbances.
Individual Sensitivity
How your body processes medications plays a significant role. Factors such as metabolism, age, and overall health can influence how DayQuil affects you. If you’re prone to sensitivity to stimulants, you might notice a mild alertness or difficulty winding down if you take DayQuil later in the day.
Timing Matters
Taking DayQuil in the evening or close to bedtime increases the chances of experiencing restlessness. For this reason, it’s generally recommended to use DayQuil during the day and switch to nighttime-specific medications like NyQuil for evening relief.
Does DayQuil Contain Stimulants Like Caffeine?
A common misconception is that DayQuil contains caffeine or other strong stimulants.
No Caffeine in DayQuil
DayQuil does not contain caffeine or traditional stimulants like those found in coffee or energy drinks. Its formula is designed to treat cold and flu symptoms without causing jitteriness for most users.
Clearing Misconceptions
The stimulating effects some people report are usually linked to phenylephrine. While it may mimic the alertness associated with caffeine in certain individuals, its action is much milder. The misconception likely stems from the “non-drowsy” label, which some interpret as meaning “stimulating.”
Can You Take DayQuil at Night?
Taking DayQuil at night can be a mixed bag. Here are the pros and cons:
Pros of Nighttime Use
Symptom Relief: If DayQuil is the only cold medicine available, it will still help alleviate symptoms like fever, cough, and congestion.
Non-Drowsy Formula: The non-drowsy formula ensures that you won’t feel overly sedated if you need to stay up late for work or caregiving duties.
Cons of Nighttime Use
Restlessness: Phenylephrine might interfere with your ability to fall asleep.
Better Alternatives Available: NyQuil, a sister product of DayQuil, contains antihistamines that promote drowsiness. It is specifically designed for nighttime symptom relief and restful sleep.
The Bottom Line
If your symptoms persist into the evening, consider using a medication better suited for nighttime. DayQuil works best when taken as intended—for daytime use. For uninterrupted sleep, opt for NyQuil or similar products.
How to Minimize Sleep Disruption While Taking DayQuil?
If you’re concerned about DayQuil affecting your sleep, there are several ways to minimize disruptions.
Time Your Doses Earlier in the Day
The simplest way to avoid potential sleep issues is to take DayQuil in the morning or early afternoon. Its effects typically last 4 to 6 hours. Avoid taking it within 4 hours of your bedtime to give your body enough time to process the active ingredients.
Manage Sensitive Reactions to Phenylephrine
Phenylephrine’s stimulating effects vary between individuals. If you notice restlessness, consider reducing other stimulants, such as caffeine, during the day. Some people might experience fewer side effects with alternative decongestants, so consult a healthcare provider to explore other options.
Space Out Doses
DayQuil should be taken every 4 to 6 hours, but not more than the recommended daily limit. Spacing out doses can help prevent an overlap of symptoms and potential restlessness in the evening.
Comparing DayQuil to Other Cold Medications
DayQuil stands out in the cold medication aisle, but how does it compare to alternatives?
DayQuil vs. NyQuil: Key Differences
DayQuil: A non-drowsy formula for daytime use. Contains phenylephrine, acetaminophen, and dextromethorphan.
NyQuil: Specifically designed for nighttime relief. It includes doxylamine, an antihistamine that promotes drowsiness, along with acetaminophen and dextromethorphan.
The biggest difference lies in their effects on alertness. DayQuil keeps you functioning during the day, while NyQuil helps you rest at night.
Other Over-the-Counter Medications
Sudafed (Pseudoephedrine): A powerful decongestant that may cause even stronger stimulating effects than phenylephrine.
Tylenol Cold & Flu: Offers similar symptom relief but may include variations in active ingredients.
Each product is tailored for specific needs, so understanding the formulations can help you make the best choice for daytime or nighttime use.
Getting quality sleep while sick is vital for recovery. Here are some strategies to improve your rest:
Use a Humidifier
Dry air can worsen congestion, making it harder to breathe and sleep. A humidifier adds moisture to the air, soothing irritated nasal passages and reducing coughing.
Elevate Your Head
Sleeping with your head elevated can help reduce nasal congestion. Use an extra pillow or adjust your bed slightly to keep your airways open.
Maintain Good Sleep Hygiene
Stick to a consistent sleep schedule.
Keep your bedroom dark, quiet, and cool.
Avoid screen time before bed, as the blue light can interfere with melatonin production.
Stay Hydrated
Drinking plenty of fluids keeps mucus thin and easier to clear, which can improve breathing and help you sleep better.
Natural Sleep Aids Compatible with DayQuil
For those who prefer natural remedies, several options can enhance sleep without conflicting with DayQuil.
Melatonin
Melatonin is a hormone that helps regulate the sleep-wake cycle. It’s safe to use with DayQuil and can help counteract any mild restlessness caused by phenylephrine.
Yes, you can take DayQuil at night as it lacks strong stimulants. However, the phenylephrine may cause restlessness in sensitive individuals. Consider alternatives like NyQuil for better nighttime relief.
Does DayQuil have caffeine?
No, DayQuil does not contain caffeine. Its ingredients, such as acetaminophen and phenylephrine, are designed to alleviate cold symptoms without causing significant stimulation.
Why does DayQuil sometimes make me restless?
Phenylephrine, a decongestant in DayQuil, can cause restlessness in some individuals. Sensitivity varies, so adjust dosage timing if this occurs.
Can I combine DayQuil with natural sleep aids?
Yes, DayQuil can generally be used alongside natural sleep aids like melatonin or chamomile tea. Always consult a doctor if unsure about interactions.
Conclusion
DayQuil is a trusted medication for daytime cold and flu relief. While its non-drowsy formula is ideal for staying productive, phenylephrine can cause mild restlessness in some individuals. Timing your doses earlier in the day and managing personal sensitivities can help reduce any potential sleep disturbances.
For nighttime relief, NyQuil or other sleep-friendly medications are better alternatives. Pairing DayQuil with good sleep hygiene and natural aids like melatonin or herbal teas can further enhance your rest. By tailoring your approach to your individual needs, you can get through cold and flu season with minimal disruption.
DayQuil is a popular over-the-counter medication used to relieve symptoms of colds and flu. It helps manage issues like cough, fever, and congestion. While DayQuil provides quick relief, it’s crucial to follow the dosage guidelines for safe and effective use. Taking it improperly can lead to unwanted side effects or even severe health risks. So, let’s dive into understanding how often you can take DayQuil and its proper usage.
How Often Can You Take DayQuil?
DayQuil is designed for short-term relief from cold and flu symptoms. For adults and children aged 12 years and older, the recommended dosage is every 4 to 6 hours as needed. However, you should not exceed 4 doses within a 24-hour period. This guideline ensures safe use and minimizes the risk of side effects, especially those associated with acetaminophen.
For children aged 6 to 12 years, it’s essential to follow specific pediatric dosing guidelines listed on the package or prescribed by a healthcare professional. For children under 6, it is generally not recommended unless directed by a doctor.
Avoid doubling doses even if symptoms persist, as this could lead to adverse effects or overdose. If your symptoms don’t improve after a few days of using DayQuil, consult your healthcare provider for further advice.
What Does DayQuil Do?
It is designed to tackle multiple cold and flu symptoms at once. It contains a combination of active ingredients that work together to provide relief. Here’s what you need to know about what DayQuil does.
Key Ingredients and Their Effects
Acetaminophen: This ingredient reduces fever and alleviates minor aches and pains. It’s commonly used for its effectiveness and safety when taken in appropriate doses.
Dextromethorphan: It’s a cough suppressant that reduces the urge to cough, providing relief from constant irritation.
Phenylephrine: This nasal decongestant shrinks blood vessels in the nasal passages, relieving congestion and sinus pressure.
How Does It Work?
The ingredients work synergistically to combat flu symptoms like headaches, sore throat, and congestion.
It doesn’t make you drowsy, which makes it suitable for daytime use.
By addressing these symptoms, it helps you carry on with your day, even while battling a cold or flu.
It typically provides relief for about 4 to 6 hours. Its active ingredients work steadily during this period to suppress symptoms like congestion, cough, and fever.
Timing for Taking the Next Dose
You can take your next dose once 4 to 6 hours have passed from the last dose. However, ensure you don’t take more than 4 doses in a 24-hour period. Maintaining this interval is crucial to avoid overconsumption of acetaminophen or other active components.
For long-lasting relief, consider complementing it with adequate hydration, rest, and other doctor-recommended remedies.
Side Effects of DayQuil
Like any medication, it can cause side effects. While most are mild, some can be more serious and require immediate medical attention.
Common Side Effects
Drowsiness: Although DayQuil is non-drowsy, some people may experience slight fatigue.
Nausea or Upset Stomach: This can occur, especially if taken on an empty stomach.
Headache: Mild headaches may develop in some individuals.
Serious Side Effects
Allergic Reactions: Symptoms include hives, swelling, or difficulty breathing. Seek emergency care immediately.
Liver Damage: Excessive acetaminophen use can harm the liver, presenting symptoms like jaundice or severe fatigue.
Cardiovascular Issues: Rarely, phenylephrine may cause an increased heart rate or high blood pressure.
If you experience serious side effects, stop taking it and consult a healthcare professional right away.
Precautions When Taking DayQuil
To use it safely and effectively, it’s essential to follow specific precautions.
Warnings About Alcohol and Other Medications
Avoid Alcohol: Consuming alcohol while taking DayQuil can increase the risk of liver damage due to acetaminophen.
Medication Interactions: Don’t combine this medication with other medications containing acetaminophen or decongestants, as this may lead to overdosing.
When to Consult a Doctor
If you have pre-existing conditions like liver disease, heart problems, or high blood pressure, seek medical advice before using DayQuil.
Pregnant or breastfeeding individuals should also consult their doctor to confirm it’s safe to use.
These precautions ensure you get relief without compromising your health.
FAQs
How often can you take DayQuil in a day?
Adults can take DayQuil every 4–6 hours as needed, but not more than 4 doses in 24 hours. Follow the package instructions carefully.
How long does it take DayQuil to work?
DayQuil typically starts working within 30 minutes to an hour. Its effects may vary depending on individual factors like metabolism and severity of symptoms.
Can children take DayQuil?
DayQuil is not recommended for children under 12 years unless specified by a doctor. Always check the product label for specific age-related guidelines.
What are common side effects of DayQuil?
Common side effects include dizziness, nausea, and dry mouth. If you experience severe reactions like rash or difficulty breathing, seek medical help immediately.
Conclusion
DayQuil is a trusted option for managing cold and flu symptoms, offering relief from fever, congestion, and cough. However, knowing how often can you take DayQuil is key to its safe and effective use. Stick to the recommended dosage, be aware of potential side effects, and follow all precautions. If your symptoms persist or worsen, always consult a healthcare provider. By using DayQuil responsibly, you can get back to feeling better faster
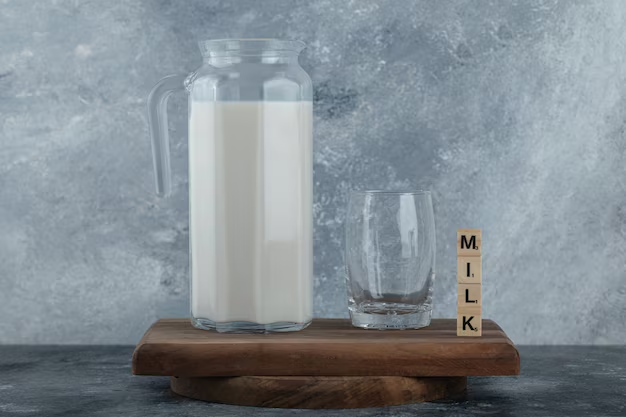
Heartburn and acid reflux are common digestive issues that affect millions of people worldwide. These conditions often arise due to excessive stomach acid moving into the esophagus, causing a burning sensation in the chest. Many people believe that drinking milk can alleviate heartburn symptoms. But does milk actually help heartburn? This article will delve into whether milk truly helps with heartburn and acid reflux, analyzing medical evidence and offering practical advice for managing these conditions.
Does Milk Help Heartburn?
Milk has long been considered a natural remedy for heartburn. Its soothing texture and neutral taste make it seem like an ideal choice for relief. But does it truly work?
Why Is Milk Thought to Help Heartburn?
Milk contains calcium and protein, which can temporarily neutralize stomach acid. Many people feel immediate relief after consuming milk because it coats the esophagus and stomach lining. This creates a protective barrier against acidic contents. The belief that milk helps heartburn likely stems from these soothing properties.
What Does Research Say About Milk For Heartburn?
Scientific studies reveal mixed results. Milk can initially neutralize stomach acid, providing short-term comfort. However, its effects may not last long. Whole milk, in particular, is high in fat, which can relax the lower esophageal sphincter (LES). A relaxed LES allows stomach acid to flow back into the esophagus, worsening heartburn in the long run.
Low-fat or skim milk may offer better results for some individuals. However, this depends on the person’s overall health, diet, and the severity of their heartburn symptoms.
Does Milk Help Acid Reflux?
Acid reflux occurs when stomach acid flows backward into the esophagus. Like heartburn, milk is often suggested as a remedy. Let’s explore how milk interacts with acid reflux symptoms.
Temporary Relief from Acid Reflux
Milk’s alkaline nature can help neutralize stomach acid temporarily. Drinking milk may reduce the burning sensation associated with acid reflux. The protein content in milk might also enhance its buffering effect, further soothing the stomach lining.
Potential Drawbacks
Despite its temporary benefits, milk is not a long-term solution for acid reflux. The fat content in milk, especially whole milk, can slow down digestion. This may increase the chances of acid reflux episodes. Additionally, drinking too much milk can stimulate acid production in some individuals, potentially aggravating symptoms.
For people with lactose intolerance, milk may exacerbate digestive discomfort, leading to bloating or gas.
Does Cold or Warm Milk Help Acid Reflux?
The temperature of milk can influence its effects on acid reflux. Is there a difference between drinking it cold or warm?
Effects of Cold Milk
Cold milk is often preferred for its immediate soothing effect. It can reduce the burning sensation in the esophagus by cooling inflamed tissues. However, cold milk may cause the stomach muscles to contract, potentially leading to discomfort for some individuals.
Effects of Warm Milk
Warm milk can be more relaxing and easier to digest. It may help the body produce more digestive enzymes, improving stomach function. However, warm milk’s heat might relax the LES, increasing the likelihood of acid reflux.
The choice between cold and warm milk depends on personal preference and how an individual’s body reacts to temperature changes.
How Does Milk Help Acid Reflux?
Milk’s soothing effects are primarily due to its composition. Here’s how it interacts with the digestive system:
Coating the Stomach Lining
Milk coats the stomach lining, which may reduce irritation caused by stomach acid. This barrier effect can temporarily alleviate symptoms, especially during mild reflux episodes.
Neutralizing Stomach Acid
Calcium in milk neutralizes stomach acid, creating a more alkaline environment. This can be beneficial for brief periods but does not address the underlying causes of acid reflux.
Triggering Digestive Hormones
Protein in milk can stimulate the release of digestive hormones like gastrin. While this might aid digestion, it could also lead to increased stomach acid production if consumed in excess.
How To Drink Milk for Acid Reflux
If you choose to use milk as a remedy for acid reflux, moderation is key. Here’s how to incorporate it effectively:
Drinking milk alongside meals can help buffer stomach acid without overwhelming your digestive system. Avoid drinking large amounts on an empty stomach, as this might stimulate acid production.
Limit Portions
Stick to small portions of milk rather than drinking it in excess. Overconsumption can backfire, leading to discomfort and increased acid reflux symptoms.
Does Milk Help Acid Reflux at Night?
Nighttime acid reflux is a common concern, and many wonder whether milk can provide relief before bedtime.
Benefits of Milk at Night
Drinking a small amount of milk before bed might soothe the esophagus and reduce burning sensations. This can help some individuals sleep better by alleviating discomfort.
Potential Downsides
For others, consuming milk at night could worsen reflux symptoms. Lying down soon after drinking milk might increase the risk of acid moving back into the esophagus. To reduce this risk, avoid lying down immediately after consuming milk.
Does Milk Help Heartburn During Pregnancy?
Pregnant individuals often experience heartburn due to hormonal changes and the growing baby pressing against the stomach. Milk is commonly suggested as a remedy, but how effective and safe is it during pregnancy?
Benefits of Milk for Pregnancy-Related Heartburn
Milk can provide temporary relief for heartburn during pregnancy. Its soothing properties may help neutralize stomach acid and reduce the burning sensation in the esophagus. Low-fat or skim milk is often recommended as it is easier to digest and less likely to trigger additional symptoms.
Concerns with Milk Consumption During Pregnancy
While milk is generally safe for pregnant individuals, excessive consumption might lead to bloating or discomfort, particularly for those with lactose intolerance. Drinking large quantities of milk might also stimulate stomach acid production in some cases.
Recommendations for Pregnant Individuals
Pregnant individuals should consume milk in moderation and pair it with meals to avoid triggering reflux. Opting for lactose-free or plant-based alternatives, such as almond milk, can also be beneficial. It’s important to consult a healthcare provider before relying on milk or any remedy for heartburn during pregnancy.
Natural Remedies for Heartburn
Milk is one of many natural remedies for heartburn, but exploring other options can expand your toolkit for relief. Here are some tried-and-tested methods:
Ginger
Ginger is a well-known digestive aid that can soothe the stomach and reduce inflammation. It’s effective in relieving nausea and mild heartburn. Drinking ginger tea or adding fresh ginger to meals can be beneficial.
Apple Cider Vinegar
Although acidic, apple cider vinegar may help balance stomach acidity in some cases. Dilute one to two teaspoons of apple cider vinegar in a glass of water and sip it slowly for relief. Always use it sparingly to avoid irritation.
Herbal Teas
Herbal teas, such as chamomile and licorice root, can calm the digestive tract and alleviate heartburn. Avoid peppermint tea, as it might relax the LES and worsen symptoms for some individuals.
Lifestyle Modifications
In addition to natural remedies, making small lifestyle changes can greatly improve heartburn symptoms:
Eat smaller, more frequent meals to avoid overloading your stomach.
Avoid common triggers like spicy foods, caffeine, and alcohol.
Don’t lie down immediately after eating; wait at least two to three hours before going to bed.
What Foods Neutralize Stomach Acid Immediately?
Certain foods can act as natural antacids, helping to neutralize stomach acid and provide instant relief. Here are some examples:
Milk
Milk can soothe the esophagus and temporarily neutralize acid, but its effects are short-lived and depend on the type of milk consumed.
Bananas
Bananas are naturally alkaline and gentle on the stomach. They help coat the stomach lining and reduce acid production.
Oatmeal
Oatmeal is a low-acid, high-fiber food that can absorb stomach acid and reduce irritation. It’s an excellent choice for a reflux-friendly breakfast.
Ginger
Ginger’s anti-inflammatory properties help reduce acid reflux and soothe the stomach lining. It’s versatile and can be used in teas, soups, or as a cooking ingredient.
Yogurt
Plain, low-fat yogurt contains probiotics that promote gut health and may reduce heartburn symptoms. Avoid flavored or high-fat varieties, as they can worsen reflux.
These foods, along with milk, provide options for immediate symptom relief. However, they should complement a balanced diet and not replace professional medical advice.
FAQs
Are plant-based milks effective for heartburn relief?
Yes, almond milk and other low-fat plant-based options can soothe acid reflux without the drawbacks of dairy milk.
Can milk cause heartburn instead of relieving it?
Yes, whole milk or drinking milk in excess can relax the LES, leading to increased acid reflux in some cases.
Are there better alternatives to milk for heartburn relief?
Ginger tea, aloe vera juice, and oatmeal are effective natural remedies for managing heartburn and acid reflux.
What foods should I avoid if I have acid reflux?
Avoid spicy, fatty, and acidic foods like tomatoes, citrus, and fried items to minimize reflux symptoms.
Does lactose-free milk help with acid reflux?
Lactose-free milk can be a better option for those with lactose intolerance, reducing digestive discomfort while still offering soothing effects.
Conclusion
So, does milk help heartburn? The answer isn’t straightforward. Milk can provide temporary relief by neutralizing stomach acid and soothing irritation. However, its long-term effectiveness depends on factors like fat content, timing of consumption, and individual tolerance. While milk might work for some, others may find it worsens symptoms.
Instead of relying solely on milk, consider integrating other natural remedies and lifestyle changes for more comprehensive heartburn management. For chronic symptoms, consult a healthcare provider to explore tailored treatment options. Remember, understanding your triggers and making mindful dietary choices are key to preventing heartburn and acid reflux.
Kombucha, a fizzy and flavorful fermented tea, has become a staple for health enthusiasts. Praised for its probiotic benefits, this drink is celebrated for aiding digestion and promoting gut health. But one question lingers: does kombucha have caffeine? If so, how much? This article explores the caffeine content of kombucha and its implications for caffeine-sensitive individuals.
What Is Kombucha?
Kombucha is a fermented beverage made by combining tea, sugar, and a SCOBY (Symbiotic Culture of Bacteria and Yeast). The fermentation process transforms the sugary tea into a tangy, slightly sweet drink packed with live probiotics. Its unique taste and potential health benefits have contributed to its rise in popularity.
Reputation as a Health Beverage
Known for its rich probiotic content, kombucha is often associated with improved digestion and better gut health. Many also tout its potential for boosting energy, supporting the immune system, and even aiding weight loss. Its natural ingredients make it a preferred alternative to sugary sodas.
Does Kombucha Have Caffeine?
The caffeine in kombucha comes from the tea used in brewing, typically black or green tea. Both of these teas naturally contain caffeine. During fermentation, some of the caffeine is metabolized by the SCOBY, but a portion remains in the final product.
Is Kombucha High in Caffeine?
Kombucha is relatively low in caffeine compared to other caffeinated drinks. Here’s a quick comparison:
Coffee (8 oz): 95-200 mg
Black Tea (8 oz): 40-70 mg
Kombucha (8 oz): 10-25 mg
With its lower caffeine content, kombucha is a gentler option for those seeking an energy boost without the jitters.
Suitability for Caffeine-Sensitive Individuals
If you’re sensitive to caffeine, kombucha may still be a viable choice. The amount is significantly lower than coffee or traditional tea, making it less likely to cause side effects like anxiety or disrupted sleep. However, it’s wise to consume it in moderation and monitor your body’s response.
How Much Caffeine Is in Kombucha?
On average, an 8-ounce serving of kombucha contains between 10 and 25 milligrams of caffeine. The exact amount depends on:
Type of Tea: Black tea kombucha tends to have higher caffeine levels compared to green tea varieties.
Brewing Time: Longer brewing times might slightly reduce caffeine as fermentation progresses.
Brand and Recipe: Commercial kombucha brands often have consistent caffeine levels, while homemade kombucha can vary widely.
Kombucha vs. Coffee: A Caffeine Comparison
When comparing caffeine levels, kombucha is the clear winner for those looking to reduce their intake. An 8-ounce serving of kombucha typically contains 10-25 mg of caffeine. In contrast, coffee boasts 95-200 mg per 8-ounce cup, a significant difference that impacts how the body responds.
Coffee delivers a quick, potent energy boost due to its higher caffeine concentration. However, it often leads to energy crashes, jitteriness, or anxiety in those sensitive to caffeine. Kombucha provides a much gentler lift, thanks to its lower caffeine content and probiotic composition, which supports sustained energy without the unpleasant side effects.
Why Is Kombucha a Better Low-Caffeine Option?
For individuals aiming to limit their caffeine consumption, kombucha offers a balanced solution. The beverage provides enough caffeine to feel slightly energized but avoids overstimulation. Additionally, the probiotics in kombucha may aid digestion and contribute to overall well-being, making it a popular choice for those seeking a holistic alternative to coffee.
Does Health-Ade Kombucha Have Caffeine?
Health-Ade Kombucha is a leading commercial brand known for its commitment to quality and health. Their kombucha typically contains 5-15 mg of caffeine per 8-ounce serving. The exact amount depends on the flavor and the tea used in brewing.
Popular Flavors and Their Caffeine Levels
Health-Ade offers a wide variety of flavors, such as:
Pink Lady Apple: One of their bestsellers, with moderate caffeine content.
Pomegranate: A tangy option with similar caffeine levels to their other offerings.
For those concerned about caffeine, Health-Ade Kombucha provides detailed nutritional information on their labels, making it easier to choose the right product for your preferences.
Does Synergy Kombucha Have Caffeine?
Synergy Kombucha, produced by GT’s Living Foods, is another favorite among kombucha enthusiasts. Their caffeine content ranges between 8-14 mg per 8-ounce serving, depending on the flavor and ingredients.
Diverse Product Range
Synergy Kombucha offers a rich variety of flavors, including:
Trilogy: A fruity blend that aligns with their standard caffeine content.
Gingerade: Known for its bold, zesty flavor and moderate caffeine levels.
Mystic Mango: A tropical twist with similar caffeine profiles.
Caffeine-Free Options
For those avoiding caffeine entirely, Synergy also provides caffeine-free varieties, such as their “Pure Love” line, made with herbal teas instead of traditional tea bases.
Factors That Influence Caffeine Levels in Kombucha
Caffeine levels in kombucha are influenced by several factors, each playing a critical role in determining how much caffeine is left in the final product. Below, we dive deeper into these factors and their impact:
1. Tea Selection
The type of tea used as the base for brewing kombucha significantly affects its caffeine content.
Traditional Teas (Black and Green):
Most kombucha recipes use black or green tea, both of which naturally contain caffeine. Black tea typically has more caffeine, ranging from 40-70 mg per 8-ounce serving. Green tea contains less, usually around 20-45 mg per 8-ounce serving. Since kombucha inherits its caffeine from the tea, black tea-based kombucha tends to have slightly more caffeine than green tea-based varieties.
Decaffeinated Teas:
For those looking to minimize caffeine, decaffeinated black or green teas are an excellent option. These teas undergo a decaffeination process that removes most of the caffeine, leaving only trace amounts. As a result, kombucha brewed with decaffeinated tea will have minimal to no caffeine.
Herbal Teas:
Herbal teas like chamomile or rooibos, which are naturally caffeine-free, can also be used to create kombucha. However, brewing kombucha with herbal teas requires care, as the SCOBY thrives on nutrients found in traditional teas. Supplementing with green or black tea occasionally ensures the SCOBY remains healthy.
2. Brewing Time
The fermentation period influences the caffeine content in kombucha due to the activity of the SCOBY (Symbiotic Culture of Bacteria and Yeast).
Shorter Fermentation Periods:
If the kombucha is brewed for a shorter time (around 7-10 days), the caffeine content remains closer to that of the original tea. This is because the SCOBY has less time to metabolize the tea compounds, including caffeine.
Extended Fermentation Periods:
With longer fermentation times (14-21 days or more), the SCOBY has more opportunity to consume caffeine as it feeds on the tea and sugar. While the reduction in caffeine is not drastic, it can make a noticeable difference. This is why longer-fermented kombucha often has a slightly lower caffeine level than batches brewed for shorter periods.
Flavor and Caffeine Trade-Off:
Extended fermentation reduces caffeine but also affects flavor. Over-fermented kombucha may taste sour or overly tangy, so finding a balance between flavor and caffeine reduction is key.
3. Commercial vs. Homemade
The source of kombucha—whether it’s homemade or commercially produced—impacts its caffeine predictability.
Commercial Kombucha:
Store-bought kombucha brands often list the caffeine content on their packaging. These products are typically made with consistent recipes and brewing times, ensuring predictable caffeine levels. Most commercial kombuchas contain 10-25 mg of caffeine per 8-ounce serving, depending on the tea used and the brand’s brewing process.
Homemade Kombucha:
Brewing kombucha at home offers flexibility but less predictability. Home brewers control factors like tea type, fermentation length, and recipe adjustments, all of which influence caffeine levels. For example:
Using decaffeinated or herbal teas can significantly lower caffeine in homemade kombucha.
Extended fermentation times may reduce caffeine but also risk altering the taste or alcohol content. Since caffeine levels in homemade kombucha are not standardized, it’s challenging to determine the exact amount without lab testing.
Kombucha Health Benefits
Kombucha, often called the “elixir of life,” is more than just a tasty drink. Its unique combination of fermentation, tea, and probiotics makes it a powerhouse of potential health benefits. Let’s explore why kombucha is so widely celebrated in the health and wellness community.
Supports Gut Health
Kombucha is rich in probiotics, which are live bacteria and yeasts beneficial for gut health.
Improves Digestion: The probiotics in kombucha help balance the gut microbiome, promoting smoother digestion and reducing issues like bloating, gas, and constipation.
For individuals with gut issues, kombucha acts as a natural remedy, improving gut health over time.
Boosts Immune System
The probiotics in kombucha don’t just aid the gut—they also enhance immune function.
Gut-Immune Connection: A significant portion of the immune system resides in the gut. By improving gut health, kombucha indirectly supports immunity.
Antibacterial Properties: Kombucha contains acetic acid, which has natural antimicrobial properties. It can help fight harmful bacteria in the digestive system and elsewhere in the body.
This makes kombucha an excellent addition to your diet, especially during cold and flu season.
Provides Antioxidants
Antioxidants are compounds that protect the body from oxidative stress, a major contributor to aging and chronic diseases.
Source of Polyphenols: Kombucha inherits polyphenols, powerful antioxidants, from the tea used in its brewing process. Green tea-based kombucha, in particular, is rich in these compounds.
Fights Free Radicals: Antioxidants in kombucha help neutralize free radicals, reducing inflammation and protecting cells from damage.
This property makes kombucha a natural ally in promoting skin health, slowing aging, and preventing diseases.
Increases Energy
While kombucha’s caffeine content is relatively low, it still provides a mild energy boost.
Caffeine and B-Vitamins: The fermentation process generates B-vitamins, particularly B1 (thiamine), B6, and B12. These vitamins support energy metabolism and can improve focus and stamina.
Gentle Energy Lift: Kombucha’s combination of caffeine, B-vitamins, and natural sugars delivers a sustained, jitter-free energy boost, making it a perfect alternative to coffee or energy drinks.
For people looking to feel refreshed and energized naturally, kombucha is an ideal choice.
Aids Detoxification
Kombucha supports the body’s natural detox processes, primarily through the liver.
Glucuronic Acid Production: Kombucha may contain glucuronic acid, a compound that binds to toxins in the liver and helps eliminate them from the body.
Clears Harmful Substances: Drinking kombucha regularly can assist in flushing out harmful substances, reducing the toxin load on the liver.
Chronic inflammation is linked to many health problems, including arthritis, heart disease, and diabetes.
Anti-Inflammatory Effects: Kombucha’s antioxidants help reduce inflammation in the body by targeting the underlying oxidative stress.
Improves Joint Health: The glucosamines in kombucha may increase hyaluronic acid production, which helps maintain joint lubrication and reduce arthritis symptoms.
Drinking kombucha can be a simple step toward managing inflammation and maintaining joint health.
Supports Weight Management
Kombucha can aid in weight management through several mechanisms.
Reduces Sugar Cravings: Its tangy-sweet flavor satisfies sweet cravings, making it easier to avoid sugary snacks.
Low-Calorie Beverage: With only 30-50 calories per serving, kombucha is a healthier alternative to soda or sugary drinks.
Improves Metabolism: Kombucha’s probiotics and B-vitamins support efficient digestion and energy use, contributing to weight control.
While it’s not a miracle weight-loss drink, kombucha fits well into a balanced diet for maintaining a healthy weight.
Enhances Mental Clarity and Mood
Kombucha’s effects go beyond physical health—it also supports mental well-being.
Improves Focus: The low caffeine content and B-vitamins help improve concentration without the jitters associated with coffee.
Mood Booster: Gut health is closely linked to mental health, often referred to as the gut-brain axis. Kombucha’s probiotics may help reduce stress, anxiety, and depressive symptoms.
For those dealing with brain fog or low mood, kombucha can offer a natural pick-me-up.
Kombucha and Wellness Trends
In an era of health-conscious living, kombucha aligns with trends emphasizing natural, low-calorie, and functional beverages. Its ability to offer mild energy without overwhelming the body makes it a go-to drink for yoga enthusiasts, fitness lovers, and anyone pursuing a balanced lifestyle.
Yes, kombucha naturally contains caffeine because it is brewed using tea, which is a natural source of caffeine.
Is kombucha high in caffeine compared to soda?
No, kombucha typically has less caffeine than most sodas, with around 10-25 mg per serving compared to 30-50 mg in soda.
How much caffeine is in Health-Ade Kombucha?
Health-Ade Kombucha contains approximately 5-15 mg of caffeine per 8 oz serving, depending on the flavor and brewing process.
Does kombucha have more caffeine than green tea?
No, kombucha generally has less caffeine than green tea due to the fermentation process, which reduces caffeine content.
Conclusion
So, does kombucha have caffeine? Yes, it does, but in much lower amounts compared to coffee or traditional tea. With 10-25 mg per 8-ounce serving, kombucha provides a mild caffeine kick while offering a host of health benefits, from probiotics to antioxidants. Whether you’re a caffeine-sensitive individual or simply seeking a healthier alternative to energy drinks, kombucha is a great choice to support your wellness journey.
The question, “Can constipation cause back pain?” is more common than you might think. Constipation is a digestive issue that affects millions worldwide, but its impact can extend beyond the gut. One surprising and often misunderstood connection is the relationship between constipation and back pain. This pain can manifest in various parts of the back, often confusing those affected. Understanding this link can help address underlying issues effectively.
Constipation-related back pain arises due to several mechanisms, including pressure on nerves, bloating, and inflammation. Symptoms can range from mild discomfort to severe, localized pain. In this article, we’ll explore how constipation can lead to back pain, diving into the causes, types, and preventive strategies to manage these symptoms.
What Is Constipation?
Constipation occurs when bowel movements become infrequent or difficult to pass. Medically, it’s defined as having fewer than three bowel movements per week. The condition can lead to hard, dry stools that are painful to expel.
Common symptoms of constipation include:
Straining during bowel movements.
A sense of incomplete evacuation.
Abdominal bloating and discomfort.
These symptoms can sometimes escalate, triggering discomfort in areas beyond the digestive tract, including the back.
How Common Is Constipation?
Constipation is a prevalent condition, affecting about 16% of adults globally. In older populations, particularly those over 60, the prevalence can rise to over 33%. Factors contributing to constipation include poor dietary habits, low fluid intake, sedentary lifestyles, and certain medications. Its widespread occurrence underscores the importance of understanding its potential effects on the body.
Nerve Compression: When stool builds up in the colon, it can create pressure on surrounding nerves. This pressure can radiate to the back, leading to discomfort or sharp pain.
Bloating and Gas: Accumulated gas from delayed digestion can exert pressure on the abdominal cavity. This pressure may affect the spine, leading to postural changes or nerve irritation.
Inflammation: Chronic constipation may lead to localized inflammation, affecting muscles and tissues in the back.
Upper back pain due to constipation is less common but can occur. When bloating and gas push upwards, they can affect the diaphragm and surrounding areas. This pressure can occasionally extend to the upper back, particularly in severe cases of gastrointestinal distress.
Can Constipation Cause Lower Back Pain?
Lower back pain is a more frequent symptom associated with constipation. The build-up of stool and gas in the intestines can exert direct pressure on the lower spine. This pressure can strain surrounding muscles and tissues, leading to dull, aching pain or sharp, localized discomfort.
Can Constipation and Gas Cause Back Pain?
Yes, constipation combined with gas can amplify back pain. Gas builds up in the intestines when digestion slows, causing bloating. This bloating can push against the spine and adjacent muscles, resulting in discomfort or cramping. In severe cases, the pain may mimic that of musculoskeletal issues.
Can Constipation Cause Back Pain Near Kidneys?
Constipation-related pain near the kidneys often stems from referred pain. When the colon is full, it can press against organs like the kidneys. This pressure might create discomfort that feels like kidney pain but originates in the digestive system.
Can Constipation Cause Back Pain Sciatica?
Yes, sciatica pain can be exacerbated by constipation. The sciatic nerve runs through the lower back and legs. Pressure from a distended colon or gas can irritate this nerve, leading to radiating pain along its path. Managing constipation can significantly reduce this type of discomfort.
Can Constipation Affect the Spine?
Constipation can impact spinal health over time. Chronic bloating and poor posture caused by discomfort can strain the spine. Additionally, prolonged sitting or hunching due to abdominal pain can lead to postural misalignments, indirectly affecting spinal health.
How to Relieve Back Pain from Constipation?
If constipation is causing back pain, immediate relief is essential to improve comfort. Here are some steps you can take:
Hydrate: Drink plenty of water to soften stools and ease bowel movements.
Gentle Movement: Walking or mild stretching can stimulate bowel activity.
Apply Heat: A heating pad on your lower back can reduce muscle tension and alleviate pain.
Adjust Posture: Sitting upright or in a squatting position during bowel movements can help.
Over-the-Counter Laxatives: Mild stool softeners or fiber supplements may provide temporary relief.
These measures target both the digestive system and the associated discomfort, offering quick and effective solutions.
Constipation Back Pain Treatment
When at-home remedies aren’t enough, medical treatments can address both constipation and its associated back pain:
Fiber Supplements: Products like psyllium or methylcellulose can bulk up stool and promote bowel movements.
Laxatives: Osmotic or stimulant laxatives may be prescribed for short-term relief.
Prescription Medications: Drugs like lubiprostone or linaclotide may be recommended for chronic cases.
Pain Relievers: Nonsteroidal anti-inflammatory drugs (NSAIDs) can alleviate back pain but should be used cautiously.
For persistent issues, consulting a healthcare professional ensures proper diagnosis and targeted treatment.
Exercises for Constipation Back Pain
Gentle exercises can reduce back pain and stimulate bowel movements. Here are some effective options:
Child’s Pose: This yoga pose stretches the lower back and eases tension.
Knee-to-Chest Stretch: Lying on your back, pull one knee to your chest to relieve pressure on the spine.
Cat-Cow Pose: Alternate between arching and rounding your back to improve mobility and digestion.
Pelvic Tilts: Strengthen your core and lower back by tilting your pelvis while lying flat.
Walking: A simple 15-minute walk can activate the digestive system.
Consistency with these exercises can provide long-term relief.
Foods to Relieve Constipation and Back Pain
Diet plays a crucial role in managing constipation and its associated pain. Include these high-fiber and hydration-friendly foods:
Fruits: Apples, pears, and prunes are excellent sources of fiber and natural laxatives.
Vegetables: Leafy greens, broccoli, and carrots improve digestion.
Whole Grains: Opt for brown rice, oats, and whole wheat bread for sustained bowel health.
Hydration: Drink plenty of water and include hydrating foods like cucumbers and watermelon.
Probiotics: Yogurt and fermented foods like kimchi can balance gut bacteria.
Avoid processed foods and excessive caffeine, as they can worsen constipation.
Home Remedies for Constipation and Back Pain
Natural remedies can offer relief without the need for medications. Consider these options:
Herbal Teas: Chamomile and peppermint tea can relax the digestive tract and reduce bloating.
Warm Baths: Soaking in warm water eases muscle tension in the back.
Massage: Gentle abdominal massages can stimulate bowel activity.
Castor Oil: A small amount taken orally may act as a natural laxative.
Epsom Salt: Adding Epsom salt to a bath can relax muscles and aid detoxification.
These remedies are safe for most people but should be used cautiously in severe cases.
Preventing Constipation-Related Back Pain
Lifestyle Tips to Avoid Constipation
Prevention is better than cure. Adopting these lifestyle habits can help avoid constipation and related back pain:
Stay Active: Regular exercise keeps your digestive system moving.
Eat Fiber-Rich Foods: Include fruits, vegetables, and whole grains in your meals.
Hydrate: Drink at least 8 glasses of water daily.
Avoid Overeating: Large meals can slow digestion and lead to bloating.
Limit Stress: High stress levels can disrupt normal bowel movements.
Consistency with these habits ensures long-term digestive health.
Symptoms lasting more than two weeks despite home treatments.
Early intervention prevents complications and ensures effective management of the root cause.
FAQs
Where is constipation pain felt in the back?
Constipation pain is often felt in the lower back due to pressure on nerves and surrounding tissues. It may also cause a general achy sensation or cramps in the middle and upper back.
Can constipation cause back pain near the kidneys?
Yes, constipation can cause back pain near the kidneys as the buildup of stool in the colon may exert pressure on nearby organs, creating discomfort and pain in the lower back area.
Can constipation cause back pain and sciatica?
Constipation can aggravate sciatica if the buildup of stool or gas presses on the sciatic nerve. This may result in pain radiating from the lower back to the legs, worsening existing nerve-related conditions.
Can constipation affect the spine?
Constipation can indirectly affect the spine by altering posture due to discomfort or bloating. This may lead to strain on spinal muscles, contributing to localized or radiating back pain.
Conclusion
The connection between constipation and back pain is undeniable, as the strain and pressure caused by digestive issues can extend beyond the gut. To answer the question, “Can constipation cause back pain?”—yes, it absolutely can. This discomfort often arises from nerve compression, bloating, and changes in posture, all linked to the build-up of stool in the intestines.
Understanding this relationship is key to finding relief. Whether through dietary adjustments, exercise, or medical treatments, addressing constipation can significantly reduce back pain. However, persistent or severe symptoms should not be ignored, as they might indicate an underlying issue. By taking proactive measures and consulting a healthcare provider when needed, you can effectively manage both conditions and improve your quality of life.
Therefore, the quick answer is generally straightforward: Yes, Coke Zero does contain caffeine, unless you choose the Caffeine-Free Coke Zero version. This distinction is paramount for individuals monitoring their stimulant intake.
The Coke Zero caffeine amount is modest compared to a cup of coffee, but it is certainly present and should be accounted for in daily consumption totals. This article will provide a full, top-notch guide to the caffeine content, the nutritional landscape, and the true health impacts of this massively popular beverage.
Coke Zero’s Popularity & The Caffeine Debate
The world of soft drinks has undergone a radical transformation in the last two decades. As consumers have become acutely aware of the health risks associated with high sugar intake, beverage giants have responded by formulating a range of products designed to deliver flavor without the caloric load.
Among these innovations, Coca-Cola Zero Sugar, widely known as Coke Zero, emerged as a global sensation. It promised the iconic, classic taste of Coca-Cola, but without the sugar and without the calories.
This value proposition resonated immediately with millions of people globally who sought to moderate their sugar consumption without giving up their favorite fizzy drink.
However, the introduction of a “zero” product often sparks immediate confusion regarding its full nutritional profile, particularly concerning stimulating ingredients. The question that frequently arises, becoming a pervasive topic of debate online and in casual conversations, is: does Coke Zero have caffeine?
Can you drink Coke Zero?
This query is not merely about a minor ingredient; it affects consumer choice, dietary restrictions, and ultimately, whether you can you drink Coke Zero late in the day or as part of a low-stimulant diet.
It is a common misconception that all zero-calorie or sugar-free sodas are also caffeine-free. This is often an assumption made by people transitioning from regular soda to diet alternatives, as they seek to cut both sugar and stimulants simultaneously.
However, in the vast majority of cases, the core formula for the flagship Coke Zero product includes a standard amount of caffeine to help replicate the complex, characteristic flavor profile of its full-sugar counterpart.
This ingredient is deliberately included to enhance the perceived sweetness and provide a subtle, recognizable lift that consumers expect from a cola product.
We will meticulously break down the numbers, compare Coke Zero to other popular drinks, and clarify the circumstances under which this beverage is or is not caffeinated, ensuring you have all the facts before you decide if is Coke Zero caffeinated enough to warrant a change in your drinking habits.
Quick Answer Summary
The most direct and immediate answer to the central question is critical for both the reader and for achieving high search visibility. Coca-Cola Zero Sugar is, by default, a caffeinated beverage. The exact Coke Zero caffeine amount is standardized across most regions to deliver a consistent, appealing cola flavor.
Does Coke Zero Have Caffeine?
Yes, Coke Zero has caffeine. The vast majority of bottles and cans sold globally contain caffeine as a standard ingredient.
Per 100 ml: The caffeine concentration is approximately 9.6 mg. This metric is often used for labeling in countries adhering to EU standards.
Caffeine-Free Coke Zero exists but is explicitly marked and is not available in all countries; it must be specifically sought out if you require a non-caffeinated option.
The table below provides a clear, side-by-side comparison of the caffeine content and nutritional value of Coke Zero against other popular beverages.
Product
Caffeine (per 100 ml)
Caffeine (per 12 oz can)
Calories
Sugar
Coke Zero
~9.6 mg
~34 mg
0
0
Diet Coke
~12.8 mg
~46 mg
0
0
Regular Coke
~9 mg
~34 mg
140
39g
Coffee (8 oz brew)
—
~40–95 mg
0
0
Coke Zero Caffeine Content Breakdown
Understanding the precise measurement of how much caffeine is in a Coke Zero requires a detailed look at various serving sizes, as the total intake depends entirely on the volume consumed.
The fundamental Coke Zero caffeine amount is consistent across all formats, ensuring that the cola provides a predictable experience, but the numbers scale up quickly for larger bottles.
Coca-Cola Zero Sugar is formulated to mirror the stimulant content of Coca-Cola Classic, which is approximately 34 milligrams (mg) per standard 12 ounce serving.
This level is relatively low when considered against the broader spectrum of caffeinated drinks available in the market today. However, many people consume bottles far larger than the standard can, which significantly increases their total caffeine exposure.
Detailed Caffeine Content by Serving Size
The table below meticulously details the caffeine load you can expect from different formats of the beverage. This is crucial information for anyone calculating their daily intake or managing caffeine sensitivity.
Serving Size
Volume (Metric/Imperial)
Caffeine (mg)
100 ml Coke Zero
100 ml
9.6 mg
Standard Can
355 ml (12 oz)
34 mg
Medium Bottle
500 ml (16.9 oz)
48 mg
Large Bottle
591 ml (20 oz)
~57 mg
1 Liter Bottle
1000 ml
96 mg
2 Liter Bottle
2000 ml
192 mg
Export to Sheets
Note on 20 oz bottles: A standard 20 oz bottle, which is incredibly common in convenience stores and vending machines, contains nearly 60 mg of caffeine. If an individual drinks three of these throughout the day, their caffeine intake from Coke Zero alone would approach 170 mg, which is a substantial amount that could certainly impact sleep or anxiety levels, necessitating careful consideration of consumption patterns.
The Significance of Caffeine Per 100ml
The metric of Coke Zero caffeine per 100ml is specifically relevant for international consumers. Many global food regulations, particularly within the European Union, mandate labeling based on the 100 ml unit, making this a critical number for cross-border comparisons and compliance. The 9.6 mg per 100 ml figure places the drink squarely within the low-to-moderate category of caffeinated soft drinks.
For those tracking their intake, knowing how much caffeine in 1 Coke Zero can be misleading if the serving size is not specified. An individual might assume the 34 mg found in a standard can.
But if they routinely purchase a 500 ml (just over 16 oz) bottle, their actual intake is closer to 48 mg. This discrepancy highlights the importance of reading the fine print on the bottle, rather than relying solely on the general name of the product.
Note on Regional Differences:Caffeine levels may differ slightly in the UK, Europe, and Asia due to various food standardization practices, flavor preferences, and local regulations concerning the maximum allowable limit of stimulants in a beverage; however, the typical range for Coke Zero is always similar, generally falling between 9 mg and 10 mg per 100 ml across these regions.
Coke Zero vs Diet Coke: Which Has More Caffeine?
A common source of confusion for consumers looking to switch to a sugar-free cola is the distinction between Coca-Cola Zero Sugar (Coke Zero) and Diet Coke. While both are calorie-free and sugar-free, their flavor profiles and their caffeine contents are notably different. The question of Coke Zero vs Diet Coke caffeine content is easily resolved by looking at the official figures, which reveal a consistent pattern.
In a head-to-head comparison, Diet Coke has more caffeine than its counterpart, Coke Zero. This is a crucial detail for consumers who are specifically sensitive to stimulants.
Drink
Caffeine (per 12 oz / 355 ml serving)
Coke Zero
~34 mg
Diet Coke
~46 mg
Regular Coke
~34 mg
Coffee (8 oz brew)
80–95 mg
Export to Sheets
Why Diet Coke Has More Caffeine
The difference in stimulant content is not random; it is a direct consequence of the distinct flavor profiles Coca-Cola sought to achieve with each product.
Diet Coke (Established 1982): This drink was originally formulated to be a diet version of the classic cola, but its flavor was intentionally lighter and distinctly different from Regular Coke. The flavor relies heavily on a blend of artificial sweeteners.
To compensate for the different taste notes inherent in this sweetener profile, Coca-Cola often slightly increased the caffeine level. The slightly higher caffeine content, resulting in ~46 mg in a can of Diet Coke, helps to amplify the cola flavor and provides a slightly sharper “bite” that Diet Coke drinkers have come to expect.
Coke Zero (Established 2005/2006): The primary marketing and formulation goal of Coke Zero was to taste exactly like Regular Coke but with zero sugar. Since Regular Coke contains approximately 34 mg of caffeine per can, Coke Zero was intentionally formulated to contain the same amount to replicate the total experience, including the stimulant effect.
In essence, the higher caffeine level in Diet Coke is part of its unique flavor formula, while the 34 mg in Coke Zero is part of its formula designed to replicate Regular Coke. This explains why, when comparing Coke Zero vs Diet Coke, the latter consistently delivers a greater caffeine punch.
Coke Zero vs Coffee: Caffeine Comparison
Placing the Coke Zero caffeine amount into perspective requires a comparison against the true heavyweights of the beverage world, particularly coffee. Many people switch from coffee to sodas, believing they are cutting down on caffeine, but they often underestimate the sheer difference in potency.
The central question here is: does Coke Zero have more caffeine than coffee? The definitive answer is no, not by a significant margin. A typical cup of home-brewed or drip coffee contains far more caffeine than an entire can of Coke Zero.
The table below illustrates the stark contrast in stimulant content between a standard serving of Coke Zero and other common caffeinated drinks.
When considering how much caffeine in Coke Zero vs coffee, the difference is typically 2-to-1 or even 3-to-1 in favor of coffee. An 8-ounce cup of coffee contains, at minimum, twice the caffeine of a standard 12-ounce can of Coke Zero.
A person could potentially drink two or three cans of Coke Zero throughout the day and still consume less total caffeine than someone who drinks one large cup of strong morning coffee.
This comparison is vital for individuals managing health conditions, like high blood pressure or chronic anxiety, where moderate caffeine reduction is recommended. Switching from a high-caffeine coffee habit to a moderate Coke Zero habit can represent a significant step down in daily stimulant intake.
However, this fact should not lead to overconsumption of the soda, because the cumulative effect of multiple cans can quickly equal or surpass the caffeine content of a single large coffee drink, particularly if the consumer opts for large bottles.
Does Coke Zero Have Sugar, Calories, or Carbs?
The entire premise of Coca-Cola Zero Sugar, which is often simply called Coke Zero, revolves around its zero-nutritional content regarding macronutrients. For millions of people managing conditions like diabetes, following ketogenic diets, or simply attempting weight loss, the most appealing factor is the assurance that does Coke Zero have sugar is answered with a definitive “No.” This is achieved through the use of high-intensity artificial sweeteners.
A Breakdown of the “Zero” Promise
Sugar:Coke Zero does not contain sugar. It utilizes artificial sweeteners instead of sucrose (table sugar) or high-fructose corn syrup, the primary caloric agents in Regular Coke. This makes it suitable for individuals needing to monitor their blood glucose levels.
Calories:Coke Zero has zero calories. The artificial sweeteners used are so potent that only minute amounts are needed to achieve the desired sweetness level, meaning the total caloric content is negligible—so close to zero that legally, it is rounded down to zero per serving.
Carbohydrates (Carbs): Consequently, the drink also contains zero net carbohydrates. This is what makes it a popular choice for low-carb diets like keto.
The Key Ingredients Explained
To create the classic cola flavor without the bulk of sugar, the formula relies on a precise mix of functional ingredients. Understanding these components is essential to evaluating the beverage’s overall impact on the body and addressing the full Coke Zero nutrition facts caffeine conversation.
Carbonated Water: The base of all sodas, providing the essential fizzy sensation.
Color (Caramel E150d): Used to give the cola its signature deep brown hue.
Sweeteners (Aspartame and Acesulfame-Potassium): These are the substitutes for sugar.
Aspartame (E951): This is one of the most common and studied artificial sweeteners globally. It is approximately 200 times sweeter than sugar.
Acesulfame-Potassium (Ace-K or E950): Often used in combination with aspartame to improve the flavor profile and reduce any lingering aftertaste. It is roughly 200 times sweeter than sugar and is heat-stable.
Acidity Regulators (Phosphoric Acid and Citric Acid): These acids are added to provide the “tartness” and distinct sour flavor that is characteristic of cola.
Natural Flavors: This category includes the proprietary blend of spices, oils, and botanical extracts that give Coca-Cola its unique taste. This is where the core flavor comes from.
Caffeine: The stimulant that provides the slight bitterness and the expected energy lift.
It is clear from this list that the primary functional ingredients are the dual sweeteners, the acids, and the added caffeine.
Coke Zero Ingredients & Caffeine Source
The manufacturing process of Coke Zero is a highly controlled, large-scale operation that ensures quality and consistency across billions of servings. The inclusion of caffeine is not incidental; it is a deliberate step in the beverage’s engineering, essential for both flavor and function.
How Caffeine is Added
Caffeine in Coca-Cola products is sourced globally, often from the decaffeination of coffee beans or tea leaves, although synthetic forms are also widely used due to their consistency, purity, and cost-effectiveness.
The key point is that caffeine is an added ingredient in its refined, pure form, not a natural byproduct of other ingredients in the can.
Preparation of the Syrup: The process begins with creating the highly concentrated “secret” syrup. This syrup contains the natural flavors, the sweeteners (Aspartame and Ace-K), the caramel coloring, the phosphoric acid, and the pure caffeine powder.
Dissolution and Blending: The caffeine is precisely weighed and dissolved into the syrup mixture. Strict quality control ensures the exact 9.6 mg per 100 ml concentration is achieved every time.
Mixing and Carbonation: The concentrated syrup is then mixed with highly purified, chilled, and carbonated water at the bottling facility. The precise ratio of syrup to water ensures the final product has the exact chemical profile and sensory attributes.
Preservation: The final step before canning or bottling involves filling and sealing the containers, where the carbonation pressure is maintained to preserve the fizz.
The inclusion of the stimulant serves a dual role:
Flavor Balancing: Caffeine has a slightly bitter taste. In cola, this bitterness helps to cut through the extreme sweetness of the artificial sweeteners, creating a more balanced and complex flavor that more closely approximates the taste of sugar-sweetened cola.
Sensory Expectation: Consumers expect a cola to provide a mild energy boost. The caffeine delivers this expected pharmacological effect, which reinforces the connection between the drink and a moment of refreshment or energy.
Is Coke Zero Caffeine-Free? (The Confusion Explained)
The source of the most significant confusion surrounding this product lies in the dual product offering. To answer the question, is Coke Zero caffeine free, you must first clarify which version of the product you are referring to, because the answer determines the very nature of the beverage you are drinking.
The Fundamental Difference
Default Coke Zero is Caffeinated: If you pick up a standard black or red can labeled “Coca-Cola Zero Sugar” or “Coke Zero,” it is safe to assume Coke Zero is caffeinated and contains the standard 34 mg of the stimulant. This is the flagship product, sold globally, and it is the standard answer to does Coke Zero has caffeine.
Caffeine-Free Coke Zero is Separate: Coca-Cola recognized the demand for a zero-sugar, zero-calorie cola that could be enjoyed late at night or by those with stimulant sensitivities. To address this, they introduced a distinctly labeled product called Caffeine-Free Coca-Cola Zero Sugar.
This means that the question, does Coke Zero contain caffeine, has two correct but distinct answers based on the packaging. The standard product has Coke Zero got caffeine included in the formula, while the specialty product is explicitly formulated without it.
Packaging and Labeling Clarification
To avoid confusion, Coca-Cola provides clear visual distinctions on its packaging:
Caffeinated Version: The packaging is usually black or red and prominently displays the product name, “Coca-Cola Zero Sugar.” The presence of caffeine is usually listed in the ingredients, often simply as “Caffeine.
Caffeine-Free Version: The packaging for the non-caffeinated option is almost always marked with a distinctive color on the label (often gold, white, or a different shade of red/black) and, most importantly, the phrase “Caffeine Free” or “Decaf” is boldly printed directly on the main label.
Consumers sensitive to stimulants must verify the label before purchasing, as the two products often sit side-by-side on store shelves. The distinction is not in the “Zero Sugar” part, but entirely in the “Caffeine Free” declaration.
Deep dive into how EU regulations often cap caffeine at 150 mg/L and require labeling if the content exceeds 15 mg per 100 ml. Explain that the 9.6 mg/100 ml figure is standard globally, though local formulations might use different sweetener ratios (impacting perceived flavor) and slightly different caffeine sources.
Include a short table showing the common EU label format (e.g., 10 mg per 100 ml is common in many continental European labels).
Is Coke Zero Bad for You? (Science-Based Breakdown)
Artificial Sweeteners Research: Extensive discussion of Aspartame and Acesulfame-Potassium safety reviews by the FDA, EFSA, and WHO. Discuss the long-term studies, the acceptable daily intake (ADI), and debunk common myths (like cancer links), noting that the consensus is that they are safe in moderation.
Dental Health: Discuss the Phosphoric Acid content, which is the primary dental concern. Explain that while it’s less damaging than sugary soda, the acidity (low pH) still contributes to enamel erosion.
Blood Sugar Impact: Explain how, since the drink has no sugar, it generally does not spike blood sugar or insulin. Discuss recent research on gut microbiome and potential metabolic impacts, maintaining a balanced scientific view.
Caffeine Sensitivity: Detailed discussion on the effects of 34 mg of caffeine on sleep, anxiety, and heart rate for sensitive individuals.
Hydration Myths: Clarify that while caffeinated, Coke Zero is primarily water and contributes to daily fluid intake, refuting the myth that it causes dehydration.
Moderation Recommendations: Provide specific, evidence-based recommendations for safe consumption levels.
Who Should Avoid or Limit Coke Zero?
Pregnant People: Discuss the 200 mg daily caffeine limit recommended for pregnancy and how even a few cans could quickly add up, posing risks to the fetus.
Those with Caffeine Sensitivity: Discuss the symptoms (anxiety, tremors, insomnia) that even 34 mg can induce.
Migraine Sufferers: Explain the “rebound headache” effect from caffeine withdrawal and how consistent, moderate doses of caffeine, or the consumption of aspartame, can be a trigger for some people.
Insomnia Sufferers: Stress the 6-hour half-life of caffeine and the importance of avoiding the drink in the late afternoon or evening.
People with Kidney Issues (Phosphate Load): Discuss the relationship between high phosphate intake (from phosphoric acid) and chronic kidney disease progression.
FAQs
Does Coke Zero have caffeine or sugar?
Coke Zero contains caffeine but no sugar. The core product, Coca-Cola Zero Sugar, is formulated with approximately 34mg of caffeine per 12 oz can, which is comparable to Regular Coke. However, it achieves its sweet taste through zero-calorie artificial sweeteners like aspartame and acesulfame-potassium, meaning it contains zero grams of sugar and zero calories per serving.
Does Coke Zero have caffeine-free version?
Yes, Coke Zero offers a caffeine-free version that is available in many markets. This product is clearly and distinctly labeled as Caffeine-Free Coca-Cola Zero Sugar on the packaging. If you are sensitive to stimulants, you should specifically look for this version, as the default Coke Zero product does contain caffeine.
How much caffeine is in Coke Zero UK?
The caffeine content of Coke Zero UK and in much of Europe is highly standardized and falls within the global average. You can expect approximately 9.6 mg of caffeine per 100 ml of the beverage. For a standard 330 ml UK can, this equates to around 32 mg of caffeine. This amount is clearly listed on the nutritional label in accordance with European food regulations.
Why does Diet Coke have more caffeine than Coke Zero?
Diet Coke has more caffeine (around 46 mg per 12 oz can) than Coke Zero (34 mg primarily because of different flavor formulas. When Diet Coke was initially formulated, the slightly higher caffeine amount was included to enhance the perceived cola taste and mask the specific flavor notes of its sweetener blend.
Coke Zero, conversely, was designed to perfectly replicate the exact taste and sensory profile of Regular Coke, which only contains 34 mg, so its caffeine level was intentionally matched.
Does Zero soda have caffeine?
Most “Zero” sodas do have caffeine, as the stimulant is a critical component of the cola flavor profile. This is true for major brand competitors like Pepsi Zero Sugar and Dr Pepper Zero Sugar. The term “Zero” refers exclusively to zero sugar and zero calories, not the stimulant content. If a Zero soda has caffeine removed, it will be explicitly labeled as “Caffeine-Free” or “Decaf.”
How much caffeine in Coke Zero vs coffee?
The caffeine content in Coke Zero is very low compared to coffee. A standard 12 oz can of Coke Zero contains 34 mg of caffeine. In contrast, an average 8 oz cup of drip-brewed coffee contains 80 mg to $95 mg of caffeine. Therefore, coffee typically contains 2 to 3 times more caffeine per serving than Coke Zero.
Is Coke Zero high in caffeine?
No, Coke Zero is not considered high in caffeine. When compared to popular alternatives:
Compared to sodas: It has a standard, moderate amount, similar to Regular Coke.
Compared to coffee: It is very low in caffeine.
Compared to energy drinks: It is extremely low, as many energy drinks contain 160 mg to 200 mg per can.
The $34 \text{ mg}$ dose is generally safe for most individuals, even those with moderate caffeine sensitivities.
Does Coke Zero have caffeine Reddit?
Concerns on Reddit frequently ask about the cumulative effects of the 34 mg of caffeine in Coke Zero, particularly for those trying to quit their coffee habit or those drinking multiple cans daily.
Common Reddit advice emphasizes that while one can is low in caffeine, drinking several large bottles can quickly lead to an intake exceeding 150 mg (e.g., three 20 oz bottles contain 170 mg). Users also frequently discuss the difficulty in finding the non-caffeinated version.
Final Verdict: Should You Drink Coke Zero?
A concise, balanced conclusion summarizing the key findings.
Reiterate the core facts: Yes, it has caffeine (∼34 mg), no, it has no sugar/calories.
Summarize health impacts: Generally safe in moderation, but the acidity and sweeteners warrant caution.
Recommend the Caffeine-Free version for stimulant-sensitive individuals and suggest 1 can per day as a healthy benchmark for the caffeinated version.
Chai is a globally beloved beverage, blending aromatic spices with robust tea. Originating from India, its popularity has spread worldwide, thanks to its unique flavor and potential health benefits. Yet, many wonder, does chai have caffeine? This is an essential question for those monitoring their caffeine intake. Let’s break it down and uncover the nutritional and caffeine details behind chai.
Chai Nutritional Facts
Chai is more than just a comforting drink; it’s also packed with potential health benefits. Here’s a breakdown of its primary ingredients and nutritional value:
Key Ingredients
Black Tea: The base ingredient provides antioxidants like catechins and theanine.
Spices: Common spices include cinnamon, cardamom, ginger, cloves, and black pepper. These add flavor and possible anti-inflammatory properties.
Milk: Often used to create a creamy texture, milk adds protein and calcium. Non-dairy options like almond or oat milk can be substituted.
Sweeteners: Traditional chai uses sugar or honey, adding a touch of sweetness.
Nutritional Overview
Calories: Depends on preparation; ranges from 60-200 calories per serving.
Protein: 2-4 grams if milk is included.
Fat: Low fat unless cream or full-fat milk is used.
Carbohydrates: Mainly from sweeteners, typically 10-20 grams.
Chai is a flavorful, nutrient-dense option for those looking for a warm, invigorating drink.
Does Chai Tea Have Caffeine?
The short answer: yes, chai tea does have caffeine. However, its caffeine content varies based on its preparation.
Traditional Chai
Traditional chai is made using black tea, which naturally contains caffeine. Its standard serving prepared in the traditional Indian way contains 20-50 mg of caffeine per cup. This level is moderate compared to coffee but may still provide a mild energy boost.
Commercially Prepared Chai
Packaged chai blends often vary in caffeine content. Commercial chai products may use decaffeinated black tea or other bases like herbal teas. Always check the label for specific caffeine details.
Does Chai Tea Have Caffeine at Starbucks?
Starbucks, a go-to destination for chai lovers, offers a variety of chai-based drinks. Let’s explore the caffeine levels in these popular options.
Chai Tea
Starbucks’ regular chai tea, brewed using a concentrate, contains approximately 40 mg of caffeine per 8-ounce cup. This is lower than most coffee options but enough to provide a subtle pick-me-up.
Chai Tea Latte
The chai tea latte at Starbucks is a fan favorite. This creamy, spiced beverage contains around 95 mg of caffeine per 16-ounce (grande) serving. The caffeine comes from the black tea in the chai concentrate used for this preparation.
Decaffeinated Options
For those avoiding caffeine, Starbucks offers customization. You can request a decaffeinated version, substituting herbal tea or decaf chai concentrate.
Does Chai Latte Have Caffeine?
Yes, it contains caffeine, but the levels depend on how it’s made.
Homemade Chai Lattes
When preparing chai lattes at home, you control the caffeine content. Using regular black tea provides 30-50 mg of caffeine per serving, while decaffeinated black tea reduces this to nearly zero.
Preparation and Variations
Caffeine levels in chai lattes can increase if you brew the tea longer or use more concentrated blends. Adding coffee shots, such as in a “dirty chai latte,” further boosts caffeine content significantly.
How Much Caffeine is in Chai vs. Coffee?
When comparing chai to coffee, caffeine content is a key differentiator.
Caffeine Comparison
Chai: 20-50 mg per cup.
Coffee: 95-200 mg per cup, depending on the type and brewing method.
Coffee contains significantly more caffeine than chai, making chai a gentler option for those sensitive to caffeine.
Factors Influencing Caffeine
Several factors affect the caffeine content in chai:
Concentration: Pre-made chai concentrates often have higher caffeine levels than loose-leaf or bagged teas.
Milk Ratio: Adding milk dilutes the caffeine slightly.
Does Twinings Chai Tea Have Caffeine?
Twinings is a popular brand offering a variety of chai teas. Does Twinings chai tea have caffeine? Yes, most of its blends contain caffeine.
Caffeine Levels in Twinings Chai Tea
Traditional Twinings Chai A standard cup of Twinings Chai contains approximately 40-50 mg of caffeine, similar to other black tea-based chais.
Decaffeinated Chai Options Twinings also offers decaffeinated chai tea, which contains minimal caffeine (less than 2 mg per serving). This is a great option for those seeking the flavors of chai without the stimulant effects.
Comparison to Other Brands
Twinings chai tea is comparable to other major brands like Tazo and Bigelow in terms of caffeine content. The primary difference lies in flavor profiles, as each brand uses slightly different spice blends. Always check the label for precise caffeine information.
Is Chai Good for You?
Chai offers numerous health benefits, thanks to its unique blend of black tea and spices. But is it good for everyone? Let’s explore its pros and cons.
Health Benefits
Anti-Inflammatory Properties Chai is rich in spices like ginger, cinnamon, and cloves, all of which have natural anti-inflammatory properties. These spices can help reduce joint pain, improve digestion, and promote overall well-being.
Supports Heart Health Black tea in chai contains flavonoids, antioxidants that may support heart health by improving cholesterol levels and reducing the risk of heart disease.
Boosts Immunity Ingredients like cardamom and cloves have antimicrobial properties that may help your body fight infections.
Aids Digestion Ginger, a key spice in chai, is known to soothe the stomach and aid digestion, making chai a popular choice for those experiencing mild gastrointestinal discomfort.
Potential Drawbacks
Caffeine Concerns While chai has less caffeine than coffee, its caffeine content can still pose issues for people who are sensitive to it. Overconsumption may lead to restlessness, increased heart rate, or disrupted sleep.
Sugar Levels Sweetened chai, especially the ones served in cafes, can be high in added sugars. It’s important to opt for unsweetened or lightly sweetened versions if you’re watching your sugar intake.
Chai is a nutritious, comforting drink when consumed in moderation. However, it’s not ideal for everyone.
Is Chai Healthier Than Coffee?
When it comes to health benefits, both chai and coffee have their strengths. But which one comes out on top?
Nutritional Profiles
Chai
Calories: Typically lower, especially when unsweetened or made with low-fat milk.
Antioxidants: Contains flavonoids from black tea and spices.
Caffeine: Moderate levels, around 20-50 mg per cup.
Coffee
Calories: Black coffee is calorie-free, but added cream and sugar can increase the count significantly.
Antioxidants: High in polyphenols, which may reduce inflammation and improve brain function.
Caffeine: Higher levels, often 95-200 mg per cup.
Health Scenarios
Better for Digestion: Chai, with its ginger and spices, is ideal for improving gut health.
Better for Energy: Coffee is more effective for an immediate energy boost due to its higher caffeine content.
In general, chai is a better choice for those seeking a balanced beverage with moderate caffeine and added health benefits from spices.
Although chai has many benefits, it’s not suitable for everyone. Here are groups who may want to limit or avoid it:
Individuals Sensitive to Caffeine
Even though chai has less caffeine than coffee, its content can still cause issues for those sensitive to stimulants. Symptoms like jitters, insomnia, or increased heart rate can occur.
Pregnant Individuals
Caffeine intake during pregnancy should be limited. While chai may fit within safe limits, it’s best to consult a healthcare provider about appropriate consumption levels.
People with Gastrointestinal Issues
Spices like cinnamon and black pepper can irritate the stomach for some people. Those with sensitive digestion may need to avoid spiced teas.
Alternative Suggestions
Herbal Teas: Caffeine-free options like chamomile or peppermint offer soothing properties.
Golden Milk: A warm beverage made with turmeric, milk, and no caffeine.
Decaffeinated Chai: Retains the classic flavor without the stimulating effects.
FAQs
Can chai be caffeine-free?
Yes, chai can be made caffeine-free by using herbal tea or caffeine-free tea blends instead of traditional black tea. You can also prepare chai with rooibos, which is naturally caffeine-free, while maintaining the spiced flavor of chai.
Will chai keep you awake?
Chai contains caffeine from black tea, which may provide a mild energy boost and could keep some people awake. However, the caffeine content is lower than coffee, so it’s less likely to cause significant sleep disturbances, especially in moderation.
Is there a caffeine-free tea?
Yes, there are many caffeine-free teas, including herbal options like chamomile, rooibos, peppermint, and hibiscus. These teas are naturally free of caffeine, making them ideal for those looking for a soothing beverage without any stimulating effects.
Is tea bad before bed?
Tea with caffeine, such as black or green tea, may interfere with sleep if consumed too close to bedtime. However, herbal teas like chamomile or valerian root are caffeine-free and can promote relaxation, making them ideal before bed.
Conclusion
So, does chai have caffeine? Yes, it does, but the amount varies depending on the preparation and brand. Traditional chai contains moderate caffeine levels, making it a gentler alternative to coffee. Whether you enjoy it for its rich flavors, health benefits, or cultural roots, chai offers something for everyone. However, those sensitive to caffeine or specific spices should consume it mindfully.
Chai is not just a drink; it’s an experience. Whether enjoyed plain, as a latte, or decaffeinated, there’s a chai for every palate.
Chocolate is one of the most beloved treats worldwide. From creamy milk chocolate bars to rich dark truffles, its versatility makes it a favorite for people of all ages. However, one common question often arises: Does chocolate have caffeine?
Understanding the caffeine content in chocolate is important, especially for individuals who are sensitive to caffeine or monitoring their intake. Caffeine, a natural stimulant, is found in cocoa beans, the primary ingredient in chocolate. Depending on the type of chocolate, the caffeine levels can vary. Let’s explore this fascinating topic in more detail.
Does Chocolate Have Caffeine?
Yes, chocolate does contain caffeine. Caffeine occurs naturally in cocoa beans, which are the source of chocolate. This stimulant is responsible for the mild energy boost some people feel after eating chocolate.
Cocoa Butter: This is the fat extracted from cocoa beans and is caffeine-free.
Sugar: Added to sweeten chocolate, especially in milk and white varieties.
Milk: Used in milk chocolate to create a creamy texture.
How Caffeine Is Derived from Cocoa Solids?
Caffeine is naturally found in the cocoa solids of the cocoa bean. Darker chocolates, which have a higher cocoa content, also have more cocoa solids. This is why dark chocolate contains more caffeine than milk or white chocolate.
Chocolate Nutrients
Chocolate is not just about caffeine. It is packed with nutrients that offer several health benefits, though it also has its downsides.
Nutritional Benefits of Chocolate
Antioxidants: Cocoa is rich in flavonoids, which help reduce inflammation and improve heart health.
Magnesium: Dark chocolate is an excellent source of magnesium, essential for muscle and nerve function.
Mood Booster: Compounds like theobromine and phenylethylamine in chocolate can enhance mood.
Potential Drawbacks
Sugar: Many chocolates, especially milk chocolate, are high in added sugars, contributing to weight gain and dental issues.
Calories: Chocolate is calorie-dense, making portion control important.
Caffeine: While beneficial in small amounts, caffeine in excess can lead to jitters or sleep disturbances.
Is There Caffeine in Milk Chocolate?
Yes, milk chocolate does contain caffeine, but its levels are much lower than those in dark chocolate. The combination of added milk and sugar dilutes the cocoa solids, reducing the caffeine content.
How Much Caffeine Is in Milk Chocolate?
A standard 1.55-ounce (43-gram) milk chocolate bar contains approximately 9 milligrams of caffeine. For comparison, an 8-ounce cup of coffee typically has around 95 milligrams.
Does Dairy Milk Chocolate Contain Caffeine?
Yes, Cadbury Dairy Milk Chocolate contains caffeine, though the amount is minimal. A typical serving has about 5-10 milligrams, depending on the size of the bar and the cocoa percentage.
Does Dark Chocolate Have Caffeine?
Dark chocolate contains significantly more caffeine than milk chocolate. This is because it has a higher concentration of cocoa solids, where caffeine is found.
Caffeine Levels in Dark Chocolate Based on Cocoa Percentage
The higher the cocoa percentage, the more caffeine the chocolate contains. For example:
70% Dark Chocolate: Contains about 20 milligrams of caffeine per ounce.
85% Dark Chocolate: May contain up to 25 milligrams of caffeine per ounce.
Why Dark Chocolate Typically Contains More Caffeine
Dark chocolate often contains little to no added milk or sugar, leaving a high concentration of cocoa solids. This amplifies both its flavor and caffeine levels, making it a preferred choice for those who enjoy a strong chocolate taste with a slight energy boost.
Caffeine is naturally found in cocoa solids, not in cocoa butter. Since white chocolate is made entirely from cocoa butter and contains no cocoa solids, it has virtually no caffeine. This makes it a great option for those who enjoy chocolate flavors but want to avoid caffeine entirely.
Is There Caffeine in Hot Chocolate?
Yes, hot chocolate contains caffeine, but the levels are generally lower than those in chocolate bars. The caffeine in hot chocolate comes from the cocoa powder or chocolate used in its preparation.
How Hot Chocolate Differs in Caffeine Content from Chocolate Bars
A typical cup of hot chocolate contains 2-7 milligrams of caffeine, depending on the recipe.
In comparison, a 1-ounce piece of dark chocolate can have 20-25 milligrams of caffeine.
Factors That Influence Caffeine Levels in Hot Chocolate
Type of Cocoa Used: Hot chocolate made with dark chocolate or pure cocoa powder has higher caffeine levels.
Serving Size: Larger servings naturally contain more caffeine.
Added Ingredients: Using milk chocolate or sugar blends can lower the caffeine content compared to darker chocolate bases.
Chocolate syrups, like those used in milkshakes or desserts, do contain small amounts of caffeine. The caffeine comes from the cocoa used in their formulation.
Caffeine in Popular Chocolate Syrups
Hershey’s Chocolate Syrup: Contains about 2 milligrams of caffeine per tablespoon.
Other Brands: Syrups made with higher cocoa content or dark chocolate bases may contain slightly more caffeine.
Comparison with Other Chocolate-Based Products
Chocolate syrup has less caffeine compared to solid chocolate bars because it is diluted with water, sugar, and other ingredients. For example:
One tablespoon of chocolate syrup has significantly less caffeine than a small piece of dark chocolate or a cup of hot chocolate.
Caffeine in Chocolate vs. Coffee: What to Know
When comparing caffeine levels, coffee far surpasses chocolate. Coffee is a concentrated source of caffeine, while chocolate has milder levels due to its cocoa content.
What Has More Caffeine: Coffee or Chocolate?
Coffee: An 8-ounce cup contains about 95 milligrams of caffeine, significantly more than chocolate.
Chocolate: A standard piece of dark chocolate has around 20 milligrams, while milk chocolate has only about 9 milligrams per serving.
Comparing the Caffeine Kick from Chocolate to Coffee
Coffee: Provides a rapid and noticeable energy boost due to its high caffeine content.
Chocolate: Offers a gentler stimulant effect, ideal for those seeking a smaller caffeine dose.
While chocolate is not a replacement for coffee in terms of caffeine, it can be a satisfying alternative for a lighter boost.
FAQs
Is any chocolate caffeine-free?
Yes, white chocolate is caffeine-free because it contains no cocoa solids, which are the source of caffeine in chocolate products.
Does Cadbury chocolate have caffeine?
Yes, Cadbury chocolate contains caffeine, with levels depending on the type. Dairy Milk has minimal caffeine, while dark variants have slightly more.
Can you eat chocolate if you can’t have caffeine?
Yes, you can opt for white chocolate, which is caffeine-free, or check labels for low-caffeine milk chocolate options.
Conclusion
So, does chocolate have caffeine? The answer is yes, but the amount depends on the type of chocolate. Dark chocolate has the highest levels, milk chocolate contains moderate amounts, and white chocolate is virtually caffeine-free. Products like hot chocolate and chocolate syrup also have small amounts of caffeine, influenced by the cocoa content and preparation methods.
Understanding the caffeine levels in chocolate helps you make informed choices, whether you’re managing your caffeine intake or simply looking for the perfect treat. Moderation is key to enjoying chocolate while balancing its nutritional benefits and potential drawbacks.
Dr Pepper is one of the most iconic soft drinks in the United States, known for its unique blend of 23 flavors. First introduced in 1885, it has remained a favorite for soda enthusiasts worldwide. A common question among consumers is, “Does Dr Pepper have caffeine?”
Many people are mindful of their caffeine intake, whether for health reasons or simply to manage their energy levels throughout the day. Caffeine is a well-known stimulant that can affect focus, sleep, and even heart health. Understanding the caffeine content in beverages like Dr Pepper helps consumers make informed choices.
Let’s dive deeper into the caffeine levels in Dr Pepper and compare it to other popular sodas.
Does Dr Pepper Have Caffeine?
Yes, it contains caffeine. This is because caffeine enhances the flavor profile of many soft drinks and provides a mild stimulant effect. However, its caffeine content varies compared to other sodas, making it a popular option for those looking for a moderate caffeine boost.
How Does Dr Pepper’s Caffeine Compare to Other Sodas?
Dr Pepper’s caffeine levels are moderate compared to beverages like Coca-Cola, Mountain Dew, and Pepsi. For example:
A 12-ounce can of Dr Pepper contains 41 milligrams of caffeine.
Coca-Cola contains slightly less at 34 milligrams per 12 ounces.
Mountain Dew has a higher caffeine concentration at 54 milligrams per 12 ounces.
These differences may influence your choice depending on how much caffeine you want in your drink.
How Much Caffeine Is in Dr Pepper?
The caffeine content in Dr Pepper is measured at 41 milligrams per 12-ounce serving. This level is considered moderate and ideal for individuals who want a subtle energy lift without the jittery effects of highly caffeinated drinks like energy drinks or coffee.
Here’s a quick comparison chart of caffeine levels in popular sodas:
Beverage
Caffeine (mg per 12 oz)
Dr Pepper
41
Coca-Cola
34
Pepsi
38
Mountain Dew
54
Sprite (caffeine-free)
0
Factors That Influence Caffeine Levels in Sodas
Recipe Variations: The formulation of each soda brand determines caffeine levels.
Serving Size: Larger servings naturally contain more caffeine.
Flavor Additives: Additional ingredients like chocolate or specific spices may alter the caffeine concentration.
Does Dr Pepper Have Caffeine vs. Coke?
Dr Pepper contains slightly more caffeine than Coke. A 12-ounce can of Coca-Cola has 34 milligrams of caffeine, while Dr Pepper offers 41 milligrams. While the difference might seem minimal, it can be significant for those monitoring their intake closely.
Analysis of Caffeine in Other Popular Sodas
Dr Pepper also compares well with other sodas like Pepsi and Mountain Dew. For instance:
Pepsi has 38 milligrams per 12 ounces, falling just below Dr Pepper.
Mountain Dew is on the higher end, with 54 milligrams per 12 ounces, making it more suitable for those seeking a stronger caffeine hit.
On the other hand, caffeine-free sodas like Sprite or 7UP are good alternatives for those avoiding caffeine entirely.
Does Dr Pepper Zero Have Caffeine?
Yes, it contains caffeine. It is formulated to mimic the original Dr Pepper flavor without sugar, making it an excellent option for diet-conscious consumers who still want a caffeine boost.
Do Diet Dr Pepper and Cherry Dr Pepper Have Caffeine?
Diet Dr Pepper: This version contains caffeine levels similar to the regular Dr Pepper, at about 41 milligrams per 12 ounces.
Cherry Dr Pepper: It also has caffeine, aligning closely with the original at approximately 41 milligrams per 12 ounces. The added cherry flavor doesn’t significantly alter the caffeine content.
Does Dr Pepper Cream Soda Zero Have Caffeine?
It does have caffeine but at slightly lower levels compared to the original flavor. It combines the signature 23 flavors with a creamy twist, offering a caffeine-free option for those who prefer less stimulation.
Exploring Caffeine-Free Dr Pepper Options
Not all Dr Pepper beverages contain caffeine. For those who love the its signature taste but prefer to avoid caffeine, there are specific variants available.
List of Caffeine-Free Dr Pepper Variants
Caffeine-Free Dr Pepper: This option delivers the classic 23-flavor profile without the stimulant.
Caffeine-Free Diet Dr Pepper: A diet-friendly option that retains the original flavor minus sugar and caffeine.
Caffeine-Free Dr Pepper vs. Regular Dr Pepper
The primary difference between these versions lies in their caffeine content. While regular Dr Pepper has 41 milligrams of caffeine per 12 ounces, the caffeine-free variants maintain the same taste but cater to those seeking less stimulation. This makes them a better choice for late-night drinks or for individuals sensitive to caffeine.
Dr Pepper and Sugar Content
Sodas are often criticized for their sugar content, and Dr Pepper is no exception. Sugar levels, combined with caffeine, influence both the taste and energy-boosting effects of the drink.
Overview of Sugar Levels in Dr Pepper Flavors
Regular Dr Pepper contains about 40 grams of sugar per 12-ounce can.
Diet Dr Pepper and Dr Pepper Zero offer sugar-free alternatives for those managing caloric intake.
Flavored variants, like Cherry Dr Pepper, may have slightly higher sugar content due to added flavoring.
How Sugar and Caffeine Work Together in Sodas
Caffeine and sugar complement each other, providing a quick energy burst. However, consuming these in excess can lead to energy crashes, weight gain, and other health issues. Opting for lower-sugar options like Dr Pepper Zero helps mitigate some of these risks.
Does Dr Pepper Affect Sleep?
Caffeine can disrupt sleep patterns if consumed too close to bedtime. Caffeine stimulates the central nervous system, making it harder to fall asleep and reducing sleep quality.
How Caffeine in Dr Pepper Can Disrupt Sleep Patterns
Consuming Dr Pepper late in the day can lead to restlessness and insomnia.
Caffeine blocks adenosine, a chemical that promotes sleepiness, resulting in delayed sleep onset.
Tips for Enjoying Dr Pepper Without Compromising Sleep
Limit Afternoon Consumption: Avoid drinking caffeinated beverages after 3 PM.
Opt for Caffeine-Free Variants: Choose caffeine-free Dr Pepper during evening hours.
Monitor Total Intake: Balance soda consumption with plenty of water to stay hydrated and reduce caffeine’s impact
Best Caffeine-free sodas to Try
If you’re looking to cut caffeine completely, there are numerous alternatives to Dr Pepper that still satisfy your soda cravings.
Top Caffeine-Free Alternatives
Caffeine-Free Coca-Cola: Classic Coke taste without the caffeine.
7UP: Another citrus soda perfect for those avoiding caffeine.
Root Beer: Most root beers, such as A&W, are caffeine-free.
Ginger Ale: Options like Canada Dry offer a sweet and spicy twist without caffeine.
Healthier Options for Soda Lovers
For a healthier twist, try sparkling water with natural fruit flavors. Brands like LaCroix and Spindrift offer refreshing beverages without added sugars or caffeine.
Is Dr Pepper Bad for You?
While Dr Pepper is a popular soda, it’s essential to understand its health implications when consumed in excess.
Health Impact of Dr Pepper’s Ingredients
Caffeine: Overconsumption can cause jitteriness, increased heart rate, and insomnia.
Sugar: High sugar levels contribute to weight gain, tooth decay, and diabetes.
Artificial Sweeteners: Diet options use sweeteners like aspartame, which some people prefer to limit.
Comparing Dr Pepper to Other Sodas in Terms of Health Risks
Dr Pepper falls in line with most sodas in terms of sugar and caffeine content. However, choosing lower-sugar options, such as Diet Dr Pepper, can reduce health risks. Moderation remains the key to enjoying any soda without compromising your well-being.
Health Effects of Dr Pepper
Caffeine has both benefits and drawbacks depending on how much you consume.
Benefits of Caffeine Consumption
Increased Alertness: Caffeine enhances focus and reduces fatigue.
Improved Mood: Moderate doses can boost serotonin levels, improving your mood.
Potential Health Perks: Studies suggest caffeine may lower the risk of Parkinson’s and Alzheimer’s diseases.
Drawbacks of Caffeine Consumption
Dependency: Over time, your body may rely on caffeine for energy.
Insomnia: High caffeine intake can interfere with sleep cycles.
Heart Health Concerns: Excessive consumption may increase heart rate and blood pressure.
Dr Pepper contains 41 mg of caffeine per 12-ounce can, much less than coffee, which averages 95 mg per 8-ounce cup. It’s a milder option for those seeking a smaller caffeine boost without the intensity of coffee.
Is there a caffeine-free version of Dr Pepper?
Yes, there are caffeine-free options like Caffeine-Free Dr Pepper and Caffeine-Free Diet Dr Pepper. These variants maintain the same signature taste without caffeine, making them suitable for those avoiding stimulants or looking for a nighttime drink.
What’s the healthiest way to enjoy Dr Pepper?
The healthiest way to enjoy Dr Pepper is by choosing Diet Dr Pepper or Caffeine-Free Dr Pepper to reduce sugar or caffeine intake. Drink it in moderation, alongside a balanced diet, to avoid excessive calories or stimulants.
Conclusion
Dr Pepper is a beloved soda with a moderate caffeine content of 41 milligrams per 12-ounce serving. However, caffeine levels are lower than some other sodas like Mountain Dew, making it a balanced choice for moderate caffeine seekers.
To enjoy Dr Pepper responsibly:
Monitor your daily caffeine and sugar intake.
Choose caffeine-free or diet varieties when needed.
Avoid consuming caffeinated sodas close to bedtime.
With these tips, you can enjoy Dr Pepper while maintaining a balanced and healthy lifestyle.