Home Blog Page 49

Coffee Milk Recipe

0

Coffee milk is more than just a beverage; it’s a beloved tradition in Rhode Island, where it’s considered the official state drink.

This creamy, sweet concoction combines the rich flavor of coffee with the sweetness of sweetened condensed milk, resulting in a delightful treat that’s perfect for any time of day.

Whether you’re a Rhode Island native or simply looking to explore a unique coffee experience, here’s how to make the perfect cup of coffee milk.

Name:Coffee Milk Recipe
Cuisine:Mixed Cuisine
Prep Time:5 minutes
Cooking Time:5 minutes
Total Time:10 minutes
Servings:1
Yield:1 cup of Coffee Milk

Ingredients

  • 1 cup of freshly brewed coffee (preferably a dark roast)
  • 1/4 cup of coffee syrup (such as Autocrat or Eclipse, readily available in Rhode Island stores)
  • 1/4 cup of whole milk or half-and-half
  • Ice cubes (optional, for iced coffee milk)

Instructions

Brew the Coffee:

Start by brewing a strong cup of coffee using your preferred method. Dark roast coffee works best for coffee milk, as it stands up well to the sweetness of the syrup.

Warm the Milk:

In a small saucepan, heat the milk over low heat until it’s warm but not boiling. You can also heat it in the microwave for about 30 seconds.

Mix the Syrup:

In a separate container, measure out 1/4 cup of coffee syrup. Coffee syrup is a sweet syrup made from coffee extract and sugar. It’s what gives coffee milk its distinctive flavor. If you can’t find pre-made coffee syrup, you can make your own by simmering equal parts strong coffee and granulated sugar until it thickens into a syrup-like consistency.

Combine:

In a coffee mug, pour the freshly brewed coffee, followed by the warm milk. Stir well to combine the coffee and milk.

Sweeten:

Add the 1/4 cup of coffee syrup to the coffee-milk mixture. Stir until the syrup is fully dissolved and the coffee milk is sweet and well-mixed.

Serve:

Coffee milk can be enjoyed hot or cold. For a classic hot coffee milk, serve immediately. If you prefer it iced, allow the mixture to cool and then add ice cubes.

Coffee milk is a delightful and unique treat that captures the essence of Rhode Island. Its sweet, creamy flavor makes it a favorite among locals and an intriguing discovery for visitors. With this simple recipe, you can savor the taste of this Rhode Island tradition in the comfort of your own home. So brew a cup, sweeten it to your liking, and enjoy the magic of coffee milk!

Nutrition Facts (Approximate per serving)

Calories: 200 kcal

Total Fat: 5g

Saturated Fat: 2-3g

Cholesterol: 10-15mg

Sodium: 30-40mg

Total Carbohydrates: 25-30g

Dietary Fiber: 0g

Sugars: 25-30g

Protein: 2-3g

10 Simple Coffee Milk Recipes

Coffee milk is a delightful treat that combines the boldness of coffee with the sweetness of milk. Here are 10 easy recipes to enjoy this delightful beverage.

From classic coffee syrup to creative flavored versions, these recipes will satisfy your coffee cravings and sweet tooth. Try them all and find your favorite coffee milk concoction. Cheers!

1. Classic Coffee Milk

Prepare a strong cup of coffee and mix with 1/4 cup of coffee syrup and 1/4 cup of whole milk. Enjoy hot or iced.

2. Vanilla Coffee Milk

Add a touch of elegance by stirring in a teaspoon of pure vanilla extract to your coffee milk for a fragrant twist.

3. Caramel Coffee Milk

Elevate your coffee milk with caramel syrup. Mix 1/4 cup of coffee syrup, 1/4 cup of milk, and a drizzle of caramel syrup for a sweet treat.

4. Mocha Coffee Milk

Create a mocha masterpiece by adding a tablespoon of cocoa powder to your coffee milk mixture. It’s a delightful combination of coffee and chocolate.

5. Almond Coffee Milk

Replace regular milk with almond milk for a nutty flavor. Add a sprinkle of cinnamon for extra warmth.

6. Coconut Coffee Milk

Enjoy a tropical twist by mixing 1/4 cup of coconut milk with your coffee and coffee syrup. Top with coconut flakes for a finishing touch.

7. Irish Coffee Milk

For a spirited version, add a shot of Irish cream liqueur to your coffee milk. It’s perfect for a cozy evening.

8. Mint Chocolate Coffee Milk

Combine the refreshing taste of mint with rich chocolate by adding a drop of mint extract and a sprinkle of cocoa powder to your coffee milk.

9. Hazelnut Coffee Milk

Infuse your coffee milk with the delightful flavor of hazelnuts. Stir in a teaspoon of hazelnut syrup or use hazelnut-flavored coffee.

10. Iced Coffee Milkshake

Blend ice cream, coffee, coffee syrup, and milk for a delightful coffee milkshake. Top with whipped cream and a drizzle of syrup for an indulgent treat.

If you’re a coffee lover seeking a delightful twist, here are 10 simple recipes for coffee milk. From classic sweetened coffee milk to creative concoctions like caramel macchiato, vanilla cold brew, and mocha madness, these recipes are easy to make and offer a caffeinated pick-me-up with a touch of indulgence. Explore these coffee milk creations and elevate your daily brew.

Savor the Flavor: Homemade Carne Asada Seasoning Recipe

0

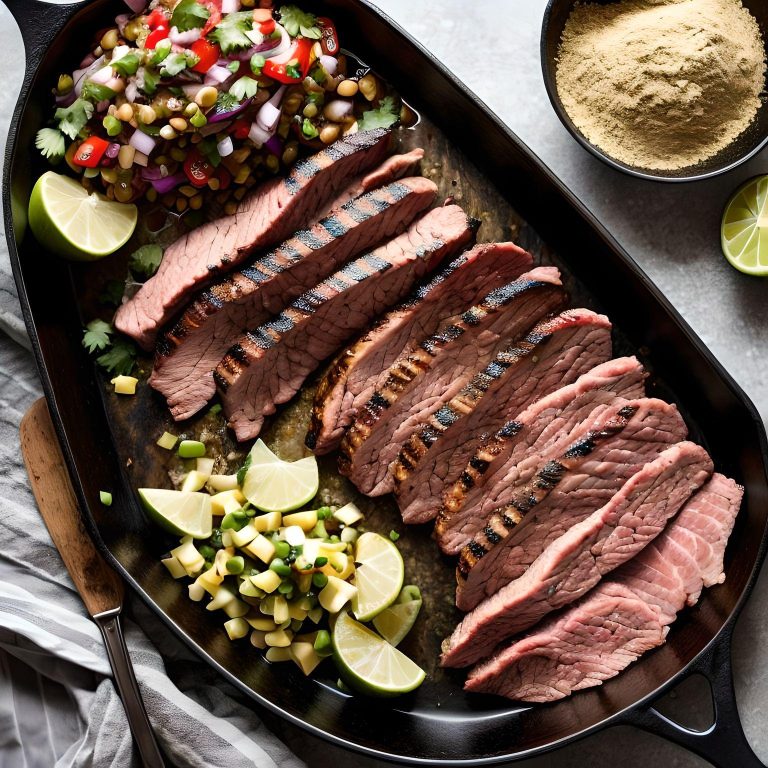
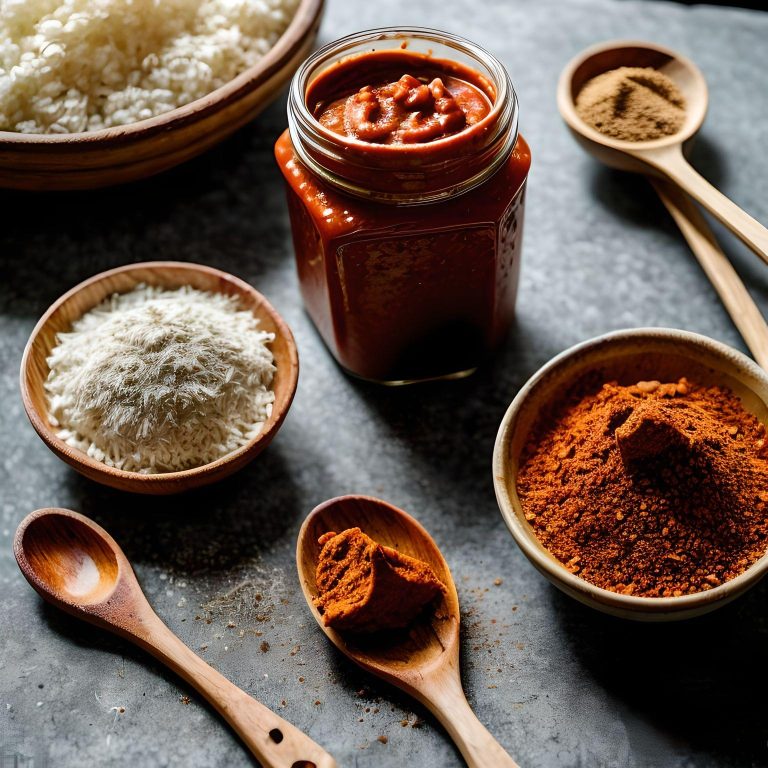
Carne Asada, a beloved dish in Mexican cuisine, is all about the perfect blend of marinated, grilled beef. To truly master this dish, you need a well-balanced and flavorful seasoning.

The secret lies in a homemade Carne Asada seasoning that captures the essence of authentic Mexican flavors.

We’ll guide you through crafting the ideal seasoning for your next carne asada adventure.

NameHomemade Carne Asada Seasoning
CuisineMexican
Prep Time5 minutes
Cooking Time0
Total Time5 minutes
Servings12 servings
Yield2 cup

Ingredients

  • 2 tablespoons chili powder
  • 1 tablespoon cumin
  • 1 tablespoon smoked paprika
  • 1 tablespoon garlic powder
  • 1 tablespoon onion powder
  • 1 teaspoon dried oregano
  • 1 teaspoon black pepper
  • 1 teaspoon salt
  • 1/2 teaspoon cayenne pepper (adjust for spice preference)
  • Zest and juice of 1 lime
  • 2 tablespoons vegetable oil

Instructions

Gather Your Ingredients:

Before you start, ensure you have all the necessary ingredients measured and ready.

Combine Dry Ingredients:

In a small bowl, mix together the chili powder, cumin, smoked paprika, garlic powder, onion powder, dried oregano, black pepper, salt, and cayenne pepper. This combination of spices will be the heart of your Carne Asada seasoning.

Zest and Juice the Lime:

Grate the zest from the lime, and then squeeze out its juice. The lime will add a bright, citrusy flavor to your seasoning.

Add Lime and Oil:

Combine the lime zest, lime juice, and vegetable oil with your dry spice mixture. Stir well until you have a uniform, slightly wet seasoning blend.

Marinate Your Meat:

For the best results, rub your Carne Asada seasoning generously onto your choice of meat, typically flank steak or skirt steak. Make sure to coat all sides evenly. Place the seasoned meat in a resealable plastic bag or a covered dish and refrigerate for at least 30 minutes, but marinating overnight is ideal for maximum flavor.

Grill to Perfection:

Preheat your grill to high heat. Remove the marinated meat from the fridge and allow it to come to room temperature. Grill the meat to your preferred level of doneness, typically about 5-7 minutes per side for medium-rare.

Rest and Slice:

Let the grilled meat rest for a few minutes before slicing it thinly against the grain. This ensures tender, juicy slices.

Serve and Enjoy:

Now that your Carne Asada is perfectly seasoned and cooked, it’s time to serve it up! Enjoy your Carne Asada in tacos, burritos, or simply as a delicious main dish.

The homemade Carne Asada seasoning adds a burst of flavor to your grilled meat, making it a delightful and memorable meal. Feel free to adjust the level of spiciness to suit your taste buds, and don’t be afraid to experiment with this seasoning to make it your own. Whether it’s a family gathering or a casual dinner, Carne Asada seasoned to perfection is always a crowd-pleaser. So, fire up that grill and savor the incredible flavors of this classic Mexican dish. ¡Buen provecho!

Nutrition Facts (per serving)

Please note that the following nutrition facts are approximate and can vary depending on the specific meat used and the amount of seasoning applied.

  • Calories: 20
  • Total Fat: 2g
  • Saturated Fat: 0g
  • Cholesterol: 0mg
  • Sodium: 400mg
  • Total Carbohydrates: 2g
  • Dietary Fiber: 1g
  • Sugars: 0g
  • Protein: 0g

10 simple Carne Asada Seasoning Recipes

Creating your own Carne Asada seasoning is a delightful journey into Mexican cuisine. This blend of chili, cumin, zesty citrus, and a hint of heat will transform ordinary dishes. Homemade seasoning ensures fresh, flavorful results tailored to your taste. Elevate your culinary adventures with this versatile and authentic spice blend.

1. Carne Asada Tacos

Carne Asada Tacos

Create mouthwatering Carne Asada Tacos by marinating thin slices of beef in the seasoning, grilling to perfection, and serving them in warm tortillas. Top with fresh salsa, onions, and cilantro for an authentic street taco experience.

2. Carne Asada Burrito Bowl

Carne Asada Burrito Bowl

For a low-carb twist, make a Carne Asada Burrito Bowl. Grill your seasoned meat, then serve it over a bed of lettuce, rice, or cauliflower rice. Add black beans, guacamole, and sour cream for a satisfying meal.

3. Carne Asada Fajitas

Slice the marinated Carne Asada into strips and sauté with bell peppers and onions. Serve in warm tortillas, and garnish with your favorite toppings, like cheese, sour cream, and avocado.

4. Carne Asada Skewers

Carne Asada Skewers

Thread marinated beef onto skewers with colorful bell peppers and onions. Grill to perfection for a fun and flavorful skewer dish perfect for gatherings.

5. Carne Asada Salad

Carne Asada Salad

For a lighter option, toss grilled Carne Asada slices with mixed greens, cherry tomatoes, and avocado. Drizzle with your favorite dressing for a refreshing Carne Asada Salad.

6. Carne Asada Quesadillas

Carne Asada Quesadillas

Make savory Carne Asada Quesadillas by placing seasoned meat between tortillas with cheese. Grill until the cheese is melted and the tortillas are crispy. Slice into wedges and serve with salsa.

7. Carne Asada Breakfast Burritos

Carne Asada Breakfast Burritos

Start your day with a kick by adding Carne Asada seasoned meat to your breakfast burrito. Combine with scrambled eggs, cheese, and salsa, then wrap in a tortilla for a hearty morning meal.

8. Carne Asada Loaded Potatoes

Carne Asada Loaded Potatoes

Bake or grill potatoes until crispy, then top with seasoned Carne Asada, cheese, sour cream, and green onions for a filling and satisfying dish.

9. Carne Asada Rice Bowl

Carne Asada Rice Bowl

Serve grilled Carne Asada over a bed of fluffy white or brown rice. Add steamed veggies and drizzle with a sauce made from lime juice, garlic, and olive oil for a flavorful rice bowl.

10. Carne Asada Nachos

Create the ultimate appetizer by piling tortilla chips with seasoned Carne Asada, cheese, jalapeños, and black beans. Bake until the cheese is bubbly, and serve with guacamole and sour cream for the perfect party snack.

These recipes offer a variety of ways to enjoy the delicious flavors of Carne Asada seasoning, from tacos to salads and even breakfast burritos. Get creative and savor the taste of Mexico in your own kitchen!

Pineapple Filling For Cake Recipe

0

When it comes to adding a burst of tropical flavor to your cakes, there’s nothing quite like homemade pineapple filling. This sweet and tangy filling not only adds a vibrant touch to your desserts but also elevates the taste to a whole new level.

Whether you’re making a pineapple upside-down cake, a fruity layer cake, or just want to surprise your taste buds, this pineapple filling recipe is a must-try.

So, let’s dive into how to make this delectable pineapple filling from scratch.

NamePineapple Filling For Cake
CuisineFusion
Prep Time5 minutes
Cooking Time10 minutes
Total Time15 minutes
Servings8 servings (1/4 cup per serving)
Yield2 cups of pineapple filling

Ingredients:

  • 1 can (20 ounces) crushed pineapple in juice
  • 1/2 cup granulated sugar
  • 2 tablespoons cornstarch
  • 1/4 cup water
  • 1 teaspoon lemon juice
  • A pinch of salt

Instructions

1. Drain the Pineapple

Start by draining the crushed pineapple using a fine-mesh sieve or a colander. Press down with a spoon to remove excess juice. Set aside.

2. Create the Pineapple Syrup

In a medium-sized saucepan, combine the granulated sugar, cornstarch, and a pinch of salt. Mix them together until well combined.

3. Add Pineapple and Water

Add the drained crushed pineapple and 1/4 cup of water to the saucepan with the sugar mixture. Stir everything well.

4. Cook Over Medium Heat

Place the saucepan over medium heat and bring the mixture to a gentle boil, stirring constantly. This should take about 5-7 minutes. Keep a close eye on it to avoid burning.

5. Simmer and Thicken

Once it starts boiling, reduce the heat to low and let it simmer for another 2-3 minutes or until the mixture thickens. Continue stirring to prevent lumps from forming.

6. Add Lemon Juice

Remove the saucepan from the heat and stir in the lemon juice. The lemon juice adds a refreshing zing to balance the sweetness of the pineapple.

7. Cool and Use

Allow the pineapple filling to cool completely. It will continue to thicken as it cools. Once cooled, your homemade pineapple filling is ready to use.

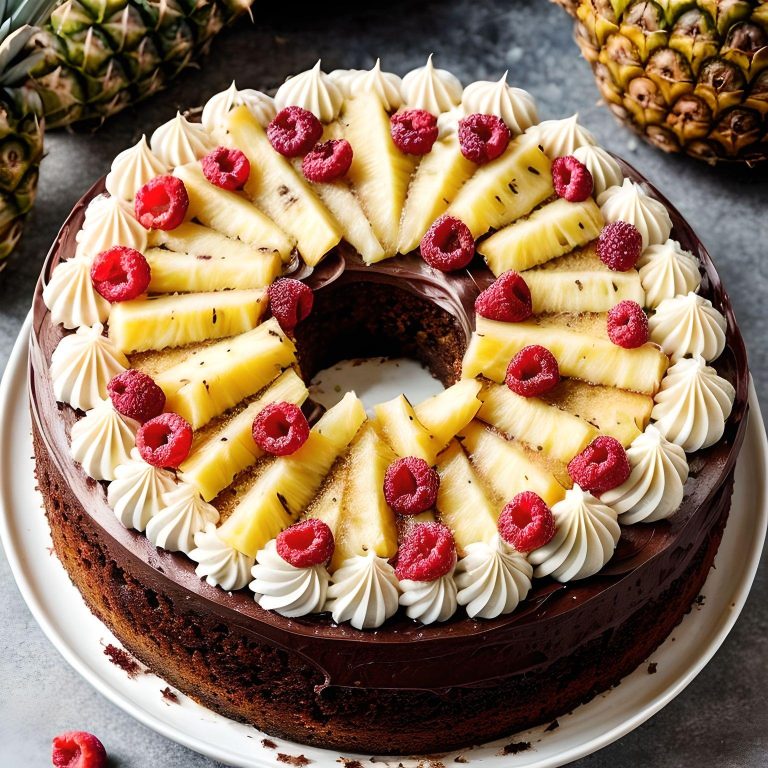
Now that you have your homemade pineapple filling, the possibilities are endless. Spread it between layers of a vanilla or coconut cake, use it as a topping for cheesecake, or even fill cupcakes with this tropical delight.

The sweet and tangy flavors of pineapple will transport your taste buds to a sunny paradise with every bite. So, go ahead and make your cakes taste like a slice of the tropics by adding this easy-to-make pineapple filling.

Nutrition Facts (Approximate)

  • Serving Size: 1/4 cup
  • Calories: 70
  • Total Fat: 0g
  • Saturated Fat: 0g
  • Trans Fat: 0g
  • Cholesterol: 0mg
  • Sodium: 5mg
  • Total Carbohydrates: 18g
  • Dietary Fiber: 0g
  • Sugars: 15g
  • Protein: 0g

10 Simple Pineapple Filling For Cake Recipe

Transform your cakes with this delectable pineapple filling! Simple and versatile, it adds a burst of tropical sweetness. Mix pineapple, sugar, and cornstarch, then layer between cakes for a mouthwatering treat. Perfect for any occasion!

1. Pineapple Coconut Cake

Create a tropical delight by layering a moist coconut cake with our homemade pineapple filling. Top it off with whipped cream and toasted coconut flakes for a heavenly treat.

2. Pineapple Filled Cupcakes

Fill your favorite cupcakes with pineapple filling for a surprise burst of fruity goodness in every bite. Top them with cream cheese frosting for the perfect balance of flavors.

3. Pineapple Thumbprint Cookies

Make thumbprint cookies with a twist. Fill the thumbprints with pineapple filling before baking, adding a fruity center to your buttery, crumbly cookies.

4. Pineapple Danish Pastries

Elevate your breakfast game by using pineapple filling in your danish pastries. These flaky, sweet pastries will be a hit at brunch.

5. Pineapple-Filled Crepes

Fill delicate crepes with pineapple filling and a dollop of whipped cream. Roll them up for a delicious breakfast or dessert option.

6. Pineapple-Filled Doughnuts

Inject pineapple goodness into your homemade doughnuts. Roll them in powdered sugar or glaze for an irresistible treat.

7. Pineapple-Filled Pancakes

Add a twist to your morning pancakes by spreading pineapple filling between layers. Stack them high and drizzle with maple syrup.

8. Pineapple-Filled Muffins

Make breakfast muffins with a delightful surprise inside. These moist and flavorful muffins are perfect for on-the-go snacking.

9. Pineapple-Filled Puff Pastry Tart

Create an elegant dessert by filling puff pastry with pineapple goodness. Serve with a dusting of powdered sugar or a scoop of vanilla ice cream.

10. Pineapple-Filled French Toast

Make your French toast extra special by sandwiching pineapple filling between slices of bread. Dip in egg mixture, cook until golden brown, and enjoy a sweet and fruity breakfast.

These pineapple filling variations can elevate your cakes with a burst of tropical flavor and creativity. Enjoy experimenting with these delightful recipes!

Chipotle Corn Salsa Recipe

0

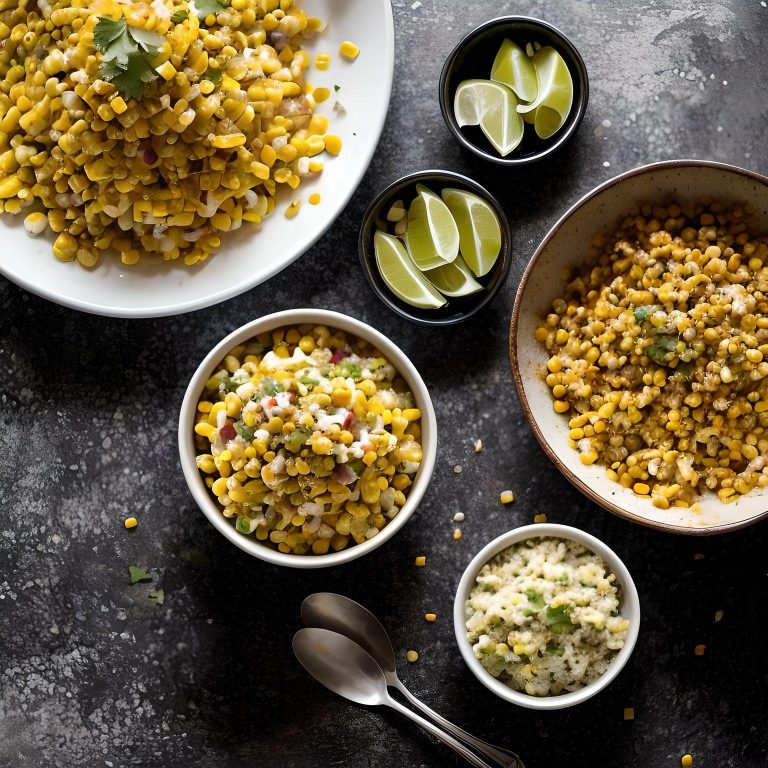
Chipotle corn salsa is a delightful medley of smoky chipotle peppers, sweet corn, and vibrant spices.

We’ll guide you through creating this delectable chipotle corn salsa that’s sure to become a favorite at your gatherings and meals.

This zesty salsa adds a burst of flavor to any dish, making it a perfect accompaniment for tacos, nachos, grilled meats, or even as a dip for tortilla chips.

NameChipotle Corn Salsa Recipe
CuisineMexican
Prep Time15 minutes
Cooking Time10 minutes
Total Time25 minutes
Servings6 servings
YieldAbout 3 cups

Ingredients

  • 2 cups corn kernels (fresh or frozen)
  • 1 can (14 ounces) black beans, rinsed and drained
  • 1 red bell pepper, finely chopped
  • 1/2 red onion, finely chopped
  • 1-2 chipotle peppers in adobo sauce, finely chopped
  • 1/4 cup fresh cilantro, chopped
  • Juice of 2 limes
  • 1 tablespoon olive oil
  • Salt and pepper to taste

Instructions

Prepare the Corn

If using fresh corn, carefully cut the kernels off the cob. If using frozen corn, thaw and drain any excess moisture.

Cook the Corn

In a skillet over medium heat, sauté the corn kernels until they develop a slightly charred appearance, stirring occasionally. This adds a lovely roasted flavor. Set aside to cool.

Combine Ingredients

In a large mixing bowl, combine the roasted corn, black beans, chopped red bell pepper, finely chopped red onion, and chipotle peppers.

Add Cilantro and Lime Juice

Gently fold in the fresh cilantro and squeeze the juice of two limes over the mixture. Mix well.

Drizzle with Olive Oil

Pour the olive oil over the salsa and toss until all the ingredients are evenly coated.

Season to Taste

Add salt and pepper to taste, adjusting the seasoning as needed to suit your preference.

Chill and Serve

Allow the flavors to meld by refrigerating the chipotle corn salsa for at least 30 minutes before serving. This also helps to enhance the taste.

Serve and Enjoy

Serve the chipotle corn salsa as a side, a topping for tacos or nachos, or as a delicious dip for tortilla chips. Enjoy the burst of flavors and the spicy kick from the chipotle peppers!

Creating chipotle corn salsa is a wonderful way to infuse your meals with a burst of flavor and a hint of heat. With its vibrant colors and diverse textures, this salsa is a crowd-pleaser and a must-have for any fiesta or gathering.

Experiment with the spice levels and ingredient quantities to suit your taste, and make every bite a fiesta of flavors!

Nutrition Facts (Per Serving)

Calories: 165 kcal

Total Fat: 4.8g

Saturated Fat: 0.6g

Trans Fat: 0g

Cholesterol: 0mg

Sodium: 241mg

Total Carbohydrates: 28.7g

Dietary Fiber: 7.2g

Sugars: 2.7g

Protein: 6.6g

Vitamin D: 0%

Calcium: 4%

Iron: 13%

Potassium: 329mg

10 Simple Chipotle Corn Salsa Recipes

Discover the zest of Chipotle Corn Salsa! Whether classic, fruity, or protein-packed, these easy recipes deliver a burst of smoky, spicy flavor. Elevate your dishes with this versatile, crowd-pleasing delight!

Classic Chipotle Corn Salsa

Classic Chipotle Corn Salsa

Combine canned corn, diced red onion, chopped fresh cilantro, minced jalapeños, lime juice, and a pinch of salt. Mix well and let it chill for 30 minutes before serving.

Spicy Mango Chipotle Corn Salsa

Spicy Mango Chipotle Corn Salsa

Mix canned corn, diced mango, red onion, chopped cilantro, chipotle peppers in adobo sauce, lime juice, and salt. Adjust the spice level to your liking and refrigerate before serving.

Avocado Chipotle Corn Salsa

Avocado Chipotle Corn Salsa

Combine corn, diced avocado, red onion, cilantro, chipotle peppers, lime juice, and salt. Gently mix and refrigerate to allow flavors to meld.

Black Bean Chipotle Corn Salsa

Black Bean Chipotle Corn Salsa

Mix corn, black beans, diced tomatoes, red onion, chipotle peppers, cilantro, lime juice, and salt. Let it sit in the fridge for an hour for the flavors to blend.

Pineapple Chipotle Corn Salsa

Pineapple Chipotle Corn Salsa

Combine corn, diced pineapple, red onion, chipotle peppers, cilantro, lime juice, and a pinch of salt. Refrigerate for a refreshing twist.

Cucumber Chipotle Corn Salsa

Cucumber Chipotle Corn Salsa

Mix corn, diced cucumber, red onion, chipotle peppers, cilantro, lime juice, and salt. Chill and serve for a cool, crunchy salsa.

Tomato Chipotle Corn Salsa

Tomato Chipotle Corn Salsa

Combine corn, diced tomatoes, red onion, chipotle peppers, cilantro, lime juice, and salt. Refrigerate to enhance the flavors.

Fruit Medley Chipotle Corn Salsa

Fruit Medley Chipotle Corn Salsa

Mix corn, diced watermelon, mango, red onion, chipotle peppers, cilantro, lime juice, and salt. Chill for a unique and sweet-spicy salsa.

Peach Chipotle Corn Salsa

Peach Chipotle Corn Salsa

Combine corn, diced peaches, red onion, chipotle peppers, cilantro, lime juice, and a pinch of salt. Refrigerate for a sweet and smoky salsa.

Jicama Chipotle Corn Salsa

Jicama Chipotle Corn Salsa

Mix corn, diced jicama, red onion, chipotle peppers, cilantro, lime juice, and salt. Let it chill to enjoy a crunchy and tangy salsa.

Discover a flavor fiesta with our 10 simple chipotle corn salsa recipes. From the classic blend to tropical mango or creamy avocado infusions, there’s a salsa for every palate.

Try a pineapple twist or add a zesty kick with tomato. Explore these vibrant variations for a salsa sensation that elevates any meal. Spice up your table today!

Gravy Roast Pork Recipe

0

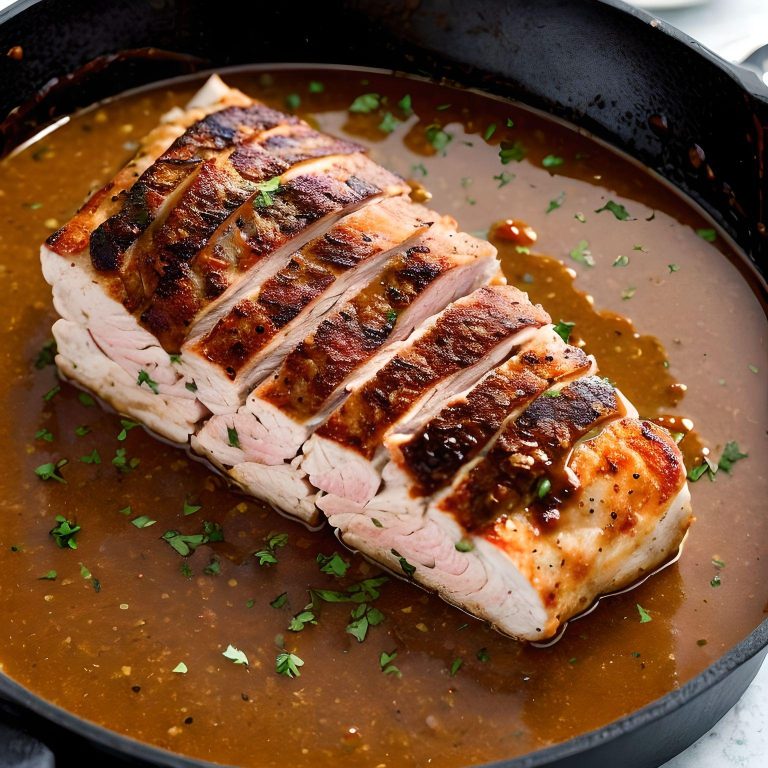
When it comes to a perfectly roasted pork loin or tenderloin, a flavorful gravy is the crowning jewel.

This homemade gravy recipe for roast pork is the ideal companion to elevate your pork roast to gourmet levels.

With a few simple ingredients and some easy steps, you’ll have a rich and savory gravy that will have everyone at your table asking for seconds.

NameGravy Roast Pork Recipe
CuisineFusion
Prep Time10 minutes 
Cooking Time20 minutes 
Total Time30 minutes 
Servings8 serving
Yield2 cups of gravy

Ingredients

  • 2 cups of pork drippings (from the roasted pork)
  • 2 cups of chicken or beef broth (use the one that complements your preference)
  • 1/4 cup all-purpose flour
  • 1/4 cup unsalted butter
  • 1 small onion, finely chopped
  • 2 cloves garlic, minced
  • Salt and freshly ground black pepper, to taste

Instructions

1. Collect the Drippings

After removing the roast pork from the oven, transfer it to a cutting board to rest. Place the roasting pan on the stovetop over medium heat.

2. Deglaze the Pan

Add a bit of broth to the pan and use a wooden spoon to scrape up all the flavorful browned bits from the bottom. This is where a lot of the delicious flavor is hiding.

3. Prepare the Roux

In a separate saucepan, melt the unsalted butter over medium heat. Add the finely chopped onion and minced garlic. Sauté until the onion becomes translucent and soft, about 3-4 minutes.

4. Add Flour

Sprinkle the all-purpose flour over the sautéed onions and garlic. Stir continuously to form a smooth paste or roux. Continue cooking for about 2 minutes to remove any raw flour taste.

5. Combine the Drippings and Broth

Gradually pour in the collected pork drippings from the roasting pan along with the broth, stirring constantly to avoid lumps.

6. Simmer

Allow the gravy to come to a gentle simmer, and let it cook for about 5-10 minutes. This will help it thicken and meld all the flavors together. Stir occasionally.

7. Season

Taste the gravy and season with salt and freshly ground black pepper as needed. Remember that the drippings may already have some salt, so adjust accordingly.

8. Strain

For a smoother consistency, strain the gravy through a fine-mesh strainer into a serving dish to remove any solids.

9. Serve

Pour your homemade roast pork gravy into a gravy boat or a bowl and serve alongside your beautifully roasted pork.

With this homemade gravy recipe, your roast pork will reach new heights of flavor. The combination of savory drippings, a well-seasoned roux, and the aromatic sautéed onion and garlic creates a gravy that’s sure to impress your family and guests. Say goodbye to store-bought gravy and savor the homemade goodness that this recipe brings to your table.

Nutrition Facts

Calories: 90

Total Fat: 7g

Saturated Fat: 4g

Cholesterol: 20mg

Sodium: 220mg

Total Carbohydrates: 4g

Dietary Fiber: 0g

Sugars: 1g

Protein: 2g

10 Simple Gravy Roast Pork Recipes

Indulge in savory delights with these 10 simple gravy roast pork recipes. From classic herb-infused gravies to exotic twists, these dishes promise a flavorful journey for your taste buds. Get ready to savor every bite!

1. Classic Pork Gravy

A timeless favorite, this classic pork gravy features the rich drippings from your roast pork, mixed with a savory roux and a touch of broth. Season with salt and pepper for a perfect finishing touch.

2. Herb-Infused Pork Gravy

Elevate your gravy by adding fresh herbs like thyme and rosemary to the mix. Simmer them with the drippings and broth for an aromatic and flavorful twist.

3. Apple Cider Pork Gravy

For a hint of sweetness, substitute some of the broth with apple cider. The combination of savory pork drippings and the fruity notes of cider creates a delightful contrast.

4. Mushroom Pork Gravy

Sauteed mushrooms add a robust earthiness to your gravy. Slice them and cook in butter before incorporating them into your pork gravy for an umami-rich experience.

5. Mustard Pork Gravy

Give your gravy a zesty kick by whisking in some Dijon mustard. The tanginess pairs wonderfully with the succulent roast pork.

6. Maple Glazed Pork Gravy

Infuse your gravy with a touch of sweetness by stirring in maple syrup. The result is a luscious, caramelized flavor that complements the pork beautifully.

7. Red Wine Pork Gravy

Add sophistication to your roast pork with a red wine-infused gravy. Simmer red wine with the drippings and broth for a rich, complex flavor profile.

8. Creamy Pork Gravy

To create a velvety texture, whisk in a splash of heavy cream. The creamy pork gravy is luxuriously smooth and pairs wonderfully with tender roast pork.

9. Lemon Garlic Pork Gravy

Brighten up your gravy by adding minced garlic and a squeeze of fresh lemon juice. The citrusy notes add a refreshing contrast to the savory pork.

10. Spicy Jalapeño Pork Gravy

For those who enjoy a little heat, finely chop a jalapeño pepper and sauté it with onions before making your gravy. The spiciness creates an exciting twist on traditional pork gravy.

Gravy roast pork is a mouthwatering dish that combines succulent pork with rich, flavorful gravy. To make it, start by seasoning a pork roast with your favorite herbs and spices, then roast it until it’s tender and juicy. Meanwhile, prepare a delicious gravy by simmering pan drippings with broth, herbs, and flour. Pour the savory gravy over sliced pork for a comforting and satisfying meal that’s perfect for any occasion. Enjoy the irresistible taste of gravy roast pork today!

Carrabba’s Blackberry Sangria Recipe

0

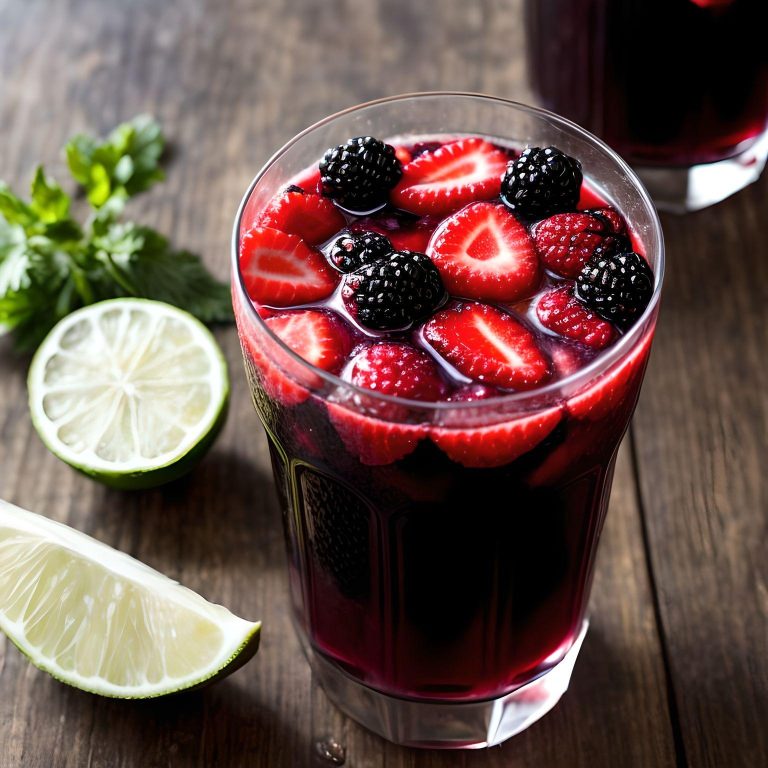
When it comes to refreshing and delightful beverages, Carrabba’s Blackberry Sangria takes center stage.

This fruity and flavorful concoction is the perfect addition to any gathering, whether you’re hosting a summer barbecue,

a brunch with friends, or simply looking to unwind after a long day. Made with fresh blackberries, red wine, and a touch of sweetness, this sangria recipe is sure to become a favorite.

NameCarrabba’s Blackberry Sangria Recipe
CuisineItalian
Prep Time30 minutes
Cooking Time30 minutes
Total Time4 hours 30 minutes
Servings8 servings

Ingredients

  • 1 bottle of red wine (preferably a Spanish red like Tempranillo or Rioja)
  • 1/2 cup brandy
  • 1/4 cup triple sec
  • 1/4 cup simple syrup (adjust to taste)
  • 1 cup fresh blackberries
  • 1 orange, sliced
  • 1 lemon, sliced
  • 1 lime, sliced
  • 1 apple, sliced
  • 1 cinnamon stick
  • Soda water (optional, for serving)
  • Ice cubes

Instructions

Prepare the Fruits:

Begin by washing and slicing the orange, lemon, lime, and apple. Set aside a few slices of each fruit for garnish.

Muddle the Blackberries:

Take a few of the fresh blackberries and muddle them in the bottom of a pitcher. This releases their juices and adds a burst of flavor to the sangria.

Combine the Ingredients:

Pour the entire bottle of red wine into the pitcher with the muddled blackberries. Add the brandy, triple sec, and simple syrup. Stir to combine all the ingredients.

Add the Sliced Fruits:

Drop in the sliced orange, lemon, lime, and apple into the pitcher. These fruits will infuse the sangria with their refreshing citrus flavors.

Cinnamon Infusion:

Place the cinnamon stick into the pitcher. This will give the sangria a subtle spicy note that balances the sweetness of the fruits.

Chill and Let It Marinate:

Cover the pitcher and refrigerate for at least 4 hours, or overnight if possible. Allowing the sangria to chill and marinate ensures that the flavors meld together beautifully.

Serve:

When you’re ready to serve, fill glasses with ice cubes and pour the sangria over the top, making sure to include some of the delicious fruit slices. If you prefer a lighter version, top off each glass with a splash of soda water.

Garnish:

For that extra touch of elegance, garnish each glass with a slice of orange, lemon, lime, and a fresh blackberry.

Enjoy:

Sip and savor the rich flavors of Carrabba’s Blackberry Sangria. It’s a delightful blend of red wine’s depth, fruity notes from the blackberries, and the zesty freshness of citrus fruits.

Pro Tips

Adjust the sweetness: If you prefer your sangria on the sweeter side, you can add more simple syrup to taste. Conversely, if you like it less sweet, reduce the amount of syrup.

Experiment with fruits: Feel free to get creative with the fruits you use. Raspberries, strawberries, or even peaches can be fantastic additions.

Make it ahead: Sangria tastes even better when it’s allowed to sit in the refrigerator for a while. Plan ahead and make it a day in advance for the best results.

Carrabba’s Blackberry Sangria is the perfect drink for celebrating life’s moments, big or small. With its vibrant colors and refreshing taste, it’s an instant crowd-pleaser. So, gather your friends and loved ones, and raise a toast to good times with this delicious homemade sangria. Cheers!

Estimated Nutrition Facts

  • Calories: 194 calories
  • Total Fat: 0g
  • Saturated Fat: 0g
  • Cholesterol: 0mg
  • Sodium: 1mg
  • Total Carbohydrates: 21g
  • Dietary Fiber: 2g
  • Sugars: 16g
  • Protein: 1g
  • Vitamin C: 40% DV
  • Calcium: 2% DV
  • Iron: 3% DV
  • Potassium: 156mg

10 Simple Carrabba’s Blackberry Sangria recipes

Carrabba’s Blackberry Sangria is a delightful, fruity libation that’s perfect for any occasion. With these 10 simple steps, you can recreate this refreshing drink at home, making your gatherings extra special. Cheers to a taste of Carrabba’s in your own kitchen!

1.Classic Blackberry Sangria

The original Carrabba’s Blackberry Sangria recipe, featuring red wine, brandy, triple sec, and fresh blackberries. A timeless favorite that’s both refreshing and bursting with fruity flavors.

2.Peachy Blackberry Sangria

Swap out some of the blackberries for ripe, sliced peaches to create a delightful Peachy Blackberry Sangria. The combination of peaches and blackberries adds a sweet, juicy twist to the classic recipe.

3.Citrus Twist Blackberry Sangria

Add extra citrus zing by doubling the amount of orange, lemon, and lime slices. This Citrus Twist Sangria balances the richness of red wine with a vibrant burst of citrusy freshness.

4.Spiced Blackberry Sangria

Elevate your sangria with a hint of spice. Infuse the mix with a cinnamon stick, a couple of cloves, and a dash of nutmeg for a warming Spiced Blackberry Sangria that’s perfect for cooler evenings.

5.White Sangria with Blackberries

For a lighter take, substitute white wine for red in the classic recipe. White Sangria with Blackberries is crisp, refreshing, and ideal for those who prefer a milder wine flavor.

6.Berry Medley Sangria

Mix up your berries! Combine blackberries with raspberries, strawberries, and blueberries for a colorful Berry Medley Sangria. It’s a berry bonanza of flavors.

7.Minty Blackberry Sangria

Add a handful of fresh mint leaves to your classic recipe for a Minty Blackberry Sangria. The mint infuses the drink with a cool, herbal twist that’s perfect for summer sipping.

8.Sparkling Blackberry Sangria

Top off your glass with sparkling water or champagne for a fizzy twist. Sparkling Blackberry Sangria adds effervescence and sophistication to your favorite sangria.

9.Ginger-Infused Blackberry Sangria

Grate some fresh ginger and let it steep in the sangria mix for a few hours. The result? A zesty and invigorating Ginger-Infused Blackberry Sangria that’s perfect for those who love a little kick.

10.Tropical Blackberry Sangria

Transport your taste buds to the tropics by adding chunks of pineapple, mango, and kiwi to your sangria. Tropical Blackberry Sangria is a vacation in a glass, combining the sweetness of blackberries with the exotic allure of tropical fruits.

Carrabba’s Blackberry Sangria is a delightful and refreshing beverage that combines the rich flavors of red wine with the sweetness of blackberries. To recreate this tasty treat at home, you’ll need red wine, blackberry brandy, simple syrup, and fresh blackberries. Mix it all together, chill, and serve over ice for a delicious homemade version of Carrabba’s Blackberry Sangria. Cheers to a delightful sip of summer!

Number Cake Recipe

0
If you’re looking to celebrate a special occasion with a unique and visually appealing dessert, a number cake is the perfect choice.
Number cakes have taken the world of baking by storm, and they allow you to personalize your sweet treat for birthdays, anniversaries, or any memorable event.
We’ll guide you through the process of creating a delightful number cake that not only looks impressive but also tastes divine.
NameNumber Cake Recipe
CuisineFusion
Prep Time30 minutes
Cooking Time30 minutes
Total Time1 hour
Servings12
Yield1 Number Cake

Ingredients You’ll Need

For the Cake

  • 2 cups all-purpose flour
  • 1 ½ cups granulated sugar
  • 1 cup unsalted butter, softened
  • 4 large eggs
  • 1 cup milk
  • 2 teaspoons vanilla extract
  • 2 teaspoons baking powder
  • ½ teaspoon salt

For the Frosting and Decorations

  • 2 cups heavy whipping cream
  • ¼ cup powdered sugar
  • Assorted fruits (strawberries, blueberries, raspberries, kiwi, etc.)
  • Edible flowers (optional)
  • Sprinkles (optional)

Instructions

Step 1. Preparing the Cake

Preheat your oven to 350°F (175°C) and grease two rectangular cake pans. You can choose the size depending on the number you want to create.

In a bowl, whisk together the flour, baking powder, and salt. Set it aside.

In another large bowl, cream the softened butter and sugar until it becomes light and fluffy.

Add the eggs, one at a time, beating well after each addition. Stir in the vanilla extract.

Gradually add the dry ingredients to the wet ingredients, alternating with the milk. Begin and end with the dry ingredients. Mix until just combined.

Divide the cake batter evenly between the two prepared pans. Smooth the tops with a spatula.

Bake for 25-30 minutes or until a toothpick inserted into the center comes out clean.

Allow the cakes to cool in the pans for 10 minutes, then transfer them to a wire rack to cool completely.

Step 2. Assembling the Number

Once the cakes have cooled, it’s time to shape them into the desired number. Using a printed or hand-drawn number as a guide, carefully cut out the shape from each cake layer.

Place one of the cut-out numbers on your serving platter or cake board.

Step 3. Preparing the Whipped Cream Frosting

In a mixing bowl, whip the heavy whipping cream and powdered sugar until stiff peaks form.

Spread a layer of whipped cream over the first cake layer.

Place the second cut-out number on top of the whipped cream layer.

Frost the entire number cake with the remaining whipped cream.

Step 4. Decorating Your Number Cake

Now comes the fun part – decorating! Use your creativity to arrange the assorted fruits, edible flowers, and sprinkles on top of the whipped cream.

You can also use a piping bag to add extra details or write a special message on your number cake.

Chill the cake in the refrigerator for at least 30 minutes to set the whipped cream.

Serving Your Number Cake

Once your number cake has chilled and the decorations are set, it’s ready to be served and enjoyed. Slice it carefully to reveal the beautiful layers and personalized design.

A number cake is a fantastic way to celebrate milestones and special occasions. You can customize it with the recipient’s favorite flavors and colors, making it a memorable and delicious centerpiece for any event. So, go ahead and try your hand at creating a stunning number cake that will leave everyone impressed and satisfied!

Nutrition Facts

  • Calories: 380
  • Total Fat: 24g
  • Saturated Fat: 14g
  • Trans Fat: 0g
  • Cholesterol: 135mg
  • Sodium: 190mg
  • Total Carbohydrates: 35g
  • Dietary Fiber: 1g
  • Sugars: 21g
  • Protein: 6g

10 Simple Number Cake Recipes

Indulge your sweet tooth with our delightful Number Cake recipe! Create personalized, scrumptious desserts for birthdays and special occasions. Layered with cream and adorned with fresh fruit, it’s a treat that’s as beautiful as it is delicious.

1. Chocolate Lover’s Delight

Chocolate Lover's Delight

Indulge your chocolate cravings with this Number Cake. Replace a portion of the flour with cocoa powder for a chocolatey twist in the cake layers. Fill it with chocolate mousse and garnish with chocolate shavings and a drizzle of rich chocolate sauce.

2. Fresh Berry Bliss

Fresh Berry Bliss

For a burst of freshness, use a vanilla sponge cake base, layer it with a mix of fresh berries, and top it with a cloud of whipped cream. Finish with a dusting of powdered sugar and a few mint leaves for a fruity delight.

3. Lemon Zest and Blueberry

Lemon Zest and Blueberry

Zesty lemon-flavored cake layers filled with a luscious lemon curd and fresh blueberries. Add a lemon glaze on top and a few extra blueberries for a refreshing, tangy treat.

4. Tropical Paradise

Tropical Paradise

Transport your taste buds to the tropics with coconut-flavored cake layers, a passion fruit curd filling, and a garnish of toasted coconut flakes and pineapple chunks.

5. Nutty Crunch

Nutty Crunch

Infuse your Number Cake with nutty goodness by adding finely chopped almonds or hazelnuts to the cake batter. Fill it with a creamy Nutella spread and garnish with chopped nuts for a delightful crunch.

6. Red Velvet Elegance

 Red Velvet Elegance

Create a stunning red velvet Number Cake by using red velvet cake layers, a cream cheese frosting filling, and decorating with red velvet crumbs and white chocolate chips.

7. Caramel Pecan Perfection

Caramel Pecan Perfection

Craft a caramel-infused cake with layers of caramel sauce and pecans. Drizzle extra caramel over the top for a caramel lover’s dream.

8. Citrus Sunshine

Citrus Sunshine

Opt for a citrusy delight with orange or lemon cake layers, a citrus-flavored cream cheese filling, and zest from your chosen citrus fruit for a zingy kick.

9. Mocha Magic

Mocha Magic

For coffee enthusiasts, incorporate instant coffee granules into your cake layers and make a mocha cream filling. Finish with a dusting of cocoa powder and chocolate-covered coffee beans.

10. Rainbow Radiance

Rainbow Radiance

Make a vibrant and colorful Number Cake by using food coloring to create rainbow-hued cake layers. Fill with vanilla buttercream, and add rainbow sprinkles for a fun and visually appealing dessert.

Creating a show-stopping number cake is easier than you think! With our 10 simple number cake recipe, you can celebrate birthdays and milestones in style.

Start with a basic sponge or cookie base, then decorate with your favorite frosting, fruits, and candies to form any number you desire. It’s a fun and delicious way to personalize your celebrations!

Honey Gold Potatoes Recipe

0

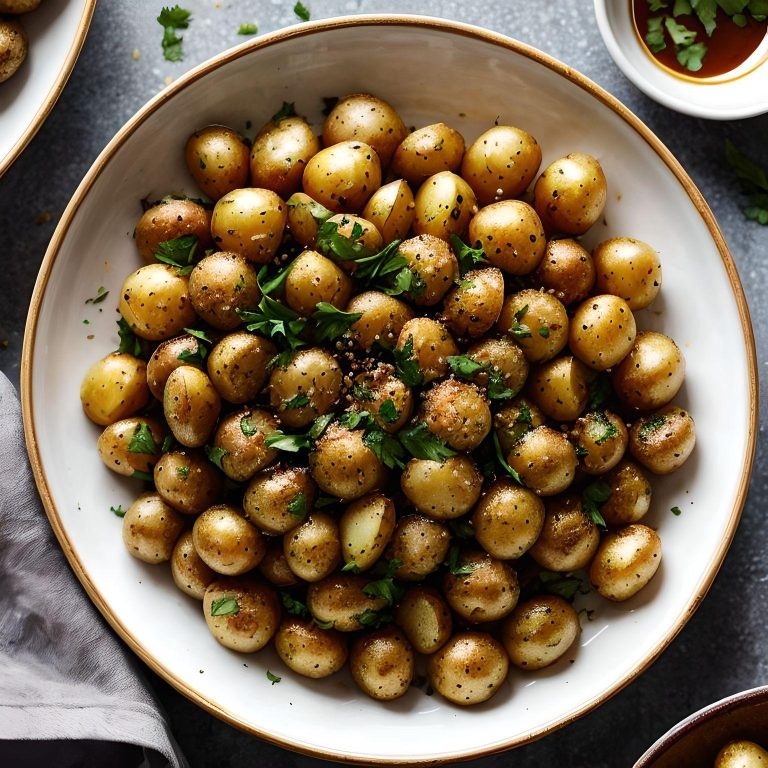
Honey Gold potatoes are a true gem in the world of culinary delights.

These petite, golden-hued tubers are renowned for their buttery texture and naturally sweet flavor.

Whether you’re planning a cozy family dinner or an elegant dinner party, these honey gold potato recipes will elevate your culinary game and leave your guests craving for more.

NameHoney Gold Potatoes Recipe
CuisineAmerican
Prep Time 10 minutes
Cooking Time35 minutes
Total Time40-45 minutes
Servings 4
Yield4 servings

Ingredients

  • 2 pounds of honey gold potatoes, halved or quartered
  • 2 tablespoons of olive oil
  • 2 tablespoons of honey
  • 1 teaspoon of fresh rosemary, minced
  • 1 teaspoon of fresh thyme leaves
  • Salt and pepper to tast

Instructions

Preheat your oven to 400°F (200°C).

In a bowl, mix the olive oil, honey, rosemary, thyme, salt, and pepper.

Toss the honey gold potatoes in this mixture until they are well coated.

Spread the potatoes in a single layer on a baking sheet.

Roast for 30-35 minutes or until they turn crispy and golden brown.

Serve hot as a delightful side dish.

Nutrition Facts (Per Serving)

Calories: 190 kcal

Fat: 7g

Carbohydrates: 31g

Fiber: 3g

Sugar: 7g

Protein: 2g

10 Simple Honey Gold Potatoes Recipes

Honey Gold potatoes are a versatile and delicious addition to your culinary repertoire. Here are 10 simple recipes to make the most of these golden gems, from crispy roasted potatoes to creamy mashed delights. Explore the full potential of this sweet and savory spud!

1. Garlic Parmesan Honey Gold Potatoes

Elevate your side dish game with these Garlic Parmesan Honey Gold Potatoes. Simply roast your potatoes with olive oil, minced garlic, and grated Parmesan cheese for a crispy, savory treat that’s perfect alongside any main course.

2. Honey Gold Potato Wedges

Transform honey gold potatoes into irresistible wedges. Coat them with a mix of olive oil, honey, paprika, and a pinch of cayenne pepper for a sweet and spicy twist. Bake until golden brown and enjoy the satisfying crunch.

3. Creamy Mashed Honey Gold Potatoes

Create creamy mashed potatoes by boiling honey golds until tender, then mashing with butter, cream, and a touch of honey. It’s comfort food at its finest, offering a sweet and buttery flavor with a fluffy texture.

4. Honey Gold Potato Hash

Start your morning right with a hearty Honey Gold Potato Hash. Dice potatoes and cook with onions, bell peppers, and your choice of protein like bacon or sausage. Drizzle honey for a sweet surprise that pairs perfectly with savory flavors.

5. Honey Gold Potato and Leek Soup

Warm up with a bowl of Honey Gold Potato and Leek Soup. Simmer diced potatoes, leeks, and chicken or vegetable broth until tender. Blend until smooth, then stir in a touch of honey for a subtle sweetness.

6. Honey Mustard Roasted Honey Gold Potatoes

For a tangy twist, coat honey gold potatoes with a mixture of honey, Dijon mustard, and olive oil. Roast until crispy and golden, creating a side dish with a perfect balance of sweet and savory flavors.

7. Honey Gold Potato Tacos

Make Taco Tuesday unforgettable with Honey Gold Potato Tacos. Slice and pan-fry your potatoes until crispy, then fill soft tortillas with these delights. Top with your favorite taco fixings and drizzle with honey for a unique twist.

8. Honey Gold Potato and Spinach Salad

Create a healthy salad by mixing roasted honey gold potatoes with fresh baby spinach, cherry tomatoes, and a honey-Dijon vinaigrette. It’s a satisfying and nutritious side or light lunch option.

9. Grilled Honey Gold Potato Skewers

Thread honey gold potato chunks onto skewers, brush with honey and olive oil, and grill until charred and tender. These skewers make a delightful BBQ side dish or appetizer.

10. Honey Gold Potato Croquettes

Transform leftover mashed honey gold potatoes into croquettes. Shape them into small patties, coat with breadcrumbs, and pan-fry until crispy and golden brown. Serve with a dipping sauce for a delightful snack or appetizer.

Honey Gold potatoes are a versatile and delicious ingredient that can elevate your meals. Here are 10 simple recipes to make the most of these golden gems. From crispy roasted potatoes with a drizzle of honey to creamy mashed potatoes with a touch of sweetness, these recipes offer a variety of ways to savor the unique flavor of Honey Gold potatoes. Explore and enjoy!

Cayenne Pepper Recipe

0

Cayenne pepper is not just a fiery spice; it’s also the main ingredient in a flavorful hot sauce that can elevate the taste of a wide variety of dishes.

Making your own homemade cayenne pepper sauce is not only easy but also allows you to control the heat level and customize the flavors to your liking.

We’ll guide you through a simple yet delicious recipe for homemade cayenne pepper sauce.

NameCayenne Pepper Recipe
CuisineFusion
Prep Time15 minutes
Cooking Time30 minutes
Total Time45 minutes
Servings16 servings
Yield2

Ingredients

To make your homemade cayenne pepper sauce, you will need.

  • 20-25 fresh cayenne peppers
  • 3 cloves of garlic
  • 1 medium-sized onion
  • 2 cups of white vinegar
  • 1 teaspoon salt
  • 1/2 teaspoon sugar (optional, for balance)
  • A pinch of black pepper

Instructions

Prepare the Cayenne Peppers

Wash and dry the cayenne peppers thoroughly. You can choose to leave the seeds in for extra heat or remove them for a milder sauce. If you’re new to cayenne peppers, it’s a good idea to start with fewer seeds and adjust the heat level to your preference.

Chop the Vegetables

Roughly chop the garlic and onion. These will add depth and flavor to your sauce.

Cook the Ingredients

In a medium-sized saucepan, combine the cayenne peppers, garlic, onion, white vinegar, salt, sugar (if using), and black pepper. Heat the mixture over medium-high heat until it starts to simmer.

Simmer

Reduce the heat to low and let the mixture simmer for about 20-30 minutes. This will allow the flavors to meld, and the peppers to soften.

Blend

After the mixture has cooled slightly, carefully transfer it to a blender. Blend until you achieve a smooth, sauce-like consistency. Be cautious when blending hot liquids; allow them to cool a bit before blending and keep the blender lid slightly ajar to allow steam to escape.

Strain (Optional)

If you prefer a completely smooth sauce, strain the mixture through a fine-mesh strainer to remove any remaining solids.

Bottle and Store

Pour your homemade cayenne pepper sauce into clean, sterilized bottles or jars. Seal the containers tightly and allow the sauce to cool completely before refrigerating. It will last for several months in the refrigerator.

Homemade cayenne pepper sauce is a versatile condiment that can add a spicy kick to soups, stews, grilled meats, and more. Plus, making it yourself allows you to adjust the flavor and heat to suit your taste buds. Give this simple recipe a try and discover the joy of adding your homemade spicy touch to your favorite dishes. Enjoy!

Nutrition Facts (Per Serving):

  • Calories: 8 kcal
  • Carbohydrates: 2 g
  • Fiber: 0.5 g
  • Sugar: 1 g
  • Protein: 0.2 g
  • Fat: 0 g
  • Sodium: 147 mg

10 Simple Cayenne Pepper Recipes

Cayenne pepper is a fiery spice that can add a kick to your dishes. Here’s a simple recipe to make your own cayenne pepper powder.

Start by drying fresh cayenne peppers in the sun until they become brittle. Then, grind them into a fine powder using a spice grinder. Store your homemade cayenne pepper in an airtight container and use it to spice up your favorite recipes.

1. Cayenne Roasted Vegetables

Transform ordinary roasted veggies into a spicy delight by sprinkling cayenne pepper over your choice of vegetables before roasting. Drizzle them with olive oil, add salt, pepper, and cayenne for that extra kick. Roast until they’re tender and slightly crispy.

2. Spicy Cayenne Popcorn

For a fiery twist on a classic snack, make spicy cayenne popcorn. Melt butter, mix in cayenne, and drizzle over freshly popped popcorn. Toss to coat evenly and enjoy a spicy, savory snack.

3. Cayenne Pepper Guacamole

Add a pinch of cayenne pepper to your guacamole for a spicy twist. Mash ripe avocados, mix with diced tomatoes, onions, lime juice, and cilantro. Season with salt and cayenne to taste. Serve with tortilla chips.

4. Cayenne Lemonade

Spice up your lemonade by adding a pinch of cayenne. Stir in lemon juice, water, sugar, and cayenne until well combined. Serve over ice for a refreshing, zesty drink.

5. Cayenne-Marinated Grilled Chicken

Transform your grilled chicken with a zesty twist! Combine cayenne pepper, olive oil, garlic, lemon juice, and honey for a flavorful marinade that elevates your BBQ game.

6. Cayenne Spiced Nuts

For a spicy snack, coat mixed nuts with egg white, sprinkle cayenne, salt, and a bit of sugar. Roast until crispy and aromatic.

7. Cayenne Honey Glazed Salmon

Blend honey, cayenne, garlic, and lemon juice to make a spicy-sweet glaze for salmon fillets. Bake or grill for a mouthwatering main course.

8. Cayenne Deviled Eggs

Give deviled eggs an extra kick by adding a pinch of cayenne to the filling. Combine egg yolks, mayo, mustard, and cayenne. Pipe the mixture into egg white halves for a spicy appetizer.

9. Spicy Cajun Jambalaya

Enhance your jambalaya with cayenne pepper. Sauté onions, bell peppers, celery, and garlic. Add cayenne, paprika, tomatoes, rice, and broth. Cook with shrimp, chicken, or sausage for a spicy, hearty meal.

10. Cayenne Chocolate Truffles

Indulge in spicy-sweet treats by adding a dash of cayenne to your chocolate truffle mixture. Roll the mixture into balls, coat with cocoa powder, and chill. Enjoy the delightful blend of flavors in each bite.

Cayenne pepper is a versatile spice that can add a spicy kick to your dishes. Try these 10 simple recipes to incorporate cayenne into your meals. From spicy chicken wings to zesty pasta sauces, cayenne adds flavor and a hint of heat. Experiment with these recipes to discover new ways to enjoy this fiery spice in your favorite dishes.

Slow Cooker London Broil Recipe

0

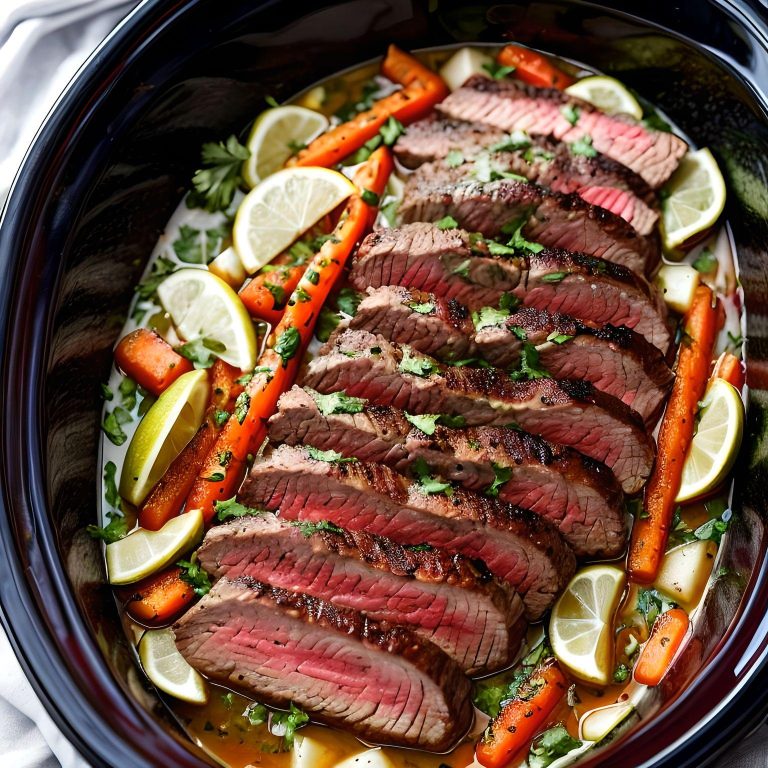
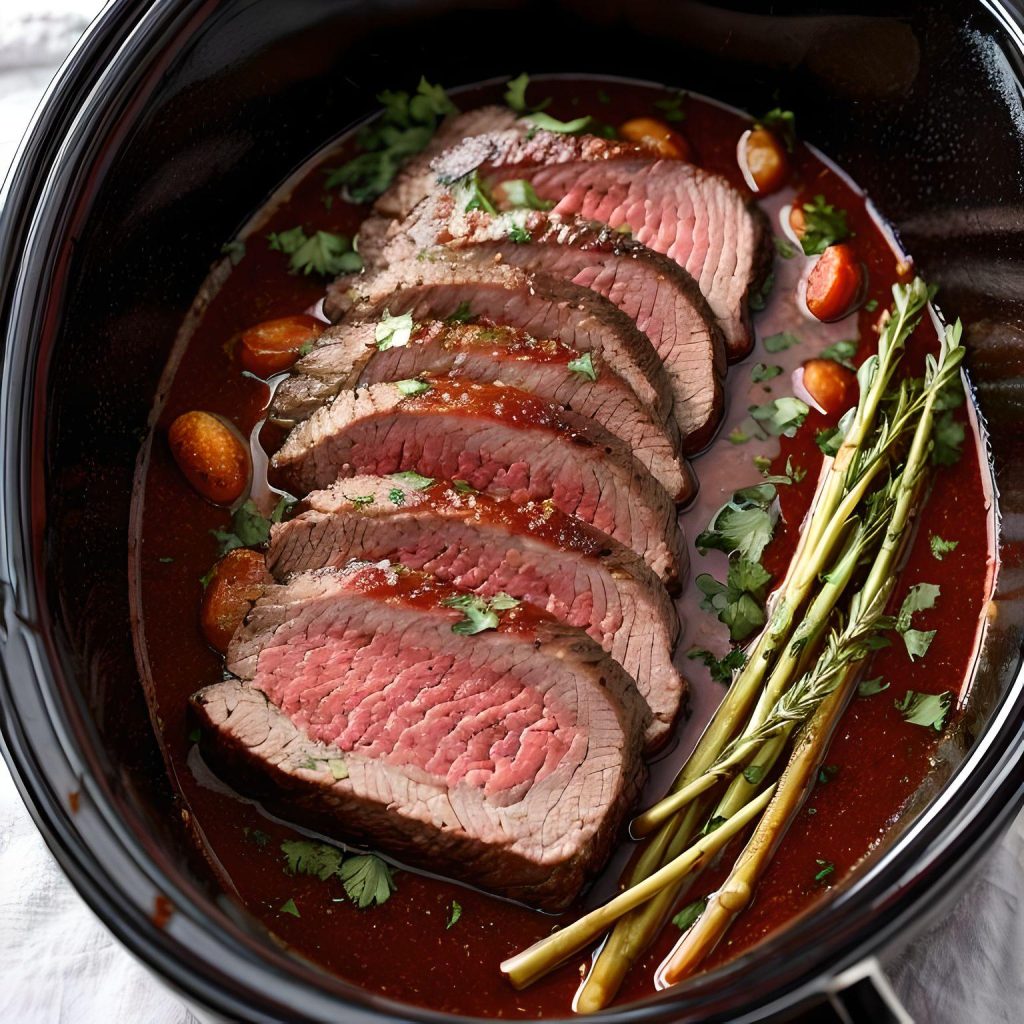
Discover the ultimate slow cooker London Broil recipe! This culinary delight combines convenience with exceptional flavor.

Season your London Broil to taste, add some broth, and let the slow cooker work its magic. In a few hours, you’ll savor the tender, juicy results.

Say goodbye to complicated cooking methods, and hello to the best London Broil you’ve ever had!

Yield: 1 London broil roast, sliced into 6 portions

NameSlow Cooker London Broil Recipe
CuisineLondon Broil
Prep Time15 minutes
Cooking Time6-8 hours
Total TimeApproximately 6 hours and 15 minutes to 8 hours and 15 minutes
Servings6 servings
Yield1 London broil roast, sliced into 6 portions

Ingredients

  • 2-3 pounds of London broil
  • 1 onion, thinly sliced
  • 4 cloves of garlic, minced
  • 1 cup of beef broth
  • 1/2 cup of soy sauce
  • 1/4 cup of Worcestershire sauce
  • 2 tablespoons of brown sugar
  • 1 teaspoon of dried thyme
  • 1 teaspoon of dried rosemary
  • 1/2 teaspoon of black pepper
  • 1/4 cup of cold water
  • 2 tablespoons of cornstarch
  • Fresh parsley, for garnish (optional)

Instructions

  1. Prepare the London Broil:

Start by seasoning the London broil with salt and pepper on both sides. This will enhance the flavor of the meat.

  1. Layer the Ingredients:

In the slow cooker, place the thinly sliced onions and minced garlic on the bottom. These will add a savory base to your London broil.

  1. London Broil in the Slow Cooker:

Lay the seasoned London broil on top of the onions and garlic.

  1. Mix the Sauce:

In a separate bowl, whisk together the beef broth, soy sauce, Worcestershire sauce, brown sugar, dried thyme, dried rosemary, and black pepper. Pour this flavorful mixture over the London broil in the slow cooker.

  1. Set the Slow Cooker:

Cover the slow cooker and cook on LOW for 6-8 hours or until the London broil is fork-tender. Slow cooking allows the meat to absorb all the delicious flavors.

  1. Thicken the Sauce:

About 30 minutes before serving, remove 1/4 cup of the cooking liquid from the slow cooker and mix it with 2 tablespoons of cornstarch until smooth. Return this mixture to the slow cooker, stirring well. This will thicken the sauce.

  1. Slice and Serve:

Once the London broil is tender, remove it from the slow cooker and let it rest for a few minutes before slicing it thinly against the grain. This will ensure maximum tenderness.

  1. Garnish and Serve:

Place the sliced London broil on a serving platter, and if desired, garnish with fresh parsley for a pop of color. Serve with the flavorful sauce from the slow cooker.

This Slow Cooker London Broil recipe is not only easy to prepare but also delivers a mouthwatering, melt-in-your-mouth result. The slow cooker does all the hard work for you, leaving you with a succulent and flavorful dish that your family and friends will love. Enjoy!

Nutrition Facts (Per Serving)

  • Calories: Approximately 350-400 calories per serving (varies based on the size of the London broil)
  • Protein: Approximately 40-45 grams per serving
  • Carbohydrates: Approximately 7-10 grams per serving
  • Fat: Approximately 18-22 grams per serving
  • Fiber: Approximately 1-2 grams per serving
  • Sugars: Approximately 4-6 grams per serving
  • Sodium: Approximately 1200-1500 milligrams per serving (varies based on the brand of ingredients used)

10 Variations of Slow Cooker London Broil Recipes

London Broil is a flavorful cut of beef that, when prepared in a slow cooker, becomes tender and succulent. This easy recipe requires minimal effort but yields maximum flavor. Simply season your London Broil with your favorite herbs and spices, place it in the slow cooker, add some broth or wine, and let it cook low and slow. In a few hours, you’ll have a melt-in-your-mouth London Broil that’s perfect for any occasion.

  1. Classic Slow Cooker London Broil
Classic Slow Cooker London Broil

This classic recipe features London broil slow-cooked to tender perfection with onions, garlic, and a savory beef broth-based sauce. Serve it with mashed potatoes for a comforting meal.

  1. London Broil with Red Wine Sauce

Elevate your London broil by adding a rich red wine sauce to the slow cooker. The wine infuses the meat with a delightful depth of flavor.

  1. Asian-Inspired London Broil
London Broil with Red Wine Sauce

For an Asian twist, marinate your London broil in soy sauce, ginger, and garlic before slow cooking. Serve with steamed rice and stir-fried vegetables.

  1. Mushroom and Onion London Broil

Enhance the umami factor by adding sliced mushrooms to your London broil in the slow cooker. The mushrooms create a savory, earthy sauce.

  1. Barbecue London Broil
Barbecue London Broil

Slather your London broil with barbecue sauce and slow-cook it for a mouthwatering, tender BBQ-infused dish.

  1. Italian Herb London Broil

Infuse your London broil with Italian flavors by using herbs like basil, oregano, and rosemary in the slow cooker. Serve with pasta or crusty bread.

  1. Honey Mustard Glazed London Broil
Honey Mustard Glazed London Broil

A sweet and tangy honey mustard glaze takes this London broil to the next level. It’s a delightful combination of flavors.

  1. Teriyaki London Broil

Marinate your London broil in a homemade teriyaki sauce before slow cooking. It’s a delicious fusion of sweet and savory.

  1. Taco-Seasoned London Broil
Taco-Seasoned London Broil

Season your London broil with taco spices, slow-cook it, and then shred the meat for a flavorful taco filling. Top with your favorite toppings.

  1. Vegetable-Packed London Broil Stew

Turn London broil into a hearty stew by adding carrots, potatoes, and peas to the slow cooker. The result is a comforting one-pot meal.

These diverse London Broil recipes ensure there’s something for everyone. Let your slow cooker do the work, and enjoy a succulent, flavorful meal that’s sure to impress your taste buds and dinner guests alike.