Passing by a bakery, your gaze diverts to a hot plate of pound cakes. They smell mouth-watering, and they look luscious. The urge of committing gluttony stops you from questioning; Is pound cake healthy? You probably end up buying more than a reasonable amount.
It is one of those “Been there, done that” moments.
I, too, find myself eating pound cakes for breakfast for several days straight. Or I find myself relying on pound cakes as a good snack, especially during stressful times.
So, let’s find the answer to that question, shall we?
The name suggests the relevance of some ‘pound’ with this cake. The truth is, the recipe requires a whole pound of sugar, butter, and eggs for the cake to be made. To be completely frank, the recipe itself is petrifying to me.
Refined processed sugar is so easy to be consumed, utterly unnoticed in the form of pound cake. So don’t be surprised the next time the ‘pounds’ go up on the weighing scale.
Depending on the recipe, one slice of pound cake can have calories ranging anywhere from 800 to 2000 calories. And one-fourth of these calories come from pure fat.
Even after being high in calories, pound cakes satiate you for only several minutes. You will get hungry soon enough if you try to fill yourself with only pound cakes. It has protein in a denatured form, the eggs baked in high heat, making it coagulated.
You will be getting all the byproducts of protein (urea, creatinine, creatine, uric acid). Still, you wouldn’t be getting the actual benefits of protein. One average-sized pound cake can contain up to nine eggs, making it an unfit choice for vegans and patients on protein restriction.
So, you are getting obesity from the calories, cardiac anomalies from the fat, and kidney shut down from the protein.
How Much Fat is Too Much Fat?
As the previous point discussed the abundance of fat in pound cakes, let me tell you more. The recipe initially calls for two sticks of butter, excluding the amount you would need in the oven.
But I am guessing you are eating more store-bought cakes than baking at home. Commercial brands use saturated trans-fat instead of unsaturated cis fat (vegetable fat). Trans fat is an artificially synthesized replacement for butter and is a leading cause of fat buildup in your arteries.
Margarine is a healthier option if you are making pound cakes at home. But it is not widely used in recipes because it doesn’t give you the exact texture. So, it is not only about the amount of fat used, but also the kind.
In the end, you are stuffing yourself with heart attack, cardiac failure, and neurological disorders when you are overindulging on pound cakes, utterly unaware of the dangers.
Bad News for Many People:
Pound cakes contain several ingredients that will be potentially detrimental to several people and might significantly impact the interest of public health.
People intolerant to gluten or lactose can have severe physical consequences due to the consumption of pound cake. These cakes may contain trace elements of peanut, wheat, gluten, etc., allergens. They can be present either as a part of the recipe or due to cross-contamination.
It is also not suitable for people following specific diets such as keto or paleo.
Disproportionate Food Values:
There has to be a decent ratio between the macronutrients for any food item to be considered healthy. An average-pound cake has 14 grams of fat, 5 grams of protein, and 57 grams of carbohydrate. I am not blaming carbs here; I am only pointing out the disproportionation among the macros.
Disproportionate foods can be dangerous because they will serve you just as fine, but you will unknowingly develop malnutrition disorders. Since it is almost impossible for an average person to calculate their macros accurately, deficiency disorders are rising.
This will help you lower your chances of suffering from diabetes or glucose intolerance. It will also keep your weight in check.
But refrain from using aspartame as an artificial sweetener, as it can pose significant risks to your kidneys. Sucrose is a safe choice in this case.
Use Real Fruits!
Commercial pound cakes never do, and pound cakes from bakeries rarely have natural fruits. Set your imagination free and get wild while experimenting with different fruits to make your cakes healthier and tastier.
Some naturally sweet fruits are mango, banana, strawberry, blueberry, raspberry, apricot, etc.
Don’t Go Wild with the Butter!
Use a minimum amount of oil or butter. That’s it.
Frequently Asked Questions (FAQs)
Can I eat pound cakes when I am on a diet?
As long as you stay within your calorie limit, you can eat whatever you want. Even pound cakes!
Can I eat pound cakes if I am diabetic?
No. It’s sugar town here. Pound cake would be an irresponsible choice for a diabetic person.
Can I make vegan pound cakes at home?
Of course. You can use a variety of substitutes for an egg. Take a scroll through the internet to find some good vegan-friendly recipes.
Can I eat pound cake as lunch?
As much as I relate to your question, the answer is, sadly, no. You will end up in a sugar crash and get hungry within minutes.
Final words!
Next time you wake up in a cold sweat, wondering, “Oh lord, is pound cake healthy? Give this article another read and make yourself a hot plate of truly healthy pound cakes. Bon appetit.
Bread is a staple in every household. Hence, we should carefully assess the ingredients used to make it. Most families rely on white bread, but its health adversaries are well known; therefore, many are moving to consume squaw bread instead.
Squaw bread is more nutritious because it is rich in nutrients and fiber. So, is squaw bread healthy?
These brown, sweet bread are the saving grace of many households as they become more cautious about the type of food they consume. The nutrient-rich bread is excellent for weight loss too.
Apart from squaw bread, other alternative healthy bread options are also available. Let’s dive into the details.
This Squaw bread is whole rye bread with both American and German flavoring. It is a sweet, soft, and fluffy dark brown bread. The central ingredient of this bread is rye, followed by molasses.
It has excellent health benefits and can be used to make a delicious sandwich. You can also create an appetizer by spreading some butter on the squaw bread or by serving it with a side of salads and cheese. Making it the dish ultimate dish for a small informal gathering.
Squaw bread is very healthy for your heart and stomach. It is rich in fiber which helps you maintain a regular bowel movement. Also, it’s low in carbohydrates, so good for your health. And it is a bit on the sweeter side, but its nutrients help regulate the sugar level in the body.
Thus, making it suitable for diabetic and constipated patients. Additionally, it makes you feel full, which satiates your hunger for a more extended period making this a star candidate in your weight loss journey.
The squaw bread has a higher concentration of fiber, which is excellent for the body as it absorbs water and makes it easier for bowel movements. Hence, it reduces the chances of having constipation.
Fibers in the bread help regulate cholesterol in the body, making this bread ideal for people who suffer from heart problems and constipation.
Moreover, since it is rich in fiber, it does wonder to control food cravings as it makes one feel full, so cravings for sugar and other food go down.
The squaw bread also lowers insulin, making it ideal for people with diabetes.
Low Carbohydrates:
Squaw bread has low carbohydrates, making it great for reducing weight. In addition, it has lower calories making it the perfect carb for your weight loss journey and a favorite among bodybuilding enthusiasts.
It contains around 100 calories, but it depends on the ingredients used to make the bread.
Apart from that, it is excellent for boosting metabolism. So, it is ideal for weight loss as metabolism is a crucial component of one’s weight loss journey.
Control Blood Pressure and Sugar levels in the body:
Squaw bread has ingredients that can lower your blood pressure level, so it is ideal for adding squaw bread to your diet if you are suffering from high blood pressure.
Although this bread has some added sugar elements, it has some natural elements that help regulate the sugar level in one’s blood. Since it regulates blood sugar levels, it again proves to be an ideal bread choice for a diabetic patient.
Furthermore, consuming it makes you feel full, reducing cravings for other sugar-based food. Therefore, making it ideal for people looking to incorporate more healthy items.
Additionally, it helps people with gastric problems hormonal problems as it lowers their progress.
When Should You Avoid Squaw Bread?
You should avoid squaw bread if you are allergic to gluten as it can cause serious health complications. It does not contain much protein; hence, it is unsuitable for eating on its own and needs a protein source to make a balanced meal.
How is Squaw Bread Different from White Bread?
Squaw bread is a multigrain bread with a lot of nutritious value. However, white bread is made from highly processed flour and manufactured using artificial substances. Moreover, the sugar content is more significant in white bread.
Therefore, white bread eliminates any good nutrients or fibers, so vitamins and minerals are added. Still, a few other preservatives are added, making it very unhealthy. Consuming white bread can lead to obesity and gateway to other diseases.
Differences Between Squaw Bread and White Bread
Squaw bread is made from rye and molasses, while white bread is made from processed flour and added additives.
Also, squaw bread has relatively low carbohydrates, low protein, high fiber, and has many nutrients. On the other hand, white bread has high protein, carbohydrates, and artificially added vitamins while lacking fiber and other nutrients.
Unlike white bread, squaw bread is good for weight loss, constipation, cholesterol, low blood pressure, and controlling sugar levels in the blood.
Squaw bread is less fluffer and sweeter than white bread because white bread does not have fiber, while squaw bread does. The fiber in squaw bread makes it a tad coarser.
How to Make a Squaw Bread?
A squaw bread is best made at home as packaged squaw bread has a few added ingredients that deprive it of its nutritious values. In addition, you need a lot of time to make this bread.
It requires you to prepare the dough, pre-heat the oven, and gather all the necessities, so make sure you have ample time before making this bread at home.
Add one packet of yeast, one and a half cups of water, and three spoons of four tablespoons of refined sugar and toss them in a big round bowl.
You should let the yeast rise for a few minutes. Meanwhile, you can take a break and get a few small chores done.
Add Other Ingredients and Mix Them:
Here comes the star ingredient- Rye flour. Precisely measure two and a half cups of rye flour while adding four calculated molasses, with a generous two teaspoonfuls of honey. Follow that with two teaspoonfuls of butter, cocoa powder, and cornmeal.
To add more flavor, add precisely one teaspoon of salt. Be careful while adding salt, and do not mix sugar and salt as all your hard work will go in vain.
Kneading the dough by hand is a long and tedious task. To make things quicker, add all the ingredients in quantity mentioned above and mix them in a mixer. Traditional kneading by hand has its perks, but time is money. So, get things done more efficiently by making the dough in a mixer.
Allow the Dough to Rest and Preheat the Oven:
Once you make the dough, make it into a round shape and brush it with some oil. Then find a moderate-sized bowl and let the dough rest there with a clean cloth over it for one whole hour.
Try not to poke or disturb the dough during that hour. Meanwhile, get a nap, get some office work done or complete longer chores around the house. All while letting the oven pre-heat at a temperature of 455 degrees Celsius.
Complete the Heating Process:
Find a large tray that would perfectly fit inside an oven and line parchment paper on the tray. Then add some corn flour to the parchment so that the dough does not stick to the parchment paper.
When the pre-heating duration is over, place the tray in the ocean and let it bake for thirty-five minutes. Constantly check the bread to ensure that it does not get burnt.
Immediately after cooking, let the hot bread cool for a few minutes before you dig into it and serve it to others.
Are There Other Healthy Alternative Bread to Squaw Bread?
Let’s get to know about the alternatives as well.
Rye Bread:
Rye bread has many health benefits. As the name suggests, this bread is primarily made from rye and wheat. Eating rye bread will satiate your hunger and regulate your blood sugar level and hormones.
In addition, rye has a high fiber content which is excellent for maintaining healthy bowel movements and relieving constipation. Simultaneously, it can lower cholesterol, thus improving your heart’s health.
They have a dark brown color and are sour. This distinctive taste from white does not sit well with ordinary people. Moreover, it is somewhat denser and has gluten, comparatively lesser than other bread.
Since it has gluten, people allergic to gluten cannot consume such bread as it can be detrimental to their health. Also, it can result in bloating for people who cannot properly digest all the rye bread ingredients. Additionally, the high sugar concentration makes it easier on the taste buds but not on your health.
Oat Bread:
Oat bread is a very healthy bread to consume as it is packed with nutrition. It’s is produced from oats, yeast, and wheat. Since it is made of oats, it has high fiber, suitable for bowel movement, and relieves constipation. It also digests carbs slowly to feel full for a long time.
Most pieces of oat bread have a high amount of wheat flour. Hence, the carbohydrate amount is lightly higher in oat bread and is high in protein. However, it is rich in protein as oats do not make bread ingredients, so it needs a little help.
Unfortunately, the addition of wheat flour means it is unsuitable for gluten intolerant people. But there are a few gluten-free options, oat bread options, but those have high starch content.
Gluten-Free bread:
Gluten-free bread is made using sound technology and is free of rye or wheat.
Some gluten-free bread is made out of almonds corn flour, among many other ingredients. These loaves of bread are a lifesaver for their health. It gives you a range of food to choose from and is ideal for people who have a gluten allergy or an autoimmune disease called celiac.
However, to determine how healthy gluten-free bread is, you must look at the ingredient list. Usually, it lacks high fiber concentration, which is incredibly unhealthy for your stomach. Furthermore, it has a higher concentration of refined sugar which can be detrimental to health.
Since making the bread requires sophisticated technology, the loaves of bread do not come cheap. As a result, it can make a hefty dent in your pocket. Hence, experts advise steering clear of gluten-free bread if you do not have gluten sensitivity as some types of these bread are not as healthy.
Frequently Asked Questions (FAQs)
Are rye bread and squaw bread the same?
They are not the same. Rye is one of the significant ingredients of squaw bread, but squaw bread has other ingredients.
Are there other names for squaw bread?
Squaw is considered an offensive term in some cultures; hence it has a new name. It is most commonly known as “Cucamonga sweet wheat.”
How many calories are in the squaw bread?
The calorie count depends on how it is made, and it usually has 100 calories in it.
Conclusion
Is squaw bread healthy? It shines when compared to white bread in terms of nutrition, making it a healthier option.
There are many ways this nutritious bread can be made and consumed. The most straightforward recipe is written in this article. So simply follow the steps to create delicious bread. Other healthy alternatives to squaw bread are oat bread, rye bread, and gluten-free bread.
If you’re into spicy food, there is no doubt that you know that chili is one of the most flavorsome spices. Not only does it have a strong and savory flavor, but it also packs a powerful and attractive aroma.
But there is still one very important question that is still needed to be asked — is chili healthy?
Regardless of how good it is to your tongue, how good it is to your health is just as important, if not more. And today, you will learn just about that.
Chilli peppers can be really healthy items of food, but not everyone has a tolerance for them. However, apart from that, they do contain a lot of micronutrients that can fill in the insufficiencies in your diet.
Not to mention chili is an integral part of every diet by being one of the biggest taste enhancers.
The health benefits of chili can be manifold. All the different nutrients in it can collectively have a big impact on any diet.
Vitamins and Minerals in Chili:
Capsaicin, the component responsible for giving the pepper the heat and kick, has many health benefits. It is composed of:
Vitamin C:
Chilis are a great source of Vitamin C. They are great antioxidants that may help in keeping your immune system up and running to its fullest capability.
It also helps in the absorption of other nutrients like Iron. So, chilis can complement the other sources of Vitamin C in your diet to help you reach your daily requirement.
Pyridoxine:
They also contain Pyridoxine which is also known as Vitamin B6. This helps in enhancing mental health by keeping symptoms of depression under control. As such, brain health may also be improved.
In addition to this, Vitamin B6 helps in the production of Hemoglobin in blood. So, chilis can be a great source of your daily Vitamin B6 intake.
Vitamin A:
Chilis also boost the production of Vitamin A in your body. The high content of beta carotene in chilis is converted into Vitamin A by your body. Your eyes will be most benefited by this vitamin, but there is more to it.
It can help you achieve better skin by reducing acne. But more importantly, it may reduce the probability of particular cancers and support your bone health as well.
Vitamin K:
Phytonadione can also be found in chilis, which is basically Vitamin K1. This vitamin plays a great role in the coagulation of blood to keep its flow healthy and regular.
Potassium:
Chilis can be a good source of minerals such as Potassium. It contributes to the functionality of your nervous system and helps in the contraction of muscles. Potassium also helps in regulating the fluid of the body.
Excess sodium in your diet can also be balanced out with Potassium.
Copper:
Another mineral you are getting from chilis is copper. It plays a part in developing healthy bones, maintaining blood vessels, supporting the immune and nervous systems. Iron absorption is also increased because of copper.
But it is to be remembered that chilis provide these vitamins and minerals only up to a certain quantity. A reasonable intake of chili would not be able to provide these micronutrients adequately. So, they should be a part of an already well-rounded diet plan.
Chilis for Weight Loss:
The main component in chilis is Capsaicin. This component may have some hand in weight loss.
Capsaicin may cause a reduction in cravings for food. But on top of that, it could also help in boosting your metabolism resulting in more fat burning in your body.
That is, it can cause an increase in the rate of burning fat. When your metabolism gets faster, you expend energy more efficiently and burn more fat as a result. Fat burning is an anabolic process that is heavily boosted by Capsaicin in chilis.
Regular consumption of chilis may limit your appetite and lead you to take lower calories overall. If you have issues controlling your hunger, this could be of help.
But it is to be kept in mind that the number of studies done on this is limited. And some studies found no mentionable evidence of chili being a useful tool for weight loss.
Another factor is that regular intake of chili might cause your body to be resistant to it. So even if it works for you, there is no guarantee of it working the same way in the future.
Other Health Benefits of Chili:
Chilis also come with a lot of other health benefits apart from these. Chilis can reduce intestinal problems. Capsaicin, in Chilis, is also a great anti-inflammatory agent.
If you have uncontrolled high blood pressure, chilis might be able to help you lower it. These are just the smaller contributions of chilis—the big ones being providing some protection against potential cancer risks and diabetes.
But as mentioned before, whether or not chili is any good for you at all is dependent on your body. And there are certainly some people who would do more damage than good to their body by intaking chili.
Who Should Stay Away from Chilis?
A lot of people might simply not have the stomach for chilis. It can cause many problems, including nausea, burning in the abdomen, and headaches. Even Diarrhea can occur in many cases. Chilis can even cause symptoms of ulcers in people who are prone to it. Many people might even have irritable skin and eyes.
If consumption of chilis causes any of these in you, it is good for you to avoid excessive intake of chilis. It probably would be worse for you than doing any good.
So, is chili healthy? Now you can figure that out by yourself based on your needs and vulnerabilities. But it is very important to remember that chili is only a part of your daily diet.
Frequently Asked Questions (FAQs)
Are chilies good for men?
It’s been found that chili helps to boost testosterone and make men more sexually active.
Is chili good for your heart?
Research shows that chili is good for heart and reduces chances of a heart attack.
Are chilies good for blood pressure?
There are chances that it can help lower blood pressure, but there’s no conclusive evidence yet.
Final Words
Is chili healthy? It cannot provide the complete daily nutrition for any vitamin or mineral mentioned. However, it can be a great addition to a balanced diet and can make sure the food is simultaneously tasty and healthy.
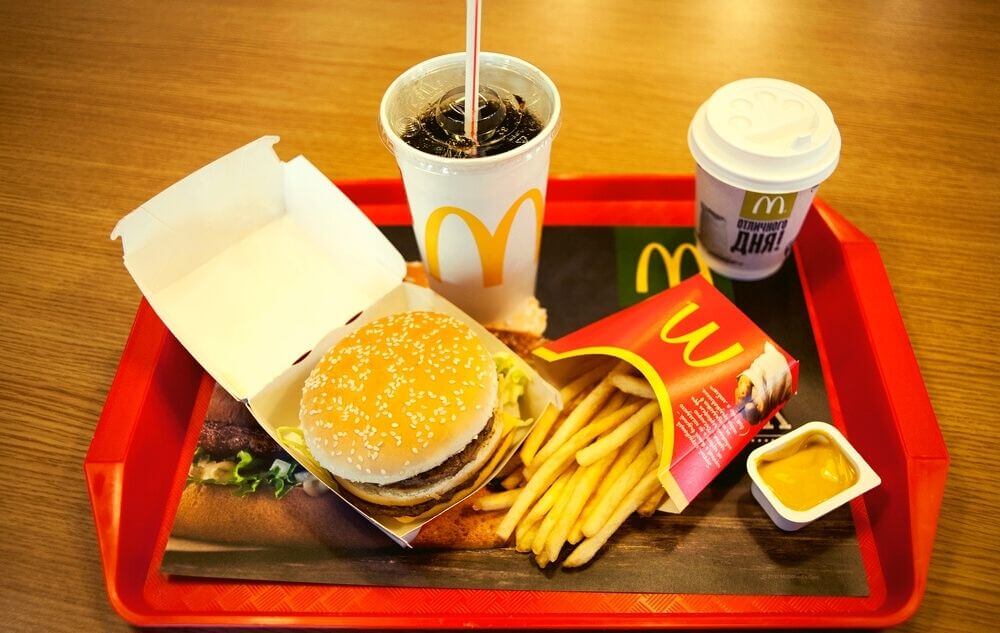
McDonald’s and healthy just don’t fit together at all. As one of the largest fast-food chains in the world, McDonald’s meals usually make great cheat meals. But is McDonald’s breakfast healthy?
Big Macs and cheeseburgers are definitely unhealthy options for meals, although they taste good. However, some people say that some of the McDonald’s breakfast menu items can be quite healthy.
So, if you are someone leading a healthy lifestyle and want to see whether McDonald’s breakfast menu has something for you, keep reading!
Is McDonald’s Breakfast Healthy?
It would be a bit vague if we called the entire menu healthy or unhealthy as there are many items. Hence, we will be discussing some of the breakfast options and will be taking a look at their basic nutritional values.
Big Breakfast:
Although this dish is very filling, it is a nightmare for people with heart diseases because of its 18 g of saturated fat (49 g fat). This dish has 750 calories and an unreasonable amount of sodium; 1490 mg! and consists of biscuits, hot sausage, hash browns, and scrambled eggs.
The big breakfast has 25 g of protein which isn’t bad, but it also has about 53g carbs. So overall, this dish is very unhealthy.
Breakfast Sandwiches:
Since McDonald’s has a large number of breakfast sandwiches, it wouldn’t be possible to look at them separately. Therefore, we have compiled all of them into this single section.
Some very popular sandwich options will be the McGriddles, the egg McMuffins, bacon, egg and cheese bagel, sausage biscuit, and sausage McMuffin.
To clear things out, let’s just say none of these sandwiches can actually be considered as a healthy breakfast option. This is because all of them have high levels of saturated fat and sodium.
Almost all of these sandwiches have a good amount of protein, 13 g or more. However, the high amounts of saturated fat and sodium make them bad for regular consumption.
If we were to pick out a relatively healthy option amongst sandwiches, we’d say go for the Egg McMuffin or egg white delight McMuffin. These sandwiches have 300 and 250 calories, respectively, and have the least saturated fat. Additionally, they have about 17 g of protein, which means they can keep you full.
Hotcakes:
McDonald’s hotcakes are essentially pancakes, and with this breakfast option, you’ll get 3 hotcakes topped off with a good amount of syrup and butter. There are 590 calories and 102 g of carbohydrates in this meal, making it a poor option if you want to be in a caloric deficit. This is almost as much as 7 white bread slices!
This dish also has a large amount of sugar, about 45 g, and not much protein or fiber. Hence, while this dish might be delicious, it is in no way good for your health.
Hash Browns:
Most people don’t have just hash browns for breakfast; they’re usually added as sides to your breakfast. Hash browns are made of potatoes, which means they have some carbs in them even though they’re very small.
Since they are deep-fried, they also have some saturated fat in them, and even for a side dish, this isn’t good. There are 150 calories in each serving of hash browns, so adding them to your meal will just make your breakfast unhealthier.
Sausage Burrito:
When compared to most of the breakfast sandwiches from the menu, we think the sausage burrito is a relatively healthier option. This dish consists of sausage, cheese, onions, chiles, and scrambled eggs wrapped in a very soft tortilla. Having 300 calories isn’t actually bad if you’re trying to deduct your caloric intake.
The sausage burrito also has 13 g of protein, which is the same amount you’d get from eating an egg, and has 6 g of saturated fat, which is still a lot, but less than most sandwiches.
One of the main issues with this burrito is that it has 780 mg of sodium, which is more than 1/3 of your daily suggested intake. Therefore, eating it will make you feel a bit bloated because of the sodium.
Fruit’ n Yogurt Parfait:
For those of you who want to stick to a very strict and healthy diet, the Fruit’ n yogurt parfait is one of the best things you could have from the menu. This dish tastes very fresh and healthy with low-fat vanilla yogurt, crispy granola, and a handful of blueberries and strawberries.
It also has only 210 calories, which is significantly lower than anything else from the breakfast menu. The sodium and saturated fat content are also at a reasonable amount. Perhaps the only issue with this parfait is that it only has 6 g of protein, which isn’t enough.
We must tell you that McDonald’s has discontinued this fruit’ n yogurt parfait in most places, but there’s hope that they’ll bring it back.
Fruit and Maple Oatmeal:
Since the fruit’ n yogurt parfait has been discontinued, this fruit and maple oatmeal is another decent healthy option you can find in McDonald’s. This oatmeal has two servings of whole-grain oats, which gives you a good amount of fiber for better digestion.
There are also plenty of fruits mixed into the warm oatmeal, such as apples, different types of raisins, and even cranberries. For extra sweetness, you may also add brown sugar to this oatmeal bowl. However, we’d say that would be an unhealthy choice, and the sweetness from the fruits is enough.
Frequently Asked Questions (FAQs)
What is the unhealthiest breakfast option?
There are numerous unhealthy breakfast items at McDonald’s, but the unhealthiest options will probably be the big breakfast with hotcakes. This breakfast option has an insane 1340 calories.
What is the healthiest breakfast sandwich at McDonald’s?
Most breakfast sandwiches have too many calories, but if you want something that is very low on calories, you should go for the Egg White Delight McMuffin, which has only 250 calories.
When Does McDonald’s Sell Breakfast?
They start selling breakfast from 5 am to 11 am, but on Fridays, they sell it till 11:30 am.
Are hash browns sold all day at McDonald’s?
Unfortunately, no. Hash browns are a part of the breakfast menu, so they’re only sold during the breakfast hours.
Final Words
Since fast food is so convenient for people with busy schedules, there are a lot of people trying to be healthy who wonder; Is McDonald’s breakfast healthy?
While most of the items from the breakfast menu at McDonald’s aren’t good for you at all with high levels of sodium and saturated fat, there are a few healthier options.
It is very tempting just to grab a cheesy McGriddle when you’re in McDonald’s. But if you want a healthy life, we’d urge you to go for something like a fruit and maple oatmeal or even a sausage burrito would be better.
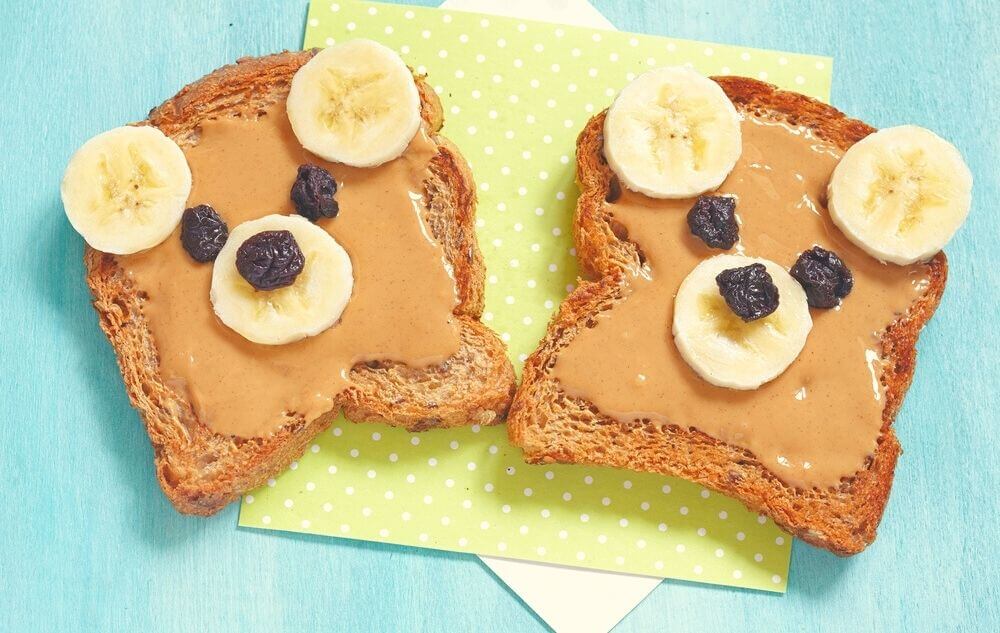
Toast and peanut butter happen to be a breakfast staple in most houses around the world. But for someone who just took up a healthier lifestyle, it’s normal to ask, is peanut butter toast healthy?
“Healthy foods can’t be tasty” is a common, widespread misconception. And good old-fashioned peanut butter on toast is such a satisfying and filling early morning breakfast that you might easily doubt its health benefits.
Simply put, peanut butter on toast can be healthy. But there are so many ifs and buts behind it that we really need to delve into its details before coming to a solid conclusion.
Before delving into any details, it is important to establish a baseline. Throughout this article, unless specified otherwise, we are going to talk about one 2 tablespoons or around 30 grams of peanut butter and one slice of toast.
If you notice the packaging of most commercially available peanut butter, you will see that they specify the serving size is 2 tablespoons. And that is probably because 30-35 grams of any nut butter is what you need to spread on a slice of toast evenly.
As for toast, one medium slice of white or whole wheat or any other type of bread will amount to about 35 grams of toast. So together, this meal can be a 64-gram meal that can be very healthy, but you need to pay close attention to the details.
Why Peanut Butter Is Good for You?
Usually, an organic jar of peanut butter from a good brand will be made of fresh or roasted peanuts, and they will not have a lot of harmful additives. This type of peanut butter is a fantastic choice for health benefits.
A serving of this delicious nut butter will contain around 15 grams of protein while also being rich in vitamin E, Vitamin B6, Magnesium, Manganese, and Niacin (B3). All of these are necessary and very good for your health.
Peanut butter is also a really good source of copper, and yes, you do need the mineral copper in your body. It helps your bones and blood vessels stay in good health while your immune functions work as intended.
As for the “butter” part of the equation, peanut butter contains a lot less of those saturated fats that you only hear bad things about. In fact, peanut butter is a great alternative to regular old butter as all the fats you will find here are mostly the good kind.
Here are a few health issues that peanut butter can help you in:
Keeping Your Weight in Check:
If weight management is what you are concerned about, then good for you, peanut butter works wonders in that area too. The big servings of proteins, fibers, and monounsaturated fats make it so that a meal consisting of peanut butter will take longer for your stomach to digest.
This, in turn, will help you stay full for longer periods of time. Basically, you will eat less and feel hungry less often. This is also why bodybuilders everywhere tend to endorse peanut butter.
Substituting any toast spread like jam, butter, or Nutella with peanut butter means you will reduce your sugar intake by a pretty hefty margin, and that will keep the blood glucose levels in check.
Reducing Diabetes Risk:
In the same vein, regular and limited consumption of natural peanut butter will reduce the risk of diabetes. According to research, this reduction can be as high as almost 20%.
Blood Pressure Control:
Another mineral available in abundance from peanut butter is potassium. Along with other benefits, potassium will help you keep your blood pressure in check.
However, it is important to know the sodium or salt contents of the brand you buy as some manufacturers might put a bit too much salt, and as we all know, that is pretty bad in terms of blood pressure.
Prevention of Cancer:
The antioxidants that we have been talking about thus far are also known for their effectiveness in cell repair.
This means peanut butter can and will help your body cells stay healthy for longer, and when they eventually do get damaged, they can also be repaired. However, in the long run, healthy cells mean fewer chances of rare chronic diseases, e.g., cancer.
Improvement in Skin and Bone Health:
Vitamin E is an antioxidant that, along with other benefits, will keep you safe from harmful UV rays. When we go out in the sun or even stay in, for that matter, the largest organ of our body, our skin, gets an unhealthy amount of UV exposure.
The antioxidants in peanut butter will reduce your risks of UV damage.
At the same time, other antioxidants of peanut spread can help calcium be efficiently transported throughout your body. It will also encourage healthier blood clotting and give your bones just the boost they need.
While we just basically raved about how peanut butter is so amazing, there is a flip side to that coin too. Too much of a good thing is mostly bad, and this phrase reigns truer than ever in the case of peanut butter. It is great for your body until it’s not.
Here are a few bad sides of peanut butter that you should look out for:
Calorie Density:
Staying in good shape is a lot more about mathematics than you might think. You can easily calculate the amount of calorie intake and calories burnt throughout the day to effectively judge how “healthy” your day has been.
Intaking more calories than you can burn in 24 hours is not ideal, and peanut butter does not really help this case. This spread is incredibly calorie-dense, and even one serving size can be up to 200 calories.
Overconsuming:
The danger with labeling something “healthy” is that people do not really pay attention to how much they consume when something is “healthy.” But obviously, they should.
Eating an ungodly amount of peanut butter is not good for you. It will fill you up with calories and leave a lot less space for actual healthy food in your stomach. It will also directly influence your heart, blood, and body weight.
Sodium Content:
Salt enhances the flavor. So it is very common for peanut butter makers to stuff their products with more salt so that they taste better. And admittedly, they do taste better, but at what cost? More salt means more sodium, and your blood pressure will hate you if you do not carefully monitor your sodium intake.
All the Additives:
While natural and pure peanut butter are amazing, most commercially manufactured, brands are not. To extend the shelf life and make it more palatable to the average joe, big brands stuff their bottles with all sorts of oils, stabilizers, and white sugar.
It might help your jam be tastier and easy to use, though it is definitely not in the best interest of your health.
This is no small issue either; some brands are so liberal with these additives that a lot of the jars available in the supermarket do not even have peanuts as their main ingredient. Even “natural peanut butter” is guilty of this sin.
Harmful Pesticides:
Peanut production is a complicated process that is also pretty difficult compared to other nuts and fruits. One of the biggest reasons for this is peanuts are easily attacked by various insects and pests.
To combat these, farmers are pretty generous with their use of pesticides, and owing to the naturally thin shells of peanuts, some might leech inside and contaminate the actual nut.
Traces of these pesticides in a bottled jar of peanut product has been proven to decrease fertility in men along with being awful for pregnant women. So picking an organic variety is a must.
Aflatoxins:
Aflatoxins are toxins generated by a fungus that may infect farmland and peanut plants. Several studies have connected the presence of aflatoxins in food possessing an elevated risk of liver and kidney cancer.
While in developed countries, this is not that big of an issue, in tropical and sub-tropical climates, outbreaks are just waiting to happen.
A general rule of thumb is always to avoid the big brands’ mass-manufactured products. As delicious and cheap as they are, it comes at a severe cost. Additives, preservatives, and stabilizers are all your enemy here.
Consulting the content list on the label of a particular product you are interested in is important. Look to see if there is any palm oil and/or salt. Both of those should be avoided. Then coming to sugar, unless you make your butter from scratch, sugar can not really be avoided, so just pick the one that has the least amount.
Additionally, do not be fooled by the “reduced-fat” variety as they will trade the fat with more added sugar. Even if you are buying the regular kind, still look for the sugar amount and find the one with as little sugar as you find.
The “no-stir” variety is also “no-good,” as typically it means there are additive oils to stop the natural fats from separating.
What to Look for in a Peanut Butter
Always go for the natural and organic variety for any spread, peanut butter included. “Natural” means there will not be any artificial or synthetic products added, and that is exactly what your body needs.
Read the contents list again to see if peanuts are the first and main ingredients, and also, as a general rule of thumb, the fewer ingredients in that list, the better.
Moreover, you can look for some separation as that is a fully natural process, and it usually indicates that the peanut butter has little to no additives. Stirring might require a little bit more effort every morning, but your body will thank you in the long run.
Thus, you should pick a natural and organic peanut butter that has no palm or other oil and is unsalted. Having said that, there is a better option. Some boutique convenience stores offer grinding services and will make you fresh peanut butter right in front of you.
If one of those is available near you, we highly recommend it. Another option is to make your own in a food processor, and in that way, you can carefully control the sugar and salt amount.
What Bread to Pick?
Peanut butter toast is only half peanut butter. The rest of it is the bread, and it is just as important if you are conscious about what you put in your body. So what kind of bread is the best?
We’ll tell you what’s not best or even good. White bread. White bread should be avoided at all costs as it is made from highly processed grains and has a lot of added sugar, among other things.
100% whole grain is what you should pick. Bread made with 100% whole grain will enhance your cardiovascular health as well as ensure you get enough healthy carbs and nutrition.
If you want some more specific recommendations, here is a helpful list of all the bread that are considered to be healthier alternatives to white bread in no particular order:
Sprouted whole grain bread
Rye Bread
Oat Bread
Sourdough
Flaxseed Bread
Gluten-Free Bread
If you are looking to cut down on carbs further, here is a fantastic bread alternative. Apples. Yes, you read that right. Please don’t knock it before you try it!
Nutritional Values:
Coming back to our calorie conversation again, below you will find a nutritional value chart for one slice of whole-grain bread and 2 tablespoons of organic natural peanut butter. Our final verdict will be based on that chart and some other discussions.
So we highly recommend you check the chart out to see if a slice of toast with peanut butter should be the go-to breakfast for your dietary needs:
Portion Size
68-70 g
Calories
250
Total Fat
12g
Saturated Fat
2.5g
Total Carbohydrate
29g
Sugar
5g
Protein
9.5g
Cholesterol
0g
Dietary Fiber
2.5g
Potassium
197mg
Sodium
320mg
Iron
10%
Calcium
6%
Note that this chart was based on our sample of peanut butter toast and it will vary slightly depending on your choice of peanut butter and bread as well as portion size. So take this chart with a grain of salt (unlike the peanut butter).
Is Peanut Butter Toast healthy? The Verdict
Carefully observing all the facts at our disposal, the answer is yes. Peanut butter toast is healthy. However, the caveat here is that not all peanut butter on any toast in any amount is healthy. Here is a prerequisite for peanut butter toast to be healthy:
The peanut butter is natural without any synthetic additives or oil
Peanut butter does not have a high amount of sugar or sodium
100% whole grain bread is used
The serving size of 1 piece of toast and 2 tablespoons of peanut butter is maintained
As long as you follow these 4 rules, peanut butter toast will be a fantastic breakfast or snack for you, and you can eat it without any guilt.
How to Make the Healthiest Peanut Butter Toast?
Aside from the rule of 2 tablespoons of peanut butter spread evenly on one slice of toast, you can play around with toppings to make your breakfast even more delicious.
The best topping that we can recommend here is fruits. Although they add calories to an already calorie-packed meal, they do not really do any serious harm.
Apples, bananas, kiwi, avocado, strawberries are all great options. If you are looking to add a bit of extra sweetness, drizzle some honey or natural maple syrup but do not overdo it.
A sprinkle of chia seeds will also taste amazing, while a small pinch of flakey sea salt will bring out the natural peanut flavors.
As for toppings, you should avoid, don’t use butter on your toast, and don’t use jams with high sugar content.
Frequently Asked Questions (FAQs)
Is Peanut Butter Toast good for weight loss?
Yes, Peanut Butter keeps you full longer, and thus it works very well with a wide range of diets, including weight loss ones.
How many calories are in 2 slices of toast with peanut butter?
In 2 slices of whole wheat toast and organic refined sugar-less peanut butter, you will find around 480 to 500 calories.
Is toast healthier than plain bread?
Toasted bread is healthier and more delicious than plain bread as it contains carbs without a high glycemic index.
Conclusion
You can kiss all your worries about your breakfast staple goodbye as the answer to your question, is peanut butter toast healthy, is yes. They are indeed healthy. Just keep your peanut butter’s calorie count and quality in mind, and you won’t have this delicious breakfast or snack weighing on your conscience!
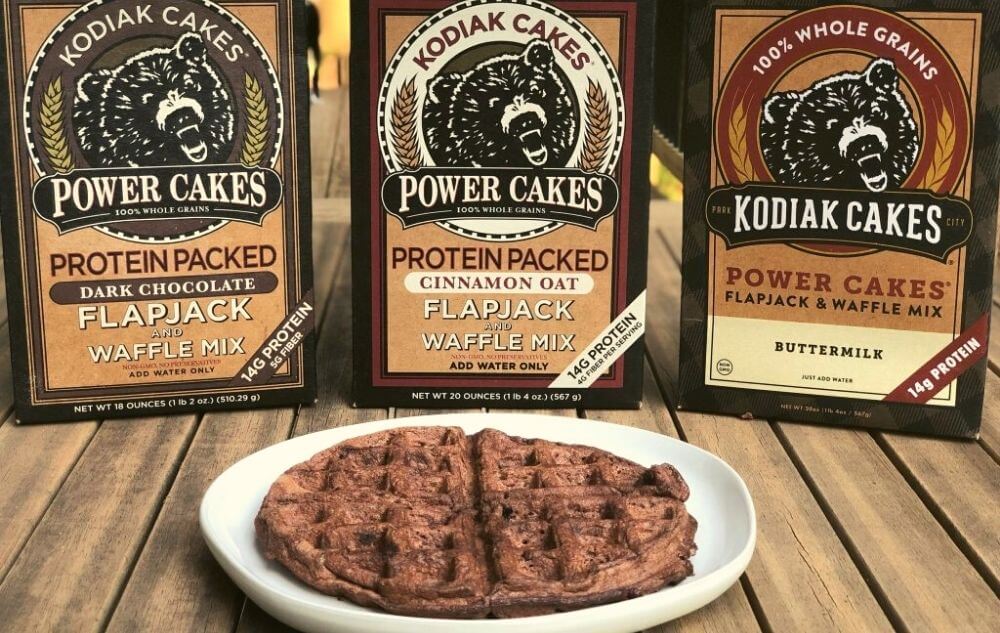
Kodiak Cakes are one of the most popular brands of cake mixes in the market right now. And that is because it stands out from the crowd by adding the health factor to the delicious snack.
While most brands keep their eyes set solely on the taste and the sweetness of the cake, Kodiak decided to add the nutrients element to them too. But all these might sound too good to be true. Thus, it begs the question: are Kodiak cakes healthy? But before that, we need to know:
It is a brand of waffle and pancake mix. The taste of the cakes is not like any other brands. Rather they can be told apart by their unique texture and taste.
They tend to not lean on the sweeter side of cakes like most other cakes tend to. And right off the bat, you will know they are a healthier option over traditional cakes.
On top of that, their texture is also a little different since they contain healthier ingredients. They are made from 100% whole grain, wheat flour and oat flour, cane sugar, protein concentrates, and protein isolate.
Now you might be wondering where they came from.
Origin of Kodiak cakes
Just like a lot of successful brands out there today, Kodiak Cakes originally started out as a small family business. Clearly, it is not as small as it once used to be, but everything has to start somewhere.
It was founded as a family-owned brand in 1982. In the 90s, two brothers from the family started a corporation with the family business, but the outcome was not significant. It was overshadowed by the other cake companies for the longest time until 2014.
In 2014, they came to the hit show Shark Tank to pitch their idea, and that is where they got a lot of traction and attention from. The hosts of the show and the pitchers could not come to an agreement or cut any deal, but at least people got to know about the brand and their ideologies—and that was enough for them to boom.
The cake is different and has goals, unlike most cake brands out there. But the main question still remains. And that would be:
The amount of protein in them can help you build lean muscle while keeping you fuller for a longer time. Protein takes a longer time to digest, which keeps our appetite in control for a bigger period of time.
We also know that it has many fibrous ingredients. The protein teamed up with the fiber can keep your insulin spikes under control and provide you with a stable level of energy. All these are some mentionable upper hands of the Kodiak cakes and why so many people are fascinated about them.
But Lacks Other Micronutrients and Are High in Sugar!
But if you are not keen on the protein content necessarily, you might find there to be a couple of drawbacks with the Kodiak cake mix. The cakes are not really that healthy as per the FDA regulations.
They do not have the minimum amount of Vitamin A, Iron, and calcium which is 10% of the daily requirement. Allegedly, they are also filled with a copious amount of saturated fat and high levels of sugar.
What Happens If You Eat Too Many Kodiak Cakes?
Regular consumption of this might lead to many problems including cholesterol spike, diabetes, heart diseases resulting in a heart attack, or even cancer.
But it should not be forgotten that these are the absolute worst-case scenarios, and occasional consumption of this is not going to lead to such extremities. Only if someone consumes them beyond the limit, will they even have the risk of facing such diseases.
For that matter, excessive consumption of anything at all will have consequences.
It cannot be ruled out whether Kodiak Cakes are healthy or unhealthy since a huge determinant of that is the person who is consuming it, in what quantity they are consuming it, and the frequency of the consumption.
So, whether it is for you or not is totally dependent on your own goals. Now you might be asking who it is really for.
Who Is Kodiak Cake for?
The brand has risen in popularity immensely, particularly among teenagers. A reason behind it is the high protein content which attracts a lot of youth nowadays. It is good for anyone who is trying to keep fit.
If you are both into cakes and are aware of the contribution of protein in building muscle, this is for you. It will be a complete package for you.
But you don’t necessarily have to be into fitness or a gym-goer! You can still consume it as a replacement for regular cake since after all, it is a healthier alternative.
In fact, it is one of the biggest Cake mix brands out there with a whopping 54% market share in the category.
You can find Kodiak Cake online from their website or from Amazon. You can also find them in your nearest Walmart, Target, or any departmental store.
Frequently Asked Questions (FAQs)
Are Kodiak Cakes healthier than regular pancakes?
Yes, because they’re made with whole-grain flour, unlike pancakes that are made with refined flour.
Are Kodiak Cakes Keto?
Most of the Kodiak cakes aren’t suitable for keto diets.
Are Kodiak Cakes kid friendly?
Yes, they’re safe for kids.
Final Words
Are Kodiak cakes healthy? Now, you know and can gauge if the cake is for you or not by understanding your needs.
In layman’s terms, if you are keen on fitness and daily protein intake, they can be really good replacements for regular cakes. On the other hand, if you do not categorize yourself as someone like this, you might have to bring other factors into consideration before jumping to a conclusion.
What else do you need when you have food which is both delicious and healthy to eat? It is undeniable that when prepared properly, beef jerky tastes delicious. But is beef jerky healthy? Well, that is a tricky question.
For many years, people have added beef jerky to their diet lists. And why is that? Because beef jerky is full of protein, vitamins, and minerals, is low carb, and it is also a go-to recipe that you can make easily. But often, people are concerned because it is a snack item, and often snack items are not healthy.
So, let’s try and become a food label expert to understand whether beef jerky is a healthy food or not.
Beef jerky is the source of protein, minerals, and vitamins. Although the nutrition factors of beef jerky matter from brand to brand, the United States Department of Agriculture (USDA) has found out the nutrition found in beef jerky. The main nutrients are listed below for a better understanding:
Protein: 9.4 grams
Fat: 7.3 grams
Carbs: 3.1 grams
Fiber: 0.5 grams
Zinc: 21%
Vitamin B12
Phosphorus: 9%
Folate: 9%
Iron: 8%
Potassium: 4%
Magnesium: 3%
There are several other nutrients present in beef jerky, like chlorine, copper, selenium, etc., which also add value to it, just like the main nutrients. There are several brands of beef jerky in the market, and each and every one of them might not have the same amount of protein, minerals, and vitamins in them.
That is why USDA measured an average proportion of each nutritious item for beef jerky.
What Makes Beef Jerky Healthy?
Beef jerky is an on-the-go snack with nutritious values. That is why it is often used as an item of low-carb diets recommended by dietitians. We have scribbled down the important features of the main nutrients in beef jerky to help you understand how healthy and convenient it is for you to make and eat.
Protein Benefits:
Beef jerky is often called the ‘powerhouse’ of protein. Foods rich in protein help you increase your strength and capabilities. It also helps you balance the metabolism of your body. Other than that, proteins are known to reduce hunger by reducing your appetite.
Having less appetite would prevent you from overeating and maintain your weight the way you want. As beef jerky is rich in protein but low in carbs, nutritionists and dietitians would suggest you eat it as a part of your daily diet. It is also used in paleo and low-carb diets.
Rich Minerals:
Minerals boost up the metabolism in your body, and this high metabolism helps you reduce weight. Beef jerky is very rich in iron and zinc. These two minerals are very healthy and important for your body. These minerals control the immunity power and the energy level of your body.
A deficit of any of these would cause your energy level to go down and weaken your body. Especially iron deficiency won’t let your body energize.
Packed with Vitamins:
Beef jerky is also filled up with many important vitamins, which helps reduce the unwanted fat accumulated inside our body. It contains vitamins like Vitamin B12, folate, phosphorus.
B12 works as an energy provider to our body by breaking the foods and converting them into sugar for us. The converted sugar helps our body gain high metabolism and long-lasting energy.
On the other hand, phosphorus and folate are seen to be working on reducing appetite, which reduces your food intake and, as a whole, reduces your weight as well.
Is Beef Jerky Healthy All the Time?
The answer to this is no. Beef jerky has its pros and cons. Although we have discussed so many useful and important things beef jerky contains, we should still remember it is made of red meat. Excessive consumption of red meat is very harmful to health. So, let’s try to find out the downfalls or cons of beef jerky as a food.
Rich in Sodium:
The level of sodium contained inside beef jerky is troublesome. Excess intake of sodium can cause heart problems increasing your blood pressure. It can also increase the risk of stroke and kidney diseases.
Every ounce of beef jerky contains almost 1800 milligrams of sodium, whereas the recommendation to eat it regularly is 2300 milligrams.
Beef jerky contains 14 milligrams of cholesterol. This amount is a bit more than a diet prepared for healthy persons. A high amount of cholesterol intake increases the risks of heart diseases, like, heart attack, stroke, etc.
Your body already produces a certain amount of cholesterol for different body functions.
Eating too much beef would increase your cholesterol level and cause you different kinds of heart and kidney diseases.
Calorie Rich:
Although beef jerky is used for a low-carb diet and weight loss, it takes up the space for other food. It itself contains 116 calories approximately. Calorie-rich foods should not be taken every day and often. So, the intake of beef jerky should be limited.
From the key points above, we can deduce that intake of beef jerky is good in low carb diets, but the amount of its intake should be measured, and excess intake of beef jerky should be avoided.
Frequently Asked Questions (FAQs)
Is beef jerky good for losing weight?
Yes, you can add beef jerky to your diet for losing weight as it’s a low-carb item and filled with nutrients. However, make sure you don’t eat excessively.
Is beef jerky processed food?
Beef jerky is a processed food as its natural taste is modified through curing and salting.
Can eating too much beef jerky make you constipated?
Yes, beef jerky is rich in iron and fat, and these two nutrients are known sometimes to cause constipation.
Final Words
Beef jerky is a very convenient food that is very easy to prepare as well. Almost all diet plans for low carbs would contain beef jerky as an item. Although it tastes good and is very easy to make, beef jerky should not be consumed every day and in an excessive amount.
So, is beef jerky healthy? The answer is, when eaten in moderation, beef jerky is a very healthy food to take. Now that you know treat yourself with some delicious homemade beef jerky but be careful of its side effects.
Jello is a gelatin-based substance that has been around since 1987. You might have had it with school lunches or snacks when you were a kid.
But do you ever wonder if it has any health benefits? Or, what if it carries toxic additives? So, comes the question, is jello healthy?
We are about to give you an array of reasons why you should or should not consume jello. You’ll also learn about all the potential side effects of its consumption, as well as if it is healthy in the long run.
Ready to learn some jello facts? Then read on to know more!
To determine a food’s contribution, first, we need to know what it is made of. Jello is a sweet food substance with a wiggly texture, often served with artificial or natural flavors and colorings. It is mainly made from gelatin.
But did you know gelatin is made from animal collagen? Interesting, right?
Animal collagen is a protein constituent of the connective tissues that work to hold our body together, including skin and ligaments.
The Making:
First, animal bones get boiled and dried. After that, it is later treated with an acid-base and gets filtered until the collagen is extracted.
Due to the extraction process, it turns into a powder-like substance. When the collagen (gelatin) gets combined with water; it forms a jelly-like substance.
You can buy jello in powder form and make it according to your preference or as pre-made snacks and sweets.
However, it is not suitable for vegetarian diets unless plant-based gelling chemicals are utilized.
Though it has both benefits and drawbacks, it’s generally safe to eat. Below, we’ll discuss the pros and cons to help you make a decision.
Reasons to Consume Jello:
Here, you are about to discover the significant health benefits associated with eating jello. So, without wasting any more time, let’s get right to it.
Improves Bone and Joint Health:
Gelatin is a supplement that improves bone and joint health, including pain and inflammation reduction. This is partly due to the fact that collagen is a critical component of the cartilage that cushions your joints.
Bone:
Additionally, you require calcium to maintain strong bones – and you would be surprised to know that your bones are primarily composed of collagen. To be accurate, between 90% and 95% collagen.
Gelatin is basically cooked collagen in an easily absorbed form. This is why it is not astonishing that anything prepared from cooked animal bones would be beneficial to your bone health.
Joint:
Consequently, by taking gelatin, you should be expanding the cartilage in your joints and promoting joint and bone health.
Many athletes supplement with collagen or gelatin. The same is true for individuals who have scleroderma.
Two essential components, Proline and Glycine, are required to form new cartilage in our joints. And what’s gelatin made of, you ask? Proline and Glycine, indeed!
So, unless you want to wind up like your great aunt Susan, who has debilitating arthritis, you’ll want to make sure your joints get the nutrients they need.
According to medical experts, consuming 5 grams of particular collagen peptides every day for 12 months improved women’s bone mineral density. However, it is not recommended to anyone without a doctor’s advice. So, please consult your doctor before applying it.
Source of Protein:
Protein’s benefits are undeniable. This macronutrient is necessary for the formation and maintenance of tissues throughout our bodies, production, muscle development, and many more.
However, individuals, such as athletes or those attempting to grow muscle may need additional protein. But did you know 11 grams of protein are contained in just two tablespoons? That is almost 10% of your recommended daily allowance!
And because gelatin is not a complete protein due to the absence of specific amino acids, it is not recommended for post-workout recovery. Still, it can certainly help you meet your daily protein requirements.
For Fat-Free diet:
The majority of protein sources, particularly red meat, contain a moderate amount of fat. Even if you stick to lean cuts, you are still going to get some fat in the mix.
However, it would be great if you understood that fat is not the problem here. The appropriate type and amount of fat in your diet can actually improve your health rather than put you at risk.
Nonetheless, you should be aware of reducing fat consumption. If it becomes necessary, gelatin becomes an excellent source as it is practically fat-free.
Improves Digestion:
Gelatin has been associated with improved digestion. This is partly due to the fact that gelatin binds to water, which aids in the passage of food through the digestive system.
Additionally, gelatin contains Glycine, the predominant inflammation control in the stomach, small intestine, and GI tract. Glycine is the anti-inflammatory part that can modulate the gut flora and protect the gut from freezing. It also helps to strengthen the stomach lining.
Gelatin’s ability to absorb water is also beneficial since it retains fluid where it belongs and facilitates good bowel movements.
These actions are one of the reasons that gelatin-rich soups and broths are recommended as practical strategies to improve digestion and gut health. They’re even included in gut-healing protocols such as the GAPS diet.
Increases Weight Loss:
Consumption of gelatin over an extended period of time may help to decrease hunger. It assists you in feeling fuller so that you eat less. A study showed that ingesting a gelatin meal may also help obese individuals achieve maximum fullness.
This, in turn, may help to stop binge eating and promote weight loss.
Apart from its empty calorie content, collagen aids in weight loss by controlling blood sugar.
However, it is important to realize that eating too much sugar-sweetened food containing artificial colors and flavors may result in specific adverse effects.
Sugar-free boxed jello is sweetened with aspartame and sucralose. Aspartame has been shown in animal and human research to cause cell damage and inflammation. These chemicals impart a pleasant taste and flavor to jello but provide no nutritional advantages.
Besides, animal studies have linked aspartame to an increased risk of developing various malignancies, including lymphoma and kidney cancer.
Several times artificial flavors have been demonstrated to disrupt the gut microbiome. Although it is known that jello helps to reduce body weight, it has been shown that regular consumption of artificial flavors results in a rise in body weight.
Artificial Colorings:
Now let’s talk about the colorings. It’s possible that you understand that the majority of jello is artificially colored. Although the amount of food color in jello is unclear, it is likely to vary between brands.
These colorings are basically created with substances derived from petroleum, a naturally occurring chemical used to make gasoline that may have adverse health effects.
Some food colors include benzidine, a recognized carcinogen dyes that may induce cancer. There are even other worries concerning them, such as the possibility that food dyes cause hyperactivity in children.
Further research indicates that as little as 20 mg of artificial food colors may have a detrimental effect.
However, the (FDA) permits their use in low dosages deemed to be safe.
Increased Sugar Intake:
The third point to make is about sugar. For instance, one serving of Jell-O Original Strawberry Gelatin Snacks has a whopping 17 grams of sugar. The powdered version isn’t much better, with 19 grams of sugar per serving.
There are sugar-free varieties available, but these rely on artificial sweeteners to provide the necessary sweetness. These sweeteners are troubling in and of themselves and hence aren’t much better than sugar.
Frequently Asked Questions (FAQs)
Are jello and gelatin the same thing?
No, jello is made by boiling gelatin.
Is jello good for your joints?
There is some limited proof that jello might be beneficial for joints, but there’s no conclusive evidence yet in support of this claim.
Is jello easy on the stomach?
It is, so, you won’t have digestion issues after eating it.
Conclusion
Now, is jello healthy?
It provides far more health benefits than drawbacks and is entirely safe to take. However, doctor’s consultation is advised if you are allergic.
Also, many varieties of jello are manufactured every day. So, even if you’re vegetarian, you will still be able to receive your fix of protein, as vegan jellos are available.
Other than that, do not be afraid to include jello into your daily diet. Just keep in mind that excessive consumption of anything is dangerous — consume jello only as much as it is necessary.
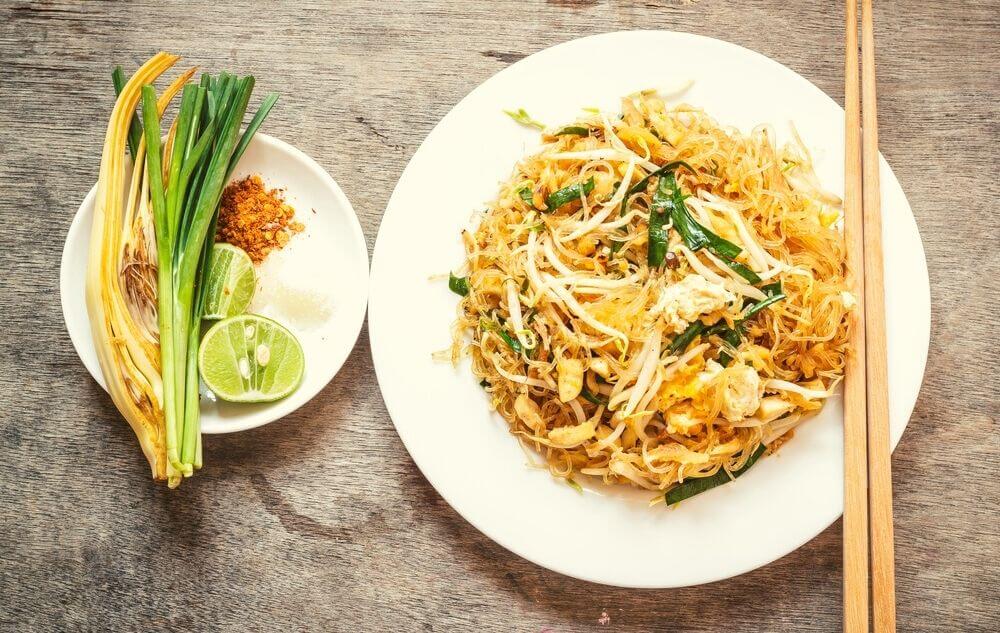
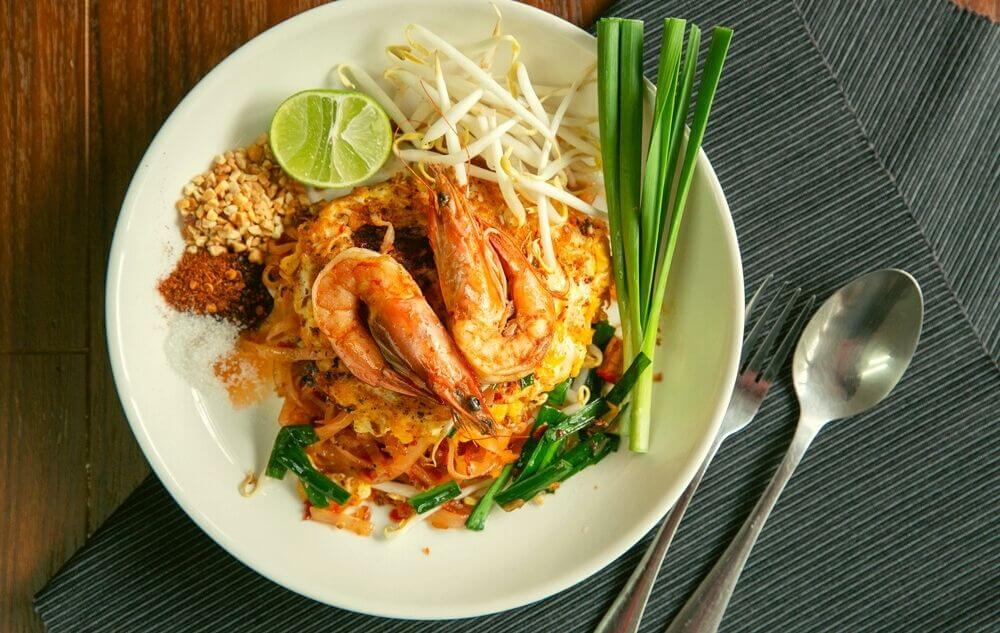
Thai food is getting more and more popular every day because of its wonderful flavors and has become readily available throughout the world. Pad Thai noodles are one of the best comfort foods you can find.
However, at this age, we have to always consider if something is good for our body before we consume it. This might lead people to ask, is Pad Thai healthy?
There are a lot of variations of Pad Thai, and each of them has some different nutritional values. So, without further ado, let’s get into taking a deeper look at all the things that make Pad Thai either healthy or unhealthy.
In short, it’s not healthy. Although it does have a good amount of protein and can have a large number of vitamins and minerals from the veggies, it’s also high in sodium, sugar, carbs, fat, and calories.
So that you can understand the nutritional benefits and cons of pad Thai, we have discussed the nutrients in Pad Thai separately below in two sections: disadvantages and advantages.
Disadvantages of Pad Thai
There are quite a few nutrients that are in excess in this dish which make it very unhealthy for you, take a look at them below.
Calories:
When someone is trying to lose weight, they try to keep their caloric intake lower than what they burn. Hence, the calories in Pad Thai must not be too high for it to be a part of a healthy diet. Now, unfortunately, most Pad Thai such as Pad Thai chicken noodles that you will find in restaurants will have a high amount of calories.
A large portion of chicken pad Thai noodles for 1 person can have over a thousand calories in them. If you regularly eat such Pad Thai dishes then you are guaranteed to gain weight because of the astounding number of calories you will be consuming in just one meal.
Sugar Carbohydrates:
For your body to carry all of its functions smoothly, and for you to be energized, you need a certain amount of carbohydrates in your diet. But the issue arises when you are eating too many carbs. Pad Thai usually has a very large amount of carbs because of the noodles.
To put it into numbers, a single portion on average has around 180 grams of carbohydrates. Such over-consumption of carbs will make it very easy to gain weight since we store the carbs that we do not burn, as fat. In addition to that, it may even lead to cardiovascular diseases.
There’s also plenty of sugar in Pad Thai because of the sauce that is used to make this dish so flavorful. Usually, granulated sugar is used in the peanut sauce, and the sugar content is about 43 grams. This is considered to be a high amount of sugar, which is undoubtedly unhealthy.
Fats in Pad Thai:
To give all the veggies, chicken, and other ingredients in Pad Thai that crispy texture, they have to be deep-fried. Meaning a lot of oil is used in making pad Thai. The oils used for making Pad Thai are usually coconut oil, soybean oil, or palm oil.
All of the oils that we have mentioned are very high in saturated fat, and as you may know, saturated fat is terrible for your health. Consuming a lot of saturated fat may lead to arterial blockages and many types of heart diseases, which could be fatal.
In one serving of chicken Pad Thai, there are 33 grams of fat and 6 grams of saturated fat. Therefore, people with high cholesterol problems and heart diseases should steer clear of oily Pad Thai made in restaurants at all times.
Additionally, the high amounts of fat in Pad Thai can also lead to quick weight gain, and as we know eating too many fatty foods leads to obesity.
Sodium:
One of the biggest problems with pad Thai is that it contains a heaping amount of sodium which is bad for your health for a multitude of reasons. A lot of salt is used to season the noodles, and by adding a ton of fish sauce and soy sauce, the sodium content of pad Thai only goes up.
Containing over 2.400 mg of sodium, this amount of sodium in one serving of Pad Thai is even greater than what you are recommended to consume in one whole day.
When you eat so much sodium with your food, you’ll gain a lot of water weight which will make you bloated. Long-term effects of having Pad Thai regularly because of the sodium include high blood pressure, weakness, heart failure, and kidney diseases.
Advantages of Pad Thai
Although there are several harmful properties, there are also a few beneficial nutrients in Pad Thai that we have discussed next.
Protein:
In a healthy diet, protein is one of the most vital nutrients to keep your muscles growing and strong. A lot of Pad Thai noodles will often have a good amount of chicken or other sources of protein which is great.
However, if you buy your Pad Thai from a cheap store, then the amount of lean protein might be low. If you’re cooking your Pad Thai, then try to add a decent portion of chicken breast or other lean protein sources into it.
Approximately 54 grams of protein is present in 1 serving of Pad Thai, so we can say it is a good source of protein.
Vitamins from Veggies:
Traditionally pad Thai consists of a lot of vegetables, and it especially has a lot of bean sprouts. These vegetables are excellent sources of various types of vitamins and minerals that are essential to keep your body healthy and fight off diseases.
You may also be able to add extra vegetables to your pad Thai when ordering to make your meal more nutritionally rich!
Frequently Asked Questions (FAQs)
Is it okay to have Pad Thai when you’re trying to lose weight?
No, because pad Thai has a very high amount of sodium and can have even more than 1000 calories per serving.
What are the healthiest Thai dishes?
While Pad Thai is certainly unhealthy usually, there are a lot of very healthy and nutritional Thai dishes. They include Yum Talay, Khao man gai, and tom yum goong.
Is Pad Thai or Pad See Ew healthier?
Neither of these dishes is very healthy, but since Pad See has fewer calories than Pad Thai, we would say it’s a bit healthier.
Why is Pad Thai so high in sodium?
Pad Thai includes ingredients such as fish sauce, soy sauce along with table salt for flavor, and they massively increase the sodium content.
Ways to Make Pad Thai Healthy
It’s very easy to make pad Thai healthy while retaining all of its great flavors. You should consider making pad Thai at home instead of ordering in so you can customize it according to your diet plan.
One of the first things that you should do is reduce the amount of oil used, and you could also use a healthier oil such as avocado oil or olive oil. You can also air fry your chicken, shrimp, and vegetables to make the dish less oily.
Adding extra vegetables is always a plus in terms of nutrition, and when cooked properly they can make your pad Thai even more delicious. You should also try to use more lean proteins, such as chicken breast in your dish.
Lastly, use less salt to season the pad Thai so the sodium content in your pad Thai isn’t as crazy as it is in the ones you can find at restaurants.
Conclusion
After reading our article, you might think that pad Thai is a very unhealthy option for your meal. While that is partially true, we must add that it can be a healthier option if you follow the tips we have written above.
To summarize the answer to the question – is pad Thai healthy, it is generally quite unhealthy but can be made healthier if you choose to cook and add fewer harmful ingredients.
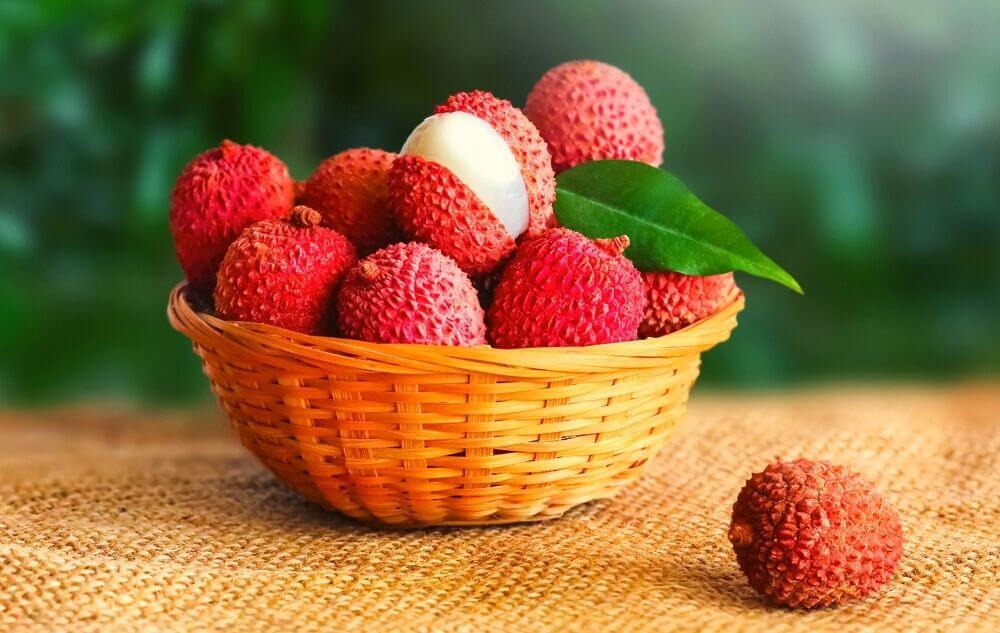
Rambutan and lychee are very similar looking fruits that can be found in anything from desserts to martinis. As members of the Sapindaceae family, lychee and rambutan are considered cousin fruits.
They are two of the most common Asian tropical fruits, highly popular among travelers around the world. However, due to several reasons, people often get confused identifying which is which.
So here, we’ve written this Rambutan vs Lychee comparison to make it easier for you to decide between the two based on the origin, appearance, flavor.
Are you excited to learn about the differences? Then scroll down further to know more!
According to legend, during Chinese dynasties, royal families would ask their servants to include lychees in their meal almost every other day! They believed lychees contain the benefits to enhance beauty. For this reason, in China; lychee is considered a royal fruit.
Whereas rambutans could be found everywhere, and due to their availability, it was considered a casual fruit.
Lychee
Let’s start with the more popular fruit, lychee.
Origin:
Most Asian markets and some supermarket stores carry fresh lychees.
The lychee tree (Litchi chinensis), which is native to southern China, produces lychee fruit. In Thailand, lychees, which are native to a tree with the same name, are also popular fruit.
Despite its origins in China, the tree is widely farmed in Southeast Asia. From the Indian subcontinent to the Hawaiian Islands, numerous diverse varieties are cultivated all over the world.
Appearance:
Small, pink-red lychee fruits have a tough leathery skin that you can’t consume. When you remove the red outer shell of lychee fruit, you’ll find soft and translucent flesh.
It is somewhat sour with a floral aroma of fruit that surrounds a single big seed inside. Clusters of three to 50 lychees can be found in each bunch.
Flavor:
Lychees have a sweet and fragrant flavor. To some people, it almost tastes like a grape with a trace of rose, while others think it tastes like a watermelon. In terms of pairing with other tropical flavors, the lychee’s sweetness and tartness make it ideal.
Despite the fruit’s modest sweetness, the luscious, succulent texture makes it a delight to eat in the summer. In addition, the fruit’s peel and the seed should not be consumed.
As the name suggests, it’s native to Southeast Asia and abundantly grown in Malaysia, Thailand, and Indonesia, where the rambutan tree thrives.
Appearance:
Large clusters of rambutan fruits, each roughly the size of a golf ball, can be found in the wild. It’s red and hairy because of the fleshy flexible ‘spines’ covering the skin. Rambutan is oval or circular in shape.
Because of its distinctive prickly hairs sprouting from its outer skin, the rambutan is recognizable. With their enormous grape-like arils and fragrant flavor, rambutan fruits are easy to identify once they’re peeled as well.
However, it does have a somewhat lychee-like appearance after peeling, which is one reason to compare both fruits.
Flavor:
With a tinge of tartness, the flavor of rambutan is primarily sweet. That’s why it is generally described as sweet and creamy.
Like dragon fruit, rambutan has a creamy texture and a strong scent. Whereas lychee is not as sweet or creamy. Rambutan also feels to be a little drier.
See? You have already found some similarities and differences.
Both rambutan and lychee have creamy white flesh with glossy brown seeds in the core which makes it difficult to differentiate between the two.
They are all part of the same family of plants: the Sapindaceae.
Trees produce lychee and rambutan. Both trees’ leaves never lose their color.
The type of lychee or rambutan, as well as the soil in which it is grown, determines its color.
You can enjoy rambutan and lychee in many similar ways: as a snack, as an addition to your salad, in your morning smoothie.
Antioxidants, including polyphenols, as well as vitamins C and potassium, are abundant in both fruits, which mature from green to red pink.
They don’t require any preparation and can even be consumed directly.
Both prefer an environment with plenty of sunshine and no risk of frost. They can survive in either a tropical or subtropical climate.
Various juices, jams, syrups, and cocktails are all made with fruits, which are noted for their flavor.
The fruit should be kept on the tree until it is fully matured before picking it. Once the fruit has been plucked from the tree, it will no longer ripen.
Rambutan vs Lychee: the Differences
While both fruits have bumpy pinkish-red skin, rambutan’s hairs are flexible and electric orange and green in color, whilst lychees are not.
Compared to rambutans, lychees are smaller. The seeds of this plant are similarly very tiny.
Rambutan and lychee have distinct scents and levels of sweetness to the discerning soapberry fan.
The lychee’s exterior skin is tougher than the rambutan’s. It’s because of this quirk that the lychee’s outer sheath is so easily brittle.
A lychee tree can get rather large, though not as large as a rambutan tree.
Both fruits differ in the amount some nutritional calories. Rambutan has 123 calories per serving, while lychee has only 66 calories per serving.
Grab Some for Yourself Now!
Now you have got the results of rambutan Vs lychee debate. You should be able to differentiate between them from now on. Recall that they are really different from one another when it comes to their skin. But there are also many similarities.
And the most important one is that both of them are fantastic selections, delicious and healthy.
Since everyone’s tastes differ, it is highly recommended to conduct a taste test. It’s possible that you’ll prefer one over the other. Both fruits have similar nutritional profiles, so it may be a matter of convenience.
Frequently Asked Questions (FAQs)
Do rambutans taste like lychee?
Yes, they do have a similar taste.
Is rambutan healthy to eat?
Yes, certainly. It’s full of vitamin C and plays a vital role in combating free radicals.
Is it OK to eat rambutan every day?
It’s recommended as its fiber and vitamin C are really good for your health.