Tapioca is arguably one of the healthiest flour alternatives and is widely used on various weight loss and healthy diets. But is tapioca the best option for those who are allergic to gluten or want to avoid gluten in their diet? Is tapioca gluten free?
To get straight to the point, tapioca is not only healthy but, without any doubt, one of the best gluten free substances that you can add to your diet.
It is made directly from starch, and there is no trace of gluten in it, even though it works as an alternative to some of the most gluten high food components.
So, how good is tapioca as a gluten free substance? That’s what we will break down in this article.
Before we can dive into what tapioca is and how it is made, we need to understand what gluten is and why it negatively influences people’s health.
To start off, gluten is the standard name for proteins or prolamins that are found in grains such as wheat, rye, and barley. The main purpose of it is to maintain or hold the shape of foods; this is due to the fact that gluten has high elasticity. For this reason, they are often used in bread and cakes.
Well, many have to avoid gluten due to certain health conditions and allergies like celiac disease and such. But medical experts have supported the fact that you should avoid gluten-based food if you can.
While gluten has a few positive impacts on your health and body, most of it can be gained through other healthier diet options.
You will also end up facing bloating and fatigue issues if you start to eat too much gluten. And even for those who aren’t affected by celiac disease, consuming gluten can trigger gastrointestinal irritation.
But does this mean you will have to quit foods that require gluten to be made, like bread and cakes? No, and that is where tapioca comes in.
What Is Tapioca?
Tapioca or tapioca starch is originated from cassava roots located in South America. It is a starch extract of the cassava root that can be a great alternative to gluten. And because of that, it doesn’t have the drawbacks of gluten but can provide the necessary elasticity support that gluten offers.
Generally, tapioca is used as a thickening agent in foods like puddings, cakes, bread, sauces. It provides a soft, fluffy, and light texture to your baked goods. And as it doesn’t contain any sort of gluten, it can be a great addition to a healthy diet.
How Tapioca Is Made?
Unlike flours that are made from wheat, tapioca flour or powder is made through a different process. Generally, tapioca is made from grinding and squeezing out the liquid of the cassava roots.
Once all the liquid is extracted, the starch is left to dry out. After the drying process is complete, you will be left with tapioca powder.
Why Is Tapioca Gluten Free?
Now, you might be wondering if tapioca acts similar to gluten, then how come it can be gluten free at the same time? Well, gluten, as mentioned before, comes from grains such as wheat, where tapioca is a starch extracted from cassava roots.
What’s more, gluten is made of protein, whereas tapioca is starch, meaning it is made of carbohydrates.
While both protein and carbohydrates are base nutrients that are required for the body, their structures and usage are entirely different. And have no similarities between them.
Thus, we can come to the conclusion that tapioca is completely gluten free because the base components of tapioca and gluten are entirely different.
Benefits of Tapioca
There is no doubt that tapioca can be an excellent replacement for gluten in your diet. But this is not the only reason you should consider adding tapioca to your meals. Tapioca has a few more positive impacts on your body that you might not know of.
Here are the benefits that you will enjoy after adding tapioca to your diet:
Tapioca comes with a good amount of dietary fiber, which helps the body to digest food smoothly.
It offers a rich amount of healthy carbs, an excellent option for those who want to gain some weight.
As it is made of starch, tapioca feeds the gut bacteria, which helps our intestinal functions and strengthens the digestive system.
Due to tapioca being gluten free, you won’t have to worry about allergies that are associated with flours.
Tapioca is also very low in fats, so you won’t have to worry about your cholesterols getting high if you plan a tapioca-based diet.
Some studies have shown that tapioca can act as a cure for headaches and migraines.
Tapioca is also regarded as a remedy to skin-related issues like scars, dark spots, dullness, dehydration, hair problems, and more.
Since it’s gluten-free, you can eat it even if you have celiac disease.
Can Vegans eat tapioca?
Yes, they can as it’s a vegan item.
Get the Best Gluten Free Experience with Tapioca!
Tapioca, without any doubt, will be a great addition to your diet and will help you to lead a healthy life. We are confident that if you have come this far in the article, then you already know how good tapioca is and how it can affect your health.
Hopefully, this answers all your concerns regarding the question— is tapioca gluten free?
So, start adding tapioca to your diet and experience the effects of a gluten free diet right away!
Cakes are usually the best comfort food alongside ice cream, especially when you are craving something sweet. You’re probably one of those people who needs to have a slice of cake for dessert on a regular basis. But you might be looking for a healthier option.
So, is carrot cake good for you? I mean who wouldn’t think it’s healthy? It’s a cake with vegetables, it probably must be healthy, right? I wouldn’t be so sure about that.
We are here to give the answer to your question, alongside a detailed breakdown of the health benefits and downsides of Carrot Cake and possible options to make it better for you. So, keep on reading!
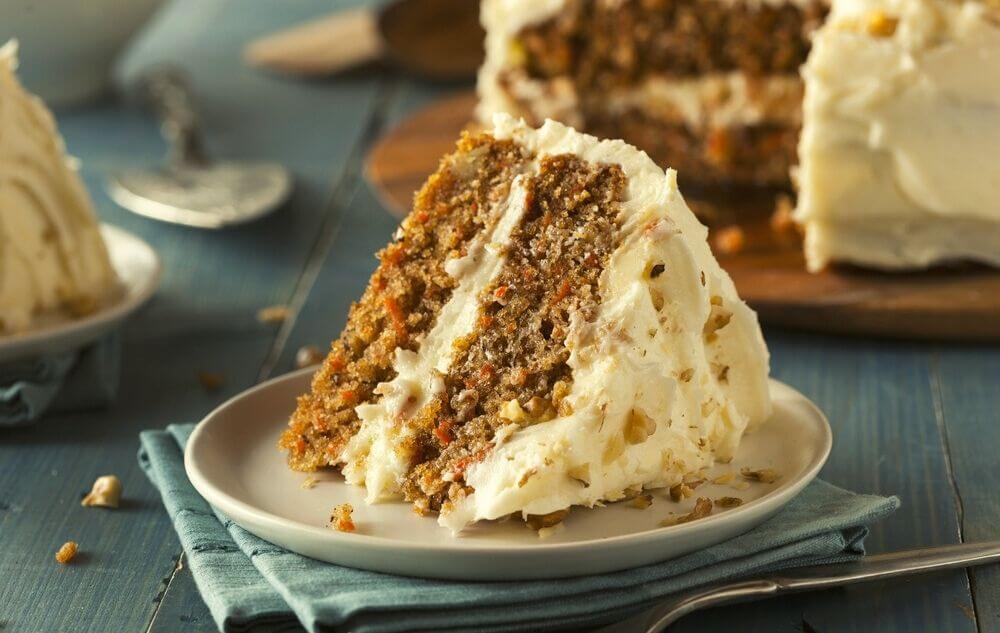
A carrot cake might contain healthy ingredients such as carrots or nuts, but chances are most of the nutritional benefits of the raw food are lost through processing.
In addition to that, carrot cakes are usually filled with more sugar and fat. Usually, one slice of 92g carrot cake with cream cheese frosting can contain up to 650 calories! Yes, that’s right, it’s almost half of your calorie count for the entire day of 1500 calorie diet.
On top of that, each serving of this cake consists of around 53 percent of fat, 3 percent protein, and 44 percent of carbs. So, if you think of substituting your regular slice of chocolate cake with a slice of carrot cake, then you might consider rethinking your situation.
Downsides of Carrot Cake:
This high sugar-based cake may contain some added nutrition from carrots and nuts, pineapple, and raisins as well if you do prefer adding them. However, the nutrition may get lost amidst all the fat and sugar.
Not to mention that having a slice of carrot cake by thinking it is probably the healthier option on a regular basis may not be a wise decision. This is because this may likely lead to chronic diseases such as Diabetes.
Moreover, it is most definitely going to make you gain some pounds within a very short period of time.
This carrot cake is one of the most deceptive desserts despite its healthy elements. Hence the moral of the story is that it’s not healthy. However, we can make it a lot healthier by substituting a few ingredients.
Using Natural Sweeteners:
The sweet luscious taste of Carrot Cake along with the cream cheese frosting, is one of the best parts of this cake. However, the large amount of sugar is the greatest issue due to the drawbacks associated with too much sugar.
Therefore, you don’t want to get carried away with adding heaps of sugar. But you can always include your natural options. In such cases, you can use canned crushed pineapple as a natural sweetener.
This will not only eliminate the downsides of artificial sugar but also add some fiber and antioxidants along with it, which is not available with added sugar.
Try Using Healthier Flour Options:
The traditional and classic recipe for a carrot cake recommends using All-purpose flour. However, it’s not the healthier option. If you want to add a boost of fiber while keeping the cake batter tender, try using Whole-wheat flour instead.
Even better, if you want to use a gluten-free option, try using Almond flour. Its nutty flavor enhances the overall taste of the cake when mixed with carrots and spices.
Swap Your Frostings:
Taking out your cream cheese frosting from the equation is not a viable option, so don’t be scared! However, we do recommend using reduced-fat cream cheese with a dash of Greek yogurt. Or use ¼ cup of powdered sugar instead of the 14 cups!
This substitute frosting makes it a bit suitable for consumption for Diabetics as well. If you’re looking for a vegan option, we got your back as well! Try swapping your regular cream cheese frosting with coconut cream frosting. You will not regret it!
Add Some Nuts for the Extra Boost of Nutrition!
If you want to add more nutrients to your carrot cake, you can always add some toasted Walnuts or Pecan. These nuts contain high content of fiber and protein, which is not only fulfilling but also a good source of Omega-3 ALA, which is good for heart.
In addition to that, it also enhances the flavor of the cake, which is a plus, I’m sure!
Is Carrot Cake Healthy as an alternative to other types of cakes?
The carrots and nuts (if you do add them) are a great source of nutrients, which is not present in other types of cake, such as Chocolate cake. In that sense, it can be considered a healthy alternative. However, sugar can eliminate the benefits.
Is Carrot Cake high in sugar?
Yes, Carrot cakes can be quite high in sugar. Don’t be fooled by the addition of vegetables in this sneaky dessert! A slice of carrot cake with a cream cheese frosting can be around 650 calories!
What are the benefits of Carrot Cake?
Carrots contain vitamins and minerals such as beta-carotene and lycopene, which are essential for ocular health. So, carrot cakes can be beneficial for keeping your eyes healthy.
How many calories are in a slice of Carrot Cake without the frosting?
A slice of carrot cake without the cream cheese frosting is usually around 240 calories. However, the frosting is the best part when eaten with the cake together.
Conclusion
This classic Easter and Spring Celebrations cake can be amazingly delicious but deceptive as well. So, is carrot cake good for you? I would say no. No cakes, in a sense, are healthy as they’re full of sugar.
Cakes are usually unhealthy, but I can imagine why people might perceive carrot cake as a better option. I get it, it has vegetables! It must be good, right? Well, not really, and now you know why!
However, you can obviously do some tweaking and swapping to make it the healthier version it can be without losing all the taste!
Tyson Foods is a modern and protein-focused food manufacturing company that produces almost 20% of the beef, pork, and chicken consumed in the United States. You may have been recommended to try out their chicken. And if you are about to try it out, you might be thinking: Is Tyson chicken healthy?
Yes, it is! The brand claims that they are mildly processed and made with 100% natural ingredients. Antibiotics aren’t in them either. Tyson’s “100% natural” chicken nuggets have 17 grams of fat and 470 milligrams of sodium.
While researching, you might find it challenging to figure out its health benefits, common myths, essential answers to the FAQs, and how to cook. In this article, we will look into them in detail.
Tyson chicken is very delicious, without any doubt. As a health-conscious person, you must look into its health perks too. Let’s figure it out:
Aids in Weight Management:
Tyson chickens have more to offer than just a complete protein source if you’re wondering if it’s healthy or not. If you eat a lot of chicken every day, you’ll reap several advantages. For starters, you’ll feel less hungry and eat less as a result.
Eating less prevents you from snacking as much, leading to bad habits and overeating later in the day. You’re more likely to get out and get some exercise, which is good for your health and helps you lose weight.
Consider chicken if you’re looking for high-quality protein. This is because chicken is low in calories and high in protein. You don’t have to worry about consuming extra calories if they’re lean. Moreover, protein is abundant in lean meat, which aids in the development of muscle mass and the reduction of body fat.
Chicken can be a really good source of protein for those trying to shed some pounds, as it’s fat portion is lesser than other meats.
To be safe, always check the label to see how much fat is in the lean chicken you’re purchasing.
The Grains:
If you’re curious about the nutritional value of the nuggets, it’s worthwhile to read the labels carefully. If the ingredients are authentic and natural, it will be better for your health.
Vegetables, rice, and grain should all be listed there. The nuggets are quite rich in nutrition but low in calories, so you’ll get the necessary protein without consuming a ton of sugar.
To find out the nutritional information, we need to know its ingredients. There are four types of chicken nuggets that Tyson produces. They are –
Air Fried Chicken Nuggets
Breaded Chicken Nuggets
Fun Nuggets
Tyson Panko Chicken Nuggets
Ingredients:
Boneless, skinless chicken breast with rib meat
Wheat flour
Brown sugar
Canola oil
Chicken broth powder
Dried Natural yeast flavors
Sugar
Paprika
Values per 100g
Air Fried Chicken Nuggets
Breaded Chicken Nuggets
Fun Nuggets
Tyson Panko Chicken Nuggets
Calories
188 kcal
300 kcal
234 kcal
235 kcal
Total Fat
4.7g
18.8g
14.3g
14.1g
Cholesterol
41mg
44.4mg
39mg
41mg
Sodium
612mg
522mg
623mg
447mg
Carbohydrates
18g
16.6g
13g
14g
Fiber
1.2g
0g
1.3g
0g
Protein
18g
15.5g
13g
14g
Iron
1.2mg
0mg
1.29mg
1.17mg
Calorie Contents:
The nuggets contain 300 kcal per 100g. So, it has around 54 calories per nugget. If you want to consume less calories, you should air-fry them.
Carbohydrate Contents:
Tyson fun nuggets contain 13g of carbs. On the other hand, Tyson’s air-fried nuggets contain 18g of carbs. So, it’s totally on you whether you choose the low carb or high carb.
The chicken nuggets themselves contain sugar. So, it boosts the carb level. It contains 0.5 teaspoons of sugar in 100g nuggets.
Sodium Contents:
Our daily sodium consumption limit is 2300mg (according to FDA). The Panko Chicken Nuggets contain 17% of that, making the nuggets rich in sodium. The other nuggets have 20% sodium in them.
Fat Contents:
Breaded Chicken Nuggets of Tyson has the highest amount fat percentage. It contains 18g of fat per 100g serving. However, Air Fried Nuggets contain only 4.7g of fat per 100g serving. If you prefer a low-calorie diet, this should be the best option for you.
Frequently Asked Questions (FAQs)
Can I eat Tyson Chicken on Keto?
The nuggets ingredients include starch, flour, and sugar. These ingredients are not a good for keto diet as it has restrictions on carbohydrate or any kind of fat content.
Are Tyson Chicken Nuggets processed?
Yes, of course.
Are Tyson Chicken Nuggets suitable for weight loss?
If you have a problem with fats or calories, you can opt for the Air Fried Chicken option, as they have the lowest fat and calorie percentage.
Does Tyson Chicken contain any antibiotics?
In 2007, Tyson declared all of its poultry meat to be an antibiotic, hormone, and artificial ingredient free.
Conclusion
Tyson is a renowned company that produces these four types of chicken nuggets. They are very much tasty without any doubt. But people are often puzzled to find out their health benefits.
As they are processed, there may be some issues related to health for some people who are following some specific diet charts like keto. But in other cases, they are a high source of protein and other essential nutrients.
If your question is, is Tyson chicken healthy, the answer is definitely ‘yes.’ There are many myths about them, like – they are not fresh or convenient, etc. But actually, they can add a boost to your nutritious lifestyle.
Did you know that Oreos were invented just a month before the Titanic sank? And if you’re wondering, no, the nutritional value of Oreos has nothing to do with how the mighty ship went down.
These delectable cookies are famous worldwide, but are Oreos healthy? The basic deduction you can make from this question is shockingly just the tip of the iceberg.
Oreos have become so popular that they went from being just a cookie to a significant flavor in cakes, cheesecakes, ice-cream, milkshakes, and possibly every dessert. Since Oreo is devoured so much in many ways, let’s see how safe these are to eat.
Oreos: Sandwich Cookies or Sugar Sandwiches?
Have you ever wondered what the primary ingredient in Oreos is that makes it everyone’s favorite cookie? You’ve guessed it correctly – it’s all sugar.
Diabetes has Entered the Chat:
When the digestive system breaks down sugar, it releases immediate energy. It gets stored as fat in the body very fast. An excess of this results in prolonged fat storage in the liver and under the skin. To an extent, this sweet component is something your body still needs to regulate blood sugar levels, but in limited amounts.
A surplus of sugar in the blood is directly linked to type 2 diabetes. Your pancreas does a lot of work to release insulin which helps break down the sugar into energy. But when there is too much, this organ has to work harder, and insulin gets into your bloodstream.
You might not hear it, but your pancreas curses you every time you take a bite from that sinful, edible disc. Oreos have 28% added sugars per serving, just three cookies. This snack is addictive like a drug, so can you imagine how much sugar you’ll consume in one sitting?
Sugar is Not Everything Nice:
What tastes good and sweet is still bad for you, just like all the other pleasant things in life. If you were to look for something sweeter than sugar itself, the answer is Oreos, hands down.
You will be surprised to know that Oreos are composed of two different types of sugar – juice obtained from evaporated sugar cane and high-fructose corn syrup.
Besides damage to vital organs, the unwanted amount of sweetness present in Oreos adds up to heaps of calories. Almost every person conscious about their health knows that calories are the most significant contributor to extra weight.
Apart from the risk of diabetes, highly sweet foods can cause kidney failure. And when there are two types of sugars in a single cookie, it is out of the question.
When the blood sugar level is too high, the kidneys cannot filter out the excess sugar, leaving traces of glucose in urine. Purifying the toxins becomes too difficult and eventually damages the kidneys. So. you may have already gathered how Oreos contribute to this.
“Only Oreo”? More like “only fat”
Another primary ingredient in Oreos is hydrogenated oil. This is a type of oil into which hydrogen is added to make it into solid fat. This helps packaged food products to last longer without spoiling.
So, you might be wondering, what harm can a bit of solid fat do? This type of oil causes your body’s LDL cholesterol, commonly known as the “bad” cholesterol level, to rise, which is a high-risk factor for heart attacks.
Not only does this cookie give you more fat deposits, but a whole bunch of bad calories as well. Studies have shown that consuming too many sweets causes nearly a 2-pound weight gain in less than a month.
If you plan to eat clean and lose some pounds, Oreos are not your friend. It is essential to cut off toxic friends from your life to live peacefully.
The Heart Doesn’t Always Want What it Wants:
Too much sugar in your diet causes insulin imbalance and mixes with your blood cells. The chemical components in insulin make the artery walls in the heart inflamed and thickened. Besides, the fat deposits caused by extra glucose further blocks those structures.
Consequently, blood pressure shoots up, and the risk of heart attack is imminent. And this is how the tragic story of cardiovascular diseases begins. If you follow your heart, you’ll want Oreos. But if you genuinely listen to your heart, it wants those cookies entirely out of sight.
So…are Oreos healthy?
If you’ve come this far and are still looking for some hope, I’ve got bad news for you; Oreo isn’t healthy.
Zero Health Benefits:
Oreos basically has no nutritional value. The prime ingredients are sugar, fat, and a bunch of calories. On top of that, the constituent ratios do not make it a balanced meal either.
Also, Oreos are the ultimate definition of junk food. There is not even a single nutritious component that is good for your health. One serving has an excess amount of sodium and close to zero protein.
Unrealistic Portion Amount:
The package says that the standard serving size is three cookies. Even for such a small portion, the fat and calorie content are exceptionally high. And considering how delicious this product is, it is doubtful anyone will eat just three cookies.
The Milk Doesn’t Help:
As the product tagline claims, “milk’s favorite cookie,” there is nothing to disagree about that. The combination is just exquisite.
Meanwhile, dairy is an excellent source of calcium but also contains fat. Adding that fat with the amount present in Oreos, the overall sum of calories is soaring.
This could also be a clever marketing strategy for the brand. The cookie was developed so that it pairs best with a cold glass of milk. Knowing how unique this fusion is, people will keep buying Oreos to enjoy this mix as much as they can.
“Wonder filled” but not filling:
Let’s face it, no parts of the Oreo taste bad. The luscious, dark chocolate biscuits with creamy goodness sandwiched in between – the entire cookie is just perfection.
This is why just 2 or 3 pieces are never enough. When you are starving and looking for a hearty snack, just a few Oreos won’t make you full. You will devour a full standard serving size and still be left with an empty stomach and panging hunger.
Ironically, sweet foods give us immediate energy. You might feel momentarily invigorated, but your taste buds will crave more. Oreos are just simply addicting and not in a good way.
Frequently Asked Questions (FAQs)
Are the vegan and gluten-free Oreos safe for your health?
As these Oreo types are only safe for people with gluten allergies and those who are vegan, they still contain an immense amount of sugar and calories. So. a standard serving of these types is still as unhealthy as the regular version of Oreos.
Are Oreos halal?
Oreos have been found to have pork-based gelatin, which is not halal for Muslim people. But the ones manufactured in Middle Eastern countries contain plant-based gelatin, which is safe for Muslims to consume.
Why are Oreos so popular if they are so unhealthy?
Regardless of the nonexistent health benefits, the company has managed to market its product in unique ways, which have captured the eyes of everyone worldwide.
The unique design makes it very eye-catching for small children.
Is it okay to just eat the cream filling and not the biscuit part of Oreos?
The Oreo cream filling contains the most sugar, artificial flavoring, and fat. So, you are not doing yourself a favor by throwing away the hard biscuit parts if you are on a diet.
Final Words
Oreos usually come first in mind when you think of a sweet treat, be it a quick fix or an added flavor to a fancy, elaborate dessert. It has won the hearts (and tongues) of millions worldwide. But too much of anything isn’t good, so when health comes in question, you wonder – are Oreos healthy?
The quick answer is no, unfortunately. But this shouldn’t mean that Oreos are necessarily bad. If you can curb your cravings, just two or three of these cookies once in a while won’t hurt at all.
Sugar activates the happy chemicals in our brain. But it’s up to you how you want to trigger that happiness because that feeling of contentment comes at a cost.
Weight is a controversial topic at best, especially in this era of body positivity and self-love. However, from time to time, for some people losing weight might not be a matter of choice but a necessity.
The reason is that an overinflated weight or Body Mass Index (BMI) is usually associated with chronic diseases. Whether it’s a choice or necessity, you’re probably looking to lose weight fast; however, you’re unsure how much you should lose.
You’re probably wondering, “Hmm, is losing 20 pounds in a month healthy?”. “Should I try and lose more or less than that?”.
We are here to give you a detailed breakdown of the impact of losing 20 pounds on your body. So, keep on reading!
Is Losing 20 Pounds in a Month Healthy? – How much can you lose?
Losing up to 1 or 2 pounds per week is considered healthy by the Centers for Disease Control and Prevention (CDC). Hence, dieticians typically recommend reducing 4 to 8 pounds per month. Find out how to lose 10 pounds in a month here!
However, that doesn’t mean you can’t lose more. You probably can, but it’s not recommended for a reason, which is explained below:
Let’s Talk about Numbers and Calories
You gained a bit of weight over Thanksgiving and Christmas, or maybe amidst the pandemic when everyone was home-bound. Now that things are gradually settling down, you want to get back into shape and stop lazing around finally.
However, rushing to shed some pounds can be a bit problematic. A pound equates to 3,500 calories; hence to lose around 2 pounds per week, you would need to lose about 7,000 calories, which is acceptable.
Whenever you think about losing 20 pounds per month, that would mean burning 17,500 calories per week to lose around 5 pounds! That number is enormous and may need some serious dedication to achieve your goal.
Do you know what the sad part is? It is pretty easy to regain the pounds lost within a brief time. Even if you succeed in achieving your goal, chances are this number might not sustain in the long run.
Furthermore, losing those 20 pounds may pose some dire and adverse effects on your body as well. A proper meal-based plan and appropriate exercise regime will assist in losing weight and being healthy in the long run.
Consequences of Losing 20 Pounds Per Month
Let’s start with the physical issues you will face when losing too much weight too fast. Shedding pounds too quickly, especially by using starvation techniques, can have a counter effect and may gain more than what was initially lost.
Stress on the Body:
Apart from this, you will most certainly miss out on essential nutrients your body needs. Nutritional deficiencies such as a vitamin or mineral deficiency are likely to lead to the development of brittle hair and nails as long as hair loss.
In addition to that, taking in too few calories per day can lead to decreased energy leading to extreme fatigue. Moreover, the lack of nutritional deficiency will compromise your immune system, eventually leading to weakened bones and Osteoporosis.
Slowed Metabolism:
Furthermore, if that wasn’t bad enough, you will be slowing down your metabolism as your body goes into starvation mode. This is a defense mechanism when you cut down your calories rapidly.
When a limited supply of food is consumed, your body slows down the metabolism to help reserve energy and, as a result, hold onto fat more.
It Can Lead to More Eating!
I think we have established an understanding regarding the trade-off between consuming fewer calories than what is recommended. It’s going to mess up your immune system!
However, it may also become obsessed with food due to your insatiable hunger. Yes, you heard that right. Usually, quick fixes such as losing 20 pounds in a month mess up your leptin hormones responsible for hunger control.
Unbalanced leptin increases the chances of binge eating. Eventually, it leads to a perpetual cycle of an unhealthy obsession with food.
Impact on Your Mental Health:
Such quick fixes and rapid weight loss measures are likely to lead to an unhealthy obsession with eating. Considering how this global fixation regarding shedding pounds is overtaking the mind of youth, it’s no wonder eating disorders are at large.
Furthermore, this fixation might start small but may eventually develop detrimental eating disorders, such as anorexia, bulimia, body dysmorphia, etc.
What’s Your Actual Goal?
If you are looking to lose weight, it must be a way of increasing your self-confidence and doing better in life overall by being productive. In such cases, you should focus on the long-term gains.
Instead of jumping to the latest fad diets that promise you a loss of 20 pounds within a month, you should think of the consequences that such rapid weight loss brings. Not to mention such tactics are usually ineffective and not recommended by professionals.
You might opt for fast fixes and weight loss supplements in exchange for taking the long route. Still, you will be doing yourself a favor in the future with a more sustainable approach.
Frequently Asked Questions (FAQs)
How long should it take to lose 20 pounds?
To lose 20 pounds sustainably and healthily, it should take at least ten weeks, considering you lose 2 pounds each week. Anything less than that is likely to be unhealthy according to standards.
Is losing 20 pounds in a month too much?
It is possible to lose 20 pounds in a month. Still, it is likely to leadto health risks stemming from nutritional deficiencies, imbalance of hormones, muscle loss, etc.
Furthermore, it will also lower your metabolism and increase your cravings, harming your body.
What is considered rapid weight loss?
Losing more than 2 pounds or 1 Kg per week is considered rapid weight loss. This might lead to minor hair loss, dryness of skin, and feeling cold more frequently initially but may lead to dire consequences if it persists.
Can lack of sleep cause weight loss?
No, a lack of sleep will have the opposite effect. This is because not getting enough sleep increases the resistance to weight loss and the ability to store fat. Both these factors will deter you from losing weight.
Conclusion
If you ask if losing 20 pounds in a month is healthy, a logical answer would be it is not healthy, and for a good reason.
Just like the saying goes, “slow and steady wins the race” focus on taking small steps and adopting simple habits which are likely to provide accumulated change. It will also help to jump-start your weight loss journey more healthily.
Focus on sustainability in the long run. Short-term gains are for immediate gratification but will only get you so far.
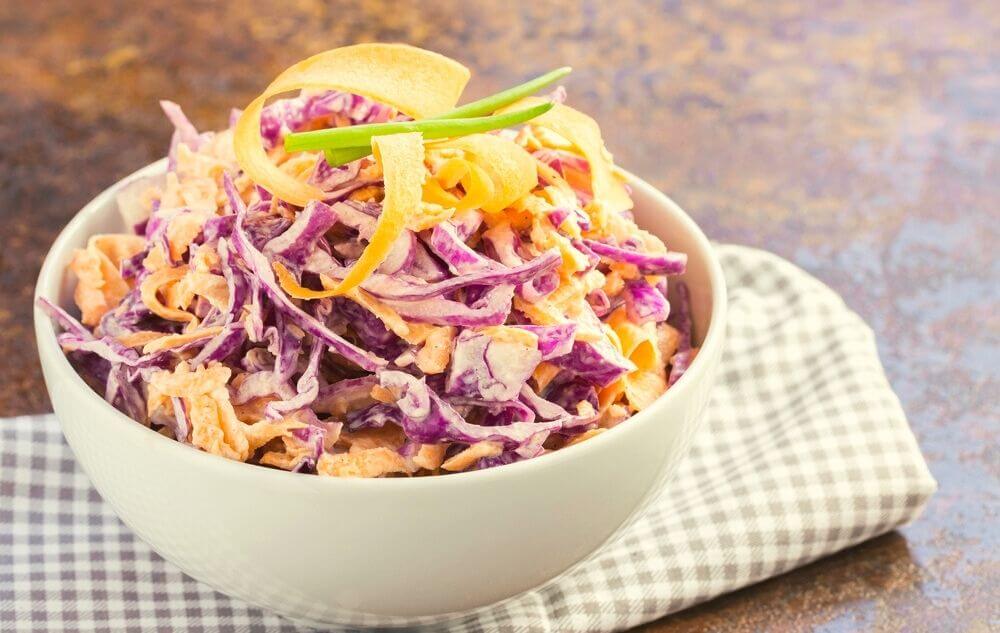
Coleslaw has been a popular side dish for centuries. What started as a refreshing and straightforward cabbage salad soon started coming in many different variations. Some chefs started using mayonnaise, and some even used cheese spread instead of the classic vinaigrette. So, many began to ask – is coleslaw healthy?
Our team has researched the different types of coleslaws to determine whether coleslaw is healthy or not. Thus, if you want to know whether or not to continue eating coleslaw – or the right portion, then keep reading!
A Little Bit About Coleslaw
The word coleslaw has been derived from the Dutch phrase “koosla,” which translates to ‘cabbage salad.’ While coleslaw’s origins can be tracked back to ancient Roman times, the recipe was formally invented back in 1770 by a Dutch cook.
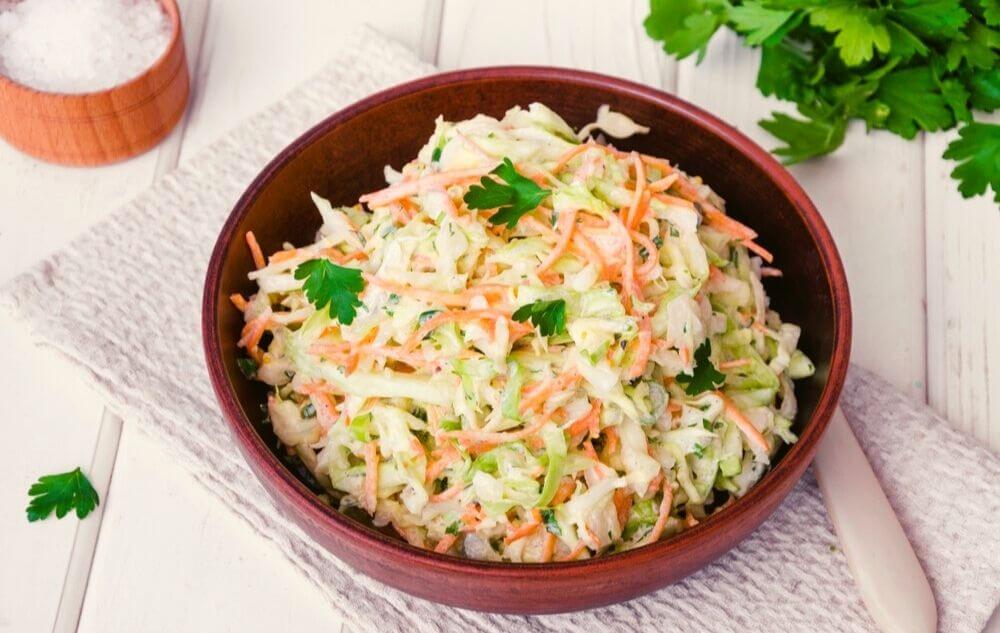
The recipe comprises shredded cabbage, butter, vinegar, and oil. But now you will find many variations, including other vegetables like carrots, apples, and more. As for the dressing, chefs nowadays use a variation of mayonnaise, mustard, and/or other spices.
We will give you a breakdown of a regular coleslaw that you can buy from a store to give you a rough idea of its nutrition. Store-bought coleslaws usually are prepared using mayonnaise, cabbage, onions, and carrots.
A normal 100gm serving contains the following:
0.8gm protein
153ug vitamin A
4mg vitamin E
1.2gm fiber
36mg calcium
156mg potassium
21mg phosphorus
173 calories
296mg sodium
16.3gm fat
The spike in the fat content is caused by mayonnaise as a dressing; however, it mainly comprises unsaturated fat. You can easily purchase the healthier version by opting for the ones made with low-fat mayonnaise – as it contains fewer calories.
Suppose you eat a regular serving of 100gm. This is all thanks to cabbage and plant oils in mayonnaise. In that case, it will provide you with the total recommended daily intake of vitamin E while also fulfilling around ¼ of your daily required vitamin A.
Tip: Always check the ingredients to ensure that the item does not include too many calories or salt. The daily recommended salt intake for adults is 6g at most. We’ve seen that many store-bought coleslaws have been made using almost ¼ of the daily allowance!
How to Incorporate Coleslaw into Your Healthy Diet
What we will suggest you do is make your coleslaw. Coleslaw was created to be a side dish; thus, eating a few tablespoons along with your main course should be fine.
At the same time, you can add more varieties of vegetables such as celery to add more nutrition to the dish. We’ll suggest adding fennel and chia seeds to take the dish to another healthy level.
This section will find some of the healthiest coleslaw recipes, which are all super easy to make.
Broccoli Slaw:
Adding or swapping broccolis for cabbages will give you a booster of iron, fiber, and vitamin K, E & A.
Ingredients:
1 cup shredded broccoli
1 apple shredded
¼ cup roughly chopped walnut
½ cup dried cranberries
½ cup chopped celery
¼ cup Greek yogurt
1 tbsp lemon juice
Salt as required
Put all the dry ingredients together and toss them for a while to get them mixed. Next, mix the yogurt with the lemon juice and pour it. Put a cover over the bowl and shake it vigorously for a minute, and there you have it – ready to be served.
This slaw is packed with nutrition and will keep you full for a long time, thanks to the addition of walnuts. You can have it on its own or pair it with a spicy meal such as BBQ.
Put the garlic, yogurt, tahini, and salt in the bowl and start mixing. Once you’re happy with the consistency of the dressing, add your veggies. Cover the bowl with a lid and toss it together until you get the dressing to coat the veggies properly. To loosen the thick paste, you may need to add a few tbsp of cold water.
This slaw, while being healthy, is also packed with flavors. You can pair it with grilled meat, burgers, or pulled meat.
Prawn Slaw:
If you are tired of the regular coleslaw and want to take the game to another level, you should surely give this recipe a shot!
Ingredients:
1 cup of shredded cabbage
1 cup of shredded carrot
100gm of sliced radish
½ cup of beansprouts
½ cup of cashew nuts
¼ cup of coriander leaves
100gm cooked or cured prawns
Juice & zest of 1 lime
1 tbsp sesame oil
2 tbsp sugar
1 red chili shopped
2 tsp of ginner shredded
When you want to eat it:
Pile the salad on a plate or bowl and place a handful of the prawn on it.
Put the lime juice and zest, sesame oil, chili, and ginger in a bowl and mix it well.
Next put the rest of the ingredients besides the prawn and toss it until it has adequately combined.
While you can easily eat it on its own as a whole meal – yes, that’s how packed with nutrition it is. Also, you can pair it with steak, fried protein, or make tacos with it! This slaw recipe can serve two.
Frequently Asked Questions (FAQs)
Is coleslaw healthy for weight loss?
If you choose the dressing carefully, it can easily be a part of your healthy weight loss diet.
Is coleslaw high in carbs?
Usually, the homemade coleslaw contains about 14 grams of carbs. However, the carb amount mainly depends on the amount of sugar.
There is a wide variety of coleslaw available in the market and recipes for you to explore. So, is coleslaw healthy? I would say yes, it’s good for your health. Should you incorporate it into your diet? We hope we were able to give you the needed information for you to decide for yourself.
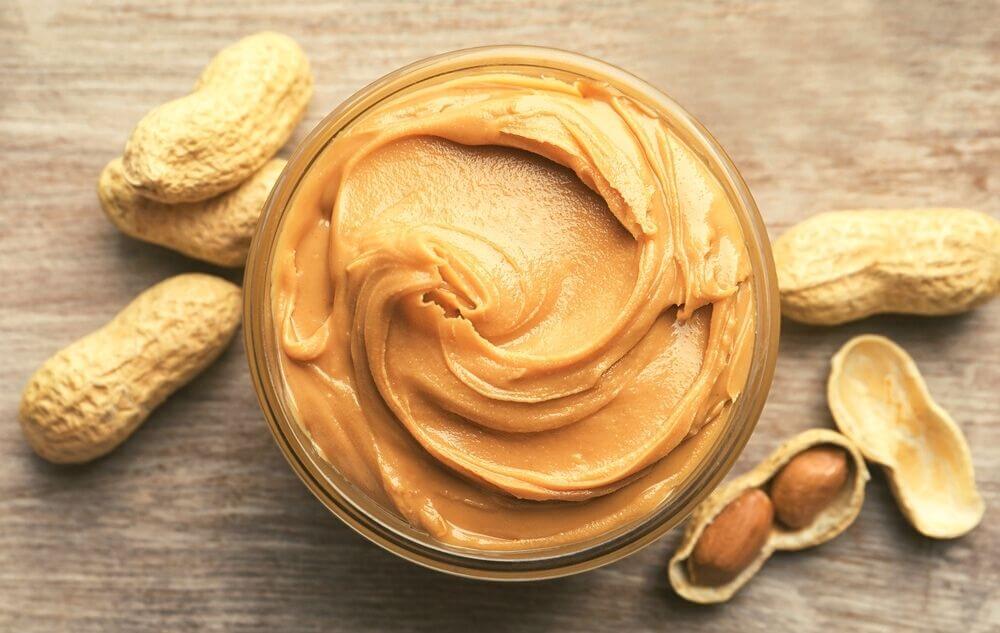
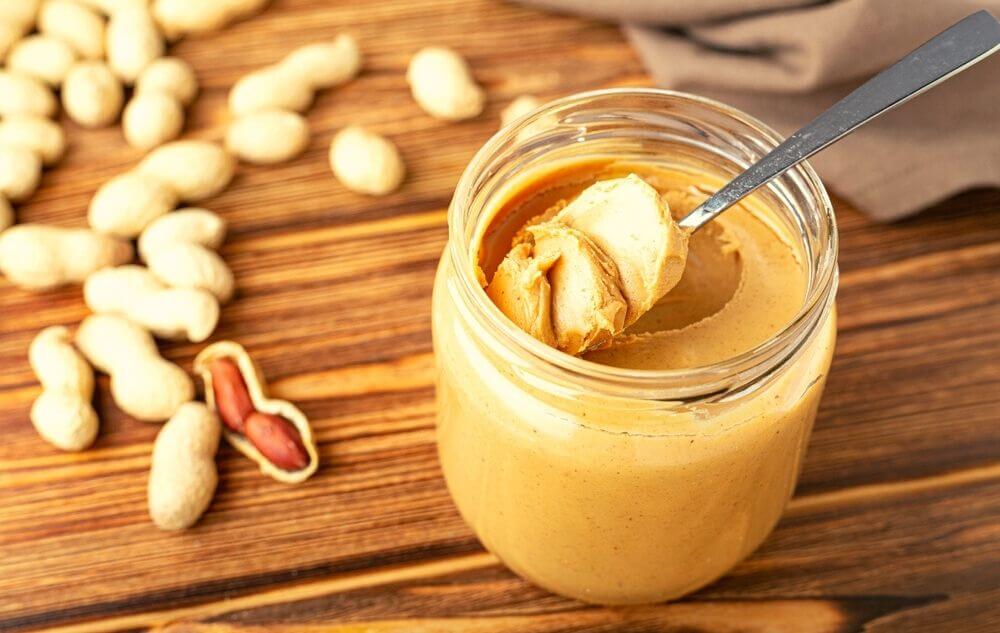
Peanut butter has earned its place as a staple food worldwide, loved for its creamy texture, rich flavor, and versatility. Whether spread on toast, blended into smoothies, or paired with fruits, it’s a go-to choice for breakfast, snacks, and even fitness meals. Beyond its taste, peanut butter is packed with nutrients like protein, healthy fats, and essential vitamins, making it a favorite among health enthusiasts.
But is peanut butter healthy? Peanut butter is healthy when consumed in moderation. It’s rich in protein, healthy fats, magnesium, and vitamin E, supporting heart health, energy, and muscle growth.
This article explores whether peanut butter is healthy to eat, delving into its benefits for weight management, heart health, and energy. It also highlights potential drawbacks, such as overconsumption risks and processed varieties with added sugars.
By the end, you’ll learn if it’s safe to eat peanut butter every day and how to incorporate it into a balanced diet while making the healthiest choices.
Nutritional Profile of Peanut Butter
Peanut butter is not just a tasty spread but also a nutrient powerhouse. It contains a balanced mix of macronutrients and essential micronutrients, making it a versatile and energy-rich food. Here’s a closer look at its nutritional profile.
Macronutrients in Peanut Butter
Protein Peanut butter is a significant source of plant-based protein, offering around 8 grams per 2-tablespoon serving. This makes it a popular choice for muscle repair and growth, especially among vegetarians and athletes.
Is Peanut Butter a Protein or Fat? While it contains protein, its high fat content makes it more of a fat source.
Fats (Healthy Fats) Approximately 50% of peanut butter’s calories come from fats, most of which are heart-healthy monounsaturated and polyunsaturated fats. These fats support heart health, reduce bad cholesterol, and provide lasting energy.
Saturated Fat: Peanut butter has about 3 grams per serving, so it’s important to consume it in moderation.
Carbohydrates Peanut butter is relatively low in carbs, with about 6-7 grams per serving, including 2 grams of fiber. Its low glycemic index makes it a suitable option for those managing blood sugar levels.
Peanut Butter Carbs: Its minimal carb content makes it keto- and diabetic-friendly when consumed without added sugars.
Micronutrients in Peanut Butter
Magnesium Peanut butter is a rich source of magnesium, providing around 50mg per serving (12% of the daily value). Magnesium supports muscle function, bone health, and energy production.
Keyword: Magnesium in peanut butter
Potassium With approximately 200mg per serving, peanut butter contributes to maintaining healthy blood pressure and proper muscle contractions.
Vitamin E Peanut butter contains about 2.5mg of vitamin E per serving (17% of the daily value), which is a powerful antioxidant that protects cells from damage and supports skin and immune health.
Peanut butter offers a well-rounded nutritional profile, combining protein, healthy fats, and essential micronutrients like magnesium and vitamin E. While it’s a calorie-dense food, its balance of nutrients makes it a valuable addition to a healthy diet when consumed in moderation.
How is Peanut Butter Made?
Making peanut butter is a tedious process that has undergone different changes since it was first made. Currently, the process consists of shelling the peanuts first. They are then dry roasted either by the batch or continuous method.
After the peanuts are done, they are cooled down inside a unique blow-cooler cylinder instead of leaving them to dry. There is still some oil and moisture left in the nuts.
The cooled peanuts then go through heat blanching or water blanching to remove any leftover outer shell. Once this step is done, they are sent for grinding. At this stage, the peanuts are sent through two different sizes of a grinder.
Moving on, the first one creates a medium grind, while the second one makes a fine texture. Inside the fine grinder, salt, sugar, and vegetable oil stabilizers are added, making the peanut butter’s final taste.
Once the peanut butter is ready, they have to be cooled down in a machine before being poured and sealed air-tight inside the jars.
Different extra elements like peanut chunks or chocolate chunks can be added to the grinding process to make the butter special. This is how peanut butter is made in the factories.
Peanut butter contains approximately 71% fats per 100 grams, meaning most of its calories come from fats. While this might seem excessive, the fats in peanut butter are primarily healthy and beneficial for the body.
Packed with Antioxidants
Peanuts are an excellent source of antioxidants, comparable to fruits. These antioxidants protect cells from free radicals, which can lead to conditions such as heart disease and cancer.
High-Quality Protein
Peanut butter provides around 25 grams of protein per 100 grams, making it a fantastic protein source. It’s particularly beneficial for individuals who avoid animal-based proteins, offering a plant-based alternative for meeting protein needs.
Boosts Energy Levels
Peanut butter helps maintain stable blood sugar levels and provides a satisfying combination of protein, fiber, and healthy fats. These nutrients supply an energy boost, making it an excellent choice to kick-start your day. Its sweet and salty flavor can also lift your mood.
Low in Carbohydrates
Despite being calorie-dense, peanut butter contains only a small amount of carbohydrates. This makes it a keto-friendly option for those following low-carb diets. Its low carb content also minimizes the risk of weight gain when consumed in moderation.
Rich in Essential Vitamins and Minerals
Peanut butter is packed with essential nutrients, including vitamins B and E, iron, potassium, manganese, and zinc. These vitamins and minerals are vital for maintaining overall health and keeping the body functioning optimally.
Peanut butter is not just delicious—it’s a powerhouse of nutrients that can enhance your diet when consumed wisely!
What are the Bad Bits of Peanut Butter?
Peanut butter indeed has some drawbacks from the good qualities listed above. Here are some of them you should know:
Saturated Fats:
While peanut butter is loaded with healthy fats, some saturated fats are also found in it. Intake of too much unsaturated fat can build up the cholesterol in our blood and cause blockage.
Potential Allergic Reactions:
A lot of people are allergic to peanuts. The percentage is gradually increasing among the children of western countries. Allergic reactions due to peanuts can be fatal.
It could also take you on a trip to the ER. So, if you have no clue about your allergies, you should get a check-up to avoid any accidents in the future.
Harmful Aflatoxin Source:
As peanuts are grown underground, they can be in contact with a widespread mold called Aspergillus. Unprocessed peanut butter is more likely to contain this, especially when they are made in underdeveloped environments.
Aflatoxin is a harmful substance that can lead to health hazards like liver cancer, delay in children’s mental development, or growth.
Risk of Gaining Weight:
As peanut butter is a high-calorie spread, there is also a significant risk of gaining weight. If you are worried about gaining weight, you should probably steer clear of peanut butter or keep the consumption to moderate amounts by properly planning your diet.
Choosing the Best Peanut Butter
Not all peanut butter is created equal. Choosing the right variety can make a significant difference in its health impact. From natural to organic options, here’s how to pick the best peanut butter for weight loss and overall well-being.
Natural vs Processed Peanut Butter
When it comes to health, natural peanut butter is the superior choice. Pure peanut butter is made from just peanuts, with no added sugars, hydrogenated oils, or preservatives. These additions, commonly found in processed varieties, can increase calorie content and diminish its nutritional value.
Natural Peanut Butter Benefits: It’s lower in unnecessary additives and retains more of the natural nutrients, such as healthy fats, protein, and fiber.
Processed Peanut Butter Concerns: Popular brands may include added sugar and oils, making them less ideal for weight loss or managing blood sugar levels.
Recommended Brands
When selecting a healthy option, look for peanut butter with minimal ingredients, ideally just peanuts and a pinch of salt. Some of the healthy peanut butter brands include:
Smucker’s Natural Peanut Butter: A classic choice for those seeking pure peanut butter with no additives.
Meridian Natural Peanut Butter: One of the healthiest peanut butter UK options, made with high-quality peanuts.
Justin’s Classic Peanut Butter: A premium choice with great flavor and a commitment to natural ingredients.
Organic and Specialty Options
For those seeking additional health benefits, organic peanut butter is a great choice. Organic varieties are made with peanuts grown without synthetic pesticides or fertilizers, ensuring a cleaner and more natural product.
Organic Peanut Butter Benefits: It’s free of harmful chemicals, supports sustainable farming practices, and may retain higher levels of nutrients.
Specialty Options: Brands like “Whole Earth Organic” and “Teddie All Natural Organic” are excellent for health-conscious consumers.
Choosing healthy peanut butter brands with simple, natural ingredients ensures you get the maximum nutritional value. Whether you opt for organic peanut butter or another natural variety, prioritize products free of unnecessary additives to support your health goals. These options are not only better for your body but also great for sustainable living.
Peanut butter’s high protein and healthy fat content make it filling, helping to curb cravings and promote satiety. Including it in a calorie-controlled diet can prevent overeating while providing essential nutrients.
Portion Control is Key: Stick to 1-2 tablespoons per serving to avoid excess calories.
Healthy Pairings: Combine peanut butter with apples or celery for a low-calorie, nutrient-rich snack. Peanut butter fruit benefits include added fiber and vitamins from fruits, making it a balanced choice.
Rye Bread Pairing: Spreading peanut butter on whole-grain or rye bread offers complex carbs and fiber, stabilizing blood sugar levels. Is peanut butter on rye bread healthy? Yes, this pairing provides sustained energy and is ideal for a balanced meal.
Peanut Butter for Bodybuilding
Peanut butter is a favorite among bodybuilders for its high calorie and nutrient density, making it perfect for muscle gain and recovery.
When to Eat Peanut Butter: Consume it as part of a pre- or post-workout meal to fuel workouts and support muscle repair. Peanut butter bodybuilding when to eat depends on personal goals, but adding it to a smoothie or spread on toast can deliver lasting energy.
Pre-Workout Snack: Pair with bananas for a quick energy boost. Isbanana and peanut butter healthy? Absolutely! This combo provides carbs for energy and protein for muscle support.
Post-Workout Meal: Add peanut butter to a protein shake or oatmeal to aid recovery and promote muscle growth.
Healthy Pairings and Recipes
Peanut butter shines when paired with nutrient-dense foods:
Bananas: Boosts potassium and energy.
Apples: Adds fiber and sweetness.
Rye Bread: Provides complex carbs and lasting satiety.
Peanut butter is a delicious and nutritious addition to weight loss diets, bodybuilding routines, and everyday meals. Pairing it with bananas, apples, or rye bread enhances its benefits, making it a versatile option for various health goals.
What Do You Think – Is Peanut Butter Healthy?
Peanut butter can be a healthy choice when eaten in moderation and as part of a balanced diet. It’s packed with protein, healthy monounsaturated fats, and essential nutrients like magnesium, potassium, and vitamin E. These benefits make it a great option for energy, muscle repair, and heart health.
However, not all peanut butter is created equal. Natural or minimally processed varieties without added sugars, hydrogenated oils, or excessive salt are the healthiest options. Overeating peanut butter can lead to excess calorie intake, so portion control is key.
Frequently Asked Questions (FAQs)
People have a lot of common questions about peanut butter. Here are some FAQs relating to peanut butter:
Does eating peanut butter make you fat?
Having peanut butter will not make you fat unless you have it in excess amounts (which is unlikely.)
Is it okay to have peanut butter every day?
Supposing you are a fan of peanut butter as your spread then no worries! You can have peanut butter every day. But remember, keep the amount in control!
Does peanut butter cause allergic reactions?
If you are allergic to peanuts, then, of course, you should steer clear of eating peanut butter. Allergic reactions due to peanuts can be quite severe.
How can you eat peanut butter?
If you’ve got a jar of peanut butter at home and want to do something creative with it, you’ll be happy to hear that peanut butter can be used for many recipes!
Peanut butter can be used in many dishes by making savory sauces mixed with oats, smoothies, ice cream, or other desserts!
Is Peanut Butter Healthy to Eat Every Day?
Yes, peanut butter can be healthy to eat daily if consumed in moderation. Its protein, healthy fats, and vitamins make it a nutritious option. However, portion control is essential to avoid excess calorie intake. For insights from real users, check out discussions on “Is peanut butter healthy Reddit” for varied opinions and personal experiences.
Is Peanut Butter Healthier Than Butter?
Peanut butter is generally healthier than butter due to its plant-based fats, which are rich in heart-healthy monounsaturated and polyunsaturated fats. Unlike butter, which is high in saturated fat, peanut butter offers added protein, fiber, and essential vitamins, making it a better choice for overall health.
Is Peanut Butter Good for Cholesterol?
Yes, peanut butter can support healthy cholesterol levels. Its monounsaturated fats help lower bad cholesterol (LDL) while maintaining good cholesterol (HDL). For heart health, choose natural, unsweetened varieties free of added oils or sugars. Is peanut butter good for cholesterol? Absolutely, when consumed in moderation.
Is Natural Peanut Butter Healthy?
Natural peanut butter is a healthier choice compared to processed varieties. It contains minimal ingredients, typically just peanuts and a pinch of salt, and avoids added sugars and hydrogenated oils. Is eating peanut butter healthy if it’s natural? Yes, it’s a nutrient-dense option.
Is Peanut Butter Healthy for Dogs?
Peanut butter can be a safe treat for dogs when given in small quantities. Avoid varieties with added sugar or xylitol, a toxic sweetener for pets. For dog-safe options, natural peanut butter is the best choice.
Final Words
Peanut butter is a delicious and versatile food with numerous health benefits. It’s rich in protein, healthy fats, and essential nutrients like magnesium and vitamin E, making it a great addition to a balanced diet. However, like any food, moderation is key. Consuming it in controlled portions helps you enjoy the benefits while avoiding potential drawbacks, such as excess calorie intake or added sugars found in processed varieties.
Understanding the pros and cons of eating peanut butter can help you make better dietary choices. Opt for natural, unsweetened peanut butter to avoid unnecessary additives and maximize its nutritional value. Pair it with healthy options like fruits, rye bread, or smoothies to complement your diet.
Is it safe to eat peanut butter every day? Absolutely, when consumed in moderation and as part of a balanced meal plan. Whether you’re looking to support weight management, build muscle, or enjoy a satisfying snack, peanut butter remains a healthy choice when selected wisely.
By prioritizing natural brands and practicing portion control, you can enjoy peanut butter’s health benefits while maintaining your overall wellness goals.
Smoothies are delicious drinks containing blended fruits, nuts, yogurt, and other nutritious ingredients. However, they can be problematic when trying to shed pounds.
So, are smoothies healthy?
Yes, smoothies are healthy because vitamins and minerals exist in smoothies made from natural fruits and vegetables. On the other hand, they are not ideal for weight loss due to their liquid nature and high sugar content. So, they are less satiating and hunger suppressing than solid calories.
Finding out its health benefits, recipes, and ways to tailor it nicely to your weight loss journey can be a problem. Here in this article, you will know about all of them precisely.
Let me ask you a question. Do fruit smoothies contribute to weight gain? The answer is that it’s unlikely unless they push you above your daily maintenance energy consumption.
Consistently consuming one with added sugar raises the risk of chronic disorders, including obesity, diabetes, and liver damage.
Here are some quick to-dos to make your smoothie aligned with your weight loss goal, even by keeping the taste intact-
To reduce the caloric intake by a third, use almond milk instead of ordinary
If you’d like, you can add some avocado to the mix
Some seeds can do a great job
Try some collagen to gain a bulk of calcium
Nut butter can be your choice
Last but not least, you should try to replace a meal with a smoothie.
If you want to lose weight, stay away from any beverage that has calories, including sodas. It’s been said, “you are what you eat.”
That is why it is important to include fiber in your drinks. Having no fiber in your smoothie will make you insulin resistant, constipated, and hemorrhoidal.
Various components are thrown into a blender to create a thick and creamy drink. The mixture is processed until it is silky and silky-smooth.
And the versatility of smoothies is one of its most appealing qualities. These are the most common ingredients:
Juice
Vegetables
Protein powder
Seeds
Nuts
Fruits
Milk or Water
Yogurt
Spices
Seven potential health benefits of smoothie consumption are listed below.
Boosts the Immune System:
Eat foods like vegetables, fruits, and seeds to flush toxins from your blood and tissues. It would help if you drank smoothies for breakfast every day to get the most out of your meal.
Enhances Mental Capability:
Certain fruits and vegetables have enhanced cognitive function and improved memory. A diet rich in omega-3 fatty acids such as coconut enhances mental alertness and attention. Adding these nutrients to smoothies boosts the brain’s performance.
Carcinogens are Checked for Growth:
Controlling the body’s production of free radicals can slow the accumulation of cancer-causing agents known as carcinogens. Cancer-causing free radicals are inhibited by antioxidants found in fruits like strawberries, blueberries, and grapes.
Bone Health is Improved:
Edmond, Oklahoma, the best breakfast is a refreshing smoothie that keeps your bones healthy. Smoothies with spinach, kale, and citrus fruits are loaded with vitamins and minerals. Calcium, vitamin D3, and vitamin K-rich meals can help strengthen bones.
Hormonal Functioning is Regulated:
Hormones play an essential role in our daily lives. However, any imbalance in their levels can have serious consequences. Hormonal imbalances can also cause health issues.
So, all you need to keep your hormones in check is a tasty smoothie. It will keep you cool this summer.
Provides a Decent Amount of Fiber:
Today, the most prevalent gastrointestinal issue is constipation. A diet rich in fiber helps regulate the excretory system, allowing you to enjoy the summer without stress.
In addition, smoothies containing lots of fruits and vegetables help keep bowels regular.
Controls the Desire for Food:
Smoothies for breakfast can give a source of energy and protein. More protein makes people feel fuller and lowers food cravings later in the day. In addition, proteins are complicated substances that take longer to digest than carbs.
Protein helps prevent muscle loss when dieting, making high-protein smoothies a perfect weight-loss food. Smoothies often contain plant, milk, or egg protein powder.
In addition, almonds and other nuts, peanut butter, flax seeds, soy milk, and tofu are all high-protein foods.
Healthy Recipes Options for Smoothies
Smoothies can be harmful in some respects when you use ingredients that don’t even fit your goals regarding health. We can mold the recipes according to our needs and get the most out of them.
However, we must exclude the things that cause harm and include those we need. So here I’m going to put some healthy recommendations for you to choose from and make your smoothie a better one.
Coconut Raspberry Smoothie:
This creamy smoothie is created in an immersion blender, allowing quicker preparation and cleaning! The coconut flavor adds extra taste and resonates with health. It can take its different flavors to serve its best in different seasons.
Summer Smoothies:
Choose from various flavors such as raspberry, mango, strawberry, and green smoothies to ensure that you never get bored. These fruits are full of excellent nutrients to build your health smoothly. Better yet, give them all a shot!
Green Goddess Smoothie:
This fruit and vegetable combination, sweetened with honey yogurt, will boost you in the morning. You can use any vegetable you like. As long as it positively impacts your health, it is excellent to eat.
Banana Peanut Butter Smoothie:
Cut peeled bananas into chunks and freeze in a self-sealing plastic bag for a thicker, cooler smoothie for up to a week. Blending bananas, milk, peanut butter, and ice cubes into a smooth and frothy smoothie is all that is required to make this delicious drink.
Spinach Smoothie:
Yes, this smoothie is packed with leafy greens, but the addition of frozen mango and pineapple keeps it from being too sweet. Try it at home to add a bit of crispiness to your diet.
Banana Berry Smoothie:
Bananas are super healthy to regulate the energy level of your body. This delicious but nutritious blend of bananas and berries is given a jolt by the addition of ginger and tangy pineapple juice. You must give it a try.
Pineapple-Citrus Smoothie:
In addition to being aesthetically pleasing and delicious, this golden smoothie is also a powerhouse of nutrition and antioxidants. The vitamin C content of the orange juice and pineapple is excellent, and the potassium content of the banana is impressive.
Therefore, these options are the options you can consider other than those sugar-added options. These can create a good point with taste and nutrition.
Frequently Asked Questions (FAQs)
We each have inquiries about smoothies and their preparation. In this part, we will address the most frequently asked questions.
Do I have to add ice?
Nope! Smoothies can be made with or without ice almost always. Ice’s primary purpose is to reduce the temperature of your drink and give it a frosty appearance.
If the question is, are smoothies healthy, we can say yes. But in case of losing our weight, we must consider its calories. Smoothies are healthy, but if you think of losing weight, you might want to tailor your recipe a bit by following the above recommendations.
Japan has offered so much to the world – technology, culture, anime, art, and food. But when you think about the country’s cuisine, the first thing that comes to mind is sushi. While it is a staple food in the mother nation, in other countries, it is a luxury choice in high-end restaurants.
Even if you dislike fish, sushi is a dish you would ironically throw all your money for. Those eye-catching colors and various flavors make you want to try them all, but is sushi healthy?
Sushi is beneficial for you in general, but you might be surprised at how this rich treat can affect your well-being in different ways.
The different constituents of sushi make it somewhat a balanced meal. It contains protein, carbs, fiber, and necessary vitamins and minerals. Let’s break down the components and see the individual health benefits.
Packed with Protein:
Fish is the ultimate source of protein, be it from the ocean or rivers. The fact that sushi fish is raw or cured in the vinegar helps it retain all the essential nutrients. Commonly used proteins in this dish are tuna, salmon, seabass, and shrimp.
All of these fishes are rich in protein and omega-3 fatty acids. These chemical components are essential for the growth of muscles, hair, and skin. They also help to prevent heart diseases and even cancer.
Salmon and tuna have a very low-fat content per serving. This is an excellent advantage as you enjoy that delicious fish that is also healthy for you.
Some sushi rolls have a layer of seaweed around them. As it is a plant-based food, seaweed naturally has high fiber and protein content.
Fiber creates bulk in undigested food and helps it pass through the intestines easily. This helps keep your digestive tract working smoothly and greatly reduces constipation.
So even if you don’t like your icky greens, you’ll love seaweed! And when sushi is wrapped in it, you get a delicious combination of flavors and health benefits.
A Good Burn:
When you try sushi for the first time, you have to see the light green paste on the side. Typically, as sauces go, you thought this was similar and dolloped a whole spoonful onto your roll. Indeed, the regret was instant when your nose and mouth were on fire!
Despite the super strong flavor and blaze in your nasal passageway, wasabi is rich in vitamins in minerals. This dressing is a hub of nutrients that prevents cancer, heart diseases, asthma, and high blood pressure, even in the tiniest amount. Wasabi is also high in Vitamin C and antioxidants.
Colorful Veggies:
Sushi is a great way to trick the kids into eating their fish and vegetables. The bright and colorful presentation of the dish makes it looks delicious anyway. Common plant-based items in sushi include avocado, cucumber, lettuce, zucchini, bell peppers, and even sweet potatoes.
Tofu is an excellent alternative for people who don’t eat fish or meat. All these vivid vegetables are rich in fiber, and vitamin C. Tofu is an excellent source of protein and essential fatty acids. These food groups have very few calories but still leave you feeling full and satisfied.
Though the side of ginger pickle is used as a palate cleanser, it still has a lot of benefits. Ginger is rich in minerals such as potassium and magnesium. These help the proper functioning of your kidneys and muscles.
Scientists have also discovered that this root helps with gastrointestinal issues, heartburn, and diarrhea. So, if you’re feeling too full after eating all that sushi, a bit of that sour ginger will take away all the bloating gas.
A vital side of sushi is soy sauce. It balances all the flavors, but it also gives the whole dish a rich, umami tang. This condiment already has sodium, so you don’t need to sprinkle salt on your sushi for a better taste.
Let’s not forget about sesame seeds! California rolls are the most common type of sushi that has this garnish. Sesame seeds are a great source of plant-based fiber and have a lot of protein, calcium, and vitamins.
You get all the necessary supplements from these tiny bits. These seeds have been found to reduce hypertension, make bones more robust, lower cholesterol, and support the growth of red blood cells.
Balance is Peace:
You’ve guessed it – all the primary food groups are there. Consider the primary ingredients in sushi – rice, vegetables, salt from soy sauce, sugar from rice syrup, seaweed, and fish. Notice anything interesting about the whole combination?
The Japanese have mastered making sushi with the perfect ratios of its components. Thus, you are getting an entirely balanced meal from a single dish. So, it is not just balanced and healthy, but it leaves your taste buds tingling with satisfaction.
Is Sushi Healthy Plate After Plate?
As heartbreaking as it sounds, too much sushi and the wrong type can be bad for your health. Let’s look at the components that make the dish a not-so-balanced meal.
Rice is Not Everything Nice:
Despite rice being the prime ingredient in sushi, too much of it doesn’t bear too well for your health. This grain is a core component and makes up most of the overall calories per serving.
Unfortunately, it would be impossible to consider sushi without rice (unless we’re talking about sashimi!). Studies have shown that people feel full and sleepy after eating sushi in large quantities. So, you won’t be able to enjoy the sushi by taking the rice out – it will taste like a disaster.
Rice constitutes about 70% of the whole sushi, which means you get a higher amount of carbohydrates in just one bite. With all that surplus of calories, say goodbye to losing weight and hello to fat deposits in your body.
Plenty of Fish in the Sea, But Not All are Worthy:
The choice of fish in sushi is crucial in how good the dish is for your body. Typically, the ones with tuna, salmon, or crab are the better ones with fewer drawbacks to health.
Swordfish, mackerel, and marlin fish-based sushi are the ones you should steer clear of. These are the types that contain high volumes of mercury. This element causes kidney failure and congenital disabilities when consumed by pregnant women.
Nothing’s Cooking:
A significant reason most people never want to try sushi is that it uses raw fish. Apart from sounding unappetizing, uncooked fish is a reservoir of parasites and unpleasant bacteria.
Since sushi is served cold, it provides an even better environment for certain bacteria and worms to thrive. You will not see those when eating because they are microscopic. However, there is no doubt that these critters exist, and you might have no idea how many of them you swallow.
The effect may not be immediate if you eat a regular serving size. But since sushi is so addicting, you could eat them non-stop. This doubles the number of parasitic worms that enter your body.
Salty Endings:
Sodium is needed in small amounts to keep the body’s required electrolytes in a balanced state. Too much sodium will eventually block arteries in the heart, cause high blood pressure, and damage kidneys. But considering the taste of soy sauce, your taste buds can already guess how much salt it has.
You will most likely dip the sushi in soy sauce for every bite you take because it enhances the overall flavor. As a result, you will lose track of how often you’ve soaked those rolls, and you unknowingly harm your blood vessels and central nervous system.
That Green Stuff isn’t What You Think it is:
Real wasabi can only be found in Japan, and it is costly to export outside. As a substitute, most restaurants use horseradish or even ground mustard. Artificial food coloring is added to these to get the shade of wasabi.
Horseradish and mustard do not have the same health benefits as wasabi. Sometimes these condiments can inflame the nasal lining and intestines when overeaten.
Wasabi replacements may not be too concerning, but the added food coloring is a cause for alarm. Many researchers have proved that artificial dyes in food contain allergenic components and even toxic chemicals that cause cancer.
Frequently Asked Questions (FAQs)
Is brown rice a better option for sushi?
Yes, brown rice is a relatively better option than traditional sushi rice, as it has more fiber and lower calories.
What can I use as a complete substitute for rice in sushi?
Grated cauliflower, couscous, and quinoa are good alternatives if you want to skip the rice in sushi altogether.
Is spicy sushi bad for you?
Spicy sushi, such as salmon rolls, is not generally unhealthy as the fish is rich in nutrients. But if you have a sensitive stomach, you may feel discomfort in your gut afterward.
Is it safe to eat sushi left out for over three days?
If your sushi was not refrigerated for over two days, there is a high chance it is teeming with bacteria. So. consuming it this way is not safe at all.
Final Words
Sushi is a colorful, unique, albeit adventurous tray of food that makes you want to learn how to use chopsticks. The grandeur of this dish draws you towards wanting to try all the different kinds out there.
But as pretty as the presentation appears, there is more than just meets the eye to this coveted food. The diverse compositions make you wonder – is sushi healthy? This depends on what type of sushi you are consuming and how often.
It is arguably a balanced meal with healthy constituents, as long as you make careful decisions on the ingredients and the amount you eat.
No matter how excited you are about seeing that movie, the whole experience is incomplete with popcorn. The two are just “butter” together. Even when you don’t have a plate full of food during your Netflix-and-chill moments, you can always rely on this for a quick munch.
This fragrant, buttery goodness is a tidbit all our mouths water for, but is popcorn healthy? It sure is a fast and filling snack, but let’s stop and see if it is good enough for our health as much as our taste buds yearn for.
You will be surprised to find out the nutritional value of these popping kernels. It may just appear as a cheap carnival snack, but it offers so much.
It’s Not Just the Film that Moves You:
A good bowel movement is always satisfying and necessary for digestive health. Dietary fiber is the main contributor to adequate roughage. Its shape and texture make it easy to forget that popcorn comes from maize, a whole grain.
In about 100 grams of popcorn, you get as much as 15 grams of fiber! This is more than enough to provide bulk to your undigested food. Not only will the food in your gut be moving well, but you will feel full and less bloated after eating popcorn.
Full and Happy:
Popcorn has a light and airy structure, which allows you to eat a lot of it without feeling too stuffed. Studies have shown that people feel more satisfied with a single serving of popcorn rather than other types of snacks of the same amount. This is a great advantage because you enjoy many snacks and do not feel hungry!
So, if the movie you just watched left you disappointed and left with questions, your snack will leave you feeling the complete opposite. Hence, popcorn is proper comfort food in all terms.
Diabetes has Left the Theater:
When talking about ordinary popcorn, pure corn kernels were directly picked and heated. The end product is still a whole grain as it is entirely untreated. Its intact nature leaves the grain to retain all of its natural fiber.
The high content of the plant fiber dramatically decreases the amount of sugar that the blood can absorb. When the blood sugar levels are low after eating, the chance of type 2 diabetes occurring is significantly reduced.
This yummy snack also contains a significant amount of polyphenols. It is a chemical that makes up antioxidants. Your body needs antioxidants to regulate sugar in the bloodstream. So once again, you have minimal risk of developing diabetes from popcorn.
The Heart Feels the Thrill:
If you have eaten enough popcorn throughout your life, you know it still tastes great without seasoning. Leaving out the salt and toppings, you can consume many boxes without worrying about high blood pressure.
You have read that popcorn leaves you feeling full and content after eating it. Lesser sugar is released into your blood when the food breaks down. This results in your heart being able to pump the blood more efficiently.
The chances of getting cardiovascular diseases to decrease. So, when you feel your heartbeat rising after eating popcorn, rest assured that it is because of the movie you’re watching and not food-induced hypertension.
The Extra Baggage Can Stay Outside:
Do you know what’s ironic about popcorn? It takes up a lot of space in containers, but just the tiniest bit inside your body. If you compare 100 grams of popcorn and the same measure of chips, the cracked kernels only have around 375 calories, whereas the crispy potatoes have nearly 536.
This proves that you can eat a lot of popcorn and still not gain too much weight. In fact, the low-calorie count and high fiber make this a great diet food option when you are looking to shed those extra pounds. You win from all directions because you get to lose weight and enjoy a delicious snack.
It’s in the Details:
Enough about the obvious health benefits – let’s get to the minute attributes. Apart from fiber, antioxidants, and low calories, popcorn has a lot of essential vitamins and minerals. These include riboflavin, niacin, vitamin A, E, K, B5, and B6.
Vitamin A, niacin, and riboflavin are needed for good eyesight and can even prevent the risk of cataracts. Another supplement good for the eyes is Vitamin E, a great contributor to healthy, supple skin and shiny hair.
The other vitamins are vital in brain development, converting food into energy and generating blood cells.
Is Popcorn Healthy with Added Seasoning?
Despite how pleasant something sounds, there’s always a catch, isn’t there? Unfortunately, the same goes for your favorite theater food.
Indeed, it’s hard to enjoy food when it is not seasoned correctly. And salt is the essential flavoring you can put on a dish. It is implausible to consume popcorn even without the tiniest bit of salt.
And that is the issue – salt itself equals sodium, which is a prime cause of hypertension. Excess salt leads to the body retaining too much water. This causes a rise in blood pressure and can damage the veins and arteries in the heart.
The heart and your kidneys will also strain to remove the unwanted water from your body. This further leads to increased blood pressure and, in extreme cases, kidney failure.
It is best to avoid ready-made popcorn as much as possible if you are conscious of your diet and health. Pre-packaged versions have been found to contain the highest amount of sodium.
So, think twice before you sprinkle that “good” stuff on your popcorn. Your tongue will be happy, but it will cost you your heart, blood, and kidneys.
Butter isn’t Always Better:
There’s a high chance you like popcorn so much because it’s greasy. Theater popcorn is swimming in butter even if you can’t see it. Admit it; most oily foods just taste better.
Even if butter is primarily a dairy product, it contains a lot of fat. This type of fat is made from hydrogenated oil, which raises the cholesterol levels in your blood. Even worse, most of the popcorn you get at the movies doesn’t even have butter, but worse – trans fats.
Another added ingredient in buttered popcorn that makes it more harmful is salt. You just read about the dangers of excessive sodium in popcorn. So just imagine the severity of the combination of fat and salt!
Next time you ask for extra butter on your popped kernels or even think of getting packaged popcorn, take a step back and reflect. The taste is no doubt addicting, which is why you should be even more careful.
Microwave is a Death Sentence:
As extreme as it sounds, microwavable popcorn is soaked in harmful chemicals. A lot of different preservatives are added to increase the shelf life. In general, such added items react to the chemicals in your bloodstream and can turn into carcinogens.
So potentially, if you make the wrong choices, you can get cancer from eating popcorn.
Diabetes has Re-Entered the Theater:
Despite all that you’ve read about popcorn preventing diabetes, it all goes down if you choose the wrong kind. Consider the added ingredients: butter, trans fats, salt, caramel, sugar, cheese, etc. Can you guess what is in great quantity in these?
It is calories, of course. Plain popcorn is a healthy snack, but it is a dietary nightmare with tons of toppings and mixes. Your blood sugar and cholesterol levels will shoot up like never before. Consequently, you are at high risk of diabetes, cardiovascular diseases, and obesity.
Reconsider Baggage Claim:
As we all know, popcorn can be addicting. And if you add flavorful junk to it, it gets even tastier. It is light and fun to eat, so you might gobble up box after box while adding more and more cheese, caramel, and whatnot.
You have guessed that this is the ultimate recipe for weight gain. So, if you’re on a diet, seasoned popcorn is a big no-no for you.
Frequently Asked Questions (FAQs)
Is air-fried popcorn safe to eat?
Yes, air-fried popcorn is the best way to consume it, as it absorbs only the slightest amount of oil.
Can I add other healthy items with popcorn?
As long as the popcorn itself doesn’t have extra toppings such as salt, cheese, sugar, or caramel, you can try adding popcorn to your salads to add an extra crunch.
Why do I feel bloated after eating popcorn?
When eaten in large amounts, the insoluble fiber in popcorn gets concentrated. This leaves you feeling gassy and bloated.
Why does popcorn sometimes smell better than it tastes?
That is your nose tricking you. The yummy smell you get is actually from the melted butter. So, you’ll notice that popcorn sold in theaters or carnivals smells significantly better than the ones popped at home.
Conclusion
Everything about popcorn just sounded so good in the beginning. Until the good stuff came in the flavoring and seasoning – it became sadder than a tragedy movie. So now you might be wondering, is popcorn healthy?
The short answer is yes, but it all depends on how you are preparing it. You can use healthy alternatives, such as coconut or olive oil. Air-popped is the best version you can go for. Many recipes online tell you how to make healthy popcorn that also tastes as good as the unhealthy versions.