Hydration is essential for maintaining overall health. From regulating body temperature to ensuring smooth bodily functions, staying hydrated is crucial. While water is often considered the go-to option, certain foods like watermelon offer a natural, refreshing, and nutrient-packed alternative. Is watermelon good for hydration? Let’s dive in to understand how this juicy fruit can keep you hydrated and support your health.
Why Is Watermelon Good for Hydration?
Watermelon is often hailed as a hydration powerhouse. This is because it combines high water content with essential nutrients, making it a superior choice for staying refreshed.
The Water Content of Watermelon
Watermelon is composed of about 92% water, making it one of the most water-rich fruits available.
Foods high in water content contribute significantly to hydration by replenishing body fluids.
Watermelon’s water-rich composition not only quenches thirst but also aids in reducing fatigue, especially during hot days.
Unlike plain water, watermelon also provides nutrients that enhance the hydration process.
High-water-content foods help regulate hydration at a cellular level, ensuring efficient water absorption and distribution throughout the body. With each bite, you’re not just satisfying your taste buds but also giving your body a hydrating boost.
Essential Electrolytes in Watermelon
Watermelon is not just about water; it’s also packed with electrolytes like potassium and magnesium.
Magnesium supports muscle function and combats fatigue, especially post-exercise.
These electrolytes in watermelon function similarly to those found in sports drinks but without the added sugars and artificial ingredients. Incorporating watermelon into your diet is a natural and effective way to replenish lost electrolytes.
Is Watermelon Better Than Water for Hydration?
While water is essential, watermelon offers a blend of hydration and nutrition that plain water cannot.
Comparison Between Water and Watermelon
Watermelon provides more than just hydration.
Along with 92% water, it delivers vitamins like C and A, antioxidants, and lycopene.
Unlike water, which solely hydrates, watermelon enhances hydration with added nutritional benefits. This makes it a superior choice during summer or after workouts when your body needs replenishment.
Health Benefits of Watermelon for Hydration and Beyond
Watermelon is more than a hydrating fruit. Its rich nutrient profile offers multiple health benefits.
Packed with Essential Nutrients
Vitamin C: Strengthens the immune system and promotes glowing skin.
Lycopene: A powerful antioxidant that protects against oxidative stress and supports heart health.
Amino acids: Promote muscle recovery and improve blood flow.
These nutrients make watermelon a great addition to any diet, providing energy and improving overall wellness.
Supports Skin and Digestion
The high water content helps maintain skin elasticity and combats dryness.
Watermelon contains dietary fiber, which aids digestion and prevents constipation.
By including watermelon in your daily routine, you’ll feel refreshed both inside and out.
Is Watermelon Good for Dehydration Recovery?
Watermelon can be a game-changer when recovering from dehydration. Its unique combination of water, electrolytes, and nutrients helps restore balance quickly.
Watermelon vs. Other Foods for Dehydration
Compared to other high-water-content foods like cucumber, oranges, and strawberries, watermelon stands out.
Its larger water volume makes it a better choice for rapid hydration.
The added electrolytes and sugars in watermelon provide instant energy and rehydration.
Whether you’re recovering from exercise or a hot day, watermelon can be your go-to option for combating dehydration effectively.
Why Is Watermelon So Hydrating?
The magic of watermelon’s hydration lies in its perfect combination of water, fiber, and natural sugars.
The Synergy of Key Components
Water: Hydrates the body instantly.
Fiber: Ensures slower water release, keeping you hydrated longer.
Natural Sugars: Enhance the absorption of water, making the process efficient.
This synergy makes watermelon one of the most hydrating and refreshing fruits available. Whether eaten fresh or blended into a smoothie, it’s a versatile way to stay hydrated.
Other Best Foods for Hydration and Dehydration Recovery
While watermelon is a standout choice for hydration, there are other foods rich in water content that can support your hydration needs effectively.
Top Hydrating Foods
Cucumber
Composed of 95% water, cucumbers are one of the most hydrating vegetables.
Celery is made up of about 95% water, similar to cucumber.
It is also a good source of electrolytes like potassium and sodium, making it an excellent snack for replenishing lost fluids.
Lettuce
Varieties like iceberg lettuce contain about 96% water.
Adding lettuce to salads or sandwiches can boost your water intake effortlessly.
Oranges and Strawberries
Oranges provide about 88% water content and are rich in vitamin C.
Strawberries, with 91% water, are another hydrating fruit loaded with antioxidants and vitamins.
Positioning Watermelon as the Hydration Leader
Among all these foods, watermelon stands out as one of the highest water-content fruits, with 92% water. Unlike others, it combines hydration with a robust nutritional profile, including vitamins, minerals, and natural sugars. This makes watermelon a versatile choice for hydration and recovery, whether consumed fresh, juiced or blended into a smoothie.
Watermelon Nutrition: What Makes It a Hydrating Superfood?
Watermelon’s nutritional profile is what truly sets it apart. It’s not just the water content but the added vitamins, minerals, and other components that make it a hydrating superfood.
Water Content
Watermelon is made up of 92% water, which provides immediate hydration to your body.
This high water content aids in replenishing fluids lost through sweat and helps regulate body temperature.
Essential Vitamins
Vitamin A
Promotes skin health by maintaining moisture and aiding in cell repair.
Supports vision and immune function.
Vitamin C
Boosts immunity and combats oxidative stress.
Enhances skin elasticity, giving it a youthful glow.
Vitamin B6
Aids in energy production by metabolizing carbohydrates and proteins.
Supports brain health and reduces fatigue.
Minerals That Hydrate
Potassium
Helps regulate fluid balance and prevents dehydration.
Reduces muscle cramps and supports heart health.
Magnesium
Plays a role in muscle relaxation and energy production.
Replenishes electrolytes lost during exercise or sweating.
Low-Calorie and Fat-Free Profile
A 1-cup serving of watermelon contains just about 46 calories, making it perfect to add to a low-calorie meal.
It’s naturally fat-free, making it perfect for those watching their calorie intake.
The Hydration Superfood
With its combination of high water content, essential vitamins, minerals, and low-calorie nature, watermelon truly earns its title as a hydrating superfood. It’s not just about quenching your thirst but nourishing your body with every bite.
FAQs
1. Can watermelon replace water entirely for hydration?
No, while watermelon is highly hydrating, it should complement water, not replace it. Watermelon provides additional nutrients, but drinking plain water remains crucial for overall hydration.
2. How much watermelon should I eat for hydration?
Eating 1-2 cups of watermelon daily provides sufficient water, electrolytes, and nutrients to support hydration while staying low in calories. This portion balances hydration without overloading on natural sugars.
3. Is watermelon better than sports drinks for hydration?
Yes, watermelon naturally provides electrolytes like potassium and magnesium without artificial sugars or chemicals. It’s a healthier, nutrient-packed alternative to sports drinks for replenishing fluids and maintaining energy levels.
4. Can watermelon help with heat exhaustion?
Absolutely. Watermelon’s high water content and natural sugars restore hydration and energy, while electrolytes like potassium help balance fluids, making it ideal for cooling down and recovering from heat exhaustion.
5. Are there any side effects of eating too much watermelon?
Eating excessive watermelon can cause bloating, digestive discomfort, or spikes in blood sugar due to its natural sugars. Moderation is key to enjoying its benefits without adverse effects.
Conclusion
Watermelon is not just a delicious treat; it’s a hydration powerhouse packed with essential nutrients. Its high water content, combined with electrolytes and natural sugars, makes it an excellent choice for staying hydrated, especially during summer. From supporting skin health to aiding digestion and dehydration recovery, watermelon offers numerous health benefits beyond hydration. So, next time you’re looking to quench your thirst, consider grabbing a slice of this refreshing fruit.
Kombucha is taking the health world by storm. This fizzy, tangy tea has become a favorite for those seeking natural ways to improve well-being. But what makes it so special? Kombucha is packed with probiotics that support digestion and gut health. This fermented drink is more than just a trendy beverage—it’s a powerhouse for the digestive system. From reducing bloating to balancing gut bacteria, kombucha offers numerous benefits. Let’s dive into its origins, how it’s made, and how it supports your digestive system.
What Is Kombucha?
Kombucha is a fermented tea with a long history. Originating in East Asia over 2,000 years ago, it was known as the “elixir of life” for its health-promoting properties. Today, it’s widely available in stores and is easy to brew at home.
How It’s Made
Kombucha starts with tea, sugar, and a SCOBY (symbiotic culture of bacteria and yeast). The SCOBY ferments the tea over 1-2 weeks, turning sugar into natural acids, carbon dioxide, and probiotics. This fermentation process gives kombucha its signature tangy flavor and bubbles.
People often ask, “What is kombucha good for?” The answer lies in its high concentration of probiotics, vitamins, and enzymes, which help improve gut health and digestion. With every sip, you’re nourishing your digestive system with beneficial bacteria.
How Kombucha Supports Digestive Health?
The digestive benefits of kombucha come primarily from its probiotic content. Probiotics are live bacteria that keep your gut microbiota healthy. Your gut microbiota consists of trillions of microorganisms that help digest food, absorb nutrients, and maintain a strong immune system.
How Does Kombucha Affect Digestion?
Kombucha helps balance gut bacteria. When your gut microbiota is balanced, digestion becomes smoother, and issues like bloating or constipation can improve. The organic acids in kombucha, such as acetic and lactic acids, also support the breakdown of food in your stomach.
How Is Kombucha Good for Your Gut?
Kombucha’s probiotics restore the good bacteria in your gut. This is especially helpful after taking antibiotics, which can wipe out both harmful and beneficial bacteria. A healthy gut microbiome improves nutrient absorption, reduces inflammation, and boosts your overall energy levels.
Is Kombucha Easy to Digest?
Yes! Kombucha is not only easy to digest but also aids the digestion of other foods. The natural enzymes in kombucha help break down complex foods into simpler compounds. This process eases the workload on your stomach and intestines, making digestion more efficient.
Benefits of Kombucha for Specific Digestive Issues
Absolutely. Kombucha soothes the stomach by reducing bloating and indigestion. Its probiotics and organic acids work together to regulate stomach acid levels, preventing issues like acid reflux. The carbonation in kombucha can also help relieve gas trapped in your digestive system, offering a gentle and natural remedy for discomfort.
Is Kombucha Good for Intestines?
Yes, kombucha plays a crucial role in maintaining intestinal health. A balanced gut microbiome reduces intestinal inflammation, which can alleviate symptoms of irritable bowel syndrome (IBS) and other digestive conditions. The antioxidants in kombucha also support the gut lining, protecting it from damage caused by harmful bacteria.
Is Ginger Kombucha Good for Digestion?
When kombucha is combined with ginger, the digestive benefits are even greater. Ginger is known for its anti-inflammatory properties and ability to relieve nausea and bloating. Ginger kombucha combines the gut-friendly benefits of probiotics with ginger’s ability to soothe the stomach. It’s a powerful duo for anyone struggling with digestive issues.
Kombucha strengthens your immune system thanks to its probiotics and antioxidants. Probiotics maintain a healthy gut microbiome, which is essential for immune function. Antioxidants, such as polyphenols in tea, fight free radicals that can weaken your immune system. Regular consumption can help your body ward off infections and recover more quickly from illnesses.
Detoxification
Kombucha supports the body’s natural detox processes. Its organic acids, such as gluconic acid, help the liver flush out toxins. Kombucha also contains enzymes and probiotics that promote a clean and healthy gut, which plays a central role in overall detoxification.
Energy Boosts
Kombucha provides a natural energy lift without the crash of sugary drinks. Its small caffeine content, combined with B vitamins and iron produced during fermentation, can help combat fatigue. Kombucha also enhances nutrient absorption by improving gut health, giving your body the fuel it needs to stay active.
Is Kombucha Good for Weight Loss?
Kombucha may aid weight loss by improving metabolism and reducing calorie intake. The probiotics in kombucha enhance gut health, which is linked to better metabolism. Its low-calorie content makes it a healthier alternative to sugary sodas or juices. The organic acids in kombucha, such as acetic acid, have been shown to help curb appetite and burn fat.
However, weight loss results depend on your overall diet and lifestyle. Drinking kombucha alone won’t lead to significant changes, but it can be a helpful addition to a balanced diet and exercise plan.
Benefits of Drinking Kombucha Daily
Drinking kombucha regularly can lead to long-term health improvements. The probiotics in kombucha help maintain a balanced gut microbiome, reducing inflammation and improving nutrient absorption over time. A healthy gut has been linked to better mental health, stronger immunity, and reduced risk of chronic illnesses.
Daily kombucha consumption can also support consistent energy levels and digestion. However, moderation is key—stick to 8-16 ounces per day to avoid excessive sugar or calorie intake.
Is Kombucha Alcoholic?
One common question is, “Is kombucha alcoholic?” The answer is both yes and no. Kombucha contains trace amounts of alcohol, usually less than 0.5%. This is a natural byproduct of the fermentation process. The amount is so low that it’s classified as a non-alcoholic beverage in most countries.
For most people, kombucha is safe to drink daily without concerns about alcohol. However, those who are pregnant, breastfeeding, or sensitive to alcohol should consume it in moderation or consult their doctor.
Potential Risks and Precautions
Although kombucha offers many health benefits, it’s not suitable for everyone. Drinking too much kombucha can lead to side effects like bloating, digestive discomfort, or excessive sugar intake. Stick to recommended servings to avoid these issues.
Who Should Avoid Kombucha?
People with compromised immune systems: The live bacteria in kombucha may cause infections in individuals with weakened immune systems.
Pregnant or breastfeeding women: Due to the trace alcohol content and potential for contamination, it’s best to consult a doctor before consuming kombucha during pregnancy.
Those sensitive to caffeine: Kombucha contains small amounts of caffeine, which may cause issues for people who are caffeine-sensitive.
Conclusion
Kombucha is an incredible drink that can support digestion and improve gut health. Its probiotics, organic acids, and enzymes work together to ease bloating, reduce inflammation, and boost nutrient absorption. Beyond digestion, kombucha enhances immunity, aids detoxification, and provides sustainable energy.
While kombucha is a great addition to a healthy lifestyle, it should be consumed in moderation. Pairing kombucha with a balanced diet and exercise ensures you enjoy its benefits without any drawbacks. Whether you’re looking to improve digestion, support your immune system, or simply enjoy a delicious and healthy drink, kombucha is worth a try.
FAQs
1. Can kombucha cure digestive problems?
Kombucha can improve digestion by promoting gut health through its probiotic content, but it is not a cure for digestive problems. It may alleviate mild issues like bloating or irregular bowel movements. For chronic conditions like IBS or GERD, consult a healthcare provider for proper diagnosis and treatment.
2. Is it safe to drink kombucha every day?
Drinking kombucha daily is generally safe for most people in moderate amounts (about 8–12 ounces). Overconsumption may lead to side effects like bloating or acid reflux. Always choose low-sugar varieties and monitor your body’s response. Pregnant women or immunocompromised individuals should consult a doctor before consuming kombucha.
3. Does kombucha contain caffeine?
Yes, kombucha contains caffeine because it is typically brewed using black or green tea. The fermentation process reduces caffeine levels, making it lower than a typical cup of tea. The caffeine content varies but usually ranges between 10–25 milligrams per 8-ounce serving, depending on the tea used.
4. Can kombucha help with weight loss?
Kombucha may support weight loss indirectly by improving digestion, boosting metabolism, and reducing sugar cravings. However, it’s not a magic solution. Opt for low-sugar versions, and pair kombucha consumption with a balanced diet and regular exercise for the best results.
5. Is homemade kombucha safe?
Homemade kombucha can be safe if brewed under sanitary conditions and with proper recipes. However, improper fermentation or contamination can lead to harmful bacteria or excessive alcohol production. Follow guidelines carefully and use pH strips to ensure safety. Beginners may prefer store-bought kombucha initially.
Acid reflux and GERD are common digestive issues that cause discomfort and disrupt daily life. Acid reflux occurs when stomach acid flows back into the esophagus, leading to symptoms like heartburn and regurgitation. GERD, or gastroesophageal reflux disease, is a more severe and chronic form of acid reflux.
Ginger, a well-known natural remedy, has been celebrated for its digestive health benefits for centuries. It’s widely used to relieve nausea, indigestion, and other stomach-related concerns. But is ginger effective for acid reflux? This article explores the medicinal properties of ginger and its potential to help those suffering from acidity and GERD.
What Is Acid Reflux and GERD?
Acid reflux happens when the lower esophageal sphincter (LES) weakens or relaxes at the wrong time. This allows stomach acid to flow back into the esophagus. Common symptoms include:
Heartburn (a burning sensation in the chest).
Regurgitation of sour-tasting liquid.
A lump-like sensation in the throat.
When acid reflux occurs frequently or becomes severe, it progresses to GERD. GERD can lead to complications like esophagitis, Barrett’s esophagus, or even esophageal cancer if untreated.
Dietary choices play a significant role in triggering or soothing these symptoms. Spicy, fatty, or acidic foods can exacerbate acidity, while natural remedies may help alleviate it.
Ginger and Its Medicinal Properties
Ginger has long been valued for its medicinal properties. It is a potent anti-inflammatory agent, making it effective for conditions involving irritation or swelling. It is also a natural digestive aid that helps:
The key bioactive compounds in ginger are gingerol and shogaol. These components are responsible for its strong anti-inflammatory and antioxidant effects. Gingerol, in particular, aids digestion and combats nausea.
Is Ginger Acidic or Alkaline?
Ginger is neither highly acidic nor alkaline. It has a pH close to neutral and does not irritate the stomach lining. Its natural properties make it gentle on the digestive system and suitable for soothing acid reflux symptoms.
Is Ginger Good for Acid Reflux and GERD?
Ginger is widely considered a helpful remedy for managing acid reflux. Here’s why:
1. Reduces Nausea
Ginger’s ability to reduce nausea is well-documented. For individuals with GERD, nausea can be a troubling symptom, especially after meals.
2. Improves Gastric Motility
Ginger enhances gastric emptying, ensuring that food moves quickly through the digestive tract. This reduces the risk of stomach contents lingering and causing reflux.
3. Anti-Inflammatory Action
The anti-inflammatory properties of ginger can soothe the esophageal lining, which is often irritated in GERD patients.
Potential Concerns
While ginger is beneficial, excessive consumption may backfire. Large quantities can lead to heartburn, as ginger has a warming nature that might irritate sensitive individuals. Moderation is key
Fresh ginger root is an excellent option for acid reflux relief. You can use small slices in hot water to make ginger tea, which calms the stomach and reduces irritation.
2. Is Raw Ginger Good for Acid Reflux?
Yes, raw ginger can be effective, but it’s important to consume it in small amounts. Chewing on thin slices or grating it into dishes can provide digestive benefits. However, overuse may be too strong for sensitive stomachs.
3. Is Ground Ginger Good for Acid Reflux?
Ground ginger is versatile and can be added to recipes or teas. It retains the active compounds of fresh ginger, offering similar benefits. However, avoid using too much, as its concentrated form can cause irritation.
4. Is Crystallized Ginger Good for Acid Reflux?
Crystallized ginger can help in moderation. However, it’s often coated in sugar, which may trigger reflux in some individuals. Consume sparingly to enjoy its benefits without worsening symptoms.
5. Is Pickled Ginger Good for Acid Reflux?
Pickled ginger, commonly found with sushi, contains vinegar. While ginger itself is helpful, the vinegar may irritate some people with acid reflux. It’s best to assess personal tolerance.
6. Is Boiled Ginger Good for Acid Reflux?
Boiled ginger is a fantastic way to enjoy its benefits. Ginger tea, made by boiling fresh slices, soothes the stomach and reduces reflux symptoms. This method is gentle and effective.
7. Is Chewing Ginger Good for Acid Reflux?
Chewing ginger can stimulate saliva production, which neutralizes stomach acid. It’s a practical option, but consuming small pieces is recommended to avoid overwhelming the stomach.
Is Ginger Tea Good for Acid Reflux?
Ginger tea is one of the most popular and effective ways to consume ginger for acidity relief. Its natural anti-inflammatory properties help reduce irritation in the esophagus. Additionally, ginger tea:
Aids digestion by speeding up gastric emptying.
Reduces nausea, which is often associated with acid reflux.
Has a soothing effect on the stomach lining.
Preparation Tips for Ginger Tea
Use fresh ginger root for maximum potency.
Avoid adding too much sugar, as it can worsen acid reflux.
Drink it warm, not hot, to avoid irritating the esophagus.
How to Make Ginger Tea for Acid Reflux?
Follow this step-by-step recipe to make ginger tea.
Ingredients:
1–2 inches of fresh ginger root.
2 cups of water.
Optional: honey (in small amounts) or chamomile for added soothing properties.
Instructions:
Peel and slice the ginger root into thin pieces.
Boil the water and add the ginger slices.
Let it simmer for 10–15 minutes.
Strain the tea into a cup and allow it to cool slightly before drinking.
This simple preparation ensures that the ginger’s natural compounds remain potent and beneficial.
When Should I Drink Ginger Tea for Acid Reflux?
Timing is crucial for maximizing the benefits of ginger tea.
After meals: Drinking ginger tea about 20–30 minutes after eating can aid digestion and reduce reflux symptoms.
During bouts of nausea: Sip slowly to alleviate queasiness and calm the stomach.
Before bed: A small cup of ginger tea can prevent nighttime acid reflux, but avoid drinking too much liquid to prevent discomfort.
Is Lemon Ginger Tea Good for Acid Reflux?
Lemon ginger tea combines two powerful natural remedies, but its suitability for acid reflux depends on individual tolerance.
Benefits
Ginger reduces inflammation and promotes digestion, while lemon adds a refreshing flavor and some vitamin C.
Concerns
Lemon is acidic, and in some cases, it may aggravate acid reflux symptoms. If you’re sensitive to acidic foods, it’s best to:
Use only a small amount of lemon juice.
Dilute the tea to reduce acidity.
Is Ginger Ale Good for Acid Reflux?
Ginger ale is not the best choice for managing acidity. While it contains ginger, most commercial ginger ales are:
High in sugar, which can trigger acid reflux.
Carbonated, which increases pressure in the stomach and worsens symptoms.
Opt for homemade ginger tea instead of sugary, fizzy ginger ale.
The mild caffeine content in green tea may boost alertness without heavily triggering acid reflux.
Ginger adds anti-inflammatory and digestion-enhancing properties.
However, those sensitive to caffeine should limit their intake, as it can occasionally aggravate reflux symptoms.
Combination Remedies with Ginger
There are some combinations that every person suffering from acid reflux can try.
Are lemons and ginger good for acid reflux?
The combination of lemon and ginger offers benefits like improved digestion and reduced inflammation. However, as noted earlier, lemon’s acidity can be problematic for some people. Start with small amounts and adjust to your tolerance.
Is Turmeric and Ginger Good for Acid Reflux?
Turmeric and ginger together create a powerful anti-inflammatory duo. Turmeric’s active compound, curcumin, can help soothe the digestive tract, while ginger promotes gastric motility. Add a pinch of black pepper to enhance turmeric’s absorption.
Look for ginger candies with minimal sugar and natural ingredients. Avoid those with excessive sugar content, as it can trigger reflux.
4. What is the best time to eat ginger?
The best time to eat ginger is in the morning or after meals. It aids digestion, reduces nausea, and boosts metabolism when taken during these times.
5. When not to take ginger?
Avoid ginger before surgery if you have bleeding disorders or are on an empty stomach. Excessive consumption can cause heartburn or irritate the stomach in sensitive individuals.
Conclusion
Ginger is a promising natural remedy for acid reflux and GERD. Its anti-inflammatory, digestive, and nausea-reducing properties make it a valuable addition to your diet. Whether consumed as tea, raw slices, or powdered in recipes, ginger can alleviate symptoms when used in moderation.
However, everyone’s body reacts differently. It’s essential to observe how ginger affects your symptoms and consult a healthcare provider if necessary. With mindful consumption, ginger could be your ally in managing acid reflux effectively.
Weight loss is one of the most common health goals worldwide, but it’s often clouded by misconceptions about sugar and natural sweeteners. Many assume that avoiding all sweeteners is the only way to shed pounds. However, replacing refined sugar with natural alternatives like honey has gained popularity.
So, is honey good for weight loss? The answer lies in honey’s unique combination of nutrients and its ability to provide sweetness without the harmful effects of processed sugar. This article delves into why honey may be a beneficial addition to your weight loss journey and how to use it effectively.
Honey for Weight Loss or Weight Gain?
The effect of honey on weight depends on portion control. Consuming honey in moderation can boost metabolism and improve digestion, both critical for weight management. Overeating, however, may lead to weight gain. Portion control is essential to reap its benefits.
Honey’s natural sugars are digested more slowly than refined sugar, providing sustained energy and reducing sudden blood sugar spikes. Studies show that honey can improve metabolic health, making it a suitable alternative for those seeking to lose weight.
Benefits of Honey for Weight Loss
Let’s discuss how honey is good for weight reduction.
Boosting Metabolism
Honey is rich in enzymes that help in breaking down fat and promoting digestion. Its antioxidant properties reduce oxidative stress, a factor linked to obesity. Enhanced metabolism means your body burns calories more efficiently, even at rest.
Reducing Appetite
One of honey’s standout qualities is its ability to suppress appetite. The natural sugars in honey trigger the release of hormones that signal fullness, helping to reduce overeating. This balance in blood sugar levels also prevents sudden cravings for unhealthy snacks.
Detoxification
Drinking honey with warm water is a popular detox method. This mixture helps flush out toxins from the body, improves digestion, and supports weight loss.
Is Honey Water Good for Weight Loss?
Yes! Honey water is an excellent way to kickstart your metabolism in the morning. It also keeps you hydrated and energized throughout the day.
Unique Honey Beverages
The honey beverages mentioned below can prove helpful in reducing extra calories.
Honey Citron Tea
This tea combines honey and citrus fruits rich in vitamin C. Not only does it aid in digestion, but its soothing properties also make it an ideal drink for managing stress, a common cause of weight gain.
Lemon and Honey
A classic combination, lemon juice, and honey are known to complement each other in weight reduction efforts. Lemon’s citric acid boosts fat metabolism, while honey provides sustained energy.
How to Use Honey for Weight Loss?
Let’s discuss different ways of using honey to lose weight.
Honey at Night
Consuming honey before bed may reduce nighttime hunger pangs. It also helps improve sleep quality by fueling the brain during rest. Better sleep supports hormonal balance, which is crucial for weight management.
Honey Varieties and Their Impact on Reducing Weight
There are different varieties and brands of honey that impact weight loss in a different manner.
Raw Honey
Raw honey is unprocessed and retains more nutrients compared to regular honey. Its higher antioxidant content makes it particularly effective in supporting weight loss.
Manuka Honey
Known for its antimicrobial properties, Manuka honey is another excellent choice. Its unique compounds not only promote health but also aid in managing weight by improving digestion.
Commercial Brands
Brands like Dabur honey are widely used, but their effectiveness depends on purity and processing. Always opt for organic or raw varieties to ensure maximum benefits.
Combining Honey with Other Foods
Honey’s versatility makes it easy to pair with various healthy foods, enhancing its benefits for weight loss. These combinations offer balanced nutrition, promote satiety, and add flavor to your diet without resorting to unhealthy sweeteners. Let’s explore how honey complements specific foods.
Is Oatmeal with Honey Good for Weight Loss?
Yes, oatmeal with honey is an excellent choice for weight loss. Oatmeal is rich in fiber, particularly beta-glucan, which helps keep you full for longer. This prevents overeating and promotes a steady release of energy throughout the day.
Adding honey to oatmeal not only sweetens the dish naturally but also provides antioxidants and minerals. Honey complements the slow-digesting carbohydrates in oatmeal, balancing blood sugar levels. Together, they create a wholesome breakfast that keeps hunger at bay while fueling your metabolism.
Is Greek Yogurt with Honey Good for Weight Loss?
Absolutely! Greek yogurt and honey make a power-packed duo for weight loss. Greek yogurt is high in protein, which helps build muscle and increases satiety. When combined with honey, it offers a hint of natural sweetness, reducing the need for refined sugars.
This combination is ideal as a breakfast, snack, or dessert. The probiotics in Greek yogurt improve gut health, aiding digestion—a key factor in effective weight loss. For added flavor and nutrients, consider topping this mix with fresh fruits or nuts.
Is Black Coffee with Honey Good for Weight Loss?
Black coffee with honey can be a potent tool for weight loss. Coffee is known for its caffeine content, which boosts metabolism and promotes fat burning. Adding honey instead of sugar to your coffee reduces calorie intake while providing a steady source of energy.
However, moderation is crucial. Too much caffeine or honey can lead to jitteriness and excessive calorie consumption. One cup of black coffee with a teaspoon of honey can offer the perfect balance to kickstart your morning metabolism.
Is Tea with Honey Good for Weight Loss?
Yes, tea with honey is not only soothing but also beneficial for weight loss. Green tea, in particular, pairs well with honey. Green tea contains catechins, antioxidants that enhance fat oxidation. Adding honey amplifies these benefits by stabilizing blood sugar levels and reducing cravings.
Other teas like chamomile or ginger tea can also benefit from honey. These combinations improve digestion and promote relaxation, indirectly supporting weight management. Replace sugar in your tea with honey to enjoy a guilt-free, nutrient-packed beverage.
Precautions and Considerations
While honey offers numerous benefits for weight loss, it’s essential to consume it responsibly. Overindulging can lead to excessive calorie intake, which counteracts its weight loss benefits. Here are some key considerations:
The Importance of Moderation
Honey is still a source of sugar and calories. One tablespoon of honey contains about 64 calories. Consuming more than the recommended amount can lead to weight gain rather than loss. Stick to 1-2 tablespoons per day for optimal benefits.
Is Honey Good for Diabetes?
For diabetics, honey may seem like a natural alternative to refined sugar, but caution is necessary. Honey has a lower glycemic index than sugar, meaning it causes a slower rise in blood sugar. However, it still affects blood glucose levels and should be used sparingly.
Diabetics should consult a healthcare provider before incorporating honey into their diet. Alternatives like stevia or erythritol may be better options for those managing blood sugar levels.
Quality Matters
Not all honey is created equal. Choose raw, unprocessed honey for the highest nutritional value. Processed honey often contains added sugars, reducing its health benefits and making it counterproductive for weight loss.
FAQs
Is raw honey better than processed honey for weight loss?
Raw honey is better for weight loss as it retains natural nutrients and enzymes, aiding digestion and metabolism. Processed honey often loses these benefits due to heat treatment, making it less effective for weight management.
How much honey should I eat daily to lose weight?
Consume 1-2 teaspoons (5-10 grams) of honey daily as part of a balanced diet. Pair it with warm water or lemon for added benefits. Overconsumption may add unnecessary calories, hindering weight loss efforts.
Is Honey Good for a Weight Loss Diet?
Honey is good for a weight loss diet when consumed in moderation. Its natural sugars provide quick energy, while its antioxidants and enzymes support metabolism, promoting fat-burning when combined with a healthy lifestyle.
Can I replace sugar with honey for weight loss?
Yes, replacing sugar with honey can aid weight loss. Honey is a natural sweetener with fewer calories and more nutrients than sugar, reducing overall calorie intake and offering health benefits when used in moderation.
How Long Does Honey Take to Lose Weight?
The timeline for weight loss with honey varies based on diet and exercise. Using honey regularly with a calorie-controlled diet may show noticeable results in 2-4 weeks, depending on individual metabolism and lifestyle.
Conclusion
Is honey good for weight loss? Absolutely—when used in moderation as part of a balanced diet. Its natural sweetness, coupled with nutrients and antioxidants, makes it a superior alternative to refined sugar. By incorporating honey into meals, beverages, and snacks, you can enhance flavor while supporting your weight loss goals.
Pairing honey with nutrient-dense foods like oatmeal, Greek yogurt, or tea further amplifies its benefits. Remember, portion control and consistency are key. While honey is no miracle solution, it can be a valuable ally in your weight management journey.
Dark chocolate is a favorite indulgence for many, often touted as a treat that blends decadence with health benefits. Unlike regular chocolate, it’s less sugary and packed with nutrients that might surprise you. But the question remains: Is dark chocolate good for you?
The answer lies in its unique composition. It is rich in antioxidants, minerals, and even compounds that can uplift your mood. However, like any food, moderation is key. In this article, we’ll dive into the nutritional value of chocolate and explore how it can influence various aspects of your health. By the end, you’ll know whether this delicious treat deserves a spot in your daily diet.
Nutritional Profile
Dark chocolate is more than just a sweet indulgence; it’s a nutrient-packed powerhouse.
1. Macronutrients and Micronutrients
It contains a balanced blend of fats, carbs, and proteins. Its 100-gram bar of 70-85% offers:
Calories: Around 600
Fat: 43 grams (majorly heart-healthy fats like oleic acid)
Carbohydrates: 46 grams (with about 11 grams of fiber)
Protein: 8 grams
Micronutrient-wise, it is a treasure trove. It’s packed with magnesium, copper, manganese, and iron. These minerals play roles in energy production, bone health, and blood production.
2. Antioxidants and Flavonoids
One of dark chocolate’s most celebrated components is its antioxidants, particularly flavonoids. These compounds help combat oxidative stress, reduce inflammation, and promote cell repair. Antioxidants also contribute to dark chocolate’s potential to protect against chronic diseases like heart disease and cancer.
In short, it combines indulgence with nutrients, offering a balance of pleasure and health benefits.
Health Benefits of Dark Chocolate
Dark chocolate isn’t just delicious—it’s beneficial for your body and mind. Let’s explore how.
1. Cardiovascular Health
It is excellent for your heart. The flavonoids it contains can lower blood pressure and improve blood flow by relaxing the arteries. Studies show that regular consumption of moderate amounts may reduce the risk of heart disease by improving cholesterol levels and decreasing bad LDL cholesterol.
2. Brain Health
Dark chocolate is known to enhance brain function. It improves blood flow to the brain, which can boost cognitive functions such as memory and focus. Its caffeine and theobromine content also provide mild stimulation, making it easier to stay alert.
Research suggests that regular consumption may even delay neurodegenerative diseases like Alzheimer’s.
3. Skin Health
Believe it or not, it can be great for your skin. Flavonoids improve skin hydration and protect against harmful UV rays. They also enhance skin density and elasticity, reducing the appearance of wrinkles over time. However, continuous dark chocolate consumption can reverse these skin benefits.
4. Liver and Other Organs
Dark chocolate’s antioxidants extend their benefits to your liver. It can help reduce inflammation and oxidative stress, which are crucial for liver health. Additionally, it promotes overall organ health by improving blood circulation and reducing stress markers.
Specific Scenarios: Is Dark Chocolate Good for You?
Dark chocolate’s benefits vary depending on when and how you consume it. Here’s what you need to know:
1. On Your Period
It can be a lifesaver during menstruation. It’s rich in magnesium, which helps relax muscles and alleviate cramps. Plus, its mood-enhancing properties can combat PMS-related mood swings.
2. Before Bed
Consuming it before bed can be a mixed bag. While it’s rich in magnesium, which promotes relaxation, it also contains caffeine. This caffeine content, albeit low, might interfere with sleep for sensitive individuals.
Is it good for you before bed? If you’re not caffeine-sensitive, a small piece can be calming, but avoid large amounts.
3. When Pregnant
Pregnant women can enjoy dark chocolate in moderation. It improves blood flow and can lower the risk of pregnancy-related hypertension. However, too much caffeine from the chocolate might be harmful, so balance is essential.
Let’s find out the relationship between weight management and dark chocolate.
1. Satiety and Cravings
Dark chocolate can help curb cravings and increase feelings of fullness. Its fiber content and rich flavor make it a satisfying snack that keeps you from overindulging in unhealthy foods.
2. Is Dark Chocolate Good for Weight Loss?
Yes, it can support weight management when used as a mindful treat. It regulates hunger hormones like ghrelin, reducing the likelihood of overeating. However, portion control is vital to avoid excess calorie intake.
How to Choose Healthy Dark Chocolate?
You should keep these considerations in mind when looking for healthy dark chocolate.
1. Cocoa Percentage
The higher the cocoa percentage, the healthier the chocolate. Aim for at least 70% cocoa to ensure a low sugar content and maximum flavonoids. Chocolates with 85% or more cocoa are even better for health benefits.
2. Compare Brands
Dove: Offers smoother textures but lower cocoa percentages, making it less ideal for health benefits.
Bournville: Known for its high cocoa content and minimal sugar, making it a good choice.
Hershey’s: Often has added sugars and lower cocoa percentages, so choose wisely from their darker options.
When selecting a brand, check labels for minimal added sugar and simple ingredient lists.
Dark Chocolate vs. Milk Chocolate
Here is the comparison between dark and milk chocolate.
1. Why is dark chocolate healthier?
It contains more cocoa, less sugar, and higher amounts of antioxidants compared to milk chocolate. These qualities make it a better choice for heart, brain, and overall health.
2. Is Milk Chocolate Good for You?
It lacks nutrient density. Its high sugar and fat content outweigh the minimal cocoa benefits, making it less healthy overall.
Potential Side Effects
Eating too much dark chocolate can lead to the following:
1. Weight Gain
Dark chocolate is calorie-dense due to its high fat and sugar content. Consuming large amounts can lead to a calorie surplus, resulting in weight gain. Moderation is essential; a small portion of high cocoa chocolate provides health benefits without excessive calories.
2. Caffeine Sensitivity
This chocolate contains caffeine and theobromine, which can affect sensitive individuals. Consuming too much may lead to jitteriness, increased heart rate, or difficulty sleeping, especially if eaten close to bedtime. Choose smaller portions or lower-caffeine options if you’re prone to these effects.
3. Digestive Issues
Overindulging may upset the stomach or cause bloating due to its fat content and the presence of caffeine and sugar. Individuals with sensitive digestion or pre-existing gastrointestinal conditions should consume it in moderation to avoid discomfort.
Moderation is the key to enjoying dark chocolate without drawbacks.
FAQs
1. Is dark chocolate good for daily consumption?
Yes, it can be consumed daily if eaten in moderation. Opt for small portions (1-2 ounces) of dark chocolate with at least 70% cocoa to enjoy its antioxidants, flavonoids, and magnesium benefits. Overindulgence may add excess calories and sugar, potentially outweighing its health advantages.
2. What percentage of cocoa is ideal for health?
For maximum health benefits, choose dark chocolate with at least 70% cocoa. Higher cocoa content ensures greater flavonoids and lower sugar levels. Aim for 85-90% cocoa if you prefer lower sweetness and maximum antioxidants. Avoid chocolates with excessive added sugars or artificial ingredients.
3. Can dark chocolate improve mood during periods?
Yes, it can enhance mood during periods due to its magnesium and serotonin-boosting properties. Magnesium helps ease cramps, while serotonin improves mood. Choose high cocoa varieties for the best results, but avoid overeating to prevent extra calorie intake, which may contribute to bloating.
4. Are all brands of dark chocolate equally healthy?
No, not all brands are equally healthy. Prioritize brands with high cocoa content (70% or more), minimal sugar, and no artificial additives. Brands like Dove, Bournville, and Hershey’s vary in ingredients and nutritional value, so check labels for the healthiest option.
5. Does dark chocolate help with weight loss?
Dark chocolate may assist with weight loss by reducing cravings and promoting satiety. Its flavonoids support insulin sensitivity and metabolism. However, moderation is key; excess consumption adds calories and fats, counteracting weight-loss efforts. Combine dark chocolate with a balanced diet and regular exercise for optimal results.
Conclusion
Dark chocolate can be a delicious and nutritious addition to your diet. Its benefits span heart health, brain function, skincare, and even weight management. However, the key lies in choosing and consuming high-cocoa-content varieties in moderation.
For the best results, opt for chocolates with at least 70% cocoa, avoid overindulging, and pair them with a balanced diet. When enjoyed responsibly, dark chocolate proves that health and indulgence can go hand in hand.
Lemon juice has gained immense popularity among those pursuing weight loss goals. Known for its refreshing taste and low-calorie profile, it’s a staple in many diet plans. Rich in vitamin C, it boosts immunity and helps maintain hydration, which is essential for overall health and weight management. But the question remains: is lemon juice good for weight loss? Let’s explore its benefits, uses, and scientific backing in this detailed guide.
Lemon juice is often celebrated for its potential to enhance metabolism. The citric acid in lemons stimulates the production of digestive enzymes, helping break down food more efficiently. This process supports better nutrient absorption and reduces bloating.
Moreover, lemons are rich in polyphenols and plant-based compounds that may promote fat breakdown. These properties make lemon juice a great addition to any weight loss journey.
2. Hydration and Appetite Control
Staying hydrated is critical for weight loss. Lemon juice mixed with water not only keeps you refreshed but also encourages frequent water intake. Proper hydration can prevent overeating by curbing hunger signals often confused with thirst.
Additionally, lemon juice contains pectin, a type of fiber that promotes satiety. While the fiber content is minimal in juice, incorporating lemon pulp can maximize its benefits.
Scientific Evidence on Lemon Juice and Weight Loss
Though not a magic potion, lemon juice may support weight loss when combined with a healthy diet and exercise. A 2014 study found that polyphenols in citrus fruits could help reduce fat accumulation. Another research highlights the role of hydration in improving metabolism and reducing calorie intake. These findings underline the potential of lemon juice in aiding weight loss, though individual results may vary.
Best Ways to Use Lemon Juice for Weight Loss
There are several ways that lemon water can be used to lose weight.
Is Lemon Juice and Water Good for Weight Loss?
Yes, combining lemon juice with water is an excellent way to stay hydrated and promote weight loss. The dilution reduces acidity, making it easier on the stomach. Drinking a glass of lemon water before meals can prevent overeating and support digestion.
How to Prepare:
Squeeze the juice of half a lemon into a glass of lukewarm or cold water.
Add a teaspoon of honey for a touch of sweetness (optional).
Is Hot Water With Lemon for Weight Loss Effective?
Warm lemon water is another popular method for reaping lemon juice benefits. It is believed to stimulate digestion more effectively, especially when consumed first thing in the morning. Warm water helps flush out toxins and primes the digestive system for the day.
Why It Works:
Warm water soothes the stomach.
Lemon juice enhances enzymatic activity, aiding in fat breakdown.
Juice Combinations for Weight Loss
Let’s find out which juice combinations are suitable for weight loss.
Is Carrot and Lemon Juice Good for Weight Loss?
Carrots are high in fiber and low in calories, complementing lemon juice’s metabolism-boosting properties. Together, they create a nutrient-rich drink that supports fat loss.
Is Lemon and Mint Juice Good for Weight Loss?
Lemon and mint juice is a refreshing combination. Mint aids digestion, while lemon enhances hydration and satiety.
Is Ginger and Lemon Juice Good for Weight Loss?
Yes, ginger and lemon juice is a powerful mix. Ginger has thermogenic properties that can increase calorie burning. Adding lemon juice boosts its fat-burning potential.
Is Apple Cider Vinegar and Lemon Juice Good for Weight Loss?
This combination is popular for its ability to regulate blood sugar levels and promote fat breakdown. However, it should be consumed in moderation to avoid stomach irritation.
How to Make Lemon Water for Weight Loss?
Lemon water is an easy, refreshing, and effective addition to your weight loss journey. Here’s how you can prepare it step by step, with some variations to keep things interesting.
Classic Lemon Water Recipe
Take a fresh lemon and wash it thoroughly.
Slice the lemon in half and squeeze the juice of one half into a glass of water.
Add about 8 ounces of lukewarm, cold, or warm water, depending on your preference.
Stir well and drink immediately.
Pro Tips:
Use filtered or mineral water for better taste.
Drink it first thing in the morning to kickstart your metabolism.
Variations for Flavor Enhancements
Mint Lemon Water: Add a few fresh mint leaves for a cooling effect.
Ginger Lemon Water: Grate a small piece of ginger into your lemon water for added thermogenic benefits.
Cucumber Lemon Water: Slice a few pieces of cucumber and let them infuse in the water for extra hydration.
Honey Lemon Water: Add a teaspoon of honey for natural sweetness.
Spiced Lemon Water: Sprinkle a pinch of cayenne pepper or turmeric for an additional health boost.
Reducing belly fat requires a combination of diet, exercise, and good hydration. While lemon water isn’t a magic solution, here are some targeted recipes to support your efforts.
It’s a common misconception that lemon juice can directly burn fat. Let’s break down the science.
Understanding Fat Metabolism
Fat loss occurs when you consume fewer calories than you burn. Lemon juice, by itself, doesn’t melt fat. However, it supports weight loss in other ways:
Boosting Hydration: Proper hydration aids metabolism.
Curbing Cravings: Lemon water can reduce unnecessary snacking by making you feel full.
Why Lemon Alone Isn’t a Fat-Burning Miracle?
Lemon juice contains no fat-burning compounds. Instead, its benefits lie in helping you stay hydrated, improving digestion, and encouraging healthier habits.
So, while lemon water is an excellent ally, achieving fat loss requires a combination of diet, exercise, and consistency.
FAQs
Is Lemon Juice Good for Weight Loss in the Morning?
Drinking lemon juice in the morning kickstarts your metabolism. It replenishes hydration after hours of fasting during sleep. Adding a pinch of turmeric or ginger can enhance its detoxifying effects.
Is Bottled Lemon Juice Good for Weight Loss?
Bottled lemon juice may lack the nutrients and freshness of freshly squeezed juice. Preservatives and added sugars in some brands can diminish its health benefits.
Is Fresh Lemon Juice Good for Weight Loss?
Fresh lemon juice is ideal for weight loss. It retains its natural vitamin C and antioxidants, which are crucial for boosting metabolism and overall health.
How much lemon water should I drink daily?
Drinking 1-2 glasses of lemon water daily is sufficient. Overconsumption may cause acidity or enamel erosion, so moderation is key for maximizing benefits without adverse effects.
Can I add sugar to lemon water?
Adding sugar to lemon water increases calories and reduces its health benefits. For a healthier, low-calorie alternative, opt for natural sweeteners like honey or stevia.
Conclusion
Lemon juice is a versatile and refreshing addition to a weight-loss diet. Its low-calorie nature, ability to boost hydration, and potential to aid digestion make it a popular choice for those aiming to shed extra pounds. While it isn’t a standalone solution, incorporating lemon juice with a balanced diet and active lifestyle can amplify your weight-loss efforts. Experiment with different combinations and methods to find what works best for your body.
Gut health is essential for overall well-being. It affects digestion, immunity, mood, and even skin health. But how do we keep our gut healthy? The answer often lies in what we eat.
Yogurt is a staple food in many diets and is praised for its potential to improve gut health. Loaded with probiotics and other nutrients, yogurt has become a go-to choice for many seeking a balanced gut. But is yogurt good for gut health, and why? This article dives into the science and benefits behind yogurt’s role in supporting your digestive system.
How Does Yogurt Impact Gut Health?
Probiotics are beneficial bacteria found in fermented foods like yogurt. They work to balance the gut microbiome, a diverse ecosystem of bacteria in your digestive tract. When this balance is maintained, it supports smooth digestion and prevents issues like bloating or constipation.
How Does Yogurt Aid Digestion?
The live cultures in yogurt, such as Lactobacillus and Bifidobacterium, help break down lactose. This makes yogurt easier to digest, even for people with mild lactose intolerance. These probiotics also play a key role in strengthening the gut lining, reducing inflammation, and promoting regular bowel movements.
Supporting a Healthy Gut Microbiome
A healthy gut microbiome is linked to better nutrient absorption and a stronger immune system. Yogurt, rich in probiotics and protein, nourishes the good bacteria in your gut, allowing them to thrive and outnumber harmful bacteria. This creates a robust foundation for overall digestive health.
Greek Yogurt vs. Plain Yogurt For Gut Health
Is Greek yogurt good for gut health? Yes, it is. Greek yogurt is strained, making it thicker and higher in protein. It usually contains probiotics, which support gut health, but check the label to ensure it includes live active cultures.
Plain yogurt, on the other hand, is often less processed and retains natural sugars. It is also an excellent option for gut health, especially when unsweetened.
Yogurts Like Coconut and Probiotic Yogurt For Gut Health
Coconut yogurt is a dairy-free alternative. While it can contain probiotics, always read the label to confirm. Probiotic yogurt, specifically designed to boost gut health, often includes strains like Lactobacillus acidophilus. These strains are proven to enhance gut health by aiding digestion and restoring microbiome balance.
The Role of Probiotic Strains
Not all probiotics are the same. Strains like Lactobacillus bulgaricus and Streptococcus thermophilus, commonly found in yogurt, are effective in improving gut health. They survive the digestive process and populate the gut, providing long-term benefits.
Noosa yogurt is creamy and flavorful but may not always prioritize gut health. While it contains live cultures, its high sugar content can offset the benefits of probiotics. It’s best consumed occasionally or in moderation.
Is Activia Yogurt Good for Gut Health?
Activia is a standout choice for gut health. It contains Bifidobacterium animalis DN-173 010, a unique strain clinically shown to improve digestion and reduce bloating. Activia’s focus on probiotics makes it a top pick.
Is Chobani Yogurt Good for Gut Health?
Chobani offers both Greek and plant-based yogurts. Most varieties are rich in probiotics and low in sugar, making them a gut-friendly option. They’re also high in protein, which adds to their overall health benefits.
Is Yoplait Yogurt Good for Gut Health?
Yoplait is widely available and often marketed as a healthy snack. While it contains live cultures, many varieties are high in sugar and artificial flavors. Opt for their plain or low-sugar options to maximize gut health benefits.
Is yogurt good for weight loss? Absolutely. Greek yogurt, in particular, is an excellent choice for those looking to shed pounds. Its high protein content keeps you full for longer, reducing cravings and overeating. Pair it with fruits or nuts for a balanced, low-calorie snack.
Other Health Benefits
Beyond gut health, yogurt offers a wealth of nutrients. It’s a rich source of calcium, which supports strong bones. The probiotics also contribute to improved immunity, while its high protein content helps build muscle. Yogurt’s versatility makes it a nutritious addition to smoothies, dips, and even savory dishes.
Special Considerations for Different Yogurt Types
There are some considerations that everyone should keep in mind when consuming different types of yogurt.
Plain Yogurt: Nutritional Benefits and Gut-Health Impact
Plain yogurt is a classic choice for gut health. It’s minimally processed and usually contains no added sugars, making it a nutritious and gut-friendly option. The probiotics in plain yogurt help balance the gut microbiome, supporting digestion and overall health. Additionally, its calcium and protein content contributes to strong bones and muscles. When choosing plain yogurt, look for varieties labeled with live active cultures to ensure you’re getting the probiotics your gut needs.
Coconut Yogurt: A Dairy-Free Alternative for Gut Health
For those who are lactose-intolerant or prefer plant-based options, coconut yogurt can be an excellent alternative. It is made from coconut milk and often contains added probiotics. However, it’s important to check labels for added sugars or artificial ingredients. While coconut yogurt provides probiotics, it is lower in protein compared to dairy yogurt. Nonetheless, its healthy fats from coconut milk offer anti-inflammatory benefits, making it a great option for gut health.
Frozen Yogurt: Does Freezing Impact Probiotics?
Frozen yogurt is a popular dessert, but does it still support gut health? Freezing can reduce the number of live probiotics, especially during long storage periods. However, some frozen yogurt brands are designed to retain active cultures. Always look for labels that mention live and active cultures to ensure you’re getting the gut-health benefits. Frozen yogurt can be a healthier dessert option compared to ice cream, but it should be consumed in moderation due to added sugars.
Unique Benefits of Yogurt
There are some unique yogurt benefits, as mentioned below.
For Females: Hormone Regulation and Bone Health
Yogurt is particularly beneficial for women’s health. It is rich in calcium and vitamin D, which support bone density, especially during menopause. The probiotics in yogurt can also aid in hormone regulation by reducing gut inflammation. This, in turn, contributes to improved menstrual health and a balanced hormonal cycle. Furthermore, yogurt’s high protein content helps maintain muscle mass, which is essential for long-term health.
Sexual Health: Yogurt’s Role in Reproductive Health
Yogurt has surprising benefits for sexual health. The probiotics in yogurt promote a balanced vaginal microbiome, reducing the risk of infections like yeast infections and bacterial vaginosis. Additionally, the high levels of zinc and calcium in yogurt are linked to improved fertility and reproductive health. These nutrients play a role in hormone production and overall sexual wellness, making yogurt a valuable addition to the diet.
Top 10 Benefits of Yogurt
The yogurt benefits are as follows:
Improves Gut Health: Probiotics in yogurt maintain a healthy gut microbiome.
Boosts Immunity: Probiotics enhance the immune response, reducing the risk of infections.
Supports Bone Health: Calcium and vitamin D strengthen bones and prevent osteoporosis.
Aids Digestion: Yogurt helps prevent bloating and constipation.
Promotes Weight Loss: Its high protein content keeps you full longer.
Balances Hormones: Yogurt supports hormonal health in the body.
Lowers Cholesterol: Yogurt can improve heart health by reducing LDL cholesterol levels.
Improves Mood: A healthy gut influences better mental health and reduced stress.
Supports Muscle Growth: Protein in yogurt helps repair and build muscles.
How to Choose the Best Yogurt for Gut Health?
You must keep these considerations in mind when looking for the best yogurt for gut health.
Look for Active Probiotics
The key to gut health is selecting a yogurt with live active cultures. Strains like Lactobacillus acidophilus and Bifidobacterium are particularly effective in supporting gut balance.
Is natural yogurt good for you? Absolutely. Natural or organic yogurt is free from additives, artificial flavors, and hormones, making it a healthier choice.
Check the Labels
Always read the nutritional information. Look for live and active cultures and ensure the yogurt is rich in protein, low in sugar, and free from artificial additives.
FAQs
1. Is plain yogurt better than flavored yogurt?
Yes, plain yogurt is better than flavored yogurt for gut health because it typically has fewer added sugars and artificial ingredients. It provides probiotics, protein, and calcium without unnecessary additives, making it a healthier option. You can add natural sweeteners like fruits or honey for flavor without compromising its benefits.
2. Can vegans benefit from yogurt?
Yes, vegans can benefit from plant-based yogurts made from almond, coconut, or soy milk. These often contain probiotics similar to dairy-based yogurts. Check for added live cultures and minimal sugar content to ensure maximum health benefits, particularly for gut health and overall digestion.
3. Does eating yogurt every day improve gut health?
Eating yogurt daily can improve gut health if it contains live and active probiotics. Regular consumption supports a balanced gut microbiome, aids digestion, and boosts immunity. Choose yogurts with minimal sugar and additives for the best results. Consistency is key to experiencing long-term benefits.
4. Are low-fat yogurts good for gut health?
Low-fat yogurts can be good for gut health if they contain active probiotics. However, some low-fat options add sugar to enhance flavor, which may counteract benefits. Choose low-fat yogurts with no added sugars or artificial sweeteners for a gut-friendly and healthy choice.
5. What’s the best time to eat yogurt?
The best time to eat yogurt is in the morning or as a snack. Eating it on an empty stomach can help probiotics reach the gut more effectively. It’s also a great pre- or post-workout snack due to its protein content and digestion-friendly properties.
Conclusion
Yogurt is undeniably a powerhouse food for gut health and overall well-being. From its rich probiotic content to its versatility in meals, yogurt offers numerous benefits. Incorporating it into your diet can improve digestion, strengthen immunity, and even support weight management. Whether you choose plain, Greek, or coconut yogurt, prioritize products with active probiotics and minimal processing. With its wide-ranging health benefits, yogurt is an easy and delicious way to promote a healthier you.
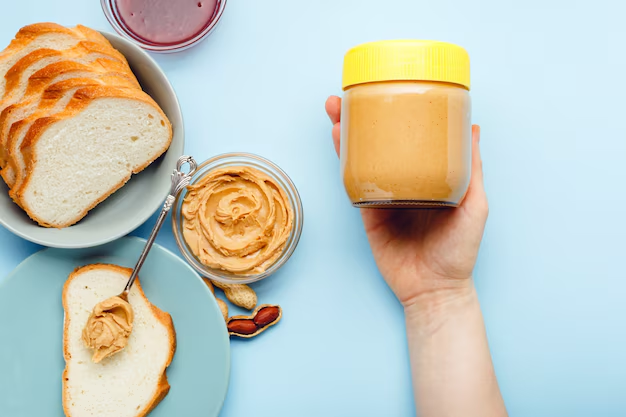
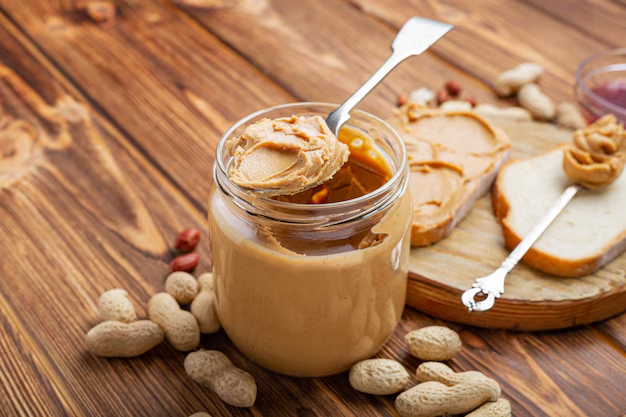
Peanut butter is one of the most popular and versatile foods worldwide. It’s creamy, delicious, and loaded with nutrients. But if you’re watching your carbohydrate intake, you might wonder, is peanut butter low in carbs? This article delves into its nutritional profile, explores its compatibility with low-carb and keto diets, and examines specific use cases. Let’s find out whether this pantry staple can fit into your health goals.
Nutritional Overview of Peanut Butter
Peanut butter is not just a tasty treat; it’s packed with macronutrients like carbs, fats, and proteins. Understanding its nutritional makeup is crucial for determining its role in your diet.
Carbohydrates in Peanut Butter
Peanut butter contains a moderate amount of carbohydrates. On average, one tablespoon (about 16 grams) of peanut butter has roughly 3–4 grams of carbs. This makes it relatively low-carb compared to other spreads like jelly or chocolate spreads.
But are peanuts themselves carbohydrates or protein? The answer lies in their composition. Peanuts, the base ingredient of peanut butter, are a legume. They contain primarily fats and proteins with a small portion of carbs. About 100 grams of peanuts contain 16 grams of carbs, which is why they are classified as a low-carb food.
Fats and Proteins in Peanut Butter
Peanut butter is rich in healthy fats. These include monounsaturated and polyunsaturated fats, which are heart-healthy and provide sustained energy. One tablespoon contains about 8 grams of fat.
In terms of protein, peanut butter is a great source. A single tablespoon delivers approximately 4 grams of protein, making it an excellent option for building and repairing muscles. These factors combined make peanut butter a nutrient-dense choice for many diets.
Peanut Butter and Low-Carb Diets
Low-carb diets focus on limiting carbohydrates while increasing fats and proteins. Let’s see if peanut butter fits into this framework.
Is Peanut Butter Good for Low-Carb Diets?
Yes, peanut butter can be a great addition to low-carb diets. Its low carbohydrate content and high fat profile align well with these dietary principles. However, moderation is key. Overeating peanut butter can still contribute to carb intake, especially if the brand contains added sugars.
Is Peanut Butter Low in Carbs and Sugar?
Most natural peanut butter are low in both carbs and sugar. Look for varieties with no added sugar, as some commercial brands sneak in sweeteners. For example, one tablespoon of natural peanut butter may contain 2–3 grams of carbs and less than 1 gram of sugar. In contrast, sweetened versions may have double the carbs.
Is Peanut Butter Carb-Friendly?
Peanut butter is considered carb-friendly, but not all products are created equal. Always read the label to avoid hidden carbs from added ingredients. The simpler the ingredient list, the better.
Keto Diet and Peanut Butter
The ketogenic diet requires a very low intake of carbs, typically under 50 grams per day. Can peanut butter fit within these strict guidelines? Let’s dive in.
How to Eat Peanut Butter on Keto?
Peanut butter can be enjoyed on keto in moderation. Stick to unsweetened, natural peanut butter, as it typically has fewer carbs. Pair it with keto-friendly foods like celery, cucumber slices, or almond flour crackers. Another option is to use it in keto recipes like fat bombs or smoothies.
Why No Peanuts on Keto?
You might have heard that peanuts are not ideal for keto. This is because peanuts are technically legumes, not nuts. Legumes are higher in carbs compared to true nuts like almonds or walnuts. However, in small amounts, peanuts and peanut butter can still fit into a keto plan without disrupting ketosis.
Is Skippy Peanut Butter Keto?
Skippy peanut butter is a popular brand, but most varieties contain added sugars and hydrogenated oils. This makes them less suitable for keto. If you’re following a ketogenic diet, avoid Skippy and similar brands. Opt for natural alternatives instead.
Best Peanut Butter for Keto
The best peanut butter for keto should be unsweetened, with minimal ingredients. Brands like Crazy Richard’s, Smucker’s Natural, and 365 by Whole Foods are excellent choices. They typically contain just peanuts and a pinch of salt, keeping the carb count as low as possible.
Yes, peanut butter is beneficial during early pregnancy. It provides essential nutrients like protein, healthy fats, and folate, which support fetal development. Folate is particularly crucial as it helps prevent neural tube defects.
Peanut butter is also an excellent source of vitamin E, magnesium, and potassium, all of which are important for a healthy pregnancy. Additionally, its high caloric density can help combat fatigue, a common symptom in early pregnancy.
Cautions
While peanut butter is generally safe, some individuals might have a peanut allergy. Pregnant women should also avoid peanut butters with added sugars or hydrogenated oils, as these can negatively impact health.
Can We Eat Peanut Butter in a Diet?
Absolutely! Peanut butter fits well into many diets, whether for weight loss, muscle building, or general health.
Weight Management: The protein and healthy fats in peanut butter promote satiety, reducing overall calorie intake.
Energy Boost: Peanut butter’s calorie density makes it a quick energy source for workouts or long days.
Heart Health: Monounsaturated fats in peanut butter support cardiovascular health.
Tips for Incorporating Peanut Butter
Use it as a topping for oatmeal or smoothies.
Spread it on apple slices for a balanced snack.
Add it to sauces or dressings for a creamy texture.
Choosing the Right Peanut Butter
Peanut butter is a favorite among health enthusiasts and food lovers alike. It’s creamy, delicious, and packed with nutrients. But when you’re on a low-carb diet, finding the right peanut butter can feel tricky. This guide will help you navigate your options, focusing on the lowest-carb peanut butter choices.
The carb content in peanut butter varies widely depending on the brand and ingredients. Peanut butter made with just peanuts and a little salt is typically the best choice. These products have fewer carbs than those with added sugars, oils, and flavorings.
Here’s what to look for when shopping for peanut butter:
Ingredients: Stick to peanut butter made with 100% peanuts or peanuts and salt. Avoid added sugar and oils.
Net Carbs: Check the label for net carbs, which is calculated as total carbs minus fiber. Aim for peanut butter with 3g net carbs or less per serving.
Serving Size: A typical serving is 2 tablespoons, so compare carb counts based on this standard.
Some popular low-carb peanut butter brands include:
Smucker’s Natural Peanut Butter (2g net carbs per serving)
Crazy Richard’s Peanut Butter (2g net carbs per serving)
Teddie All Natural Peanut Butter (3g net carbs per serving)
These brands offer minimal processing and no added sugars, making them ideal for low-carb diets.
Comparing Popular Brands for Carb and Sugar Content
Choosing the right brand makes a big difference. Always read labels carefully. A small difference in sugar content can quickly add up.
Peanut Butter and Calories
Peanut butter is high in calories, which might surprise some people. A typical serving of 2 tablespoons contains around 190–210 calories. Most of these come from healthy fats and protein. But why is peanut butter so calorie-dense?
Fat Content: Peanuts are naturally rich in fats, contributing to the high calorie count.
Concentrated Nutrition: The processing of peanuts into peanut butter doesn’t dilute its calorie content. It remains as nutrient-packed as whole peanuts.
Balancing Calories on a Low-Carb Diet
Calories matter, even on a low-carb diet. Peanut butter can fit into your meal plan, but portion control is key. Here’s how to keep it balanced:
Use Measuring Spoons: Stick to the recommended serving size of 2 tablespoons.
Pair with Low-Carb Foods: Combine peanut butter with celery sticks, cucumber slices, or a small apple for a balanced snack.
Limit Daily Intake: Aim for 1–2 servings per day to avoid overloading on calories.
By managing your portions, you can enjoy peanut butter without compromising your calorie goals.
Low-Carb Nuts as Alternatives
If you’re looking for variety, low-carb nuts are excellent alternatives to peanut butter. They provide healthy fats, protein, and fewer carbs.
Comparison of Nuts and Peanut Butter
Food
Net Carbs (per 1 Oz)
Calories
Description
Almond Butter
3 g
190
Smooth, mild flavor, fewer carbs than peanut butter
Walnut Butter
2 g
200
High in omega-3 fats
Pecans
1 g
200
Excellent for very low-carb diets
Peanuts
4 g
160
Slightly higher in carbs but affordable
Alternating between peanut butter and other low-carb nuts can keep your diet interesting. Almond butter, for instance, is a fantastic choice for those who want a lighter flavor and fewer carbs.
FAQs
1. Is peanut butter good for a low-carb diet?
Yes, peanut butter can be good for a low-carb diet, especially natural peanut butter. It’s low in carbs and high in healthy fats, making it a great choice in moderation. Watch out for added sugars in processed varieties, as they can increase carbohydrate content.
2. How many carbs are in natural peanut butter?
Natural peanut butter typically contains about 4-7 grams of carbs per 2-tablespoon serving, with 2-3 grams being dietary fiber. Always check the label, as some brands vary slightly depending on added ingredients or the processing method.
3. Can I eat peanut butter every day?
Yes, you can eat peanut butter daily if consumed in moderation. Stick to 1-2 tablespoons to avoid excessive calorie intake. It provides protein, healthy fats, and essential nutrients. Balance it with other foods to meet your dietary goals.
4. What are the best low-carb alternatives to peanut butter?
Low-carb alternatives include almond butter, macadamia nut butter, sunflower seed butter, and tahini. These options are similarly nutrient-dense but may offer lower carbs or different flavor profiles, catering to various dietary preferences.
5. How do I pick the healthiest peanut butter?
Choose natural peanut butter with only peanuts and salt as ingredients. Avoid added sugars, hydrogenated oils, or unnecessary additives. Opt for organic or minimally processed options when possible for better nutritional quality.
If you’re seeking variety, low-carb nuts like almonds and walnuts are fantastic alternatives. They provide similar nutritional benefits with unique flavors. By making mindful choices, you can enjoy peanut butter while staying on track with your health goals.
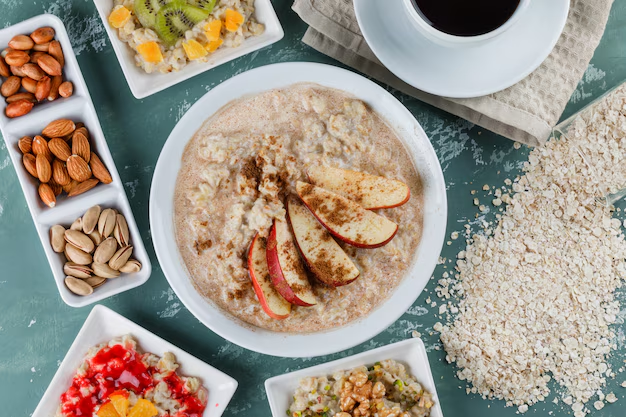
Oatmeal is celebrated as a fiber-rich breakfast staple, perfect for starting the day on a healthy note. But is oatmeal high in fiber, and what makes it so beneficial? Dietary fiber plays a vital role in maintaining digestive health, controlling blood sugar levels, and reducing cholesterol. A balanced diet with adequate fiber improves overall well-being and supports heart health.
This article explores the fiber content of oatmeal, delving into the differences between various types and cooking methods. We’ll also discuss its health benefits and how it compares to other foods in terms of fiber. If you’re curious about optimizing your fiber intake, this guide is tailored for you.
What Makes Oatmeal High in Fiber?
Oatmeal is a powerhouse breakfast for dietary fiber, with approximately 4 grams of fiber per cup of cooked oats. The primary types of fiber in oatmeal are soluble fiber and insoluble fiber, each offering unique health benefits:
Soluble fiber (like beta-glucan): Dissolves in water, forming a gel-like substance that helps lower cholesterol and stabilize blood sugar.
Insoluble fiber: Promotes bowel health by adding bulk to stool, preventing constipation.
Types of Oatmeal and Fiber Content
The fiber content in oatmeal can vary depending on its type. Here’s a quick breakdown:
Steel-cut oats: Packed with fiber due to minimal processing, offering the highest amount.
Old-fashioned oats: Retain a significant portion of fiber while being easier to prepare than steel-cut oats.
Instant oats: Still contain fiber but slightly less due to extensive processing.
Does Cooking Affect Fiber?
Cooking methods can impact oatmeal’s fiber content. While the raw fiber content remains the same, the volume of oatmeal may increase when cooked, slightly diluting the fiber concentration. For example, 1/2 cup of dry oats becomes about 1 cup of cooked oatmeal but still contains roughly the same total fiber.
Let’s find out the fiber content in different types of oatmeal.
1. Is Steel-Cut Oatmeal High in Fiber?
Yes, steel-cut oatmeal is one of the highest in fiber. With its coarse texture and minimal processing, it offers around 5 grams of fiber per 1/4 cup (dry). Its slow digestion supports prolonged fullness, making it ideal for those seeking sustained energy and digestive health benefits.
2. Is Instant Oatmeal High in Fiber?
Instant oatmeal contains less fiber compared to steel-cut or old-fashioned oats, with about 3 grams per serving. The fine processing to achieve quick cooking reduces some fiber. However, it’s still a nutritious option when fortified with additional fiber.
Tip: Choose plain instant oatmeal instead of flavored options to avoid added sugars.
3. Is Old-Fashioned Oatmeal High in Fiber?
Old-fashioned oatmeal is another excellent source of fiber, containing about 4 grams per serving. The rolled texture retains a substantial amount of fiber while being more versatile than steel-cut oats.
4. Is Quick Oatmeal High in Fiber?
Quick oats, similar to instant oatmeal, provide around 3–4 grams of fiber per serving. They undergo more processing than old-fashioned oats, but their convenience and nutritional value make them a good option for busy mornings.
5. Is Baby Oatmeal High in Fiber?
Baby oatmeal is finely ground for easier digestion but still retains fiber. It typically contains 2–3 grams per serving, making it suitable for introducing dietary fiber to infants.
Caution: Consult a pediatrician before adding fiber-rich foods to a baby’s diet.
6. Is Cooked Oatmeal High in Fiber?
Cooked oatmeal is rich in fiber, with 4 grams per 1 cup. While cooking may change the texture and volume, the fiber content remains constant, offering the same benefits for digestion and heart health.
7. Is Gluten-Free Oatmeal High in Fiber?
Yes, gluten-free oatmeal contains the same fiber as regular oatmeal. It’s an excellent option for individuals with gluten sensitivities or celiac disease, providing about 4 grams of fiber per serving.
Note: Ensure the gluten-free label to avoid cross-contamination during processing.
8. Is Plain Oatmeal High in Fiber?
Plain oatmeal, free from added flavors or sugar, offers the most pure fiber content. A serving of plain oatmeal contains 4 grams of fiber and is a great base for healthy toppings like fruits and nuts.
10 Health Benefits of Oatmeal
Oatmeal is more than just a comforting breakfast; it’s a powerhouse of nutrients with numerous health benefits. Whether you enjoy it in the morning, at night, or with milk, oats are a versatile food that can enhance your well-being. This article explores the top health benefits of oatmeal, its nutritional value, and important considerations.
1. Aids in Weight Loss
Oatmeal is rich in soluble fiber, particularly beta-glucan, which helps you feel full longer. This reduces the urge to snack between meals. The slow digestion of oats also stabilizes blood sugar levels, minimizing sudden hunger pangs.
2. Lowers Cholesterol Levels
Beta-glucan in oats binds to cholesterol in the gut, reducing its absorption. This mechanism lowers bad cholesterol (LDL) without affecting good cholesterol (HDL), promoting heart health.
3. Supports Heart Health
The combination of fiber, antioxidants, and healthy fats in oatmeal works to protect your heart. Oats help reduce inflammation, which is a key factor in cardiovascular diseases.
4. Improves Digestive Health
Oatmeal is an excellent source of dietary fiber, which promotes regular bowel movements and prevents constipation. The prebiotic effect of oats nourishes beneficial gut bacteria, enhancing gut health.
5. Boosts Energy Levels
Oats provide complex carbohydrates, which release energy slowly. This makes oatmeal a great option for sustained energy throughout the day or before a workout.
6. Stabilizes Blood Sugar
Oats have a low glycemic index, which means they cause a gradual rise in blood sugar. This is especially beneficial for people with diabetes or those looking to manage their blood sugar levels.
7. Enhances Immune Function
Beta-glucan not only benefits your cholesterol levels but also strengthens your immune system. It enhances the activity of white blood cells, helping your body fight infections.
8. Promotes Skin Health
Oatmeal’s anti-inflammatory properties can soothe itchy, irritated skin. It is often used in skincare products to treat conditions like eczema and acne.
9. Reduces Stress
Oats contain magnesium, which helps regulate the nervous system. A warm bowl of oatmeal can act as a comfort food, reducing stress and improving mood.
10. Helps Reduce Risk of Cancer
The antioxidants and fiber in oats are linked to a reduced risk of certain cancers, such as colorectal cancer. Their anti-inflammatory properties play a role in cancer prevention.
Benefits of Eating Oatmeal at Night
Eating oatmeal at night can be a healthy option, especially if you’re looking for a light, satisfying meal. Here are some specific benefits:
Better Sleep: Oats are rich in melatonin and magnesium, which help promote relaxation and improve sleep quality.
Keeps You Full: Eating oatmeal at night curbs midnight cravings and keeps you satiated till morning.
Supports Recovery: For athletes, oats consumed at night can help replenish energy stores and aid muscle recovery.
Benefits of Oats with Milk
Pairing oats with milk creates a nutrient-dense meal. Here’s why:
Calcium and Vitamin D: Milk adds calcium and vitamin D, strengthening bones and teeth.
Complete Protein: Combining oats and milk provides a complete protein source, essential for muscle repair and growth.
Creamy Texture: Milk enhances the taste and creaminess of oatmeal, making it more enjoyable to eat.
Oatmeal’s Role in Weight Loss, Cholesterol Reduction, and Heart Health
Here are the details about oatmeal’s role in weight loss, cholesterol reduction, and heart health.
Oatmeal is a low-calorie, nutrient-dense food. Its high fiber content suppresses appetite and supports weight management. Additionally, oats are free of added sugars and unhealthy fats, making them a guilt-free choice.
Cholesterol Reduction
Beta-glucan in oats absorbs cholesterol and bile acids, which are then excreted from the body. This natural process helps reduce the risk of cardiovascular diseases.
Heart Health
The antioxidants in oats, such as avenanthramides, protect blood vessels from damage and improve blood flow. Regular consumption of oatmeal lowers blood pressure, further reducing the risk of heart disease.
Disadvantages and Considerations
While oatmeal is generally healthy, there are a few points to consider:
Overeating: Consuming large portions can lead to excess calorie intake, which may hinder weight loss goals.
Instant Oatmeal: Pre-packaged instant oats often contain added sugars and artificial flavors. Opt for plain oats for maximum benefits.
Oats are nutrient-rich and provide a variety of essential macronutrients and micronutrients. Here’s a breakdown of their nutritional profile:
Nutrients
Amount (per 100g)
Calories
389 kcal
Protein
16.9 g
Carbohydrates
66.5 g
Dietary Fibers
10.6 g
Fat
6.9 g
Calcium
54 mg
Irom
4.7 mg
Magnesium
177 mg
Zinc
3.1 mg
Special Focus on Fiber
The high fiber content in oats aids digestion, regulates blood sugar, and lowers cholesterol. Steel-cut and rolled oats offer more fiber than instant varieties, making them the healthier choice.
Yes, you can eat oatmeal daily. It’s a nutrient-dense food rich in fiber, vitamins, and minerals. Regular consumption supports digestion, lowers cholesterol, and promotes heart health. Choose plain, unsweetened oatmeal to avoid added sugars, and pair it with healthy toppings like fruits or nuts for balanced nutrition.
2. What’s the healthiest type of oatmeal?
Steel-cut oats are the healthiest type due to minimal processing retaining more fiber and nutrients. They have a lower glycemic index, providing sustained energy and improved blood sugar control. Old-fashioned oats are also nutritious, but instant oatmeal often contains added sugars and fewer health benefits.
3. Is oatmeal good for people with diabetes?
Yes, oatmeal is beneficial for people with diabetes. It contains soluble fiber, which slows digestion, stabilizing blood sugar levels. Choose unsweetened varieties and pair oatmeal with protein or healthy fats to further prevent blood sugar spikes. Avoid flavored or instant oats with added sugars.
4. Can oatmeal help in muscle building?
Oatmeal supports muscle building by providing complex carbohydrates for energy and protein for muscle repair. It’s rich in nutrients like magnesium and iron, which are vital for muscle function. Pair oatmeal with protein-rich toppings like nuts, seeds, or Greek yogurt to maximize its benefits for muscle growth.
Conclusion
Oatmeal is a versatile and nutrient-packed food that can benefit your health in many ways. From improving digestion to reducing cholesterol and supporting heart health, oats are a simple yet powerful addition to your diet. For the best results, choose minimally processed oats and watch your portion sizes. By including oatmeal in your daily routine, you can take a significant step toward a healthier lifestyle.
While providing 5–8 grams of high-quality, complete plant-based protein per 100 grams, hummus is more accurately described as a balanced food, rich in both healthy unsaturated fats and crucial dietary fiber. Its powerful combination of protein and fiber makes it an excellent choice for satiety and weight loss, offering a much healthier alternative to many conventional spreads.
Hummus is a beloved, versatile dip made from chickpeas, tahini, olive oil, lemon juice, and spices. Praised globally for its creamy texture and health advantages, it is often considered a potential source of protein.
Its widespread popularity is fueled not only by its delicious versatility—serving as a dip, spread, or condiment—but also by its impressive nutritional profile. As modern diets increasingly focus on plant-based and high-protein options, a pivotal question emerges: Is hummus high in protein?
The answer is more nuanced than a simple yes or no. While hummus is undeniably a healthy, nutrient-dense food, understanding its place in a balanced diet requires a deep dive into its macronutrient composition, especially when compared to other popular spreads, and how it performs in specific scenarios like weight management.
This comprehensive guide will meticulously explore the protein content of hummus, weigh its benefits against its potential drawbacks, and address every query from “is hummus high in protein for weight loss” to “protein in 2 tbsp hummus.
1. The Core Nutritional Profile of Hummus
To determine if hummus qualifies as a high-protein food, we must first dissect its fundamental composition. Hummus is a powerhouse of blended ingredients, each contributing significantly to its overall nutritional identity.
1.1 The Macronutrient Breakdown: Protein, Fat, and Carbs
A standard 100-gram (approx. 3.5 oz) serving of classic hummus provides a balanced mix of macronutrients. However, the exact numbers can fluctuate based on the recipe (e.g., more or less tahini, added oils, or different chickpea ratios).
This table immediately brings us to a crucial realization: Hummus is not a protein isolate; it is a balanced whole food.
1.2 Is Hummus High in Protein, Fat, or Carbs?
This is one of the most frequently asked questions about this popular dip.
Is Hummus High in Fat? On a per-calorie basis, fat often contributes the largest percentage of calories in hummus due to the inclusion of olive oil and tahini. For instance, a 100g serving containing 12g of fat (at 9 calories per gram) has 108 calories from fat. While this might sound high, the crucial distinction is that these are primarily unsaturated fats—monounsaturated and polyunsaturated fatty acids that are considered heart-healthy. Therefore, while is hummus high in fat is technically true in quantity, the quality of that fat is excellent.
Is Hummus High in Carbs? Hummus has a moderate carb content, typically higher than its protein or fat content by weight. The good news is that these carbohydrates are predominantly complex carbohydrates and are naturally paired with a significant amount of dietary fiber. This pairing results in a low Glycemic Index (GI), meaning the carbs are digested slowly, providing sustained energy without sharp blood sugar spikes.
Is Hummus High in Protein? Compared to true protein-powerhouses like chicken breast or whey powder, is hummus high in protein is debatable. Compared to other popular dips or spreads (like mayonnaise, cream cheese, or many salad dressings), yes, its protein and fiber content stand out. The correct classification is that hummus is a good source of plant-based protein, contributing valuable grams to your daily total, but it should not be relied upon as your primary protein source in a meal.
1.3 A Closer Look at Protein Content
Let’s break down the protein content into common serving sizes to make it practical for daily eating:
100g Hummus Protein: As noted, 5–8 grams.
Protein in 2 tbsp Hummus (30g): A standard serving size, often providing 1.5 to 2.5 grams of protein.
1/2 cup Hummus Protein (120g): Provides roughly 6 to 10 grams of protein.
While 2.5 grams per two tablespoons is modest, when paired with high-protein sides (like grilled chicken, whole-grain pita, or even high-protein hummus brands), it becomes a significant contributor to a high-protein meal.
1.4 Is Hummus a Complete Protein?
Protein quality is just as important as quantity. A “complete protein” contains all nine essential amino acids that the body cannot produce on its own.
Chickpeas are a good source of protein but are slightly low in the essential amino acid methionine.
Tahini (sesame seeds) is also a plant protein source and is low in the essential amino acid lysine.
Crucially, when you combine chickpeas and tahini—the two core ingredients of traditional hummus—their amino acid profiles complement each other. The methionine missing in the chickpeas is provided by the tahini, and vice versa. Therefore, a classic hummus recipe is considered a complete protein, making it exceptionally valuable for vegetarians and vegans.
2. Hummus and Weight Management—A Friend to the Scale
The discussion of protein and fat content in hummus naturally leads to its role in weight management. Many people seeking to shed pounds or maintain a healthy weight often look for snacks and spreads that promote satiety without excessive calories. The question becomes: Is hummus ok for losing weight? And more specifically, is hummus high in protein for weight loss?
The answer is overwhelmingly positive, provided portion control is practiced. Hummus is not merely “okay” for losing weight; it can be a highly strategic component of a calorie-controlled diet due to the synergistic power of its macronutrients.
2.1 The Triple-Threat Mechanism for Satiety
The secret to why hummus supports weight loss lies in its unique combination of the three macronutrients that most effectively contribute to feeling full, or satiety:
1. Protein (The Muscle Builder)
Protein requires more energy for the body to digest and metabolize (a phenomenon called the thermic effect of food) compared to fat or carbs. This factor, combined with the protein’s well-documented ability to suppress hunger hormones (like ghrelin), means that even the moderate protein content in hummus helps you feel satisfied.
Is Hummus High in Protein for Weight Loss? While not extremely high on its own, it’s high enough, especially when paired with low-calorie, high-volume foods like raw vegetables, to significantly boost the overall satiety of a snack, preventing the quick return of hunger that leads to overeating. Using hummus as a dip is a clever way to increase protein intake slightly while also consuming fewer calories overall compared to snacking on chips or baked goods.
2. Fiber (The Gut Filler)
Hummus is rich in dietary fiber, primarily from chickpeas. Is hummus high in fiber? Absolutely. A standard 100g serving can provide 6 to 8 grams of fiber, significantly contributing to the daily recommended intake of 25–38 grams.
Impact on Weight Loss: Fiber is indigestible, meaning it adds bulk to food without adding calories. This bulk physically fills the stomach, sending signals of fullness to the brain. Furthermore, fiber slows down the rate at which food leaves the stomach, prolonging the feeling of satiety. This dual action is why the combination of is hummus high in protein and fiber is such a powerful tool for curbing appetite and reducing overall caloric intake.
3. Healthy Fats (The Long-Term Satisfier)
The healthy unsaturated fats from olive oil and tahini are slower to digest than carbohydrates. This slower digestion process contributes to sustained energy release and long-lasting satiety.
The Trade-off: While fats are crucial for health and satiety, they are also calorie-dense (9 calories per gram). This is why the question Is hummus high in calories is relevant. A single 2-tablespoon serving can be around 70-80 calories. For weight loss, the key is to ensure the added satiety benefit outweighs the calorie contribution, which it generally does when used as a dip for veggies instead of a high-calorie spread.
2.2 Navigating Potential Pitfalls: Calories and Portion Control
While hummus is a fantastic weight-loss tool, it is not calorie-free, and this is where many diets run into trouble.
Moderately. Due to the fat content, over-dipping can quickly add up. A half-cup serving is over 160 calories.
Stick strictly to the standard serving size of 2 tablespoons (approx. 70-80 calories).
Is Hummus High in Carbs?
Moderate. The carbs are complex and fiber-rich, which is good.
The primary risk comes from what you dip with the hummus (e.g., high-carb, high-fat pita chips).
Is Hummus High in Fat?
Yes, by weight. But it’s the good, unsaturated fat.
Choose a high protein low fat hummus recipe (often by reducing or omitting the added olive oil) if you are severely limiting fat intake.
The Bottom Line for Weight Loss: Hummus is a valuable asset because its fiber and protein content help manage hunger, reducing the likelihood of reaching for far less nutritious, calorie-dense foods later on. The key to making hummus healthy for weight loss is consistent portion control and pairing it with low-calorie, nutrient-dense carriers like sliced bell peppers, carrots, cucumbers, or celery.
2.3 Hummus vs. Popular Alternatives: The Protein Comparison
Understanding the nutritional value of hummus is best achieved by comparing it to other common spreads and dips. This comparison directly addresses questions like Which has more protein, peanut butter or hummus? and Which has more protein, avocado or hummus?
If your goal is to maximize pure protein intake, choose peanut butter. However, for a high-satiety, lower-calorie, and lower-fat spread, hummus is the superior choice, especially for weight loss. The trade-off is clear: Peanut butter has more protein, but hummus is far lower in fat and calories.
Fat content is comparable, though avocado fat is usually higher in monounsaturated fats.
Fiber
6–8 grams
7 grams
Fiber content is very similar, making both great for digestion.
If you need a protein boost, hummus has more protein than avocado. Both are excellent sources of healthy fats and fiber, but hummus offers a better overall macronutrient balance for building lean tissue while staying full.
Beyond Protein: Comprehensive Health Benefits and The Pros and Cons of Hummus
Hummus’s appeal extends far beyond its protein and fiber content. It is a true nutrient-dense food, providing a range of vitamins, minerals, and compounds that support overall health, including cardiovascular function, blood sugar control, and digestive health. To fully assess this food, we must address the question, “What are the pros and cons of hummus?“
3.1 Micronutrients and Specialized Health Benefits
The blend of chickpeas, tahini, and olive oil creates a powerful nutritional synergy that delivers several key micronutrients and health advantages.
1. Supports Heart Health
Both tahini (made from sesame seeds) and olive oil are rich sources of healthy unsaturated fats. Olive oil, in particular, is high in monounsaturated fats (like oleic acid), which are well-known for their ability to:
Lower levels of LDL (“bad”) cholesterol.
Reduce inflammation throughout the body.
Improve blood vessel function.
The overall fat profile of hummus, especially when using high-quality extra virgin olive oil, makes it a staple in heart-healthy diets like the Mediterranean diet.
2. Blood Sugar Management
Is hummus good for diabetics? Yes, it is an excellent choice. As established, the high fiber content slows the absorption of glucose into the bloodstream, preventing rapid spikes in blood sugar.
Additionally, the combination of fat, protein, and complex carbohydrates results in a very low Glycemic Index (GI) score. Foods with a low GI help maintain steady energy levels, making hummus a perfect, sustained-energy snack for individuals managing type 2 diabetes or seeking stable blood sugar throughout the day.
3. Rich Source of Iron and Other Minerals
Hummus is an impressive source of certain essential minerals that are often a concern for those following plant-based diets.
Is Hummus High in Iron? While the iron content can vary, hummus is considered a good source, particularly from the chickpeas. A 100g serving can provide 2.5–3.5 mg of iron. However, iron from plant sources (non-heme iron) is less readily absorbed than animal sources. To maximize absorption, the lemon juice in hummus is critical, as Vitamin C significantly boosts the body’s ability to take in the iron.
Other Key Minerals: Hummus provides substantial amounts of Folate (crucial for DNA synthesis and cell division), Magnesium (essential for muscle, nerve, and bone health), and Zinc (important for immune function). Tahini specifically contributes minerals like copper and selenium.
4. Gut and Digestive Health
We’ve established is hummus high in fiber, and this fiber is predominantly soluble fiber. Soluble fiber:
Feeds the beneficial bacteria in the gut (acting as a prebiotic).
A healthy gut microbiome is linked to improved immunity, better mental health, and reduced inflammation.
It also aids in regularity, preventing constipation.
3.2 Pros and Cons of Hummus: A Balanced View
To provide a complete picture, it is essential to summarize the advantages and potential drawbacks of incorporating hummus into your regular diet.
Category
The Pros of Hummus (Benefits)
The Cons of Hummus (Drawbacks)
Nutritional
Excellent source of plant-based protein, high in fiber, rich in iron, folate, and magnesium. Complete protein source.
Is hummus high in fat (by content)? Yes. High-fat content can lead to excessive calorie intake if portions are ignored.
Diet & Health
Low GI (great for blood sugar control). Supports heart health with healthy unsaturated fats. Promotes satiety for weight management.
Is hummus high in carbs? Yes, relative to protein/fat, but mostly complex carbs. The carbs in accompanying pita or chips can be detrimental.
Preparation & Safety
Highly versatile and easy to make at home (allowing control over ingredients).
Allergy Risk: Contains tahini (sesame seeds), a common and serious allergen.
Commercial Concerns
Easily accessible in stores, with many specialty flavors available.
Is hummus bad for you (store-bought)? Some commercial brands contain excessive sodium, unnecessary oils, or preservatives, negating some health benefits.
3.3 Addressing The Online Dialogue: Is Hummus High in Protein Reddit?
Online communities, particularly platforms like Reddit, frequently discuss the protein content of popular foods. The prevailing consensus on threads addressing “is hummus high in protein reddit” often aligns with the nutritional data presented here:
The general community sentiment is that hummus is not a primary protein source like chicken or cottage cheese, but it is an excellent quality, complete, secondary protein source when paired with low-calorie vegetables. Its true strength lies in the synergy of protein and fiber for satiety, rather than raw protein volume.
3.4 Hummus Protein Content Chart: A Practical Guide
When assessing a food, comparison by protein density is helpful. Here is a simple comparison chart of various common foods, allowing you to gauge where hummus fits:
Food Item
Serving Size
Protein (Grams)
Protein Density (Approx. per 100g)
Chicken Breast (Cooked)
3 oz (85g)
26 g
31 g
Cottage Cheese (2%)
1/2 cup (113g)
14 g
12 g
Black Beans (Cooked)
1/2 cup (85g)
8 g
9 g
Hummus (Classic)
1/2 cup (120g)
6–10 g
5–8 g
Hard-Boiled Egg
1 large (50g)
6 g
12 g
Avocado
1/2 medium (100g)
2 g
2 g
This chart visually confirms that while hummus is not among the highest protein foods, its density (5–8g per 100g) is respectable for a plant-based spread and significantly higher than low-protein snacks like chips or many vegetable dips.
Making Hummus a High-Protein Powerhouse and Conclusion
To truly leverage hummus as a strategic part of a health-focused diet, especially one emphasizing muscle building or satiety, it often requires customization. This final section explores ways to boost the protein content, highlights top commercial options, and provides the final verdict on the nutritional standing of this ancient dip.
4.1 Customizing Hummus: The High Protein Recipe
If the standard protein content of 5–8 grams per 100g isn’t meeting your needs, you can easily modify your recipe to create a high protein hummus recipe that is often also a high protein low fat hummus option.
High-Protein, Low-Fat Hummus Strategy
The goal is to increase the chickpea and tahini ratio while reducing the volume of calorie-dense olive oil.
Increase Tahini (Protein & Fat Boost): Tahini (sesame seeds) provides protein, healthy fats, and makes the hummus creamy. Increasing the tahini slightly adds a protein punch.
Add Protein Powder (Ultimate Boost): This is the most effective way to create a highest protein hummus. A small, flavorless scoop of pea protein, hemp protein, or unflavored collagen can be blended directly into the recipe. This method can instantly double the protein content without significantly altering the texture or taste.
Example: Adding 1 scoop (20g protein) of unflavored pea protein to a batch that yields 400g of hummus can raise the protein density from ~6g/100g to ~11g/100g.
Use Greek Yogurt (Creaminess & Protein): For those who are not vegan/dairy-free, replacing half of the olive oil and some of the water with plain, non-fat Greek yogurt (which is significantly higher in protein than traditional yogurt) adds incredible creaminess and a substantial protein boost while simultaneously reducing the total fat and calorie count, resulting in a true high protein low fat hummus.
4.2 Top High Protein Hummus Brands
While homemade is best for ultimate control, the convenience of store-bought hummus is undeniable. The modern market has responded to demand, offering options that specifically target higher protein and lower fat content.
When looking for the highest protein hummus brands, always check the nutritional label, particularly the protein-to-calorie ratio. Look for products that specifically market the use of added legumes or protein sources.
Edamame/Lentil Blends: Some brands blend chickpeas with other higher-protein legumes like edamame (soybeans) or lentils. These products often have 1 to 2 grams more protein per serving than classic chickpea-only varieties.
Protein-Fortified: A few specialty brands are now fortifying their hummus with added pea or whey protein isolates, achieving a much higher protein concentration suitable for athletes or those on strict macronutrient diets.
4.3 Special Considerations
Is Hummus High in Protein for Dogs?
While chickpeas are generally safe for dogs in small amounts, classic hummus should never be fed to dogs. The primary reasons are:
Garlic and Onions: These are common ingredients in hummus and are toxic to dogs.
High Fat Content: The olive oil and tahini can be too rich, potentially leading to gastrointestinal upset or pancreatitis in sensitive dogs.
If a pet owner wishes to share, they must use a plain, chickpea-only puree without any seasonings or oil.
Is Hummus Bad for You?
In the context of the vast majority of unhealthy processed snacks, absolutely not. Is hummus bad for you is a misconception driven by three potential factors:
Overconsumption: As a calorie-dense food, eating too much can lead to weight gain.
Sodium: Store-bought brands can be high in sodium. Always choose low-sodium options or make it at home to control salt.
Pairing: Pairing hummus with refined white bread, high-fat pita chips, or other poor choices negates the health benefits of the dip itself.
Hummus is a good, high-quality, complete plant-based protein source that is uniquely complemented by a high volume of dietary fiber and heart-healthy unsaturated fats.
While it does not compare to meat or dairy in sheer protein mass, its combination of:
Protein (5–8g/100g)
Fiber (6–8g/100g)
Low Glycemic Index
…makes it an unparalleled tool for managing hunger, stabilizing blood sugar, and supporting long-term satiety.
Whether you are aiming for weight loss (is hummus high in protein for weight loss), managing blood sugar, or simply seeking a delicious, nutrient-dense snack, hummus proves to be a versatile and indispensable addition to your diet. The key to maximizing its benefits is mindfulness: control your portions, choose quality ingredients, and pair it with fresh, whole foods.