When it comes to wholesome and delectable greens, Chinese Spinach, also known as Yin Choi or Amaranth Greens, tops the list.
Bursting with flavor and nutrition, this leafy green vegetable is a staple in Chinese cuisine.
If you’re looking for a healthy and easy-to-make dish that combines the goodness of greens with a touch of Chinese culinary flair, you’re in for a treat.
Start by washing the Chinese Spinach thoroughly under running water. Drain and pat it dry. Trim the ends and discard any damaged leaves.
2. Blanch the Chinese Spinach
In a large pot, bring water to a boil. Add a pinch of salt to the boiling water. Carefully place the Chinese Spinach into the boiling water for about 30 seconds to 1 minute, or until the leaves wilt and turn bright green.
3. Shock in Ice Water
Immediately transfer the blanched spinach to a bowl of ice water to stop the cooking process. This helps the spinach retain its vibrant green color and crisp texture. Once cooled, drain and gently squeeze out excess water.
4. Prepare the Sauce
In a small bowl, mix together the oyster sauce, soy sauce, sugar, and a dash of pepper. Set the sauce aside.
5. Sauté the Garlic
In a pan or wok, heat the vegetable oil over medium heat. Add the minced garlic and sauté for about 30 seconds, or until fragrant and lightly golden.
6. Combine and Stir-fry
Add the blanched Chinese Spinach to the pan with the garlic. Toss the spinach in the pan for a minute or two, allowing it to absorb the flavors of the garlic.
7. Add the Sauce
Pour the prepared sauce over the spinach and stir-fry for another minute, ensuring that the sauce coats the spinach evenly.
8. Serve and Garnish
Transfer the Chinese Spinach to a serving dish. You can sprinkle some sesame seeds on top for an extra layer of flavor and texture.
9. Enjoy
Your Chinese Spinach is now ready to be served. This dish pairs wonderfully with steamed rice and can be a fantastic side dish or a light and healthy meal on its own.
This Chinese Spinach recipe is a delightful way to enjoy the vibrant flavors and health benefits of this leafy green. It’s not only delicious but also packed with essential nutrients like vitamins A and C, iron, and fiber.
Whether you’re a fan of Chinese cuisine or simply looking to incorporate more greens into your diet, this recipe is a must-try. Give it a whirl in your kitchen, and savor the goodness of Chinese Spinach in every bite.
Nutrition Facts
Serving Size: 1 serving (recipe serves 2)
Calories: ~70 kcal
Total Fat: ~4g
Saturated Fat: ~0.5g
Cholesterol: 0mg
Sodium: ~220mg
Total Carbohydrates: ~7g
Dietary Fiber: ~3g
Sugars: ~1g
Protein: ~4g
Vitamin A: ~300% DV (Daily Value)
Vitamin C: ~50% DV
Iron: ~15% DV
10 Simple Chinese Spinach Recipes
Chinese spinach, also known as Bok choy or Pak choi, is a versatile leafy green that can elevate your meals. Try these 10 simple recipes, from stir-fries to soups, to savor its unique flavor and nutritional benefits. Whether you’re a seasoned chef or a beginner in the kitchen, these dishes are easy to prepare and bursting with flavor.
1. Chinese Spinach with Garlic and Ginger
A quick and healthy side dish, Chinese Spinach with Garlic and Ginger combines the earthy flavor of spinach with the aromatic punch of garlic and ginger. Sauté minced garlic and ginger in hot oil until fragrant, then toss in blanched Chinese Spinach. Drizzle with a dash of soy sauce for a delightful, savory twist.
2. Stir-Fried Chinese Spinach with Mushrooms
Elevate your spinach game by adding mushrooms! Sauté sliced mushrooms in a hot wok until tender, then toss in blanched Chinese Spinach and season with a mixture of soy sauce and oyster sauce. This dish offers a wonderful umami flavor and contrasting textures.
3. Chinese Spinach Soup
For a comforting soup, simmer Chinese Spinach in a clear broth with slices of tofu and a touch of sesame oil. It’s a soothing and nutritious option for cooler days.
4. Chinese Spinach Salad
Chinese Spinach Salad is a refreshing choice. Toss blanched spinach with sliced cucumbers, cherry tomatoes, and a light vinaigrette dressing for a crunchy and colorful dish.
5. Chinese Spinach and Egg Drop Soup
Combine blanched Chinese Spinach with a silky egg drop soup. Swirl beaten eggs into simmering chicken or vegetable broth and add the spinach for a nourishing and protein-packed soup.
6. Steamed Chinese Spinach with Garlic Sauce
Steam Chinese Spinach until tender, then drizzle with a flavorful garlic sauce made with minced garlic, soy sauce, and a touch of vinegar. It’s a simple yet delectable side dish.
7. Chinese Spinach and Tofu Stir-Fry
A vegan delight, this stir-fry pairs Chinese Spinach with cubes of tofu. Sauté the tofu until golden, then add the spinach and your favorite stir-fry sauce for a plant-based feast.
8. Chinese Spinach and Shrimp Stir-Fry
For a seafood twist, stir-fry Chinese Spinach with shrimp. Sauté the shrimp with garlic and ginger, then add the spinach and finish with a savory sauce for a delightful surf and turf.
9. Chinese Spinach with Sesame Dressing
Toss blanched Chinese Spinach with a homemade sesame dressing made from sesame paste, soy sauce, rice vinegar, and a touch of honey. This salad is nutty, tangy, and oh-so-good.
10. Chinese Spinach and Rice Noodles
For a heartier meal, toss Chinese Spinach with cooked rice noodles and a flavorful sauce. You can use a combination of soy sauce, sesame oil, and a hint of chili for a delicious noodle dish.
Chinese spinach, also known as amaranth or yin choy, is a versatile leafy green that can elevate your culinary creations. From stir-fries to soups, here are 10 simple and delicious recipes that showcase this nutritious veggie. Whether you’re a novice cook or a seasoned chef, these dishes offer a delightful way to incorporate Chinese spinach into your meals and savor its unique flavor and texture.
Colombian cuisine is a flavorful tapestry of diverse ingredients and influences, and one delightful treat that reflects this culinary richness is the beloved “bunuelo.
These cheesy dough balls are a staple during holidays and special occasions in Colombia. If you’re ready to embark on a culinary adventure, join us in learning how to make Colombian bunuelos – a savory, crispy, and utterly satisfying snack.
Name
Colombian Bunuelos Recipe
Cuisine
Fusion
Prep Time
20 minutes
Cooking Time
10 minutes
Total Time
30 minutes
Servings
20 bunuelos (varies based on size)
Yield
Varies based on the size of each bunuelo
Ingredients
2 cups of masarepa (precooked cornmeal)
1 cup of queso fresco (fresh cheese), finely grated
1/2 cup of cassava starch (yuca starch)
1/4 cup of milk
1 egg
1/2 teaspoon of salt
1/4 teaspoon of baking powder
Vegetable oil for frying
Sugar (optional, for dusting)
Instructions
Mix the Dry Ingredients:
In a mixing bowl, combine the masarepa, cassava starch, salt, and baking powder. Mix them together thoroughly, ensuring even distribution of the ingredients.
Add the Cheese:
Grate the queso fresco finely and add it to the dry mixture. The cheese will not only add a delightful flavor but also create a tender, crumbly texture in your bunuelos.
Blend in the Wet Ingredients:
In a separate bowl, whisk together the egg and milk until well combined. Pour this mixture into the dry ingredients and mix until you have a dough-like consistency. If the dough feels too dry, you can add a bit more milk.
Shape the Bunuelos:
Now comes the fun part! Take a portion of the dough and roll it between your hands to create small balls, about the size of golf balls. The dough should hold its shape without cracking.
Heat the Oil:
In a deep pan or skillet, heat vegetable oil over medium-high heat. You’ll want enough oil to submerge the bunuelos while frying.
Fry to Golden Perfection:
Carefully place the bunuelos in the hot oil, making sure not to overcrowd the pan. Fry them until they turn a beautiful golden brown, usually about 4-5 minutes per side. Keep a close eye on them to prevent overcooking.
Drain and Dust (Optional):
Remove the bunuelos from the oil and place them on paper towels to drain any excess oil. If you like a hint of sweetness, you can dust them with sugar while they’re still warm.
Serve and Enjoy:
Colombian bunuelos are best enjoyed fresh and warm. They have a delightful combination of crispy exteriors and soft, cheesy interiors. Serve them as a snack, side dish, or even as a unique addition to your breakfast spread.
Colombian bunuelos are a delightful testament to the country’s rich culinary heritage. Whether enjoyed during holidays, gatherings, or as an everyday treat, these cheesy dough balls are sure to please your taste buds and transport you to the heart of Colombia. Gather your ingredients, embrace the adventure, and savor the deliciousness of homemade Colombian bunuelos. Enjoy the crispy, cheesy, and utterly satisfying experience!
Nutrition Facts (per bunuelo)
Calories: 110 kcal
Carbohydrates: 14g
Protein: 3g
Fat: 4g
Saturated Fat: 1.5g
Cholesterol: 15mg
Sodium: 90mg
Fiber: 1g
Sugar: 1g
10 Simple Colombian Bunuelos Recipes
Colombian buñuelos are delightful fried dough balls, a beloved snack during the holiday season and beyond. Made from simple ingredients like cornflour, cheese, and eggs, they’re easy to prepare. Here are 10 simple recipes for Colombian buñuelos that will have your taste buds dancing with joy. Get ready to savor these golden, cheesy treats from Colombia in the comfort of your home!
1. Colombian Cheese-Stuffed Bunuelos
Take your classic bunuelos and add a surprise inside. Stuff them with cubes of mozzarella or your favorite cheese. As they fry, the cheese melts into gooey goodness.
2. Sweet Plantain Bunuelos
Incorporate ripe plantains into your dough for a touch of sweetness. These bunuelos are a harmonious blend of savory and sweet flavors.
3. Coconut-infused Bunuelos
Add a tropical twist to your bunuelos by mixing shredded coconut into the dough. The result? A delightful coconut-infused flavor and a hint of crunch.
4. Chocolate Bunuelos
For a dessert-worthy treat, mix cocoa powder into your dough. These chocolatey bunuelos are perfect for those with a sweet tooth.
5. Cinnamon and Sugar-Coated Bunuelos
After frying, roll your bunuelos in a mixture of cinnamon and sugar. This coating adds a warm, sweet-spicy flavor.
6. Yuca Bunuelos
Swap out some of the masarepa with yuca flour for a twist on tradition. Yuca bunuelos have a slightly different texture but are equally delicious.
Insert a cube of guava paste into the center of each bunuelo before frying. The contrast of sweet guava and savory dough is heavenly.
9. Jalapeño and Cheese Bunuelos
Add some spice to your bunuelos by mixing in finely chopped jalapeño peppers and shredded cheese. A perfect combination for those who like it hot.
10. Nutella-Filled Bunuelos
For a decadent dessert, fill your bunuelos with Nutella. As you bite into them, you’ll discover a gooey Nutella center that’s pure indulgence.
Colombian Buñuelos, small fried dough balls with a crispy exterior and a soft, cheesy interior, are a beloved treat during the holiday season and beyond. Here are 10 easy-to-follow recipes to whip up these delightful snacks at home. From traditional to creative variations, you’ll find the perfect Buñuelo recipe to satisfy your craving for these Colombian treasures.
Texas Roadhouse is known for its delicious and creamy ranch dressing that perfectly complements their fresh salads and appetizers. Luckily, you can recreate this mouthwatering dressing in the comfort of your own kitchen.
This homemade Texas Roadhouse Ranch Dressing recipe captures the rich and tangy flavors that make it so irresistible.
Let’s dive into the ingredients and steps to create this delectable dressing.
Name
Texas Roadhouse Ranch Dressing Recipe
Cuisine
American
Prep Time
10 minutes Cook
Cooking Time
0 minutes
Total Time
10 minutes
Servings
16
Yield
2 cups of dressing
Ingredients
1 cup mayonnaise
1/2 cup sour cream
1/4 cup buttermilk
1 tablespoon fresh parsley, finely chopped
1 tablespoon fresh dill, finely chopped
1 teaspoon chives, finely chopped
1 teaspoon garlic powder
1 teaspoon onion powder
1/2 teaspoon salt
1/4 teaspoon black pepper
1/4 teaspoon paprika
1/4 teaspoon cayenne pepper (adjust to taste)
1/2 teaspoon white vinegar
1/2 teaspoon Worcestershire sauce
Instructions:
Prepare Your Ingredients:
Before you start, make sure you have all your ingredients on hand. This will make the process smoother.
Combine the Wet Ingredients:
In a medium-sized bowl, whisk together the mayonnaise, sour cream, buttermilk, and white vinegar. This forms the creamy base of your ranch dressing.
Add the Seasonings:
Add the dried parsley flakes, dried dill weed, garlic powder, onion powder, salt, black pepper, and paprika to the wet mixture. Stir well to combine all the seasonings evenly throughout the dressing.
Adjust the Consistency:
If your dressing is too thick for your liking, you can add a little more buttermilk to thin it out. Start with a tablespoon at a time until you reach your desired consistency.
Chill and Serve:
Once your Texas Roadhouse Ranch Dressing is well-mixed, cover the bowl and refrigerate it for at least 1 hour before serving. This allows the flavors to meld and develop fully.
Enjoy:
Your homemade Texas Roadhouse Ranch Dressing is now ready to be drizzled over salads, used as a dip for veggies, or served alongside your favorite fried foods.
Nutrition Facts (Per Serving – 2 tablespoons)
Calories: 120
Total Fat: 12g
Saturated Fat: 2g
Trans Fat: 0g
Cholesterol: 10mg
Sodium: 180mg
Total Carbohydrates: 2g
Dietary Fiber: 0g
Sugars: 1g
Protein: 0g
Vitamin D: 0%
Calcium: 2%
Iron: 0%
Potassium: 1%
09 Simple Texas Roadhouse Ranch Dressing Recipes
Indulge in the irresistible flavors of Texas Roadhouse at home with their famous Ranch Dressing recipe.
Combine mayo, buttermilk, and spices for a creamy, tangy dressing that elevates any salad or appetizer.
Ranch Potato Salad
Make a creamy and tangy potato salad by mixing boiled and diced potatoes with Texas Roadhouse Ranch Dressing. Add some diced red onions and crispy bacon bits for extra flavor and texture.
Ranch Veggie Dip
Transform your veggies into an irresistible snack by serving them with Texas Roadhouse Ranch Dressing as a dip. It’s a healthier alternative to traditional dips, perfect for parties or snacking.
Ranch Pasta Salad
Create a zesty pasta salad by tossing cooked pasta with Texas Roadhouse Ranch Dressing, cherry tomatoes, sliced black olives, and chopped green onions. It’s a refreshing side dish for any occasion.
Ranch Burger Topping
Upgrade your burger game by spreading Texas Roadhouse Ranch Dressing on the buns. It adds a creamy and tangy element to your favorite burger recipe.
Ranch Chicken Tenders
Coat chicken tenders with Texas Roadhouse Ranch Dressing, then roll them in breadcrumbs. Bake or fry until crispy and serve with extra ranch for dipping.
Ranch Coleslaw
Mix shredded cabbage, carrots, and red cabbage with Texas Roadhouse Ranch Dressing for a creamy and tangy coleslaw. It’s a perfect side dish for BBQs.
Ranch Pizza Dip
Spread Texas Roadhouse Ranch Dressing over a pizza crust, add shredded cheese, and bake until bubbly. It makes a fantastic appetizer for game night.
Ranch Potato Skins
Bake potato skins until crispy, then fill them with Texas Roadhouse Ranch Dressing, crumbled bacon, and cheddar cheese. Broil until the cheese is melted and bubbly.
Ranch Grilled Corn
Brush ears of corn with Texas Roadhouse Ranch Dressing before grilling. It adds a creamy and tangy twist to this classic summer side dish.
Pancakes are a breakfast favorite, loved for their fluffy texture and endless topping possibilities.
If you’re looking for a healthier twist on this classic dish, oat flour pancakes are an excellent choice. They are not only nutritious but also incredibly tasty.
We’ll guide you through the steps to make your own oat flour pancakes from scratch.
Name
Oat Flour Pancakes Recipe
Cuisine
American
Prep Time
10 minutes
Cooking Time
10 minutes
Total Time
20 minutes
Servings
2-3
Yield
6-8 pancakes
Ingredients
1 cup of oat flour (You can easily make your own by grinding rolled oats in a blender.)
1 tablespoon of sugar (or your preferred sweetener)
1 teaspoon of baking powder
1/2 teaspoon of baking soda
1/4 teaspoon of salt
1 cup of buttermilk (or milk of your choice)
1 large egg
1 teaspoon of vanilla extract
2 tablespoons of melted butter (or a neutral oil)
Cooking spray or extra butter for the griddle
Instructions
1. Prepare the Oat Flour
If you don’t have oat flour on hand, simply grind rolled oats in a blender or food processor until you have a fine flour-like consistency.
2. Mix Dry Ingredients
In a mixing bowl, combine the oat flour, sugar, baking powder, baking soda, and salt. Mix well to ensure even distribution of the dry ingredients.
3. Prepare Wet Ingredients
In another bowl, whisk together the buttermilk, egg, vanilla extract, and melted butter.
4. Combine Wet and Dry Mixtures
Pour the wet ingredients into the dry mixture and stir until just combined. Be careful not to overmix; a few lumps in the batter are perfectly fine.
5. Heat the Griddle
Preheat a griddle or a non-stick skillet over medium-high heat. Lightly grease it with cooking spray or a small amount of butter.
6. Cook the Pancakes
Pour 1/4 cup of batter for each pancake onto the hot griddle. Use the back of a spoon to spread the batter into a round shape if needed. Cook until bubbles form on the surface (usually 2-3 minutes).
7. Flip and Cook Again
Carefully flip the pancakes with a spatula and cook for an additional 1-2 minutes, or until they are golden brown on both sides and cooked through.
8. Serve and Enjoy
Transfer the pancakes to a plate and serve them warm. You can top them with fresh berries, sliced bananas, maple syrup, honey, or Greek yogurt for added flavor.
Tips
For extra flavor and nutrition, consider adding ingredients like cinnamon, mashed bananas, or chocolate chips to the batter.
If you prefer a vegan option, you can substitute the buttermilk with a dairy-free milk and use a flax egg (1 tablespoon of ground flaxseed mixed with 2.5 tablespoons of water) instead of the egg.
These oat flour pancakes are a fantastic way to start your day with a nutritious and satisfying breakfast. They’re not only good for you but also versatile, allowing you to get creative with your toppings. Give this recipe a try, and you’ll discover a new favorite pancake variation that’s both delicious and wholesome. Enjoy!
Nutrition Facts
Calories: 170 kcal
Total Fat: 5g
Saturated Fat: 1g
Trans Fat: 0g
Cholesterol: 57mg
Sodium: 314mg
Total Carbohydrates: 25g
Dietary Fiber: 3g
Sugars: 4g
Protein: 7g
10 Simple And Creative Oat Flour Pancake Recipes
Whip up a wholesome breakfast with this simple recipe for oat flour pancakes. Blend oat flour, eggs, milk, and a touch of sweetness for fluffy, gluten-free pancakes. Perfect for a nutritious start to your day!
1. Blueberry Bliss Oat Flour Pancakes
Elevate your breakfast with these Blueberry Bliss Oat Flour Pancakes. Add fresh blueberries to your oat flour pancake batter for bursts of sweet, juicy flavor in every bite. Top with a drizzle of maple syrup and a dollop of Greek yogurt for a delightful morning treat.
2. Banana Nut Oat Flour Pancakes
For a hearty twist, make Banana Nut Oat Flour Pancakes. Mash ripe bananas into the batter and sprinkle with chopped walnuts or pecans. The result is a satisfying combination of sweet and nutty goodness. Serve with a dusting of powdered sugar or a drizzle of honey.
3. Chocolate Chip Oat Flour Pancakes
Indulge your sweet tooth with Chocolate Chip Oat Flour Pancakes. Stir in mini chocolate chips for a delightful pancake that feels like a dessert. Top with whipped cream and a few extra chocolate chips for the ultimate treat.
4. Cinnamon Apple Oat Flour Pancakes
Embrace the flavors of fall with Cinnamon Apple Oat Flour Pancakes. Fold in diced apples and a dash of cinnamon into the batter. Serve with a warm apple compote and a sprinkle of cinnamon sugar.
Brighten your morning with Lemon Poppy Seed Oat Flour Pancakes. Add lemon zest and poppy seeds to the batter for a zesty and slightly crunchy pancake. Serve with a lemon glaze or a dusting of powdered sugar for a citrusy delight.
7. Raspberry Almond Oat Flour Pancakes
Create a delightful contrast with Raspberry Almond Oat Flour Pancakes. Fold in fresh raspberries and chopped almonds for a burst of tartness and crunch. A light drizzle of almond butter and a sprinkle of powdered sugar enhance the flavors.
8. Coconut Oat Flour Pancakes
Transport yourself to a tropical paradise with Coconut Oat Flour Pancakes. Incorporate shredded coconut into the batter and top with sliced bananas and a coconut cream sauce. It’s like breakfast on an island.
9. Spinach and Feta Oat Flour Pancakes
For a savory twist, try Spinach and Feta Oat Flour Pancakes. Mix finely chopped spinach and crumbled feta cheese into the batter. Serve with a dollop of Greek yogurt and a sprinkle of chopped fresh herbs.
10. Savory Herb Oat Flour Pancakes
Explore a different side of pancakes with Savory Herb Oat Flour Pancakes. Add a combination of chopped fresh herbs like parsley, chives, and thyme to the batter. These savory pancakes pair wonderfully with smoked salmon and a dollop of sour cream.
From blueberry bliss to savory spinach and feta delights, these recipes cater to every palate. Enjoy a stack of fluffy, nutritious pancakes that will kickstart your day with a burst of flavor and energy.
When it comes to wholesome, comforting, and downright delicious recipes, few can rival the Pioneer Woman, Ree Drummond.
One of her standout creations that embodies all these qualities is her legendary Carrot Cake. This classic dessert is not just a treat for the taste buds; it’s a slice of homey nostalgia.
So, roll up your sleeves, preheat that oven, and let’s delve into the Pioneer Woman’s Carrot Cake recipe!
Name
Pioneer Woman Recipe For Carrot Cake
Cuisine
American
Prep Time
20 minutes
Cooking Time
25-30 minutes
Total Time
Approximately 45-50 minutes (excluding cooling and frosting time)
Preheat your oven to 350°F (175°C). Grease and flour three 9-inch round cake pans.
Mix the Dry Ingredients
In a large mixing bowl, combine the flour, sugar, baking powder, baking soda, salt, cinnamon, nutmeg, and allspice. Mix them well.
Add the Wet Ingredients
Add the vegetable oil, eggs, and vanilla extract to the dry ingredients. Mix until the batter is smooth.
Fold in the Goodies
Gently fold in the grated carrots, crushed pineapple, shredded coconut, and chopped pecans or walnuts if you’re using them. These ingredients not only add flavor but also a delightful texture.
Bake to Perfection
Divide the batter evenly among the prepared cake pans. Bake in the preheated oven for 25-30 minutes or until a toothpick inserted into the center of the cakes comes out clean.
Cool Down
Allow the cakes to cool in the pans for about 10 minutes, then remove them from the pans and place them on a wire rack to cool completely.
Frosting Time
While the cakes cool, make the cream cheese frosting. In a mixing bowl, beat the softened cream cheese and butter until creamy and smooth. Gradually add the powdered sugar and vanilla extract, continuing to beat until well combined.
Assemble the Cake
Once the cakes are completely cool, spread a generous layer of cream cheese frosting on top of one of the cakes. Place the second cake layer on top and repeat the process. Finally, add the third cake layer and frost the top and sides of the entire cake.
Decorate (Optional)
Feel free to decorate your carrot cake with additional chopped nuts, grated carrots, or a sprinkle of coconut for a beautiful finishing touch.
Chill and Serve
For best results, refrigerate the cake for a couple of hours before serving. This allows the flavors to meld together beautifully.
There you have it, the Pioneer Woman’s Carrot Cake recipe, a delightful blend of sweet, moist cake and rich cream cheese frosting that’s sure to become a family favorite. Enjoy a slice of this comforting classic, and savor the taste of home!
Nutrition Facts (Per Serving, based on 12 servings)
Calories: 550
Total Fat: 30g
Saturated Fat: 12g
Trans Fat: 0g
Cholesterol: 105mg
Sodium: 320mg
Total Carbohydrates: 70g
Dietary Fiber: 2g
Sugars: 54g
Protein: 5g
10 simple pioneer woman recipe for carrot cake
The Pioneer Woman’s Carrot Cake is a delectable treat, combining grated carrots, crushed pineapple, and chopped nuts for a moist and flavorful dessert. Topped with cream cheese frosting, it’s a classic indulgence.
1. Carrot Cake Muffins:
Transform the classic carrot cake into bite-sized delights. Mix the cake batter, pour it into muffin tins, and bake until golden brown. Top with cream cheese frosting for a miniature treat.
2. Carrot Cake Pancakes:
Start your morning with a twist. Add grated carrots, cinnamon, and nutmeg to pancake batter for a cozy breakfast experience. Drizzle with maple syrup.
3. Carrot Cake Smoothie:
Blend grated carrots, Greek yogurt, banana, honey, and a dash of cinnamon for a nutritious, carrot cake-inspired smoothie.
4. Carrot Cake Overnight Oats:
Combine rolled oats, grated carrots, raisins, and a sprinkle of cinnamon in a jar with milk. Leave it in the fridge overnight for a creamy, no-cook breakfast.
5. Carrot Cake Energy Bites:
Mix shredded carrots, oats, dates, and a touch of honey. Roll into bite-sized balls and refrigerate for a wholesome snack.
6. Carrot Cake Oatmeal:
Stir grated carrots and a pinch of cinnamon into your morning oatmeal. Top with cream cheese swirl and chopped nuts.
7. Carrot Cake Parfait:
Layer Greek yogurt, granola, and a carrot cake-inspired mixture of grated carrots, raisins, and a drizzle of honey for a guilt-free dessert.
8. Carrot Cake Trifle:
Create a dessert spectacle with layers of carrot cake cubes, cream cheese pudding, and crushed pineapple. Finish with whipped cream and chopped nuts.
9. Carrot Cake Popsicles:
Blend carrots, pineapple, yogurt, and honey, then freeze in popsicle molds for a refreshing, carrot cake-flavored summer treat.
10. Carrot Cake French Toast:
Dip thick slices of bread into a mixture of eggs, grated carrots, and spices. Fry until golden and serve with a dollop of cream cheese frosting.
These Pioneer Woman-inspired carrot cake recipes offer a variety of ways to enjoy the classic flavors of carrot cake in different forms and settings.
The limber de coco recipe is more than just a dessert; it is a frozen piece of Puerto Rican sunshine. This refreshing treat is a beloved tradition across the island. Every Puerto Rican remembers the sound of the street vendor’s cart, selling this simple, yet perfect, icy snack. It is a fundamental part of the island’s culinary identity.
The Sweet, Frozen Soul of Puerto Rico
Limbers are essentially flavored ice cups or “ice pops,” and the coconut (or coco) flavor is universally the most popular. The texture of a great coconut limber from Puerto Rico is distinct. It is not quite a popsicle, nor is it a traditional sorbet. It strikes a beautiful balance between icy refreshment and creamy sweetness.
Learning how to make coconut limber allows you to bring this authentic island flavor right into your kitchen. We will explore the traditional methods, easy shortcuts, and irresistible variations, ensuring you have the best Puerto Rican limber recipes at your fingertips. Get ready to master the limber de coco Puerto Rico experience.
What Is Limber de Coco?
A limber is a classic Puerto Rican frozen dessert. It consists of a flavored liquid that is poured into small plastic cups, usually 5-ounce or 7-ounce sizes, and then completely frozen. Once solid, the dessert is pushed up from the bottom of the cup, consumed straight from the cup—it is essentially an ice pop, but served uniquely. This distinction separates it from other frozen treats.
The name “limber” is believed to be a variation of Charles Lindbergh, the famous aviator. When Lindbergh visited Puerto Rico, a local created a frozen treat in his honor. The original name was later shortened and adapted to limber. Today, this name is cemented in the island’s culture.
While many flavors exist—including tamarind, passion fruit (parcha), and cherry—the limber de coco Puerto Rico stands as the undisputed champion. Coconut flavor is readily available and intensely loved on the island.
This ubiquitous appeal means nearly every family has its own cherished Puerto Rican limber de coco recipe, often passed down through generations. These frozen treats provide instant relief from the intense Caribbean heat, making them a fixture at family gatherings and school events.
Street vendors selling limbers de coco ice pop versions remain a common and nostalgic sight, reinforcing the dessert’s status as a cultural icon. The authentic receta limber de coco is a must-have for any lover of Caribbean cuisine.
Ingredient Deep Dive: Crafting the Perfect Limber
The success of a truly authentic and delicious limber de coco hinges on selecting the right ingredients. Simple ingredients, used correctly, yield the best flavor and texture.
Coconut Milk vs. Coconut Cream
The base of the best limbers is usually coconut. A limber de coco recipe with coconut milk provides a lighter, more refreshing texture. Coconut milk is thinner, resulting in an icier limber, which some prefer.
Coconut cream, which is thicker and richer, will yield a naturally limber de coco cremoso (creamy limber). Cream of Coconut (like the popular Coco López brand) is sweetened and often used for the easiest and creamiest versions.
Condensed Milk (Limber de Coco y Leche Condensada)
Sweetened condensed milk is the essential ingredient for flavor and texture. It adds a deep, milky sweetness and, crucially, helps prevent the limber from freezing into a solid, unmanageable ice block. This is the secret to a palatable texture.
Cream Cheese (Limber de Coco Cremoso / Cream Cheese Version)
For an extra-luxurious, almost cheesecake-like texture, cream cheese is added. This is the secret to the incredibly popular and rich limber de coco recipe with cream cheese. The fat in the cream cheese dramatically lowers the freezing point and incorporates air, resulting in a scoopable, ultra-smooth limber.
Rum (Adult Version)
A true limber de coco recipe authentic variation includes a splash of rum. While optional, a light or dark Puerto Rican rum adds a warming depth, creating a sophisticated adult dessert. The alcohol also helps to lower the freezing point further, contributing to a slightly softer texture.
Shredded Coconut (Receta Limber de Coco Rallado)
Some traditional recipes call for adding coco rallado (shredded coconut). This provides a pleasant, chewy texture contrast. It is a simple addition, but it gives a rustic feel to the limber.
Goya Canned Coconut Milk (Receta Limber de Coco Goya)
Many cooks, both at home and professionally, rely on Goya products. Receta limber de coco Goya typically uses Goya Coconut Milk or Goya Cream of Coconut for consistency and a reliable coconut flavor.
Essential Tools
You need a good blender to ensure a smooth, uniform mixture. Small disposable plastic cups (like Dixie cups) or plastic resealable limber de coco popsicles bags are necessary for freezing.
Traditional Puerto Rican Limber de Coco Recipe (Step-by-Step)
This traditional method is the heart of the limber de coco recipe Puerto Rico. It is the flavor of grandmothers and neighborhood cooks, focusing on simple techniques to maximize flavor and texture. This method often starts with creating a sugar syrup to ensure no graininess.
Ingredients:
2 cups water
1.5 cups granulated sugar
1 (13.5-ounce) can full-fat coconut milk
1 (14-ounce) can sweetened condensed milk
1 teaspoon pure vanilla extract
A pinch of salt (enhances sweetness)
Optional: 1/4 teaspoon ground cinnamon
Instructions for the Traditional Limber:
Step 1: Prepare the Simple Syrup (The Secret to Smoothness)
In a small saucepan, combine the 2 cups of water and 1.5 cups of sugar. Heat the mixture over medium heat, stirring constantly, until the sugar is completely dissolved and the liquid is clear.
This step is crucial. If you skip this, the sugar may crystallize, which creates an icy texture. Bring it to a gentle simmer for two minutes. Remove it from the heat and let it cool completely.
Step 2: Combine the Coconut Base
In a large bowl, whisk together the cooled simple syrup, the full-fat coconut milk, and the sweetened condensed milk. The condensed milk adds the necessary sweetness and prevents the final product from freezing too hard.
Step 3: Add Flavorings
Stir in the vanilla extract and the pinch of salt. The vanilla adds aromatic depth, and the salt balances the sweetness. If you are using cinnamon, add it here for a subtle warmth. Taste the mixture. It should be intensely sweet, as the freezing process dulls flavor.
This ensures the limber maintains a vibrant flavor profile when frozen. This is part of the limber de coco recipe traditional method.
Step 4: The Real Puerto Rican Method: Achieving the Correct Creamy Texture
For the creamiest result, pour the combined liquid into a high-powered blender. Blend it on high for about 30 seconds. This step incorporates a small amount of air and thoroughly emulsifies the fats (from the coconut milk and condensed milk), leading to a smoother, less-icy final product. This is a common technique used by experienced cooks and is the key to mastering how to make limber de coco properly.
Step 5: Fill and Freeze
Pour the liquid into your chosen containers. Small, 5-ounce or 7-ounce plastic cups are the most traditional container for a Puerto Rican limber de coco recipe. Fill them about three-quarters of the way full. Cover the tops of the cups tightly with aluminum foil or plastic wrap.
Place a popsicle stick or a small wooden skewer through the foil/wrap into the center of the liquid. The foil/wrap helps to hold the stick in place.
Step 6: Freezing Tips
Freeze the limbers flat in the freezer for a minimum of 6 hours, or ideally, overnight. When they are completely solid, they are ready to be served. This traditional recipe, often called limber de coco de la abuela (Grandma’s limber), truly captures the authentic spirit of the island.
Easy Limber de Coco Recipe (5 Ingredients)
Sometimes, you need to satisfy that coconut limber craving quickly. This streamlined, beginner-friendly version is a simple solution. It focuses on pantry staples and eliminates the need for a blender or a separate simple syrup step. This limber de coco recipe easy version is perfect for kids and quick summer treats.
Ingredients:
1 (13.5-ounce) can full-fat Coconut Milk
1 (14-ounce) can Sweetened Condensed Milk
1/2 cup water
1 tablespoon pure vanilla extract
1/4 teaspoon ground cinnamon
Instructions for the Easy Limber:
Step 1: Simple Mixing
In a large bowl, combine the can of full-fat coconut milk, the sweetened condensed milk, and the water. This version relies on the condensed milk’s thickness and sweetness to create a desirable texture without extra sugar.
Step 2: Flavor and Combine
Add the vanilla extract and the ground cinnamon. Whisk the entire mixture vigorously for about 2–3 minutes. Vigorously whisking the mixture for several minutes helps to fully dissolve the condensed milk and integrate the ingredients. This is a quick workaround for the simple syrup and blending steps in the traditional recipe.
Step 3: Taste and Adjust
Check the flavor. If you desire a sweeter limber de coco sencillo, you can add 1/4 cup of granulated sugar and continue whisking until the sugar dissolves. Because of the high sugar content in the condensed milk, this is often unnecessary.
Step 4: Pour and Freeze
Pour the liquid into your small plastic cups or popsicle molds. Place them in the freezer. Freeze until completely solid, which usually takes 6–8 hours. This easy how to make coconut limber method provides a delicious, if slightly icier, easy Puerto Rican coconut limber that is perfect for a spontaneous treat.
Limber de Coco Variations (Elevating the Classic)
The beauty of the limber de coco recipe is its versatility. Once you master the basic formula, you can introduce different ingredients to change the texture, flavor, and target audience. These variations range from ultra-creamy to boozy adult options.
Limber de Coco Popsicles / Ice Pops
While the cup version is traditional, converting the mixture into traditional popsicle molds makes it easier to serve and eat for some.
Conversion: Prepare the limber mixture using either the Traditional or Easy recipe. Instead of plastic cups, pour the liquid directly into standard popsicle molds.
Method: Cover the mold and insert the popsicle sticks. The final product is a perfect limber de coco popsicles or limbers de coco ice pop that eliminates the need to push the ice out of the cup. The flavor remains the same, but the delivery changes.
Limber de Coco with Coconut Milk (Classic Dairy-Free)
The core recipe using full-fat coconut milk and sweetened condensed milk is already delicious. However, a truly dairy-free option is possible.
Adjustment: Replace the traditional sweetened condensed milk with a vegan condensed milk substitute (often made with coconut or oat milk). This keeps the integrity of the texture while ensuring a completely dairy-free limber de coco recipe with coconut milk. The high-fat content of the full-fat coconut milk ensures it remains creamy, even without dairy.
Limber de Coco with Rum (Adults Only)
Adding alcohol is a popular adaptation for adult gatherings, turning a childhood snack into a sophisticated frozen cocktail.
The Booze: After preparing the limber base, add 1/4 cup of light Puerto Rican rum (or dark rum for a bolder flavor) to the batch. Do not add too much; the high alcohol content will prevent the limber from freezing solid.
Flavor Profile: For a Piña Colada-style limber, add a tablespoon of crushed pineapple to the mixture. This variation makes an excellent limber de coco recipe with rum for summer parties.
Limber de Coco with Cream Cheese (Extra Creamy)
This is perhaps the most popular modern variation sold by street vendors. It achieves an incomparable, luxurious, smooth texture. This is the definition of limber de coco cremoso.
Ingredient: Blend 4 ounces of softened cream cheese into the limber base.
Method: Combine the cream cheese, all liquids, and flavorings in a blender. Blend until the cream cheese is completely smooth and no lumps remain. The added fat and dairy solids in the cream cheese dramatically improve the texture, creating a rich, smooth dessert often referred to as a limber de coco recipe with cream cheese.
Goya Coconut Limber (Goya Product Version)
For many in the Puerto Rican diaspora and on the island, Goya products are a staple. They offer a simple, consistent base.
Ingredient: Substitute the coconut milk and simple syrup with 2 cups of Goya Cream of Coconut (often used for coquito). Reduce the amount of condensed milk since Goya Cream of Coconut is already highly sweetened.
Simple Mix: Combine 2 cups of Goya Cream of Coconut, 1/2 can of condensed milk, 1 cup of water, and vanilla. This provides a quick, guaranteed-creamy result, typical of a Receta limber de coco Goya.
Shredded Coconut Limber (Rallado)
For those who enjoy a chewy, textured dessert, adding real coconut flakes is essential.
Ingredient: Fold in 1/2 cup of finely shredded unsweetened coconut (coco rallado) into the liquid mixture just before pouring it into the cups.
Texture: The flakes will freeze into the limber, giving it a delightful bite and an even more intense coconut flavor. This makes a great Receta limber de coco rallado.
Grandma’s Limber (Limber de Coco de la Abuela)
The nostalgic version is less about a specific recipe and more about the technique and the use of the freshest ingredients.
Authenticity: This version often involves scraping the meat from a fresh coconut and extracting the milk manually, resulting in a cleaner, fresher flavor. While time-consuming, it is the purest form of the Limber de coco de la abuela and the original receta limber de coco Puerto Rican. It is about the love and care put into the process.
10 Simple Limber De Coco Recipes
Limber de Coco is a refreshing Puerto Rican treat that embodies the essence of the Caribbean. To make this delightful dessert, mix coconut cream, sugar, and water, then freeze the mixture in ice pop molds. The result? Creamy, coconutty goodness on a stick. Perfect for beating the heat and savoring a taste of paradise.
1. Classic Coconut Limber
A timeless favorite, this Limber de Coco recipe sticks to the basics. Blend coconut milk, sweetened condensed milk, and shredded coconut flakes for a creamy, tropical delight. Freeze in molds, and enjoy a taste of paradise.
2. Pineapple Coconut Limber
Elevate the classic Limber by adding crushed pineapple to the mix. The tangy pineapple pairs perfectly with the sweet coconut for a refreshing twist.
3. Nutty Coconut Limber
For a crunchy twist, sprinkle chopped nuts like almonds or cashews into your Limber de Coco mixture before freezing. The combination of creamy and crunchy textures is irresistible.
Add a tropical twist to your Limber by blending ripe bananas with coconut milk. The result is a creamy, fruity treat with a hint of banana flavor.
6. Mango Coconut Limber
Swap out the pineapple for diced mango in your Limber de Coco for a sweeter, mango-infused variation. The mango’s natural sweetness adds a burst of flavor.
7. Berry Coconut Limber
Mix in fresh or frozen berries, such as strawberries or blueberries, to your Limber de Coco. The berries provide a delightful tartness that complements the coconut.
Embrace the trend with a Matcha Coconut Limber. Mix matcha green tea powder into your coconut blend for a vibrant green treat with a hint of earthy flavor.
10. Caramel Coconut Limber
Drizzle caramel sauce over your frozen Limber de Coco just before serving. The sweet caramel adds a rich, indulgent touch to this tropical delight.
To cater to both English and Spanish-speaking audiences, here are the core recipe instructions in both languages.
English Version (Printable Recipe Card)
Recipe: Traditional Puerto Rican Limber de Coco
Ingredient
Quantity
Notes
Water
2 cups
Used for simple syrup.
Granulated Sugar
1.5 cups
Dissolve fully for best texture.
Full-Fat Coconut Milk
1 (13.5-oz) can
Base for coconut flavor.
Sweetened Condensed Milk
1 (14-oz) can
Essential for creaminess and sweetness.
Vanilla Extract
1 teaspoon
Flavor enhancement.
Instructions (How to Make Limber de Coco):
Syrup: Combine water and sugar in a saucepan. Heat until the sugar is fully dissolved. Cool completely.
Mix: Whisk the cooled syrup, coconut milk, and condensed milk together in a large bowl.
Flavor: Stir in the vanilla extract. Pour the mixture into a blender and blend for 30 seconds for optimal texture.
Freeze: Pour the mixture into 5-oz cups. Cover with foil and insert a stick. Freeze for 6–8 hours. This provides the definitive limber de coco recipe in English.
Spanish Version (Receta Completa)
Receta Limber de Coco: Versión Tradicional Puertorriqueña
Ingrediente
Cantidad
Notas
Agua
2 tazas
Para el jarabe.
Azúcar Granulada
1.5 tazas
Disuelva completamente para la mejor textura.
Leche de Coco (Grado Completo)
1 lata (13.5 oz)
Base de sabor a coco.
Leche Condensada Azucarada
1 lata (14 oz)
Esencial para cremosidad y dulzura.
Extracto de Vainilla
1 cucharadita
Para mejorar el sabor.
Instrucciones (Receta Limber de Coco):
Jarabe: Combine el agua y el azúcar en una cacerola. Caliente hasta que el azúcar se disuelva por completo. Deje enfriar por completo.
Mezcla: Bate el jarabe frío, la leche de coco y la leche condensada en un tazón grande.
Sabor: Agregue el extracto de vainilla. Vierta la mezcla en una licuadora y licúe durante 30 segundos para una textura óptima.
Congelación: Vierta la mezcla en vasos de 5 oz. Cubra con papel de aluminio e inserte un palito. Congele durante 6–8 horas. Esta receta limber de coco recipes en español garantiza que el plato sea accesible a toda la comunidad.
Tips, Troubleshooting & Storage
Achieving the perfect limber involves understanding the science of freezing a sweetened liquid. Here are the key tips to elevate your limber de coco game and troubleshoot common issues.
Why Your Limber Freezes Icy (Troubleshooting)
The most common complaint is a limber that freezes into a solid, impenetrable ice block, rather than having a smooth, melt-in-your-mouth texture.
Issue: Not enough sugar/fat. Both sugar and fat act as anti-freezing agents by lowering the mixture’s freezing point.
Solution: Ensure you use the exact amounts of sweetened condensed milk and sugar specified. If you want a creamier result, try the limber de coco cremoso version (with cream cheese). The extra fat prevents large ice crystals from forming.
How to Make It Creamier
The key to a superior, smooth, creamy texture is emulsification and fat content.
Emulsification: Use a blender to mix the base for 30 seconds to a minute. This breaks down the fat molecules and incorporates air, resulting in a significantly smoother texture.
Fat Content: Use full-fat coconut milk (not light), and consider the cream cheese variation. The added fat ensures a rich, smooth finish. The limber de coco recipe easy version, will often be icier than the traditional or creamy variations.
Shelf Life and Storage
Limbers are excellent for batch-making and storing.
Shelf Life: Limbers can be stored in the freezer for up to 3–4 months without significant degradation in quality, provided they are covered tightly.
Storage Tips: Ensure the plastic cups or molds are completely covered with plastic wrap or foil to prevent freezer burn and absorption of freezer odors. Store them flat until completely frozen, then they can be moved around as needed.
Serving Tips
The traditional way to serve is by running the cup under lukewarm water for a few seconds. This loosens the limb from the edges. You then push the limber up from the bottom and eat it straight from the cup, using the cup as a handle.
Cultural History of Puerto Rican Limbers
The limber is an indelible part of the Puerto Rican childhood experience. Its history is tied to local innovation and the enduring spirit of the island’s street food culture.
Origin of the “Limber” Name
As noted earlier, the name is a charming piece of local linguistic evolution. When Charles Lindbergh visited San Juan in 1928, he was famously honored with a frozen treat. The phonetic shift from “Lindbergh” to the easier-to-pronounce “limber” quickly took hold.
This demonstrates how popular culture and history can shape a simple recipe. The origin story gives a unique cultural cachet to limber de coco Puerto Rico.
Street Vendors and Childhood Snack
For decades, limbers have been the quintessential low-cost, high-impact snack. Local vendors, often operating from their homes or small carts, would sell a variety of flavors. These Puerto Rican limber recipes were often simple, using seasonal fruits, but the coconut version was always the staple.
The sight and sound of the limbero (limber vendor) were a signal of summer and fun. The homemade quality, the distinctive plastic cups, and the rush of cold, sweet flavor define the authentic experience. Limbers continue to be a source of nostalgia and a beloved tradition passed down to new generations.
FAQ: Your Limber De Coco Questions Answered
This section addresses common questions about preparing and enjoying this iconic dessert, ensuring you have all the knowledge needed.
How to make coconut limber?
You make coconut limber by combining full-fat coconut milk, sweetened condensed milk, and sugar (often dissolved in water as a simple syrup) with vanilla and cinnamon. The mixture is then poured into small plastic cups or molds and frozen until solid, and traditionally pushed up from the bottom of the cup to eat.
What is the difference between limber and paleta?
A limber is a Puerto Rican frozen dessert made by freezing a liquid mixture directly in a cup and eating it out of the cup. A paleta is a Mexican-style popsicle, a frozen fruit bar made with either a water or milk base and typically frozen in a mold with a stick. While both are frozen treats on a stick/handle, their origin and serving style differ.
Can I make limber without condensed milk?
Yes, you can. Suppose you want a dairy-free or less sweet limber. In that case, you can replace the condensed milk with a mixture of coconut cream, a plant-based sweetener like agave or maple syrup, and a stabilizer like a small amount of cornstarch or guar gum to maintain a creamy, non-icy texture.
Can I use Goya coconut cream?
Absolutely. Using Goya Cream of Coconut is a great shortcut, as it is already highly sweetened and very thick. If you use it, significantly reduce or eliminate the added sugar and condensed milk from the traditional recipe, as the Goya product is already very sweet. This makes the Receta limber de coco Goya very easy to execute.
How long does limber take to freeze?
Limber typically takes 6 to 8 hours to freeze solid in a standard home freezer. For the best, smoothest texture, it is best to leave it overnight. The high sugar and fat content means it takes longer to freeze than plain water or juice.
What are authentic ingredients?
Authentic ingredients for limber de coco include water, sugar, coconut milk (or coconut cream), and often cinnamon and vanilla extract. Sweetened condensed milk is a ubiquitous and traditional ingredient for both flavor and texture.
How do you make limber de coco extra creamy?
To make limber de coco extra creamy (cremoso), incorporate a dairy fat. The best methods are adding 4 ounces of softened cream cheese to the mixture before blending or using a significantly higher ratio of full-fat coconut cream instead of milk. Blending the mixture for a full minute to emulsify the fats is also key.
Is there a dairy-free version?
Yes. The recipe base of coconut milk is naturally dairy-free. Use a plant-based sweetened condensed milk substitute (often made from coconut or oat milk) instead of the traditional dairy condensed milk.
Can limber be made into popsicles?
Yes, any limber mixture can be poured into standard popsicle molds instead of the traditional small cups. This creates a limber de coco popsicles version, which is very convenient for serving.
Can I make limber with alcohol?
Yes, you can make a limber with alcohol (a popular adult version). Add a small amount (no more than 1/4 cup per batch) of a light or dark rum. Be careful not to add too much, as the alcohol will prevent the mixture from freezing completely. This makes a great limber de coco recipe with rum.
Conclusión: Your Ticket to the Tropics
Mastering the limber de coco recipe means mastering a piece of Puerto Rican heritage. Whether you choose the complex, rich Puerto Rican limber of the traditional method, or the effortless how to make coconut limber of the easy five-ingredient version.
Or one of the luxurious variations, like the creamy or boozy options, you are guaranteed a taste of the Caribbean. The balance of icy chill and deep coconut sweetness makes this dessert a true standout.
We encourage you to try the limber de coco recipe today and experiment with the variations. Let us know which one transports you back to the sunny streets of Puerto Rico!
References
Cultural History & Definition of Limber:
Limber (dessert) – Wikipedia. (Includes the Charles Lindbergh origin story, traditional serving method, and key flavors.)
If you’re a dessert enthusiast, you’re in for a treat with this delectable Crack Cake recipe.
This cake, often referred to as “Crack Cake” due to its irresistibility, will have your taste buds dancing with joy.
It’s a perfect blend of sweetness, moistness, and a hint of crunch, making it a favorite among both kids and adults. Let’s dive into this delightful recipe and get ready to bake up a storm!
Preheat your oven to 325°F (163°C). Grease and flour a Bundt cake pan, ensuring it’s well-coated to prevent sticking.
Prepare the Cake Batter: In a large mixing bowl, combine the yellow cake mix, instant vanilla pudding mix, eggs, warm water, vegetable oil, sour cream, and vanilla extract. Mix until smooth and well combined.
Pour into the Pan
Pour the cake batter into the prepared Bundt pan, spreading it evenly.
Bake
Place the pan in the preheated oven and bake for about 45-50 minutes or until a toothpick inserted into the center comes out clean.
Prepare the Glaze
While the cake is baking, prepare the glaze. In a saucepan, combine the unsalted butter, granulated sugar, buttermilk, vanilla extract, and baking soda. Cook over medium heat, stirring constantly until the mixture begins to boil. Allow it to boil for 1-2 minutes, then remove from heat.
Glaze the Cake
Once the cake is out of the oven and still warm, poke holes in it using a skewer or toothpick. Pour the warm glaze evenly over the cake, allowing it to seep into the holes and cover the surface.
Let it Cool
Let the cake cool in the pan for about 15-20 minutes, then carefully transfer it to a serving platter.
Serve and Enjoy
Allow the cake to cool completely before slicing. Serve and savor the delightful flavors of this Crack Cake!
Tips and Variations
Add Nuts
If you enjoy some crunch in your cake, add chopped pecans or walnuts to the batter before baking.
Fruit Twist
Incorporate some chopped fruits like pineapple or banana for a fruity twist to the cake.
Now that you have the recipe for this addictive Crack Cake, grab your ingredients and utensils, and get ready to bake a cake that’ll have everyone coming back for more. Happy baking and even happier indulging!
Nutrition Facts for a Serving (1/12 of the cake)
Calories: 400 kcal
Total Fat: 21g
Saturated Fat: 9g
Trans Fat: 0g
Cholesterol: 95mg
Sodium: 400mg
Total Carbohydrates: 50g
Dietary Fiber: 0g
Sugars: 34g
Protein: 3g
Please consult with a nutritionist or use precise nutritional analysis tools for more accurate values based on your specific ingredients and portion sizes. Enjoy your Crack Cake in moderation as a delightful treat!
10 Simple Crack Cake Recipes
Discover the delight of Crack Cake! This irresistible dessert, with its sweet allure and moist texture, beckons both beginners and seasoned bakers. Explore various flavors, from citrus zest to chocolate indulgence, for a truly heavenly treat.
Citrus Zest Infusion
Enhance the traditional Crack Cake by adding a burst of citrus flavor. Incorporate zest from oranges, lemons, and limes into the batter for a refreshing and tangy twist. The citrus essence beautifully complements the sweetness of the cake.
Elevate the Crack Cake by mixing chopped nuts like pecans or walnuts into the batter. The added crunch and richness from the nuts enhance the overall texture and flavor, creating a delightful nutty version.
Fruity Surprise
Introduce a fruity element by folding in diced pineapples or mashed bananas into the batter. The natural sweetness and moisture from the fruits make for a tantalizingly sweet and juicy variation.
Spiced Perfection
Spice things up by incorporating a blend of warm spices like cinnamon, nutmeg, and ginger into the batter. The aromatic spices bring a comforting and cozy feel to this already addictive cake.
Coffee Infused Elegance
Elevate the flavor profile by substituting the warm water with strong brewed coffee. The coffee infusion enhances the richness of the cake and adds a delightful hint of bitterness, perfect for coffee enthusiasts.
Coconut Paradise
Introduce a tropical twist by adding shredded coconut to the batter. The coconut flakes add a subtle sweetness and a hint of chewiness, providing a taste of paradise with every bite.
Take your Crack Cake to the next level by drizzling a generous amount of caramel sauce over the cake after it’s glazed. The sweet and buttery caramel elevates the flavors and adds a luxurious touch.
Almond Bliss
Replace the vanilla extract with almond extract and sprinkle slivered almonds on top of the glaze. The almond extract imparts a unique and delicate flavor, while the almonds add a delightful crunch.
Berry Burst
Mix in fresh or frozen berries like blueberries, raspberries, or strawberries into the batter. The burst of tartness and vibrant colors from the berries create a visually appealing and mouth-watering version of the Crack Cake.
Indulge your taste buds with our 10 enticing Crack Cake recipes! From zesty citrus infusions to nutty delights and chocolaty dreams, we’ve got a variation for every craving. Elevate this classic treat with creative twists and savor the rich flavors. Whether you’re a fan of fruits, spices, or chocolate, there’s a Crack Cake to suit every palate. Happy baking!
When it comes to cookies, we all have our favorites. But there’s something truly special about Million Dollar Cookies.
These rich and indulgent treats are the epitome of luxury in the world of cookies. Packed with premium ingredients and a heavenly taste that’s worth every bite, Million Dollar Cookies are a must-try for anyone with a sweet tooth.
We’ll share with you the recipe for these delectable delights.
Preheat your oven to 350°F (175°C). Line a baking sheet with parchment paper.
Prepare the Cookie Dough
In a large mixing bowl, cream together the butter, granulated sugar, and brown sugar until it becomes light and fluffy. This should take about 2-3 minutes.
Add the Eggs and Vanilla
Beat in the eggs, one at a time, ensuring each one is fully incorporated before adding the next. Mix in the vanilla extract.
Combine Dry Ingredients
In a separate bowl, whisk together the flour, baking soda, and salt. Gradually add this dry mixture to the wet ingredients, mixing until just combined.
Gently fold in the high-quality semisweet chocolate chips and the chopped nuts (if you’re using them).
Make the Million Dollar Filling
In a small saucepan, combine the sweetened condensed milk, semisweet chocolate chips, and butter. Heat over low heat, stirring continuously, until the chocolate and butter are fully melted and the mixture is smooth.
Assemble the Cookies
Drop rounded tablespoons of cookie dough onto the prepared baking sheet, leaving some space between each. Using your thumb or the back of a spoon, make an indentation in the center of each cookie.
Add the Filling
Fill each cookie indentation with the Million Dollar Filling mixture. Sprinkle shredded coconut and chopped nuts on top of the filling.
Bake
Bake in the preheated oven for 10-12 minutes or until the cookies are golden around the edges.
Cool and Enjoy
Allow the cookies to cool on the baking sheet for a few minutes before transferring them to a wire rack to cool completely. Once cooled, indulge in the luxurious taste of Million Dollar Cookies!
These cookies are the perfect combination of a classic chocolate chip cookie and a gooey, indulgent center that truly feels like a million bucks. Whether you’re baking them for a special occasion or just as a treat for yourself, Million Dollar Cookies are sure to impress.So, what are you waiting for? Put on your apron, gather your ingredients, and start baking these exquisite cookies today. Your taste buds will thank you!Enjoy baking and savoring your Million Dollar Cookies! If you have any more questions or need further assistance, feel free to ask.
Nutrition Facts (per serving, based on 1 cookie)
Calories: 235
Total Fat: 14g
Saturated Fat: 7g
Trans Fat: 0g
Cholesterol: 31mg
Sodium: 135mg
Total Carbohydrates: 27g
Dietary Fiber: 1g
Sugars: 18g
Protein: 3g
10 Simple Million Dollar Cookies Recipes
Indulge in sweet success with these 10 delectable Million Dollar Cookie recipes. From classic chocolate chip to gourmet creations, these treats are your ticket to sweet millionaire bliss!
Triple Chocolate Bliss Cookies
Take your Million Dollar Cookies to the next level by adding white chocolate chips, dark chocolate chunks, and milk chocolate chips to the dough. The result? A triple chocolate sensation that’s perfect for chocoholics!
Nutty Caramel Delight Cookies
Incorporate chopped caramel-filled chocolate pieces and toasted almonds into the dough for a sweet and nutty twist. Drizzle with caramel sauce after baking for an extra decadent touch.
Peanut Butter Surprise Cookies
Add a dollop of creamy peanut butter in the cookie’s center before baking to create a delightful surprise inside. These cookies offer a perfect blend of sweet and salty flavors.
Oatmeal Raisin Million Dollar Cookies
Mix in rolled oats and plump raisins into the cookie dough for a comforting and chewy texture. The hint of cinnamon elevates the taste to new heights.
White Chocolate Macadamia Nut Cookies
Substitute semisweet chocolate chips with white chocolate chips and add buttery macadamia nuts for a rich and creamy cookie experience.
Mint Chocolate Delight Cookies
Stir in mint chocolate chips and a touch of peppermint extract to achieve a refreshing minty flavor amidst the chocolatey goodness.
Coconut Lovers’ Dream Cookies
Incorporate shredded coconut into the dough and sprinkle more on top for a tropical twist on Million Dollar Cookies. The extra coconut adds a delightful crunch.
Salted Caramel Pecan Cookies
Combine chopped pecans and caramel bits into the dough, and sprinkle a pinch of sea salt on top before baking for a perfect balance of sweet and salty.
M&M’s Rainbow Cookies
Swap out the chocolate chips for colorful M&M’s candies to create a vibrant and visually appealing cookie that’s perfect for kids and kids at heart.
Million Dollar Cookies Recipes! From classic chocolate chip perfection to gourmet caramel pecan delights, these recipes are your ticket to baking brilliance. Elevate your cookie game and savor the taste of luxury without breaking the bank. Get ready to bake your way to a million-dollar smile
Preheat your Muggle oven to 350°F (175°C) and prepare a muffin tin with cupcake liners.
Mix the Dry Ingredients:
In a bowl, whisk together the flour, cocoa powder, baking powder, baking soda, and salt. Set this mixture aside.
Cream the Butter and Sugar:
In another bowl, beat the softened butter and granulated sugar until it’s light and fluffy.
Add Eggs and Vanilla:
Beat in the eggs one at a time, then add the vanilla extract and mix until combined.
Alternate Dry Ingredients and Buttermilk:
Gradually add the dry ingredient mixture and buttermilk to the wet ingredients, starting and ending with the dry ingredients. Mix until just combined.
Add Sour Cream:
Gently fold in the sour cream until the batter is smooth and well mixed.
Fill the Cauldron:
Fill each cupcake liner about two-thirds full with the batter.
Create the Cauldron:
Place a teaspoon of chocolate hazelnut spread in the center of each cupcake.
Cover the Filling:
Add a small amount of batter on top to cover the chocolate hazelnut filling.
Bake in the Muggle Oven:
Bake for about 18-20 minutes or until a toothpick inserted into the cakes comes out clean.
Cool and Set:
Allow the Cauldron Cakes to cool in the muffin tin for a few minutes, then transfer them to a wire rack to cool completely.
Prepare the Chocolate Coating:
Melt the semi-sweet chocolate chips and vegetable oil in a heatproof bowl over a pot of simmering water (or use a microwave in short bursts). Stir until smooth.
Dip and Decorate:
Dip the tops of the cooled Cauldron Cakes into the melted chocolate, letting any excess drip off. Place them back on the wire rack to set.
Magical Decorations:
If you want to add some extra magic, you can use colorful icing to draw cauldron legs or other enchanting designs on top of the chocolate coating.
And there you have it, your very own Cauldron Cakes! These delicious, magical treats are perfect for sharing with fellow wizards and Muggles alike. Enjoy the taste of the wizarding world in the comfort of your own home.
Remember, when making Cauldron Cakes, a little magic goes a long way, so make them with love and a sprinkle of wizardry.
Nutrition Facts (per serving)
Calories: 280
Total Fat: 15g
Saturated Fat: 8g
Cholesterol: 45mg
Sodium: 190mg
Total Carbohydrates: 33g
Dietary Fiber: 2g
Sugars: 17g
Protein: 4g
Please note that these nutrition facts are approximate and can vary depending on the specific brands of ingredients used and the exact quantities. Be sure to adjust the nutritional information as needed if you have specific dietary concerns or use different brands. Enjoy your Cauldron Cakes responsibly!
10 Simple Cauldron Cake Recipes
Cauldron Cakes, inspired by the enchanting world of Harry Potter, are delectable treats that bring magic to your kitchen. These chocolatey confections, often filled with surprises, offer endless creative possibilities. From classic flavors to inventive twists, Cauldron Cakes are a delightful way to indulge in a touch of wizardry at home.
1. Chocolate Hazelnut Cauldron Cakes
Enhance your Cauldron Cakes by adding a delightful hazelnut twist. Follow the classic Cauldron Cakes recipe, but substitute the chocolate hazelnut filling with a generous dollop of Nutella. The rich, nutty flavor pairs perfectly with the moist chocolate cake.
2. Raspberry Filled Cauldron
Cakes For a fruity surprise, make your Cauldron Cakes with a raspberry filling. After filling the cupcake liners with batter, add a fresh raspberry in the center before covering it with more batter. The tartness of the raspberries balances the sweetness of the cake and chocolate coating.
Cakes Give your Cauldron Cakes a caramel twist by drizzling warm caramel sauce over the chocolate coating. This adds a sweet, buttery flavor that complements the chocolate.
5. Mint Chocolate Cauldron
Cakes Add a refreshing touch to your Cauldron Cakes by incorporating mint extract into the batter. Mint and chocolate are a classic combination, and these cakes are sure to please fans of this pairing.
6. Red Velvet Cauldron
Cakes Put a magical spin on the classic red velvet cake by creating Red Velvet Cauldron Cakes. Follow the original recipe but use red velvet batter. The deep, velvety flavor and vibrant color make for a stunning treat.
7. Oreo Cookie Cauldron
Cakes For an extra dose of cookies and cream, add crushed Oreo cookies to your Cauldron Cake batter. The cookies provide a delightful crunch and creamy contrast to the cake’s texture.
8. Espresso Cauldron
Cakes Coffee lovers can enjoy an Espresso Cauldron Cake by adding a shot of espresso to the batter. The coffee flavor pairs exceptionally well with the chocolate and gives you a caffeinated boost.
9. Almond Joy Cauldron
Cakes Bring the flavors of the classic candy bar to your Cauldron Cakes. After filling the cupcakes with batter, add a mix of chopped almonds, coconut flakes, and chocolate chips. The combination of flavors and textures is truly enchanting.
10. S’mores Cauldron
Cakes Capture the essence of a campfire treat with S’mores Cauldron Cakes. Place a marshmallow and a piece of chocolate in the center before baking. Afterward, top them with crushed graham crackers for a delightful, gooey, and crunchy experience.
These 10 variations of Cauldron Cakes offer a range of flavors and experiences, ensuring there’s a Cauldron Cake for everyone’s taste preferences. Experiment with these recipes to discover your favorite magical treat.
Jalapeno relish is a versatile and spicy condiment that can add a kick to your favorite dishes. Making your own homemade jalapeno relish not only allows you to customize the heat level,
But also ensures that you have a ready supply of this delicious condiment on hand. Canning jalapeno relish is a great way to preserve its freshness for months to come.
1/2 cup chopped red bell pepper (optional, for color)
Instructions
Prepare the Jalapenos
Wear gloves to protect your hands from the spicy jalapenos. Slice the jalapenos into thin rounds. You can remove the seeds for a milder relish or leave some for extra heat.
Cook the Vegetables
In a large saucepan, combine the sliced jalapenos, chopped onions, minced garlic, and red bell pepper (if using). Stir in the white vinegar, granulated sugar, brown sugar, ground turmeric, celery seed, pickling salt, and red pepper flakes.
Simmer the Mixture
Place the saucepan over medium heat and bring the mixture to a boil. Reduce the heat and let it simmer for about 10-15 minutes, or until the peppers and onions become tender and the mixture thickens slightly.
Sterilize Jars
While the relish is simmering, sterilize your canning jars and lids. You can do this by boiling them in water for 10 minutes or using a dishwasher with a sterilization cycle.
Fill the Jars
Carefully ladle the hot jalapeno relish into the sterilized jars, leaving about 1/2 inch of headspace at the top. Wipe the jar rims with a clean, damp cloth to remove any residue.
Seal the Jars
Place the sterilized lids on the jars and screw on the bands until they are fingertip tight.
Process in a Water Bath Canner
Submerge the filled jars in a boiling water bath canner. Make sure the jars are covered with at least 1-2 inches of water. Process them for about 10-15 minutes.
Cool and Store
Carefully remove the jars from the canner and place them on a clean towel or cooling rack. Let them cool completely. As they cool, you should hear the lids pop, indicating a successful seal. If any jars don’t seal properly, refrigerate and use them within a few weeks.
Label and Date
Once the jars are cool, label them with the contents and the date. Properly sealed jars can be stored in a cool, dark place for up to a year.
Homemade jalapeno relish is a fantastic addition to sandwiches, hot dogs, burgers, and more. Canning this zesty condiment ensures that you can enjoy its bold flavors throughout the year. Experiment with the level of spiciness and share your delicious homemade jalapeno relish with friends and family!
Nutrition Facts
Calories: 30
Total Fat: 0g
Saturated Fat: 0g
Trans Fat: 0g
Cholesterol: 0mg
Sodium: 90mg
Total Carbohydrates: 7g
Dietary Fiber: 0.5g
Sugars: 6g
Protein: 0.5g
10 Similar Jalapeno Relish Canning Recipes
Jalapeno relish canning recipes offer a spicy twist to your preserves. Blend jalapenos, onions, and vinegar for a zesty condiment perfect for burgers and sandwiches. Preserve the heat in a jar!
1. Sweet Jalapeno Relish
This sweet twist on jalapeno relish combines the heat of jalapenos with the sweetness of sugar. Follow the same basic recipe but increase the sugar to 2 cups. The result is a balanced relish perfect for glazing grilled meats or spicing up sandwiches.
2. Jalapeno and Pineapple Relish
Add a tropical twist by mixing finely diced pineapple into your jalapeno relish. The combination of spicy and sweet flavors creates a delightful relish to serve with grilled chicken or seafood.
3. Jalapeno Mango Relish
Combine the fruity goodness of mango with jalapenos for a relish that’s sweet, spicy, and tangy. Perfect as a topping for fish tacos or grilled pork.
4. Smoky Chipotle Jalapeno Relish
Introduce a smoky element to your relish by adding chipotle peppers in adobo sauce. The result is a rich, smoky flavor that pairs wonderfully with grilled meats and burgers.
5. Garlic and Jalapeno Relish
Enhance the flavor profile by adding minced garlic cloves to the relish mixture. The garlic infuses a savory depth, making it an ideal accompaniment to grilled sausages and brats.
6. Jalapeno and Tomato Relish
Combine the spiciness of jalapenos with the freshness of diced tomatoes. This relish is fantastic on top of scrambled eggs or mixed into pasta salads.
7. Jalapeno-Cilantro Relish
For a refreshing twist, incorporate chopped fresh cilantro into your jalapeno relish. It’s the perfect complement to tacos, grilled shrimp, or even as a dip for tortilla chips.
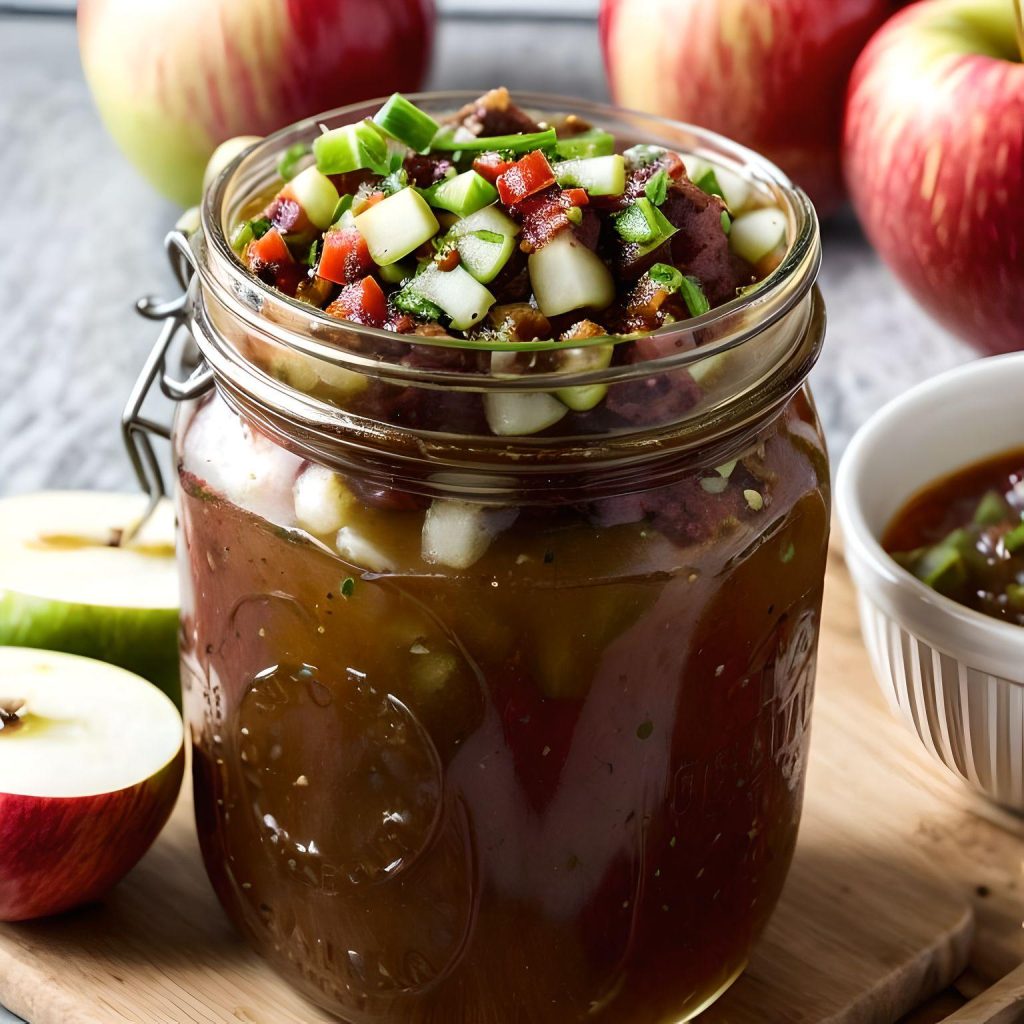
8. Jalapeno and Green Apple Relish
Mixing diced green apples into your jalapeno relish provides a delightful tartness that pairs excellently with grilled pork chops or as a condiment for cheese boards.
9. Pickled Jalapeno Relish
For a tangy kick, use a mix of white vinegar and apple cider vinegar in your relish. The added tanginess makes it a superb choice for topping hot dogs or bratwurst.
10. Honey Mustard Jalapeno Relish
Combine the spiciness of jalapenos with the sweetness of honey and the tanginess of mustard. This unique relish is perfect for dressing up grilled chicken or as a dip for pretzels.
If you’re a fan of the fiery kick of jalapeno peppers, then you’re in for a treat! We’ve curated a list of 10 similar jalapeno relish canning recipes that will satisfy your spicy cravings. From sweet and tangy to smoky and savory, these recipes offer a range of flavors to enjoy all year round. Get ready to elevate your dishes with these homemade jalapeno relishes!


 – Easy, Authentic & Creamy Versions")