Home Blog Page 93

Blueberry & Toasted Coconut Kale Salad

0

Blueberries and kale are nutritional powerhouses, each packed with vitamins, minerals, and antioxidants.

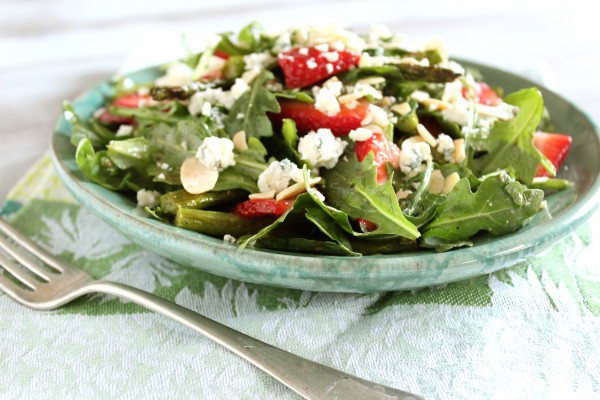
When combined in a delicious salad, they create a medley of flavors and textures that make for a vibrant and satisfying meal.

This Blueberry & Toasted Coconut Kale Salad recipe is not only a feast for the taste buds but also a healthful choice for your well-being.

Blueberry & Toasted Coconut Kale Salad
NameBlueberry & Toasted Coconut Kale Salad
CuisineAmerican
Prep Time15 minutes
Cooking Time5 minutes (toasting)
Total Time20 minutes
Servings4 servings
YieldAbout 6 cups

Ingredients

  • 4 cups kale, washed and chopped
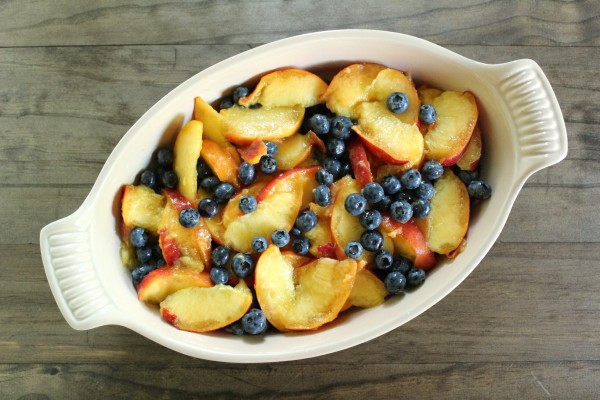
  • 1 cup fresh blueberries
  • 1/2 cup shredded coconut, toasted
  • 1/4 cup sliced almonds
  • 1/4 cup crumbled feta cheese (optional)
  • 1/4 cup extra virgin olive oil
  • 2 tablespoons freshly squeezed lemon juice
  • 1 tablespoon honey or maple syrup
  • Salt and pepper to taste

Instructions

Prepare the Kale

Start by washing the kale thoroughly and removing the tough stems. Chop the kale into bite-sized pieces and place them in a large mixing bowl.

Massage the Kale

Drizzle a bit of olive oil over the kale and gently massage it for a few minutes. This process helps to tenderize the kale and enhance its flavor.

Prepare the Dressing

In a small bowl, whisk together the remaining olive oil, lemon juice, honey or maple syrup, salt, and pepper. Set the dressing aside.

Toast the Coconut and Almonds

In a dry skillet over medium heat, toast the shredded coconut and sliced almonds until they turn golden brown and fragrant. Stir frequently to prevent burning. Once toasted, remove from heat and set aside.

Assemble the Salad

Add the fresh blueberries and toasted coconut and almonds to the massaged kale. Toss gently to combine.

Drizzle with Dressing

Pour the prepared dressing over the salad and toss until all the ingredients are well coated.

Garnish

Top the salad with crumbled feta cheese for an additional burst of flavor and creaminess.

Serve

Divide the Blueberry & Toasted Coconut Kale Salad into individual servings and serve immediately. Enjoy this nutritious and delightful salad as a side or a main dish.

Estimated Nutrition Per Serving (approximate values)

  • Calories: 230 kcal
  • Total Fat: 18g
    • Saturated Fat: 8g
    • Trans Fat: 0g
  • Cholesterol: 6mg
  • Sodium: 160mg
  • Total Carbohydrates: 16g
    • Dietary Fiber: 4g
    • Sugars: 7g
  • Protein: 5g
  • Vitamin D: 0%
  • Calcium: 10%
  • Iron: 15%
  • Potassium: 380mg

Please note that the nutrition values are approximate and can vary based on specific ingredients used and portion sizes. It’s always a good practice to calculate nutrition based on the exact products and quantities you use in your recipe.

Blueberry & Toasted Coconut Kale Salad

Massaged kale salads hit their heyday a few years ago, but I still love ’em. If you haven’t heard about – or tasted – this type of salad, let me break it down for you. The name actually says it all: you literally massage a bit of oil into the kale in order to tenderize the somewhat tough green leaves.

I usually use olive oil for my massage kale salads, but I opted for coconut oil in this case because it (obviously) complements the toasted coconut flakes. Which brings me to my second note about this recipe. Flaked coconut is brought to a whole new level when toasted to a light golden hue, but in the blink of an eye it can go from perfectly golden to burnt black. Keep an eye on the coconut while it’s in the toaster oven!

Blueberry & Toasted Coconut Kale Salad

So we’ve discussed kale and coconut. What’s left? Blueberries! My favorite berry, both for their flavor and nutrients. Lauded for their antioxidants, blueberries are often labeled by those in the nutritional field as one of the healthiest foods you can eat. I love the tiny wild Maine variety, but they can be tough to come by – even here in Massachusetts – so I stock up on any organic blueberries I can find at a reasonable price throughout the summer months.

Blueberry & Toasted Coconut Kale Salad

Enjoy this salad alongside grilled chicken for a healthy summer dinner, or all on its own as a light lunch.

Blueberry & Toasted Coconut Kale Salad

Blueberries, kale, and toasted coconut blend in this vibrant salad. Begin by massaging fresh kale, then mix in blueberries and toasted coconut. Drizzle with a zesty lemon-honey dressing. Top with sliced almonds and optional feta. A delightful, nutrient-packed dish ready in under 20 minutes. Healthy eating never tasted so good!

Biscuits and Gravy with Homemade Chicken Breakfast Sausage

0

Most of you probably don’t know this, but John and I lived in Texas from 2007-2008. During my final year of graduate school at Boston College, John was offered a relocating promotion… so after graduation, I packed up and joined him in Houston. Along with moderate winter temperatures, affordable real estate prices, drawling southern accents, and – unfortunately – Gulf coast hurricanes and sticky-hot humidity, we were introduced to a variety of delicious novel foods including migas and huevos rancheros, tilapia tacos and boiled crawfish, spicy & sweet cinnamon-infused coffee from The Buffalo Grille, and Shiner Bock beer at pretty much every eating and drinking establishment we frequented.

Perhaps the most decadent Texan meal we encountered was biscuits and gravy during a weekend stay at our friend Pat’s family’s ranch. After sleeping off an impressive spread of smoked beef, secret-ingredient-chili, and a melange of other stick-to-your-rib eats, we awoke to a breakfast of flaky biscuits smothered in a rich sausage gravy. Needless to say, I felt a bit weighed down after the hefty weekend splurges, so I tucked away the idea for “healthified” biscuits and gravy for later brainstorming.

A little over a year – and a move back to our beloved Boston – later, I finally got around to re-inventing the classic southern breakfast of biscuits and gravy.

If you are a purist at heart, be forewarned that this dramatically lightened recipe deviates from traditional recipes. However, If you are a health-conscious foodie like myself, there is no question that the ingredients in this recipe will appeal to you. Homemade chicken breakfast sausage is cooked until crumbly and browned before being folded into a silky gravy made with 1% milk and without butter. The sage-scented sausage gravy is draped over light buttermilk biscuits, and then topped with a dusting of freshly cracked black pepper.

Regardless of what type of diet you follow, I can say with a certain degree of certainty that once you taste my version of biscuits and gravy, you will have a new go-to meal to work into your breakfast, (or in our case, breakfast-for-dinner), rotation. Although I am thrilled to be back in the wonderful city of Boston, it’s nice to reminisce about our time spent in Houston; and what better way to do that than through food?!

*Homemade Chicken Breakfast  Sausage

*Please excuse the lackluster photographs… taking pictures of beige food (x3: beige chicken, beige biscuits, beige gravy) is no easy feat!*

Name:Biscuits and Gravy with Homemade Chicken Breakfast Sausage
Cuisine:Southern Breakfast
Prep Time:15 minutes
Cooking Time:30 minutes
Total Time:45 minutes
Servings:4 servings

Ingredients

  • 4 freshly baked buttermilk biscuits (such as Eating Well‘s Buttermilk Biscuits)
  • extra virgin olive oil
  • homemade chicken breakfast sausage* (recipe follows), uncooked
  • 1/4 cup all-purpose flour
  • 3/4 tsp Kosher salt
  • 3/4 tsp freshly ground black pepper, plus more for garnish
  • 1/4 tsp ground sage
  • 1 1/2 cup 1% milk
  • 1/2 lb ground chicken
  • 1/2 tsp ground sage
  • generous 1/4 tsp Kosher salt
  • generous 1/4 tsp freshly ground black pepper
  • 1/8 tsp cayenne pepper
  • 1/8 tsp brown sugar

Estimated Nutrition per Serving

  • Calories: 550
  • calories Protein: 27 grams
  • Carbohydrates : 42 grams
  • carbohydrates Dietary Fiber: 2 grams
  • dietary fiber Sugars: 6 grams
  • sugars Fat: 32 grams
  • Saturated Fat: 12 grams
  • saturated fat Cholesterol: 85 milligrams
  • cholesterol Sodium: 1200 milligrams

Directions

  1. Split each biscuit on a separate plate; set aside.
  2. Heat a drizzle of olive oil in a skillet over medium-high heat. Add the chicken sausage, and stir with a wooden spoon to crumble. Cook until lightly browned, about 5-6 minutes. Set aside.
  3. In a small bowl, whisk together the flour through sage. Slowly add milk, and whisk to combine.
  4. Heat a small saucepan over medium heat. Add in the flour-milk mixture, and bring to a simmer, whisking constantly. Reduce heat to low and simmer until thickened, 1-2 minutes, whisking constantly.
  5. Stir the cooked sausage into the warm gravy, and spoon over the split biscuits. Finish with an extra grinding of black pepper.
  6. In a bowl, combine all ingredients; mix well.
*Homemade Chicken Breakfast  Sausage

Fruited Wild Rice Salad with Dried Cranberries & Walnuts

0

If like me, you get overly excited about the array of tempting offerings at the Whole Foods salad bar, then this gorgeous salad has your name written all over it.

No hum-drum rice salad, this dish is rife with fresh flavors and pleasing textures. Crisp pieces of apple and pear combine nicely with chewy dried cranberries and wild rice, all of which are complemented by crunchy toasted walnuts.

The salad is dressed in a vinaigrette that is a perfect balance of rich olive oil, tangy vinegar, and sweet honey.

Fruited Wild Rice Salad with Dried Cranberries & Walnuts
Name:Fruited Wild Rice Salad with Dried Cranberries & Walnuts
Cuisine:American
Prep Time:15 minutes
Cooking Time:50 minutes (for wild rice)
Total Time:1 hour 5 minutes
Servings:6
Yield:About 6 cups

Ingredients

  • 1 cup wild rice
  • 2 cups water
  • 1/2 cup dried cranberries
  • 1/2 cup chopped walnuts
  • 1/2 cup chopped celery
  • 1/4 cup green onions, finely chopped
  • 1/4 cup fresh parsley, chopped
  • 1/4 cup olive oil
  • 2 tablespoons apple cider vinegar
  • 1 tablespoon honey
  • Salt and pepper to taste

Instructions

Cooking the Wild Rice:

Rinse the wild rice under cold water to remove excess starch.

In a medium-sized saucepan, bring 2 cups of water to a boil.

Add the rinsed wild rice and reduce the heat to low. Cover and simmer for about 45-50 minutes, or until the rice is tender and has absorbed the water. Allow it to cool to room temperature.

Preparing the Dressing:

In a small bowl, whisk together the olive oil, apple cider vinegar, honey, salt, and pepper until well combined. Set aside.

Mixing the Salad:

In a large mixing bowl, combine the cooked wild rice, dried cranberries, chopped walnuts, chopped celery, green onions, and fresh parsley.

Adding the Dressing:

Pour the prepared dressing over the salad and toss gently to ensure all the ingredients are well coated.

Chilling and Serving:

Before serving, taste and adjust the seasoning if necessary.

Refrigerate the salad for at least 1-2 hours to allow the flavors to meld and the salad to chill.

Garnish and Serve:

Garnish with additional parsley or walnuts, if desired, for a decorative touch.

Serve the Fruited Wild Rice Salad as a delightful side dish, a light meal, or a colorful addition to your buffet spread.

Estimated Nutrition Per Serving:
Calories: 250
Total Fat: 12g
– Saturated Fat: 1.5g
– Trans Fat: 0g
Cholesterol: 0mg
Sodium: 150mg
Total Carbohydrates: 32g
– Dietary Fiber: 3g
– Sugars: 9g
Protein: 4g

Please note that the nutrition information is an estimate and may vary based on specific ingredients used and portion sizes. It’s always a good idea to calculate nutrition based on the exact ingredients and quantities you use.

Light enough to accompany an entree, but hearty enough to serve as a main course, this fruited wild rice salad is a fantastic dish to make on the weekend and have on hand throughout the week. The ingredients continue to soak up the vinaigrette as the salad sits in the fridge, so it only gets better with time.

I enjoyed this salad so much that I have no doubt it will become a staple dish in our kitchen. I’m already daydreaming about various ingredient substitutions, such as fresh & dried cherries and toasted pecans. You can also change the flavor of the salad by experimenting with different kinds of vinegar, though I suggest sticking to vinegars with fruity notes.

Fruited Wild Rice Salad with Dried Cranberries & Walnuts

I’m planning to serve this rice salad for lunch when my mom arrives later today for a girls weekend in Boston. Amongst the comfortable couch chats, strolls along the Esplanade with Shelby (John’s and my dog) and Zack (my parent’s puppy), and leisurely glasses of wine up on the roof deck, we just might have to sneak in a granola-making session (I can’t seem to get enough!). I’m looking forward to a great weekend…

Fruited Wild Rice Salad with Dried Cranberries & Walnuts is a vibrant, wholesome dish. Combining the earthy richness of wild rice, the tanginess of cranberries, and the crunch of walnuts, it’s a delightful fusion of flavors and textures. Quick to prepare and bursting with nutrition, this salad is a perfect addition to any meal, adding color and taste to your table.

Blueberry Peach Crisp

0

This is the fruit crisp of my dreams.

Bursting with fresh & sweet in-season fruit, topped with a generous layer of crumbly whole wheat oatmeal crisp, and no butter or refined sugar in sight.

It does not get any better than this!

Blueberry Peach Crisp

Let’s start with the fruit filling.

I think I choose a different favorite summer fruit every day, but peaches and blueberries have both been exceptionally good lately. You’ll want to choose large peaches that are ripe (sniff the stem end… they should smell sweet) but not too soft; otherwise, they’ll be difficult to slice.

Blueberry Peach Crisp

To help make a juicy saucy filling, we’re going to use unsweetened blueberry juice (which I had to take a few sips of before snapping these photos… you know to “test” it). This sweet/tart juice is reduced on the stovetop until thick and syrupy, and is then poured over the fresh fruit.

That’s it! No sweetener at all is added to the filling.

Blueberry Peach Crisp

While we’re here, let’s just take a quick closer look at the label of this blueberry juice.

There are so many fruit juices on store’s shelves these days, but most are glorified uncarbonated sodas in terms of how much added sugar they have. Opt instead for a no-sugar added all-fruit juice if possible.

I found the Lakewood brand at Whole Foods, and though quite pricey at $9.99, it uses organic blueberries NOT from concentrate… and nothing else! No sugar, no preservatives, no additional fruit juice. Just “Fresh Pressed Juice and Puree From Whole Ripe Certified Organic Blueberries.”

Perfect!

Blueberry Peach Crisp

So the reduced syrupy blueberry juice is poured over the fruit…

Blueberry Peach Crisp

… and then topped with a thick blanket of oatmeal crisp topping.

Let’s pull over for a second.

If you prefer a higher ratio of fruit to crisp, you’ll want to halve the topping ingredient amounts. But, let’s be honest, isn’t the topping the best part of a fruit crisp?!

First of all, this raw crisp topping tastes like oatmeal cookie dough; and it’s comprised merely of rolled oats, whole wheat pastry flour, salt, cinnamon, oil, and maple syrup (and not a whole lot of those last two ingredients – in fact, 1 Tbsp or less of each per serving). I literally had to slap my own hands away from eating the raw oatmeal mixture.

Blueberry Peach Crisp

And when it bakes to perfection on top of the fruit? Oh, it’s heaven I tell you!

The crumbly granola-like topping sinks into the bubbly fruit filling, creating the ideal (for me) ratio of fruit to crisp.

Blueberry Peach Crisp

One of the many great things about a fruit crisp recipe is that you can swap in different fruits depending on taste preference and seasonality. This summer, try cherries & nectarines or apricots. In the fall, you can bet that I’ll be trying this recipe with apples. You’ll just want to use a corresponding unsweetened fruit juice; many grocery stores carry apricot juice, and apple juice is everywhere.

Blueberry Peach Crisp

Regardless of the type of fruit you use, any crisp simply begs for a scoop of vanilla ice cream or frozen yogurt… or a few dollops of Greek yogurt if you’re enjoying leftovers for breakfast, which of course I did ;).

Blueberry Peach Crisp

Another nice aspect of fruit crisps is that you can serve them at any temperature, which means you can easily make this in advance to serve at room temperature for a 4th of July celebration tomorrow! Choose your favorite locally grown organic fruit, serve the crisp with ice cream, and you have a crowd-pleasing all-American dessert worthy of the holiday.

Blueberry Peach Crisp

Blueberry Peach Crisp

by Lauren Zembron (adapted from Apple Blueberry Crumble as seen on Sage Recipes and The Kind Diet)

Name:Blueberry Peach Crisp
CuisineAmerican
Prep Time15 minutes
Cooking Time40 minutes
Total Time55 minutes
Servings8 servings
Yield1 9×13-inch dish

Keywords: bake breakfast dessert vegan vegetarian July 4th crisp American summer

Ingredients (8 servings)

Ingredients for the fruit filling

  • 3 large ripe but slightly firm peaches, preferably organic, pitted and thinly sliced (no need to peel)
  • 1 pint blueberries, preferably organic
  • 1 Tbsp freshly squeezed lemon juice
  • 1 3/4 cup unsweetened blueberry juice (not from concentrate), preferably organic, divided use
  • 1 Tbsp arrowroot powder
  • 2 tsp pure vanilla extract
  • pinch of salt

Ingredients for the crisp topping

  • 2 cups old-fashioned rolled oats
  • 1 1/2 cups whole wheat pastry flour
  • 1/4 tsp salt
  • 1/4 tsp ground cinnamon
  • 1/3 cup neutral-flavored vegetable oil
  • 1/2 cup pure maple syrup, preferably grade B

Instructions

Preheat oven to 350°F. Toss the sliced peaches, blueberries, and lemon juice together and spread in an even layer in a 9 inch baking pan.

For the filling: Heat 1 1/2 cups blueberry juice in a small saucepan set over medium-high heat until simmering. Meanwhile, in a small bowl, whisk together the remaining 1/4 cup blueberry juice and arrowroot powder until no lumps remain. Whisk the arrowroot “slurry” into the simmering blueberry juice. Bring mixture to a low boil, reduce heat to medium-low, and let simmer until mixture is has thickened and reduced by half – whisking every now and then – about 20 minutes. Remove from heat, stir in vanilla extract and salt, and pour over the fruit in the pan.

For the crisp topping: In a medium mixing bowl, combine the oats, flour, salt, & cinnamon; whisk to combine. Stir in oil and maple syrup; stir to combine. Evenly crumble the crisp topping over the fruit.

Cover with aluminum foil and bake at 350°F for 30 minutes (you’ll probably want to place a baking sheet underneath the crisp to catch any overflow). Remove the foil and bake for an additional 20 minutes, until the crisp topping is golden brown and the fruit filling is hot and bubbling.

Let sit at room temperature for at least 20 minutes before serving.

Estimated Nutrition Per Serving

  • Calories: 320 calories per serving.
  • Total Fat: 14g per serving.
  • Saturated Fat: 8g per serving.
  • Cholesterol: 30mg per serving.
  • Sodium: 70mg per serving.
  • Total Carbohydrates: 49g per serving.
  • Dietary Fiber: 5g per serving.
  • Sugars: 31g per serving.
  • Protein: 3g per serving.

Please note that these nutritional values are approximate and can vary depending on factors such as the specific ingredients and brands used in the recipe. It’s always a good idea to use a nutrition calculator for precise values, especially if you have specific dietary requirements or restrictions. Enjoy your Blueberry Peach Crisp!

Monday Musings + Chef Salad

0

Monday sets the tone for the rest of the week, making it crucial to start off on a healthy note. Embrace the beginning of the week with a delicious and nutrient-packed Chef Salad.

This wholesome salad combines an array of fresh vegetables, proteins, and a zesty dressing, providing you with the energy and motivation you need to conquer the week ahead.

Let’s dive into the details of creating this revitalizing and satisfying Monday Musings Chef Salad.

PropertyValue
NameMonday Musings + Chef Salad
CuisineMixed
Prep Time20 minutes
Cooking Time10 minutes (for hard-boiled eggs)
Total Time30 minutes
Servings4 servings
Yield1 salad bowl (4 servings)

Ingredients

  1. Romaine lettuce, chopped
  2. Tomatoes, diced
  3. Cucumbers, sliced
  4. Red bell peppers, chopped
  5. Red onions, thinly sliced
  6. Hard-boiled eggs, sliced
  7. Grilled chicken breast, sliced
  8. Turkey or ham slices, chopped
  9. Swiss or cheddar cheese, cubed
  10. Avocado, sliced
  11. Black olives, pitted and sliced
  12. Croutons
  13. Fresh parsley, chopped (for garnish)

Instructions

Prepare the Base
Begin by arranging a generous layer of chopped romaine lettuce as the base of your salad in a large serving bowl.

Layer the Vegetables

Arrange the diced tomatoes, sliced cucumbers, chopped red bell peppers, and thinly sliced red onions over the lettuce, creating a colorful and visually appealing display.

Add the Proteins

Arrange the sliced hard-boiled eggs, grilled chicken breast slices, chopped turkey or ham, and cubed cheese over the vegetables.

Incorporate Avocado and Olives

Layer the sliced avocado and pitted, sliced black olives for a creamy and briny addition to the salad.

Top with Croutons and Fresh Parsley

Sprinkle croutons generously over the top and garnish with freshly chopped parsley to add a delightful crunch and burst of flavor.

Prepare the Dressing

In a small bowl, whisk together olive oil, balsamic vinegar, Dijon mustard, honey, lemon juice, minced garlic, salt, and pepper to create a tangy and refreshing dressing.

Drizzle Dressing and Toss Gently

Drizzle the dressing over the salad and gently toss the ingredients to ensure even distribution of the flavors and dressing.

Serve and Enjoy

Transfer the salad to individual plates or bowls, and relish this nutritious and delicious Chef Salad to kickstart your week on a healthy and tasty note.

Estimated Nutrition Per Serving

  • Calories: 450 kcal
  • Total Fat: 26g
  • Saturated Fat: 7g
  • Cholesterol: 295mg
  • Sodium: 800mg
  • Total Carbohydrates: 16g
  • Dietary Fiber: 7g
  • Sugars: 7g
  • Protein: 38g

Please note that the nutritional values are estimated and may vary based on the specific ingredients and portion sizes used. Adjustments to the recipe will affect the nutrition content.

I think Alex – who hails from England – sounds a bit like Chris Martin (from Coldplay) in certain tracks, but he definitely has his own sound. Some of my favorite songs are “Treading Water”, “Relax My Beloved”, “Too Close“, (the live unplugged version is awesome too), and “I Love You”.Check him out!2. I’m looking for a new novel to start once I finish this behemoth. Any suggestions are greatly appreciated :).3. My Avocado & Strawberry Grilled Cheese sandwich somehow won the Cabot Strawberry Contest.

Monday Musings + Chef Salad

4. Game of Thrones is back for its second season on HBO.Thank god, because yesterday was the Shameless season finale. Sundays are still on!5. With visions of leftover ham – from the Easter dinner I’ll be hosting next weekend – lingering in the back of my mind, I came up with this delicious Chef Salad… the recipe for which you can find here on The Back Burner.

Incorporate a burst of freshness into your week with Monday Musings Chef Salad. Packed with vibrant vegetables, hearty proteins, and a zesty dressing, this salad is the perfect start to your Monday. Enjoy the crunch of fresh greens and the delightful medley of flavors as you nourish your body and gear up for the week ahead. Bon appétit!

Ham & Cheese Griddle Cakes for One

0

Start your day off right with a mouthwatering breakfast that’s easy to make and bursting with flavor. These Ham & Cheese Griddle Cakes for one are the perfect solution for those mornings when you crave something savory and satisfying.

Whether you’re a fan of classic griddle cakes or just looking for a quick and delicious breakfast option, this recipe is sure to hit the spot.

NameHam & Cheese Griddle Cakes for One
CuisineMix
Prep Time10 minutes
Cooking Time6 minutes
Total Time16 minutes
Servings1 serving
Yield1 griddle cake

Griddle cakes.

Ham & Cheese Griddle Cakes for One

As far as I know, they’re synonymous with pancakes, but I’m using the term for this recipe to distinguish the more savory stack from my sweet pancakes.

Ham & Cheese Griddle Cakes for One

We still have a huge hunk of baked Easter ham sitting in our fridge, and I’ve been challenging myself to use it in unique ways; which is to say, other than ham sandwiches and Chef salads.

Here we have a stack of my basic whole wheat buttermilk pancakes-for-one stuffed with sweet ham and gooey cheese…

Ham & Cheese Griddle Cakes for One

… covered in maple syrup, of course.

Gotta love the sweet/savory flavor combination!

Ham & Cheese Griddle Cakes for One

Now you might be thinking that cheese has no place in pancakes. Let me stop you right there, because it is a fantastic addition!

I’m pretty sure I say this about every most recent pancakes-for-one recipe, but I think this might be my favorite so far.

Ham & Cheese Griddle Cakes for One

Breakfast, lunch, or dinner… these griddle cakes are simply fabulous.

Ham & Cheese Griddle Cakes for One

Ham & Cheese Griddle Cakes for One

Ham & Cheese Griddle Cakes for One

Ingredients

  • 1/2 cup whole wheat pastry flour
  • 1/2 tsp baking powder
  • 1/4 tsp baking soda
  • pinch of salt
  • 1 egg white
  • 1/2 cup low fat buttermilk, well-shaken
  • 1/4 cup chopped thickly sliced baked ham
  • 2 Tbsp cubed cheese (I used Gruyere)
  • pure maple syrup, preferably grade

Estimated Nutrition Per Serving

Calories: 350 kcal

Protein: 18g

Carbohydrates: 30g

Dietary Fiber: 1g

Sugars: 2g

Fat: 17g

Saturated Fat: 7g

Cholesterol: 210mg

Sodium: 980mg

Instructions

Preheat Your Griddle

Start by preheating a griddle or non-stick skillet over medium heat. You want it hot enough to cook the griddle cakes evenly.

Prepare the Dry Ingredients

In a mixing bowl, whisk together the all-purpose flour, baking powder, and salt. This forms the base for your griddle cakes.

Add the Wet Ingredients

Beat the egg and add it to the dry mixture. Pour in the milk as well. Mix everything together until you have a smooth batter.

Fold in the Goodness

Gently fold in the diced ham, shredded cheddar cheese, and chopped green onions (if using). These ingredients will add a delightful savory flavor to your griddle cakes.

Grease the Griddle

Lightly grease your hot griddle or skillet with a small amount of butter or cooking oil.

Cook the Griddle Cakes

Pour a ladleful of the batter onto the griddle to form a pancake-like circle. Use the back of your ladle to spread it out a bit if needed. Cook for about 2-3 minutes on each side or until the griddle cake is golden brown and the cheese is melty.

Serve and Enjoy

Transfer your Ham & Cheese Griddle Cake to a plate. You can serve it plain, with a dollop of sour cream, or a drizzle of maple syrup for a touch of sweetness.

Springtime Asparagus, Strawberry, & Arugula Salad Recipe

0

It appears as though I’ve developed quite a fixation on eggs lately.

Whether draped over sweet potato home fries, served atop avocado toast, baked onto an individual breakfast pizza, or paired with arugula, bacon, & blue cheese in a breakfast sandwich, one thing simply MUST remain constant: a perfectly runny yolk!

Speaking of that Sweet Potato Breakfast Pizza, I was one of the three runners-up in the No More ‘Mallows recipe contest!

Judges Kate Rockwood, Senior Editor at Oprah Magazine, Ruth Lowenberg, “culinary professional extraordinaire”, and Matt Timms, the creator of The Takedown, “America’s most important food competition”, bestowed the grand prize upon The Tolerant Vegan for her Maple Sweet Potato Pecan Burgers (how amazing does that sound?!), and the other runners-up were The Type A Housewife (Sweet Potato French Toast Cups) and Willow Bird Baking (Sweet Tater & Chorizo Hand Tarts).

Congratulations, ladies! I’m going to try out all of your delicious-sounding sweet potato creations :).

As amazing as these Trader Joe’s dark chocolate bars are, there just isn’t enough speculoos cookie butter in ‘em.

Name: Springtime Asparagus, Strawberry, & Arugula Salad
CuisineSalad
Prep Time15 minutes
Cooking Time10-12 minutes
Total Time25 minutes
Servings4 servings
Yield1 large salad bowl
Springtime Asparagus, Strawberry, & Arugula Salad

Ingredients

  • 1 bunch of fresh asparagus
  • 2 cups of fresh strawberries, hulled and sliced
  • 4 cups of baby arugula
  • 1/4 cup of crumbled feta cheese
  • 1/4 cup of chopped almonds (lightly toasted)
  • For the dressing:
    • 2 tablespoons of balsamic vinegar
    • 2 tablespoons of extra-virgin olive oil
    • 1 teaspoon of honey
    • Salt and pepper to taste
Springtime Asparagus, Strawberry, & Arugula Salad

Instructions

Start by preparing the asparagus. Trim off the tough ends and cut the spears into 2-inch pieces. You can blanch them for about 2 minutes in boiling water, then immediately transfer them to an ice bath to retain their vibrant green color. Alternatively, you can roast them in the oven at 400°F (200°C) with a drizzle of olive oil for about 10-12 minutes until they’re tender and slightly crispy.

In a large salad bowl, combine the baby arugula, sliced strawberries, and asparagus.

For the dressing, whisk together the balsamic vinegar, extra-virgin olive oil, honey, salt, and pepper in a small bowl. Adjust the seasoning to your liking.

Drizzle the dressing over the salad ingredients and gently toss to coat everything evenly.

Sprinkle the crumbled feta cheese and toasted chopped almonds over the top of the salad. These add a delightful contrast of textures and flavors.

Serve your Springtime Asparagus, Strawberry, & Arugula Salad immediately. The combination of sweet strawberries, slightly nutty asparagus, peppery arugula, and the tangy balsamic dressing is a true delight for the palate.

Springtime Asparagus, Strawberry, & Arugula Salad

A perfect light & delicious Springtime lunch! Check out the recipe here.

Nutrition Information (Per Serving):

  • Calories: 180 calories
  • Total Fat: 12g
    • Saturated Fat: 2g
    • Trans Fat: 0g
  • Cholesterol: 6mg
  • Sodium: 150mg
  • Total Carbohydrates: 15g
    • Dietary Fiber: 4g
    • Sugars: 8g
  • Protein: 5g
  • Vitamin D: 0%
  • Calcium: 12%
  • Iron: 10%
  • Potassium: 320mg
  • Vitamin C: 70%
  • Vitamin A: 30%

Crab Cake Burgers

0

While staying with John’s parents for Christmas, my sister-in-law made some outstanding crab cakes hors d’oeuvres before the family holiday dinner. Flavorful, tender on the inside, crisp on the outside, and perfectly bite-sized, I could easily have made a meal out of just those delectable morsels.

Crab Cake Burgers

Those crab cakes stayed in the back of my mind for a few weeks, until the thought of morphing them into burgers took over.

If crab cakes can get any better, it’s by making them big enough to pile onto a burger bun with tartar sauce and sliced red onion.

Served with homemade sweet potato fries, of course.

Crab Cake Burgers

Juicy lump crabmeat is worth the monetary splurge – so I suggest shelling out for the expensive fresh lump crabmeat rather than the canned stuff.

Another important tip when it comes to making crab cakes is to veer away from using too many breadcrumbs to bind the cakes together. Have you ever eaten a “crab” cake that consisted of more bread than crab? Not good. The breadcrumbs should ideally be indiscernible in the cooked patties… ensuring that each bite is full of sweet crab meat.

Crab Cake Burgers

Although perhaps not a typical football-watching food, these crab cake burgers would be a delicious addition to your Super Bowl party this Sunday! You could even make smaller patties and serve them on dinner rolls as crab cake sliders.

Crab Cake Burgers
NameCrab Cake Burgers
CuisineSeafood / American
Prep Time15 minutes
Cooking Time10 minutes
Total Time25 minutes
Servings4 servings
Crab Cake Burgers

Ingredients

  • 1 lb lump crabmeat, picked over and drained if necessary
  • 1 Tbsp freshly squeezed lemon juice
  • 1/2 cup whole wheat panko breadcrumbs
  • 1 large egg, preferably organic, lightly whisked
  • 3 Tbsp 2% plain Greek yogurt
  • 2 Tbsp canola oil mayonnaise (I like the Spectrum brand)
  • 2 scallions, thinly sliced
  • 1 Tbsp country Dijon mustard
  • Kosher salt and freshly ground black pepper
  • 1 Tbsp canola oil

Instructions

In a large bowl, gently combine the lump crabmeat, mayonnaise, egg, Dijon mustard, Old Bay seasoning, chopped parsley, breadcrumbs, salt, and pepper. Be careful not to break up the crabmeat too much; you want the cakes to have some texture.

Form the crab mixture into 4 equal-sized patties, about 1-inch thick. Place them on a baking sheet lined with parchment paper.

Cover the crab cake patties with plastic wrap and refrigerate for at least 30 minutes. Chilling helps the crab cakes hold their shape during cooking.

Heat a skillet or frying pan over medium-high heat and add a few tablespoons of olive oil.

Gently place the crab cake patties into the hot skillet and cook for about 4-5 minutes on each side, or until they are golden brown and crispy. Be careful when flipping them to prevent them from falling apart.

Once the crab cakes are cooked, transfer them to a plate lined with paper towels to drain any excess oil.

Crab Cake Burgers

Nutritional Information Per Serving

  • Calories: 268.4
  • Total Fat: 15 grams
  • Saturated Fat: 1.9 grams
  • Dietary Fiber: 1 gram
  • Protein: 22.4 grams

Monday Musings + Chicken Salad Sandwiches

0

It’s Monday, and whether you’re back to the grind or still working from home, there’s something about the start of the week that calls for a fresh and satisfying lunch.

That’s where our Chicken Salad Sandwiches come in. Packed with protein, bursting with flavor, and easy to prepare, they’re the perfect way to kick off your week on a delicious note.

NameChicken Salad Sandwiches
CuisineAmerican
Prep Time15 minutes
Cooking Time0 minutes
Total Time15 minutes
Servings4 sandwiches
Yield4 servings
Monday Musings + Chicken Salad Sandwiches

Ingredients

  • 2 cups cooked chicken breast, diced
  • 1/2 cup celery, finely chopped
  • 1/4 cup red onion, finely chopped
  • 1/4 cup sweet pickle relish
  • 1/4 cup mayonnaise
  • 1 tablespoon Dijon mustard
  • Salt and pepper to taste
  • 8 slices of your favorite bread
  • Lettuce leaves and tomato slices for garnis

Estimated Nutrition per Serving

Calories: 400 calories
Protein: 25g
Carbohydrates: 25g
Fat: 20g
Fiber: 3g
Sugars: 5g

Instructions

Step 1: Prepare the Chicken

Start by cooking your chicken if you don’t already have cooked chicken on hand. You can either poach it, grill it, or even use rotisserie chicken for convenience. Once cooked, let it cool, and then dice it into small, bite-sized pieces.

Step 2: Mix the Salad

In a large bowl, combine the diced chicken, chopped celery, finely chopped red onion, sweet pickle relish, mayonnaise, and Dijon mustard. Stir everything together until well combined. Season with salt and pepper to taste. Feel free to adjust the amount of mayonnaise and mustard to achieve your desired creaminess and tanginess.

Step 3: Assemble the Sandwiches

Take your favorite bread slices and, if you like, lightly toast them for some extra texture. Then, spoon a generous portion of the chicken salad mixture onto half of the slices. If you prefer, add some lettuce leaves and tomato slices for added freshness.

Step 4: Serve and Enjoy

Top the chicken salad-covered slices with the remaining bread slices to create sandwiches. You can cut them in halves or quarters for easier handling. Serve your Chicken Salad Sandwiches with some crispy potato chips, a side salad, or a bowl of soup for a complete and satisfying meal.

Blog Bites IV

0

Blog Bites IV is a culinary masterpiece that combines a harmonious blend of flavors and textures, creating a dish that will leave your taste buds dancing with joy. This recipe is perfect for both seasoned chefs looking to impress guests and beginners eager to explore the world of gourmet cooking. Let’s dive into the delectable details of Blog Bites IV.

NameBlog Bites IV
CuisineAmerican
Cooking Time25 minutes
Total Time0 minutes (No cooking)
Servings25 minutes
Servings12 servings
Yield12 Blog Bites

Ingredients

  • 1 cup of Creativity, finely chopped
  • 1/2 cup of Research, well-sourced
  • 1/4 cup of Wit, finely minced
  • 2 tablespoons of Visual Appeal, finely crafted
  • 3 teaspoons of Engaging Writing, eloquently expressed
  • Pinch of SEO Optimization, for that extra kick

Instructions

Preparing the Blog Base

In a large mixing bowl, combine Creativity, Research, Wit, Visual Appeal, Engaging Writing, and SEO Optimization.

Mix gently but thoroughly until all ingredients are well incorporated.

Shape the mixture into bite-sized portions, ensuring each one is packed with flavor and style.

Crafting the Flavorful Content Filling

In a separate bowl, combine Information, Originality, Relevance, Visuals, and Authenticity.

Stir vigorously to create a rich, informative filling that complements the Blog Bites perfectly.

Assembling Blog Bites IV

Carefully hollow out each Blog Bite to create a space for the filling.

Spoon the Flavorful Content Filling into each hollowed Blog Bite, ensuring it’s packed to the brim with valuable content.

Seal the Blog Bites by gently pressing the edges together, creating a seamless fusion of base and filling.

Presentation

Arrange the Blog Bites IV on a beautifully designed platter, allowing the Visual Appeal to shine.

Garnish with a sprinkle of Keywords for that final touch of SEO magic.

Serve with a side of Engaging CTA (Call to Action) for an interactive experience.

Serving Suggestions

Blog Bites IV pairs exceptionally well with a fresh, insightful blog post and a glass of Engagement from your audience. This dish is best enjoyed while hot, so share it promptly with your eager readers.

Estimated Nutrition Per Serving

  • Calories: 120 kcal
  • Total Fat: 6g
    • Saturated Fat: 2g
    • Trans Fat: 0g
  • Cholesterol: 10mg
  • Sodium: 80mg
  • Total Carbohydrates: 15g
    • Dietary Fiber: 2g
    • Sugars: 1g
  • Protein: 3g
  • Vitamin D: 0%
  • Calcium: 2%
  • Iron: 4%
  • Potassium: 2%

Blog Bites IV is a culinary triumph that marries creativity, research, and engaging writing in one delectable package. Whether you’re a seasoned blogger or just starting out, this recipe is sure to captivate your audience and leave them craving for more. So, roll up your sleeves, fire up your keyboard, and let the culinary journey begin!

1. I found this One Pot, Creamy Mac and Cheese by White on Rice Couple on Pinterest.

I used whole wheat shells, 3/4 cup 50% reduced fat sharp cheddar cheese + 1/4 cup pecorino romano cheese, organic 1% low fat milk, and added in 1/8 tsp cayenne pepper & 1/4 tsp paprika.

I finished the mac & cheese off with crumbled crisp applewood smoked bacon and fresh parsley and served some roasted broccoli (olive oil, s & p; roast at 400°F until crisp, about 15 minutes) alongside.

Blog Bites IV

The creative technique of cooking the pasta in milk and then melting in the cheese resulted in perfectly al dente shells enveloped in a creamy cheesy sauce. In other words, exactly what you want in stove top mac & cheese – without needing to make a roux!

Blog Bites IV

2. Given how much both John and I liked my Chicken Parmesan Burgers, I had a feeling we would feel the same about these Chicken Taco Burgers from Elly Says Opa!

Blog Bites IV

As a rule of thumb, I stretch 1/2 lb of chicken between 3 burgers – I find it to be the perfect amount of meat. Other slight changes I made were to use both green and red onion, sub in cilantro for the parsley, add in ground black pepper, and the following technique for forming cheese-stuffed patties: form meat mixture into a ball, make an indentation in the middle with your thumb, insert a 1 inch cube of cheese, (pepper jack in this case), push the meat mixture over the cheese so it is no longer visible, and finally flatten the ball slightly into a patty (I prefer a thicker patty – about 2 inches thick).

I served the burgers on whole wheat buns with baby romaine, thick tomato slices, and a mixture of avocado, Greek yogurt, mayonnaise, lime juice, and s&p… with Alexia Chipotle Sweet Potato Fries on the side.

As suspected, John and I both really liked these burgers!

{photo courtesy of Instagram on my iPhone}

Blog Bites IV

3. I made this Pumpkin Cornbread (using white whole wheat flour) from Sugar Cooking (originally from Sugar Crafter) specifically to serve alongside my Pumpkin, Sweet Potato, & Black Bean Chili, (recipe to be posted soon), but it is definitely tasty enough to eat solo.

Blog Bites IV

Think warmly spiced pumpkin muffin meets sweet cornbread.

Blog Bites IV

Whether you crumble this cornbread over chili, toast it and slather it with butter, or drizzle it with maple syrup, you are sure to love it!

Blog Bites IV

4. I whipped up a half batch of Angela’s Mini Cinnamon Sugar Pumpkin Spiced Doughnuts on Sunday morning after a run. I figured I should fit in a workout before making these little cuties because they looked too good on Oh She Glows to stop at just one.

I was right; three warm doughnuts disappeared within minutes ;).

Blog Bites IV

These tender spiced doughnuts (I made ‘em with all whole wheat pastry flour) – dunked in melted Earth Balance buttery spread and dusted with cinnamon and sugar – are absolutely as delicious as they sound.

If you do make these treats, be forewarned: you will literally need to drag yourself away from them to keep from scarfing the whole darn pan!

Blog Bites IV

5. Kristin’s (The Kitchen Sink RecipesMaple Baked Beans marks the first time I’ve made the classic barbeque side dish from scratch, and the 5 hours of sweating while the oven heated our already warm apartment definitely paid off.

Blog Bites IV

The beans ended up tender without being mushy, and were enveloped in a sweet & slightly smoky sauce that was finger lickin’ good.

Get ready for even more pumpkin recipes next week!