Curly endive, also known as frisée lettuce, is a leafy green vegetable that adds a delightful crispness and a slightly bitter flavor to your dishes. This versatile green is not only delicious but also packed with nutrients.
We’ll dive into the world of curly endive and explore some mouthwatering recipes that showcase its unique taste and texture.
What Is Curly Endive?
Before we get into the recipes, let’s take a closer look at curly endive. It belongs to the chicory family and is often used in salads, soups, and other culinary creations. Its frilly leaves and slightly bitter taste make it a favorite among those looking to add complexity to their dishes. Curly endive is an excellent source of vitamins A and K, as well as fiber, making it a healthy addition to your meals.
| Name | Curly Endive Recipe |
| Cuisine | Mediterranean |
| Prep Time | 15 minutes |
| Cooking Time | 0 minutes |
| Total Time | 15 minutes |
| Servings | 4 |
| Yield | 1 salad serving per person |
Ingredients
- 1 head of curly endive, washed and torn into bite-sized pieces
- 1/2 cup cherry tomatoes, halved
- 1/4 cup crumbled blue cheese
- 1/4 cup chopped walnuts
- 2 tablespoons balsamic vinaigrette
- Salt and pepper to taste
Instructions
In a large bowl, combine the curly endive, cherry tomatoes, blue cheese, and walnuts.
Drizzle the balsamic vinaigrette over the salad and toss to coat.
Season with salt and pepper to taste.
Serve as a refreshing side salad or add grilled chicken or shrimp for a complete meal.
Nutrition Facts (per serving)
- Calories: 150
- Total Fat: 10g
- Saturated Fat: 2g
- Cholesterol: 5mg
- Sodium: 250mg
- Total Carbohydrates: 10g
- Dietary Fiber: 3g
- Sugars: 4g
- Protein: 6g
10 Simple Curly Endive For Recipes
Toss together curly endive leaves, cherry tomatoes, and crumbled blue cheese. Drizzle with balsamic vinaigrette, add a handful of chopped walnuts, season with salt and pepper, and give it a gentle toss. Voila! You’ve got a classic curly endive salad bursting with flavors and textures.
Enjoy as a quick side dish or make it a meal by adding grilled chicken or shrimp. It’s a simple recipe that brings a delightful crunch to your plate, perfect for a refreshing and healthy dining experience.
1. Curly Endive and Apple Slaw

Combine shredded curly endive with thinly sliced apples, toasted almonds, and a light honey mustard dressing. Toss for a crisp and refreshing slaw that’s perfect for picnics and BBQs.
2. Warm Bacon and Curly Endive Salad

Fry bacon until crispy, then crumble it over a bed of curly endive. Drizzle with warm bacon fat vinaigrette, sprinkle with red onion slices, and serve for a savory, warm salad.
3. Curly Endive Pesto

Blend curly endive leaves with garlic, olive oil, Parmesan cheese, and pine nuts to create a unique twist on traditional pesto. Toss with your favorite pasta for a quick and flavorful meal.
4. Grilled Curly Endive

Brush curly endive with olive oil, season with salt and pepper, and grill until lightly charred. Finish with a squeeze of lemon juice and serve as a smoky side dish.
5. Curly Endive and Pear Salad

Combine curly endive with sliced ripe pears, crumbled blue cheese, and candied pecans. Drizzle with a light vinaigrette for a sweet and savory salad.
6. Curly Endive and Chickpea Stir-Fry

Sauté curly endive with chickpeas, garlic, and ginger in a sesame soy sauce. Serve over rice or noodles for a quick and nutritious stir-fry.
7. Curly Endive and Roasted Garlic Soup

Roast garlic until caramelized, then blend it with curly endive, chicken or vegetable broth, and cream for a rich and comforting soup. Garnish with chives.
8. Curly Endive and Quinoa Stuffed Peppers

Mix cooked quinoa with chopped curly endive, tomatoes, feta cheese, and Greek spices. Stuff into bell peppers and bake until tender for a wholesome meal.
9. Curly Endive and Mushroom Risotto

Sauté mushrooms and onions, then stir them into a creamy risotto with curly endive. Finish with grated Parmesan cheese for a decadent dish.
10. Curly Endive and Citrus Salad
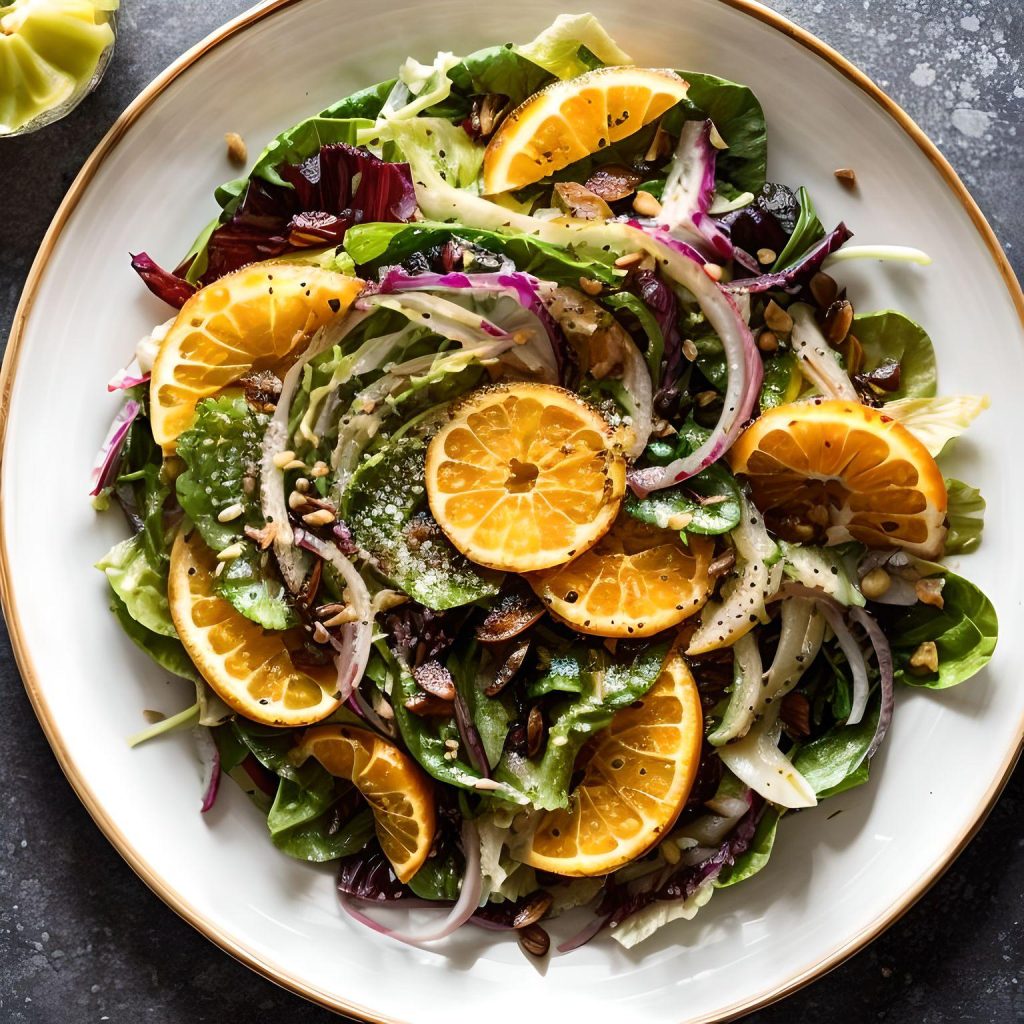
Toss curly endive with segments of oranges and grapefruits, thinly sliced red onions, and a citrusy vinaigrette. A refreshing and tangy salad for any season.
Crispy Curly Endive Salad: Toss fresh curly endive leaves with cherry tomatoes, crumbled blue cheese, and toasted walnuts. Drizzle with balsamic vinaigrette, season, and serve. A delightful, healthy salad in minutes.