Home Blog Page 59

Cayenne Pepper Recipe

0

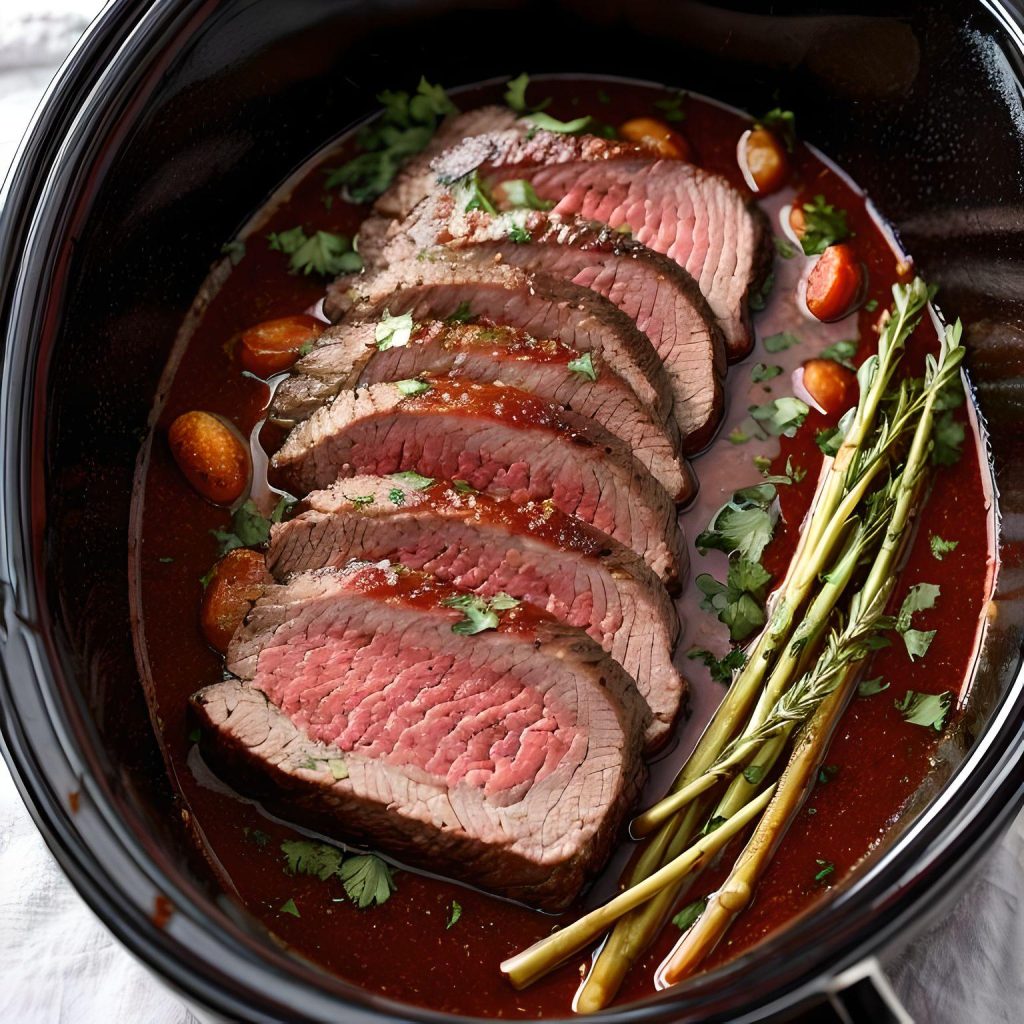
Cayenne pepper is not just a fiery spice; it’s also the main ingredient in a flavorful hot sauce that can elevate the taste of a wide variety of dishes.

Making your own homemade cayenne pepper sauce is not only easy but also allows you to control the heat level and customize the flavors to your liking.

We’ll guide you through a simple yet delicious recipe for homemade cayenne pepper sauce.

NameCayenne Pepper Recipe
CuisineFusion
Prep Time15 minutes
Cooking Time30 minutes
Total Time45 minutes
Servings16 servings
Yield2

Ingredients

To make your homemade cayenne pepper sauce, you will need.

  • 20-25 fresh cayenne peppers
  • 3 cloves of garlic
  • 1 medium-sized onion
  • 2 cups of white vinegar
  • 1 teaspoon salt
  • 1/2 teaspoon sugar (optional, for balance)
  • A pinch of black pepper

Instructions

Prepare the Cayenne Peppers

Wash and dry the cayenne peppers thoroughly. You can choose to leave the seeds in for extra heat or remove them for a milder sauce. If you’re new to cayenne peppers, it’s a good idea to start with fewer seeds and adjust the heat level to your preference.

Chop the Vegetables

Roughly chop the garlic and onion. These will add depth and flavor to your sauce.

Cook the Ingredients

In a medium-sized saucepan, combine the cayenne peppers, garlic, onion, white vinegar, salt, sugar (if using), and black pepper. Heat the mixture over medium-high heat until it starts to simmer.

Simmer

Reduce the heat to low and let the mixture simmer for about 20-30 minutes. This will allow the flavors to meld, and the peppers to soften.

Blend

After the mixture has cooled slightly, carefully transfer it to a blender. Blend until you achieve a smooth, sauce-like consistency. Be cautious when blending hot liquids; allow them to cool a bit before blending and keep the blender lid slightly ajar to allow steam to escape.

Strain (Optional)

If you prefer a completely smooth sauce, strain the mixture through a fine-mesh strainer to remove any remaining solids.

Bottle and Store

Pour your homemade cayenne pepper sauce into clean, sterilized bottles or jars. Seal the containers tightly and allow the sauce to cool completely before refrigerating. It will last for several months in the refrigerator.

Homemade cayenne pepper sauce is a versatile condiment that can add a spicy kick to soups, stews, grilled meats, and more. Plus, making it yourself allows you to adjust the flavor and heat to suit your taste buds. Give this simple recipe a try and discover the joy of adding your homemade spicy touch to your favorite dishes. Enjoy!

Nutrition Facts (Per Serving):

  • Calories: 8 kcal
  • Carbohydrates: 2 g
  • Fiber: 0.5 g
  • Sugar: 1 g
  • Protein: 0.2 g
  • Fat: 0 g
  • Sodium: 147 mg

10 Simple Cayenne Pepper Recipes

Cayenne pepper is a fiery spice that can add a kick to your dishes. Here’s a simple recipe to make your own cayenne pepper powder.

Start by drying fresh cayenne peppers in the sun until they become brittle. Then, grind them into a fine powder using a spice grinder. Store your homemade cayenne pepper in an airtight container and use it to spice up your favorite recipes.

1. Cayenne Roasted Vegetables

Transform ordinary roasted veggies into a spicy delight by sprinkling cayenne pepper over your choice of vegetables before roasting. Drizzle them with olive oil, add salt, pepper, and cayenne for that extra kick. Roast until they’re tender and slightly crispy.

2. Spicy Cayenne Popcorn

For a fiery twist on a classic snack, make spicy cayenne popcorn. Melt butter, mix in cayenne, and drizzle over freshly popped popcorn. Toss to coat evenly and enjoy a spicy, savory snack.

3. Cayenne Pepper Guacamole

Add a pinch of cayenne pepper to your guacamole for a spicy twist. Mash ripe avocados, mix with diced tomatoes, onions, lime juice, and cilantro. Season with salt and cayenne to taste. Serve with tortilla chips.

4. Cayenne Lemonade

Spice up your lemonade by adding a pinch of cayenne. Stir in lemon juice, water, sugar, and cayenne until well combined. Serve over ice for a refreshing, zesty drink.

5. Cayenne-Marinated Grilled Chicken

Transform your grilled chicken with a zesty twist! Combine cayenne pepper, olive oil, garlic, lemon juice, and honey for a flavorful marinade that elevates your BBQ game.

6. Cayenne Spiced Nuts

For a spicy snack, coat mixed nuts with egg white, sprinkle cayenne, salt, and a bit of sugar. Roast until crispy and aromatic.

7. Cayenne Honey Glazed Salmon

Blend honey, cayenne, garlic, and lemon juice to make a spicy-sweet glaze for salmon fillets. Bake or grill for a mouthwatering main course.

8. Cayenne Deviled Eggs

Give deviled eggs an extra kick by adding a pinch of cayenne to the filling. Combine egg yolks, mayo, mustard, and cayenne. Pipe the mixture into egg white halves for a spicy appetizer.

9. Spicy Cajun Jambalaya

Enhance your jambalaya with cayenne pepper. Sauté onions, bell peppers, celery, and garlic. Add cayenne, paprika, tomatoes, rice, and broth. Cook with shrimp, chicken, or sausage for a spicy, hearty meal.

10. Cayenne Chocolate Truffles

Indulge in spicy-sweet treats by adding a dash of cayenne to your chocolate truffle mixture. Roll the mixture into balls, coat with cocoa powder, and chill. Enjoy the delightful blend of flavors in each bite.

Cayenne pepper is a versatile spice that can add a spicy kick to your dishes. Try these 10 simple recipes to incorporate cayenne into your meals. From spicy chicken wings to zesty pasta sauces, cayenne adds flavor and a hint of heat. Experiment with these recipes to discover new ways to enjoy this fiery spice in your favorite dishes.

Slow Cooker London Broil Recipe

0

Discover the ultimate slow cooker London Broil recipe! This culinary delight combines convenience with exceptional flavor.

Season your London Broil to taste, add some broth, and let the slow cooker work its magic. In a few hours, you’ll savor the tender, juicy results.

Say goodbye to complicated cooking methods, and hello to the best London Broil you’ve ever had!

Yield: 1 London broil roast, sliced into 6 portions

NameSlow Cooker London Broil Recipe
CuisineLondon Broil
Prep Time15 minutes
Cooking Time6-8 hours
Total TimeApproximately 6 hours and 15 minutes to 8 hours and 15 minutes
Servings6 servings
Yield1 London broil roast, sliced into 6 portions

Ingredients

  • 2-3 pounds of London broil
  • 1 onion, thinly sliced
  • 4 cloves of garlic, minced
  • 1 cup of beef broth
  • 1/2 cup of soy sauce
  • 1/4 cup of Worcestershire sauce
  • 2 tablespoons of brown sugar
  • 1 teaspoon of dried thyme
  • 1 teaspoon of dried rosemary
  • 1/2 teaspoon of black pepper
  • 1/4 cup of cold water
  • 2 tablespoons of cornstarch
  • Fresh parsley, for garnish (optional)

Instructions

  1. Prepare the London Broil:

Start by seasoning the London broil with salt and pepper on both sides. This will enhance the flavor of the meat.

  1. Layer the Ingredients:

In the slow cooker, place the thinly sliced onions and minced garlic on the bottom. These will add a savory base to your London broil.

  1. London Broil in the Slow Cooker:

Lay the seasoned London broil on top of the onions and garlic.

  1. Mix the Sauce:

In a separate bowl, whisk together the beef broth, soy sauce, Worcestershire sauce, brown sugar, dried thyme, dried rosemary, and black pepper. Pour this flavorful mixture over the London broil in the slow cooker.

  1. Set the Slow Cooker:

Cover the slow cooker and cook on LOW for 6-8 hours or until the London broil is fork-tender. Slow cooking allows the meat to absorb all the delicious flavors.

  1. Thicken the Sauce:

About 30 minutes before serving, remove 1/4 cup of the cooking liquid from the slow cooker and mix it with 2 tablespoons of cornstarch until smooth. Return this mixture to the slow cooker, stirring well. This will thicken the sauce.

  1. Slice and Serve:

Once the London broil is tender, remove it from the slow cooker and let it rest for a few minutes before slicing it thinly against the grain. This will ensure maximum tenderness.

  1. Garnish and Serve:

Place the sliced London broil on a serving platter, and if desired, garnish with fresh parsley for a pop of color. Serve with the flavorful sauce from the slow cooker.

This Slow Cooker London Broil recipe is not only easy to prepare but also delivers a mouthwatering, melt-in-your-mouth result. The slow cooker does all the hard work for you, leaving you with a succulent and flavorful dish that your family and friends will love. Enjoy!

Nutrition Facts (Per Serving)

  • Calories: Approximately 350-400 calories per serving (varies based on the size of the London broil)
  • Protein: Approximately 40-45 grams per serving
  • Carbohydrates: Approximately 7-10 grams per serving
  • Fat: Approximately 18-22 grams per serving
  • Fiber: Approximately 1-2 grams per serving
  • Sugars: Approximately 4-6 grams per serving
  • Sodium: Approximately 1200-1500 milligrams per serving (varies based on the brand of ingredients used)

10 Variations of Slow Cooker London Broil Recipes

London Broil is a flavorful cut of beef that, when prepared in a slow cooker, becomes tender and succulent. This easy recipe requires minimal effort but yields maximum flavor. Simply season your London Broil with your favorite herbs and spices, place it in the slow cooker, add some broth or wine, and let it cook low and slow. In a few hours, you’ll have a melt-in-your-mouth London Broil that’s perfect for any occasion.

  1. Classic Slow Cooker London Broil
Classic Slow Cooker London Broil

This classic recipe features London broil slow-cooked to tender perfection with onions, garlic, and a savory beef broth-based sauce. Serve it with mashed potatoes for a comforting meal.

  1. London Broil with Red Wine Sauce

Elevate your London broil by adding a rich red wine sauce to the slow cooker. The wine infuses the meat with a delightful depth of flavor.

  1. Asian-Inspired London Broil
London Broil with Red Wine Sauce

For an Asian twist, marinate your London broil in soy sauce, ginger, and garlic before slow cooking. Serve with steamed rice and stir-fried vegetables.

  1. Mushroom and Onion London Broil

Enhance the umami factor by adding sliced mushrooms to your London broil in the slow cooker. The mushrooms create a savory, earthy sauce.

  1. Barbecue London Broil
Barbecue London Broil

Slather your London broil with barbecue sauce and slow-cook it for a mouthwatering, tender BBQ-infused dish.

  1. Italian Herb London Broil

Infuse your London broil with Italian flavors by using herbs like basil, oregano, and rosemary in the slow cooker. Serve with pasta or crusty bread.

  1. Honey Mustard Glazed London Broil
Honey Mustard Glazed London Broil

A sweet and tangy honey mustard glaze takes this London broil to the next level. It’s a delightful combination of flavors.

  1. Teriyaki London Broil

Marinate your London broil in a homemade teriyaki sauce before slow cooking. It’s a delicious fusion of sweet and savory.

  1. Taco-Seasoned London Broil
Taco-Seasoned London Broil

Season your London broil with taco spices, slow-cook it, and then shred the meat for a flavorful taco filling. Top with your favorite toppings.

  1. Vegetable-Packed London Broil Stew

Turn London broil into a hearty stew by adding carrots, potatoes, and peas to the slow cooker. The result is a comforting one-pot meal.

These diverse London Broil recipes ensure there’s something for everyone. Let your slow cooker do the work, and enjoy a succulent, flavorful meal that’s sure to impress your taste buds and dinner guests alike.

Hungarian Peppers Recipe

0

Hungarian peppers, also known as Hungarian wax peppers or banana peppers, are a versatile and flavorful ingredient that adds a delightful kick to various dishes.

With their mild to moderate heat and slightly sweet taste, Hungarian peppers are a favorite in many cuisines.

We’ll take a culinary adventure to explore some delectable Hungarian pepper recipes that showcase the unique flavors of this wonderful ingredient.

Name:Hungarian Peppers Recipe
Cuisine:Hungarian
Prep Time:20 minutes
Cooking Time:30 minutes
Total Time:50 minutes
Servings:4
Yield:8 stuffed peppers

A Taste Sensation Stuffed Hungarian peppers are a classic dish that highlights the mild heat and vibrant flavor of the peppers. Here’s a simple recipe to create this delightful appetizer:

Ingredients

  • Hungarian peppers (6-8)
  • Ground beef or turkey (1 pound)
  • Rice (1/2 cup, cooked)
  • Onion (1, finely chopped)
  • Garlic (2 cloves, minced)
  • Tomato sauce (1 cup)
  • Salt and pepper to taste
  • Cheese (optional, for topping)

Instructions

Cut the tops off the Hungarian peppers and remove the seeds.

In a skillet, cook the ground beef or turkey along with chopped onions and minced garlic until browned. Drain excess fat.

Add cooked rice, tomato sauce, salt, and pepper to the meat mixture. Stir well.

Stuff the peppers with the meat and rice mixture.

Place the stuffed peppers in a baking dish, cover with foil, and bake at 350°F (175°C) for about 25-30 minutes.

If desired, top each pepper with cheese and bake for an additional 5 minutes until the cheese is melted and bubbly.

Nutrition Facts

  • Calories: 305 kcal
  • Protein: 21g
  • Carbohydrates: 26g
  • Fat: 13g
  • Saturated Fat: 5g
  • Cholesterol: 70mg
  • Sodium: 535mg
  • Fiber: 3g
  • Sugar: 6g

Hungarian peppers can elevate your culinary experience with their unique flavor and mild spiciness. From stuffed peppers to hearty soups, there’s a myriad of delicious recipes to explore.

Incorporate these recipes into your repertoire and enjoy the delightful flavors that Hungarian peppers bring to your table. Happy cooking!

10 Simple Hungarian Pepper Recipes

Hungarian cuisine is known for its robust flavors, and peppers play a central role.

From fiery paprika to mild peppers, Hungarian recipes like goulash, lecsó, and stuffed peppers showcase the diverse and delicious uses of this versatile ingredient.

Hungarian Pepper Salad

Hungarian Pepper Salad

Create a refreshing salad with diced Hungarian peppers, tomatoes, cucumbers, red onions, and feta cheese. Toss with olive oil, lemon juice, salt, and pepper for a vibrant side dish.

Pickled Hungarian Peppers

Pickled Hungarian Peppers

Preserve the vibrant flavors by pickling Hungarian peppers. Combine sliced peppers with vinegar, sugar, salt, and spices. Let it marinate for a day or two before enjoying these tangy bites.

Grilled Stuffed Hungarian Peppers

Grilled Stuffed Hungarian Peppers

Halve and stuff Hungarian peppers with a mixture of cream cheese, herbs, and breadcrumbs. Grill until tender, serving a tasty appetizer or side dish.

Hungarian Pepper Dip

Hungarian Pepper Dip

Blend roasted Hungarian peppers with garlic, yogurt, and a dash of cayenne for a flavorful dip. Perfect for chips, veggies, or spreading on sandwiches.

Creamy Hungarian Pepper Pasta

Creamy Hungarian Pepper Pasta

Sauté sliced Hungarian peppers with garlic and mixed into a creamy pasta sauce. Toss with cooked pasta and garnish with fresh parsley and grated Parmesan.

Hungarian Pepper Bruschetta

Hungarian Pepper Bruschetta

Top toasted baguette slices with a mixture of diced Hungarian peppers, tomatoes, garlic, basil, and a drizzle of balsamic glaze for a delightful appetizer.

Hungarian Pepper and Chickpea Curry

Hungarian Pepper and Chickpea Curry

Simmer Hungarian peppers and chickpeas in a fragrant curry sauce made with coconut milk, tomatoes, and spices. Serve over rice for a hearty meal.

Baked Hungarian Pepper Rings

Baked Hungarian Pepper Rings

Cut Hungarian peppers into rings, dip in beaten egg, coat with breadcrumbs, and bake until golden and crispy. A healthier alternative to fried snacks.

Stuffed Hungarian Pepper Rolls

Stuffed Hungarian Pepper Rolls

Flatten Hungarian peppers, fill with a mixture of ground meat, rice, and spices, roll them up, and bake in a tomato sauce until tender and flavorful.

Hungarian Pepper Smoothie

Hungarian Pepper Smoothie

Blend Hungarian peppers with fruits like mango, pineapple, and a touch of ginger for a unique and zesty smoothie packed with vitamins and antioxidants.

Hungarian peppers are a staple in Hungarian cuisine, adding a delightful flavor and vibrant color to dishes. Here are 10 simple Hungarian pepper recipes to tantalize your taste buds: stuffed peppers, lecsó (pepper and tomato stew), pepper salad, roasted peppers, pepper spread, pickled peppers, paprikás csirke (chicken paprikash), pepper soup, pepper relish, and goulash. Enjoy the rich taste of Hungary!

Best Brisket Brine Recipe

0

Brisket, with its rich and smoky flavor, is a beloved centerpiece of many barbecue gatherings. But to truly elevate your brisket game, you need to start with a great brine.

Brining not only adds flavor but also keeps the meat tender and juicy throughout the cooking process.

We’ll guide you through crafting the best brisket brine recipe that will leave your guests begging for more.

NameBest Brisket Brine Recipe
CuisineBarbecue
Prep Time15 minutes
Cooking Time24 hours
Total Time24 hours (including brining)
Servings2
Yield12 pounds of brined brisket (approximately)

Ingredients

  • 1 gallon (4 liters) of water
  • 1 cup kosher salt
  • 1/2 cup brown sugar
  • 1/4 cup black peppercorns
  • 1/4 cup whole coriander seeds
  • 4 cloves garlic, smashed
  • 2 bay leaves
  • 2 sprigs fresh thyme
  • 1 lemon, sliced
  • 1 onion, sliced
  • 1 brisket (8-10 pounds)

Instructions

Prepare the Brine
In a large stockpot, combine the water, kosher salt, brown sugar, black peppercorns, coriander seeds, garlic cloves, bay leaves, and fresh thyme. Stir until the salt and sugar are fully dissolved.

Cool the Brine
Allow the brine to cool to room temperature. You can speed up the cooling process by adding ice cubes to the mixture.

Submerge the Brisket
Place the brisket in a food-safe plastic or glass container large enough to hold the brisket and the brine. Pour the cooled brine over the brisket.

Add Aromatic Flavors
Drop in the lemon slices and onion slices into the brine. These will infuse the brisket with fantastic citrus and onion notes.

Refrigerate and Brine
Cover the container and place it in the refrigerator. Allow the brisket to brine for at least 24 hours, and up to 48 hours for maximum flavor. Ensure the brisket is fully submerged in the brine.

Remove and Rinse
After the brining time is complete, remove the brisket from the brine and rinse it thoroughly under cold running water. Pat it dry with paper towels.

Barbecue or Smoke
Now, you’re ready to barbecue or smoke your brisket to perfection. Follow your preferred cooking method and recipe. The brining process has already done wonders for flavor and tenderness.

Rest and Slice
After cooking, let the brisket rest for about 15-20 minutes before slicing it. This allows the juices to redistribute, ensuring each slice is juicy and flavorful.

Serve and Enjoy
Serve your perfectly brined and cooked brisket with your favorite barbecue sauce, coleslaw, and cornbread. Get ready for the applause from your delighted guests!

The secret to a mouthwatering brisket lies in the brining process. This ultimate brisket brine recipe infuses your meat with incredible flavors while keeping it incredibly tender and juicy. Whether you’re a seasoned pitmaster or a novice barbecue enthusiast, this brine will take your brisket to a whole new level of deliciousness. So, fire up your smoker, follow this recipe, and get ready to savor the best brisket of your life. Enjoy!

Estimated Nutrition Facts per Serving

  • Calories: 300 calories
  • Protein: 25-30 grams
  • Carbohydrates: 3-5 grams
  • Dietary Fiber: 0 grams
  • Sugars: 2-3 grams
  • Total Fat: 16-20 grams
  • Saturated Fat: 6-8 grams
  • Cholesterol: 80-100 milligrams
  • Sodium: 1500-1800 milligrams

10 Simple Best Brisket Brine Recipes

Elevate your brisket game with these 10 simple brine recipes. From classic salt and sugar blends to exotic spice infusions, these techniques guarantee tender, flavorful results that will have everyone asking for seconds. Say goodbye to dry brisket forever!

1. Smoky Chipotle Brine

Enhance your brisket with a smoky kick. Add 3-4 chipotle peppers in adobo sauce to the brine mixture for a spicy, smoky flavor infusion. Perfect for those who love a little heat in their barbecue.

2. Apple Cider Vinegar Brine

Swap out some of the water in the brine with apple cider vinegar for a tangy twist. This brine adds a delightful fruity acidity to your brisket.

3. Maple Bourbon Brine

Combine the flavors of maple syrup and bourbon for a sweet and boozy brine. Add 1/4 cup of maple syrup and 1/4 cup of bourbon to the brine mixture for a mouthwatering, caramelized crust.

4. Garlic and Herb Brine

Elevate your brisket with a classic garlic and herb infusion. Increase the garlic cloves and add fresh rosemary, thyme, and sage for a fragrant and savory experience.

5. Asian-Inspired Brine

Give your brisket an Asian twist by adding ingredients like soy sauce, ginger, and sesame oil to the brine. The result is a savory and slightly sweet brisket with an umami kick.

6. Beer and Onion Brine

Replace some of the water in the brine with your favorite beer and toss in sliced onions. This combination imparts a rich, malty flavor and a hint of onion sweetness to your brisket.

7. Mustard and Brown Sugar Brine

Create a zesty and slightly sweet brisket by adding a couple of tablespoons of Dijon mustard and brown sugar to the brine. The mustard adds a tangy note, while the sugar caramelizes beautifully.

8. Rosemary and Lemon Brine

Infuse your brisket with the fresh and aromatic flavors of rosemary and lemon. Add extra sprigs of rosemary and lemon slices to the brine mixture for a bright and herbaceous taste.

9. Coffee and Chili Brine

For a bold and unique flavor, incorporate coffee grounds and dried chili flakes into the brine. This combination gives your brisket a smoky, earthy, and slightly spicy profile.

10. Honey and Orange Brine

Add a touch of sweetness with honey and orange zest. Include 1/4 cup of honey and the zest of one orange to the brine for a citrusy, honey-kissed brisket with a beautiful glaze.

Unlocking perfectly tender and flavorful dishes can be effortless with these 10 simple tips. Start with quality ingredients, marinate meats, and season generously. Opt for slow cooking methods like braising and simmering for melt-in-your-mouth tenderness. Experiment with herbs, spices, and sauces for layers of flavor. Don’t forget to balance sweet, salty, and acidic elements.

Chicken Palak Recipe

0

When it comes to Indian cuisine, few dishes are as beloved and nutritious as Chicken Palak.

This delightful recipe combines tender pieces of chicken with the vibrant flavors of spinach and a blend of aromatic spices, creating a dish that’s both healthy and delicious.

Whether you’re a fan of Indian food or simply looking to add more greens to your diet, this Chicken Palak recipe is a must-try.

Cooking Time

Prep Time: 15 minutes

Cook Time: 30 minutes

Total Time: 45 minutes

Servings: 4

Yield: 4 servings

Ingredients

  • 500 grams boneless chicken, cut into bite-sized pieces
  • 200 grams fresh spinach leaves, washed and chopped
  • 1 large onion, finely chopped
  • 2 ripe tomatoes, finely chopped
  • 2-3 cloves of garlic, minced
  • 1-inch piece of ginger, grated
  • 2-3 green chilies, chopped (adjust to your spice preference)
  • 1 teaspoon cumin seeds
  • 1 teaspoon turmeric powder
  • 1 teaspoon coriander powder
  • 1 teaspoon cumin powder
  • 1/2 teaspoon red chili powder (adjust to taste)
  • Salt to taste
  • 2 tablespoons cooking oil
  • 1/4 cup plain yogurt
  • Fresh cilantro leaves for garnish

Instructions

  1. Marinate the Chicken

In a bowl, combine the yogurt, half of the minced garlic, half of the grated ginger, turmeric powder, and a pinch of salt.

Add the chicken pieces to this mixture, ensuring they are well-coated. Let it marinate for at least 30 minutes.

  1. Blanch the Spinach

In a pot of boiling water, blanch the chopped spinach for 2 minutes.

Drain and immediately transfer the spinach to a bowl of ice water. This helps retain its vibrant green color.

Once cooled, blend the spinach into a smooth paste. Set it aside.

  1. Cooking the Chicken

Heat oil in a pan over medium heat. Add the cumin seeds and let them splutter.

Add the chopped onions and sauté until they turn translucent and golden brown.

Add the remaining garlic and ginger, and green chilies. Sauté for another 2 minutes.

Stir in the chopped tomatoes and cook until they soften and the oil starts to separate.

  1. Spice it Up

Add the coriander powder, cumin powder, red chili powder, and salt. Mix well and cook for a few minutes until the spices are fragrant.

  1. Add the Marinated Chicken

Add the marinated chicken pieces to the pan. Cook until they turn white on the outside.

  1. Simmer and Blend

Pour in the spinach paste and stir to combine. Reduce the heat to low, cover, and let it simmer for about 15-20 minutes, or until the chicken is cooked through and tender.

  1. Final Touch

Adjust the seasoning if needed. If you prefer a creamier texture, you can add a dollop of cream or yogurt at this stage.

Garnish with fresh cilantro leaves.

  1. Serve

Chicken Palak pairs wonderfully with naan, rice, or roti. Enjoy your homemade, healthy, and flavorful Chicken Palak!

Chicken Palak is a classic Indian dish that seamlessly combines the goodness of spinach with succulent pieces of chicken and aromatic spices.

It’s not only a treat for your taste buds but also a nutritious addition to your meal. Give this recipe a try and savor the flavors of India in the comfort of your own kitchen. Bon appétit!

Nutrition Facts

Serving Size: 1 servingAmount Per Serving
Calories350
Total Fat25g
Saturated Fat10g
Cholesterol100mg
Sodium450mg
Total Carbohydrates10g
Dietary Fiber3g
Sugars3g
Protein24g

Note: Nutrition values are approximate and may vary based on specific ingredients used.

You can use this format to provide the prep time, cook time, total time, servings, and yield for the remaining Chicken Palak recipes as well.

10 Simple Chicken Palak Recipes

Chicken Palak is a savory Indian dish that combines tender chicken with creamy spinach sauce. To make it, sauté chicken, blend spinach, and spices, then simmer together. Serve with rice or naan for a delicious, wholesome meal.

1. Creamy Chicken Palak

Elevate your Chicken Palak by adding a creamy twist. After cooking the chicken and spinach as usual, stir in some heavy cream or coconut milk for a rich and velvety texture. Garnish with cashews for extra decadence.

2. Spicy Chicken Palak Curry

If you love heat, try a spicy version of Chicken Palak. Increase the amount of green chilies and red chili powder to give the dish a fiery kick. It’s perfect for those who crave a bit of extra spice in their meals.

3. Lemon Garlic Chicken Palak

Infuse your Chicken Palak with a burst of citrusy flavor by adding fresh lemon juice and minced garlic. The zesty notes complement the earthy spinach and tender chicken beautifully.

4. Chicken Palak with Potatoes

Add a hearty element to your Chicken Palak by tossing in some diced potatoes. The potatoes soak up the delicious flavors of the spinach and spices, making it a filling one-pot meal.

5. Coconut Chicken Palak

For a tropical twist, incorporate coconut milk and shredded coconut into your Chicken Palak. The coconut adds a sweet and nutty undertone that pairs wonderfully with the spinach.

6. Chicken Palak with Paneer

Combine two favorites in one dish by adding cubes of paneer (Indian cheese) to your Chicken Palak. The paneer absorbs the flavors and creates a delightful contrast in textures.

7. Smoky Chicken Palak

Infuse a smoky aroma into your Chicken Palak by using a smoking technique. After cooking the dish, place a piece of hot charcoal in a small bowl in the center of the pot, add a few drops of ghee or oil, and cover it for a few minutes to infuse smokiness.

8. Cashew Chicken Palak

Elevate your dish with a touch of luxury by adding finely ground cashew nuts. The creamy cashew paste enhances the flavor and provides a delightful creaminess to the dish.

9. Chicken Palak with Fenugreek Leaves

Amp up the flavor by incorporating fresh fenugreek leaves (Methi) into your Chicken Palak. The bitter notes of fenugreek add depth and complexity to the dish.

10. Tangy Tomato Chicken Palak

Introduce a tangy twist by including tomato puree or diced tomatoes to your Chicken Palak. The acidity of the tomatoes balances the richness of the dish and brightens up the flavors.

Each of these Chicken Palak recipes offers a unique flavor profile, allowing you to tailor the dish to your taste preferences or experiment with new and exciting variations of this classic Indian favorite.

Sweet Potato Pie With Evaporated Milk Recipe

0

When it comes to classic American desserts, few can rival the warmth and sweetness of a homemade Sweet Potato Pie.

The combination of creamy sweet potatoes, aromatic spices, and the rich, velvety texture of evaporated milk makes this dessert an absolute delight.

Whether it’s for a holiday gathering or just a cozy evening at home, here’s a step-by-step guide to creating a mouthwatering Sweet Potato Pie that will leave your taste buds singing.

NameSweet Potato Pie With Evaporated Milk
CuisineFusion
Prep Time20 minutes
Cooking Time60 minutes
Total Time1 hour 20 minutes
Servings8 servings
Yield1 9-inch pie

Ingredients

For the Pie Crust

  • 1 ½ cups of all-purpose flour
  • ½ teaspoon of salt
  • ½ cup (1 stick) of cold, unsalted butter
  • 4-6 tablespoons of ice-cold water

For the Filling

  • 2 cups of cooked and mashed sweet potatoes (about 2 large sweet potatoes)
  • ½ cup of granulated sugar
  • ½ cup of brown sugar
  • 2 large eggs
  • 1 can (12 oz) of evaporated milk
  • 1 teaspoon of vanilla extract
  • 1 teaspoon of ground cinnamon
  • ½ teaspoon of ground nutmeg
  • ¼ teaspoon of ground cloves
  • A pinch of salt

Instructions

Prepare the Pie Crust

a. In a large mixing bowl, combine the all-purpose flour and salt.

b. Cut the cold, unsalted butter into small cubes and add them to the flour mixture.

c. Use a pastry cutter or your fingertips to work the butter into the flour until the mixture resembles coarse crumbs.

d. Gradually add the ice-cold water, one tablespoon at a time, and mix until the dough comes together. Be careful not to overmix.

e. Form the dough into a ball, wrap it in plastic wrap, and refrigerate it for at least 30 minutes.

Preheat the Oven

Preheat your oven to 350°F (175°C).

Prepare the Sweet Potato Filling

a. Peel and cut the sweet potatoes into chunks. Boil or steam them until they are tender, then mash them until smooth.

b. In a large mixing bowl, combine the mashed sweet potatoes, granulated sugar, brown sugar, eggs, evaporated milk, vanilla extract, ground cinnamon, ground nutmeg, ground cloves, and a pinch of salt. Mix until well combined.

Roll Out the Pie Crust

a. On a floured surface, roll out the pie crust into a circle large enough to fit your pie dish.

b. Carefully transfer the crust to the pie dish, pressing it into the bottom and up the sides.

Pour in the Filling

Pour the sweet potato filling into the prepared pie crust.

Bake the Pie

Place the pie in the preheated oven and bake for 50-60 minutes, or until the filling is set and a toothpick inserted into the center comes out clean.

Cool and Serve

Allow the pie to cool on a wire rack for at least 2 hours before serving. This helps the filling set further.

Enjoy

Slice and serve your delicious Sweet Potato Pie with a dollop of whipped cream or a scoop of vanilla ice cream for an extra treat!

There you have it—a delectable Sweet Potato Pie with Evaporated Milk that’s sure to be a hit at any gathering or as a special treat for yourself.

Its creamy, spiced goodness captures the essence of comfort food, making it a timeless dessert choice. Enjoy!

Nutrition Facts (Per Serving)

  • Calories: 350
  • Total Fat: 13g
  • Saturated Fat: 8g
  • Trans Fat: 0g
  • Cholesterol: 80mg
  • Sodium: 280mg
  • Total Carbohydrates: 53g
  • Dietary Fiber: 2g
  • Sugars: 32g
  • Protein: 6g

10 Simple Sweet Potato Pie With Evaporated Milk Recipes

Sweet potato pie with evaporated milk is a delightful dessert that’s perfect for fall gatherings.

To make this classic treat, start by roasting sweet potatoes until they’re tender. Then, blend them with sugar, cinnamon, nutmeg, and evaporated milk for a creamy filling.

Pour it into a pie crust, bake until set, and serve with a dollop of whipped cream for a deliciously sweet and comforting dessert. Enjoy!

Classic Sweet Potato Pie

Classic Sweet Potato Pie

Enjoy the timeless charm of a classic sweet potato pie. Follow the basic recipe with a flaky crust, creamy sweet potato filling, and a perfect blend of spices for that comforting, traditional flavor.

Marshmallow-Topped Sweet Potato Pie

Marshmallow-Topped Sweet Potato Pie:

Take your sweet potato pie to the next level by adding a layer of marshmallows on top. Pop it back into the oven for a few minutes to achieve a golden, gooey topping that’s simply irresistible.

Pecan-Streusel Sweet Potato Pie

Pecan-Streusel Sweet Potato Pie:

Elevate your pie game with a pecan streusel topping. Combine chopped pecans, brown sugar, and butter for a sweet and crunchy finish that pairs beautifully with the creamy filling.

Maple Bourbon Sweet Potato Pie

Maple Bourbon Sweet Potato Pie

Add a touch of sophistication to your sweet potato pie by incorporating maple syrup and a splash of bourbon. The result is a rich, subtly boozy dessert that’s perfect for special occasions.

Mini Sweet Potato Pies

Mini Sweet Potato Pies:

Create individual servings by making mini sweet potato pies in muffin tins. They’re great for portion control and serving at parties.

Vegan Sweet Potato Pie

Vegan Sweet Potato Pie:

Make a plant-based version of this classic dessert using ingredients like coconut milk and flax eggs. It’s a delicious option for those with dietary restrictions.

Gluten-Free Sweet Potato Pie

Gluten-Free Sweet Potato Pie

Cater to gluten-sensitive individuals by using a gluten-free pie crust or making a crustless sweet potato pie. The taste remains exceptional while accommodating dietary needs.

Nutella Swirl Sweet Potato Pie

Nutella Swirl Sweet Potato Pie:

Add a delightful twist to your sweet potato pie by swirling in Nutella before baking. The rich chocolate-hazelnut flavor complements the sweet potato beautifully.

Cinnamon Roll Sweet Potato Pie

Cinnamon Roll Sweet Potato Pie

Combine two beloved treats by incorporating cinnamon roll flavors into your sweet potato pie. Swirl cinnamon sugar and drizzle cream cheese glaze on top for a heavenly dessert.

Chai-Spiced Sweet Potato Pie

Chai-Spiced Sweet Potato Pie:

Infuse your pie with the warm and aromatic flavors of chai tea. Use chai spices like cardamom, cloves, and ginger for a unique, fragrant twist on this classic dessert.

If you’re craving a comforting dessert, sweet potato pie with evaporated milk is a delightful choice. Here are 10 simple recipes to satisfy your sweet tooth.

From classic cinnamon-spiced pies to unique twists like maple pecan or marshmallow-topped versions, there’s a sweet potato pie for every palate.

Enjoy the creamy goodness and rich flavor of these homemade treats today!

Mexican Pork Stew Recipe

0

When it comes to hearty and flavorful comfort food, few dishes can rival the rich and robust taste of Mexican Pork Stew.

This delightful dish, also known as “Carne de Puerco en Salsa Verde,” combines tender pieces of pork with the vibrant flavors of tomatillos, Chilies, and aromatic spices.

Whether you’re a fan of Mexican cuisine or simply looking for a delicious and comforting meal, this recipe is sure to satisfy your taste buds. So, let’s dive into the world of Mexican flavors and learn how to prepare this mouthwatering dish.

NameMexican Pork Stew Recipe
CuisineMexican
Prep Time20 minutes
Cooking time2 hours
Total Time2 hours and 20 minutes
Servings6
YieldApproximately 6 servings

Ingredients

  • 2 pounds of pork shoulder, cut into bite-sized cubes
  • 1 pound of tomatillos, husked and rinsed
  • 2 poblano peppers
  • 2 jalapeño peppers
  • 1 medium onion, chopped
  • 4 cloves of garlic, minced
  • 1 teaspoon ground cumin
  • 1 teaspoon dried oregano
  • 1/2 teaspoon ground coriander
  • Salt and pepper, to taste
  • 2 tablespoons vegetable oil
  • 2 cups chicken broth
  • Fresh cilantro leaves, for garnish
  • Lime wedges, for serving
  • Warm corn tortillas, for serving

Instructions

Roast the Peppers and Tomatillos

Preheat your broiler to high.

Place the poblano and jalapeño peppers on a baking sheet and broil them until their skins blister and blacken, turning occasionally. This should take about 5-7 minutes.

Remove the peppers from the oven and place them in a bowl. Cover the bowl with plastic wrap and let them steam for about 10 minutes.

After steaming, peel off the skin, remove the seeds, and chop the roasted peppers.

Blend the Tomatillos and Peppers

In a blender, combine the roasted tomatillos and roasted peppers. Blend until you have a smooth puree. Set this salsa mixture aside.

Sear the Pork

In a large, heavy-bottomed pot, heat the vegetable oil over medium-high heat.

Add the cubed pork and sear until it’s browned on all sides. This should take about 5-7 minutes.

Remove the seared pork from the pot and set it aside.

Saute the Aromatics

In the same pot, add the chopped onion and minced garlic. Saute until they become fragrant and translucent, about 2-3 minutes.

Combine and Simmer

Return the seared pork to the pot with the onion and garlic.

Add the cumin, oregano, ground coriander, salt, and pepper. Stir to coat the pork evenly with the spices.

Pour in the tomatillo and pepper puree, followed by the chicken broth.

Bring the stew to a boil, then reduce the heat to low, cover the pot, and simmer for about 1.5 to 2 hours, or until the pork is tender and the flavors meld together.

Serve and Enjoy

Serve the Mexican Pork Stew hot, garnished with fresh cilantro leaves.

Provide lime wedges and warm corn tortillas on the side for a complete and satisfying meal.

This Authentic Mexican Pork Stew recipe brings the vibrant and savory flavors of Mexican cuisine right to your kitchen. With tender chunks of pork swimming in a luscious tomatillo and chili sauce, it’s a dish that embodies the heart and soul of Mexican comfort food. Gather your ingredients, follow these simple steps, and treat yourself to a delightful taste of Mexico. Buen provecho!

Feel free to use and adapt this recipe article as needed for your purposes. Enjoy your Mexican Pork Stew!

Nutrition Facts (Approximate per Serving)

  • Calories: 320 kcal
  • Protein: 25g
  • Carbohydrates: 12g
  • Dietary Fiber: 3g
  • Sugars: 4g
  • Total Fat: 19g
  • Saturated Fat: 5g
  • Cholesterol: 75mg
  • Sodium: 650mg
  • Potassium: 700mg
  • Vitamin A: 8% DV
  • Vitamin C: 45% DV
  • Calcium: 4% DV
  • Iron: 15% DV

Please note that these nutrition facts are approximate and can vary based on the specific ingredients and serving sizes you use.

10 Simple Mexican Pork Stew Recipes

Discover delightful Mexican pork stew recipes! From spicy chili verde to comforting pozole, these 10 easy-to-follow recipes will satisfy your cravings for authentic Mexican flavors. ¡Buen provecho

Spicy Pork Stew

Spicy Pork Stew

Amp up the heat by adding extra jalapeños or a dash of hot sauce for a fiery kick to your Mexican Pork Stew. Perfect for those who love a bit of heat in their meals.

Slow Cooker Pork Stew

Slow Cooker Pork Stew

Let your slow cooker do the work! Combine all the ingredients and cook on low for 6-8 hours for tender and flavorful stew without much effort.

Pork and Bean Stew

Pork and Bean Stew

Add a Tex-Mex twist by tossing in some black beans. They’ll soak up the delicious flavors and add extra heartiness to your stew.

Vegetable-Packed Pork Stew

Vegetable-Packed Pork Stew

Boost the nutritional value by adding colorful bell peppers, zucchini, and corn for a hearty and veggie-packed variation.

Green Chili Pork Stew

Green Chili Pork Stew

Swap the red sauce for a tangy green chili sauce made from roasted tomatillos and green chilies for a vibrant twist on the classic recipe.

Pork and Potato Stew

Pork and Potato Stew

Throw in diced potatoes for a filling and comforting stew that’s perfect for those chilly evenings.

Pork and Rice Stew

Pork and Rice Stew

Serve your Mexican Pork Stew over a bed of cooked rice for a satisfying one-pot meal.

Pork and Hominy Stew

Pork and Hominy Stew

Add hominy, a type of dried maize kernel, for a unique and slightly nutty flavor that’s characteristic of Mexican Pozole.

Pork and Cabbage Stew

Pork and Cabbage Stew

Incorporate shredded cabbage into the stew for a fresh and crunchy texture contrast.

Pork and Sweet Potato Stew

Pork and Sweet Potato Stew

Sweet potatoes add a touch of sweetness and earthiness to your stew, making it both delicious and nutritious.

Discover the rich flavors of Mexico with these 10 simple recipes for Mexican Pork Stew. From hearty pozole to spicy chilorio, these dishes showcase the vibrant culinary traditions of Mexico. With easy-to-follow instructions and readily available ingredients, you can bring the taste of Mexico to your kitchen. Get ready to savor the warmth and depth of Mexican cuisine in every bowl

Seafood Stuffing Recipe

0

When it comes to indulging in the savory flavors of the sea, seafood stuffing is a true delicacy that never fails to delight the taste buds.

Whether you’re preparing it for a special occasion or as a delightful side dish, this recipe for seafood stuffing is sure to be a crowd-pleaser.

With a medley of succulent seafood, aromatic herbs, and rich, buttery goodness, it’s a dish that captures the essence of coastal cuisine. So, let’s dive into this mouthwatering recipe.

NameSeafood Stuffing Recipe
CuisineFusion
Prep Time20 minutes
Cooking Time30 minutes
Total Time50 minutes
Servings 8
Yield2 1/2 cups of seafood stuffing per serving

Ingredients

  • 1 cup fresh crabmeat, picked over for shells
  • 1 cup cooked and chopped shrimp
  • 1 cup scallops, roughly chopped
  • 1/2 cup chopped celery
  • 1/2 cup chopped onion
  • 1/2 cup chopped bell pepper (red or green)
  • 3 cloves garlic, minced
  • 4 tablespoons unsalted butter
  • 2 cups breadcrumbs (preferably fresh)
  • 1/4 cup fresh parsley, chopped
  • 1/4 cup fresh chives, chopped
  • 1/2 teaspoon dried thyme
  • 1/2 teaspoon dried oregano
  • Salt and black pepper to taste
  • 1 cup chicken or seafood broth
  • 2 tablespoons white wine (optional)

Instructions

Prepare the Seafood:

In a large skillet, melt 2 tablespoons of butter over medium heat. Add the chopped celery, onion, bell pepper, and garlic. Sauté until they become tender and fragrant, about 5 minutes.

Combine the Seafood:

In a large mixing bowl, combine the crabmeat, chopped shrimp, and scallops. Gently fold in the sautéed vegetables mixture.

Season and Add Herbs:

Sprinkle in the dried thyme, dried oregano, salt, and black pepper. Mix in the fresh parsley and chives for a burst of fresh flavor.

Create the Stuffing Base:

In the same skillet you used for the vegetables, melt the remaining 2 tablespoons of butter. Add the breadcrumbs and stir until they absorb the butter and turn slightly golden.

Combine and Moisten:

Pour the breadcrumb mixture over the seafood mixture. Add the white wine (if using) and 1 cup of chicken or seafood broth. Gently mix everything together until the stuffing is evenly moistened. Adjust the seasoning if needed.

Bake to Perfection:

Transfer the seafood stuffing mixture into a baking dish. Cover with foil and bake in a preheated oven at 350°F (175°C) for 25-30 minutes or until heated through.

Serve and Enjoy:

Once baked to perfection, serve your seafood stuffing as a side dish alongside your favorite seafood entree or as a delectable stuffing for fish fillets, chicken, or even bell peppers.

This seafood stuffing recipe brings the essence of the ocean to your table with its rich flavors and delightful textures. It’s a versatile dish that complements a variety of main courses and can turn an ordinary meal into a gourmet experience. So, whether you’re celebrating a special occasion or simply craving the taste of the sea, give this recipe a try and savor the deliciousness of seafood stuffing.

Nutrition Facts (per serving):

  • Calories: 240 calories
  • Total Fat: 9g
  • Saturated Fat: 4g
  • Trans Fat: 0g
  • Cholesterol: 70mg
  • Sodium: 580mg
  • Total Carbohydrates: 23g
  • Dietary Fiber: 2g
  • Sugars: 2g
  • Protein: 16g
  • Vitamin D: 4%
  • Calcium: 8%
  • Iron: 10%
  • Potassium: 8%

Please note that these nutrition facts are approximate and can vary based on the specific brands and quantities of ingredients used.

10 Simple Seafood Stuffing Recipes

Seafood stuffing is a delightful dish that elevates any seafood meal. To make it, combine diced crab or shrimp with breadcrumbs, minced onions, garlic, and celery. Season with salt, pepper, and herbs like parsley and thyme.

Mix in a beaten egg to bind the ingredients. Stuff this flavorful mixture into your favorite seafood, bake until golden, and savor the taste of the ocean in every bite. Enjoy!

1.Mushroom and Seafood Stuffing

Enhance your seafood stuffing with earthy flavors by adding sautéed mushrooms. Simply incorporate 1 cup of sliced mushrooms into the recipe during the vegetable sautéing step. The mushrooms will infuse the stuffing with a delightful umami essence.

Mushroom and Seafood Stuffing

2.Spinach and Feta Seafood Stuffing

Elevate your stuffing with a touch of Greek inspiration. Mix in 1 cup of cooked spinach and 1/2 cup crumbled feta cheese. The spinach adds a vibrant green hue and a burst of freshness, while the feta lends a creamy, tangy dimension.

Lobster and Shrimp Seafood Stuffing

3.Lobster and Shrimp Seafood Stuffing

For a luxurious twist, replace the crabmeat with 1 cup of cooked lobster meat and add an extra 1/2 cup of chopped cooked shrimp. This decadent combination will make your seafood stuffing fit for a special occasion.

Lobster and Shrimp Seafood Stuffing

4.Italian Seafood Stuffing

Transport your taste buds to Italy by adding 1/2 cup of diced tomatoes, 1/4 cup grated Parmesan cheese, and a pinch of dried basil and oregano. This Mediterranean-inspired stuffing is bursting with vibrant flavors.

Italian Seafood Stuffing

5.Sausage and Seafood Stuffing

Combine land and sea by incorporating 1/2 cup of cooked and crumbled sausage into the mixture. The savory sausage complements the seafood beautifully, creating a hearty stuffing.

Sausage and Seafood Stuffing

6.Mango and Curry Seafood Stuffing

Take a tropical twist by adding 1/2 cup of diced mango and a dash of curry powder. The sweetness of the mango and the warmth of the curry create a delightful fusion of flavors.

Mango and Curry Seafood Stuffing

7.Cajun Seafood Stuffing

Spice things up with some Cajun flair. Mix in 1/2 teaspoon of Cajun seasoning and a pinch of cayenne pepper for a zesty, bold flavor profile that packs a punch.

Cajun Seafood Stuffing

8.Artichoke and Spinach Seafood Stuffing

Combine 1/2 cup chopped artichoke hearts and 1/2 cup cooked spinach with the seafood mixture. This Mediterranean-inspired twist adds a creamy, slightly tangy dimension to your stuffing.

Artichoke and Spinach Seafood Stuffing

9.Bacon and Cheddar Seafood Stuffing

Add 1/2 cup cooked and crumbled bacon bits and 1/2 cup shredded cheddar cheese to create a rich and savory seafood stuffing. It’s a comforting combination that’s hard to resist.

Bacon and Cheddar Seafood Stuffing

10.Citrus and Herb Seafood Stuffing

Brighten up your stuffing with the zest of one lemon and the juice of half a lemon. Also, toss in some fresh dill and parsley. The citrusy notes and fresh herbs add a refreshing element to your seafood stuffing.

Citrus and Herb Seafood Stuffing

Feel free to mix and match these variations to suit your taste preferences and create a seafood stuffing that’s perfect for any occasion. Enjoy exploring these delicious possibilities!

Lemon Blueberry Pie Recipe

0

When life hands you lemons and a basket of fresh blueberries, it’s time to make something extraordinary.

This Lemon Blueberry Pie recipe combines the zingy brightness of lemons with the sweet, juicy burst of blueberries to create a dessert that’s as visually appealing as it is delicious.

Whether you’re hosting a summer gathering or just looking to satisfy your sweet tooth, this pie is a crowd-pleaser.

NameLemon Blueberry Pie
CuisineAmerican
Prep Time20 minutes Cook
Cooking Time50 minutes Total
Total Time1 hour 10 minutes
Servings8
YieldOne 9-inch pie

Ingredients

For the Crust

  • 1 1/4 cups all-purpose flour
  • 1/2 teaspoon salt
  • 1/2 cup unsalted butter, cold and cubed
  • 1/4 cup ice water

For the Filling

  • 1 1/2 cups fresh blueberries
  • 1 cup granulated sugar
  • 3 tablespoons cornstarch
  • Zest of 2 lemons
  • Juice of 2 lemons
  • 4 large eggs
  • 1/2 cup unsalted butter, melted

Instructions

For the Crust

Start by making the pie crust. In a mixing bowl, combine the all-purpose flour and salt.

Add the cold, cubed butter to the flour mixture. Using a pastry cutter or your fingers, work the butter into the flour until the mixture resembles coarse crumbs.

Slowly add ice water, one tablespoon at a time, and mix until the dough comes together. Form the dough into a disk, wrap it in plastic wrap, and refrigerate for at least 30 minutes.

Preheat your oven to 375°F (190°C).

On a floured surface, roll out the pie dough into a circle large enough to fit your pie dish. Transfer the rolled-out dough to a 9-inch pie dish, pressing it gently into the bottom and up the sides. Trim any excess dough.

For the Filling

In a medium-sized bowl, combine the sugar and cornstarch. Mix well.

Add the fresh blueberries to the sugar-cornstarch mixture and toss until the berries are coated.

In another bowl, whisk together the lemon zest, lemon juice, eggs, and melted butter until well combined.

Pour the lemon mixture over the blueberries and stir until everything is evenly mixed.

Pour the blueberry filling into the prepared pie crust.

Baking

Place the pie in the preheated oven and bake for about 40-45 minutes or until the filling is set and the top is golden brown.

If the edges of the crust start to brown too quickly, you can cover them with aluminum foil to prevent over-browning.

Once baked, remove the pie from the oven and let it cool on a wire rack.

Serving

Once the Lemon Blueberry Pie has cooled to room temperature, you can refrigerate it for a few hours to chill and set the filling.

Serve each slice with a dollop of whipped cream or a scoop of vanilla ice cream for an extra treat.

This Lemon Blueberry Pie is a delightful blend of tart and sweet, making it the perfect dessert for any occasion. With a flaky crust and a vibrant, fruity filling, it’s sure to become a favorite in your dessert repertoire. Enjoy this zesty delight with friends and family, or savor it as a special treat just for yourself.

Nutrition Facts (Per Serving – 1/8th of the pie)

  • Calories: 345 kcal
  • Total Fat: 17g
  • Saturated Fat: 10g
  • Trans Fat: 0g
  • Cholesterol: 95mg
  • Sodium: 235mg
  • Total Carbohydrates: 45g
  • Dietary Fiber: 1g
  • Sugars: 28g
  • Protein: 4g

10 Simple Lemon Blueberry Pie Recipes

Indulge your taste buds with the perfect blend of zesty and sweet in this delightful Lemon Blueberry Pie.

To create this delectable treat, combine fresh blueberries with a tangy lemon filling and a flaky pie crust. The result is a mouthwatering dessert that’s a burst of summer in every bite. Try it for your next gathering and watch it disappear.

1. Classic Lemon Blueberry Pie

Enjoy the classic combo of lemon and blueberries in this timeless pie. Follow the recipe above for a sweet and tangy treat.

2. Lemon Blueberry Pie Bars

For a portable version, make lemon blueberry pie bars. Press the crust into a baking pan, top with the filling, and bake. Cut into squares for easy serving.

3. Mini Lemon Blueberry Pies

Create individual mini pies using a muffin tin. Prepare smaller portions of the filling and crust, then bake for adorable, single-serving treats.

4. Lemon Blueberry Galette

Skip the pie dish and make a rustic galette. Roll out pie dough, add the filling in the center, and fold the edges over for a free-form dessert.

5. No-Bake Lemon Blueberry Pie

In a hurry? Try a no-bake version using a graham cracker crust, a creamy lemon-blueberry filling, and refrigeration instead of baking.

6. Lemon Blueberry Pie Smoothie

Transform the flavors into a healthy smoothie by blending blueberries, Greek yogurt, lemon juice, and a touch of honey for a refreshing drinkable pie.

7. Lemon Blueberry Hand Pies

Craft hand pies by cutting pie dough into circles, filling with the lemon-blueberry mixture, and folding them over into half-moon shapes. Bake until golden brown.

8. Lemon Blueberry Pie Parfait

Layer lemon-infused Greek yogurt with fresh blueberries and crumbled pie crust for a light and delicious parfait.

9. Lemon Blueberry Pie Muffins

Infuse your muffins with the flavors of lemon and blueberry by adding lemon zest and fresh blueberries to your muffin batter.

10. Lemon Blueberry Pie Ice Cream

Churn lemon-blueberry pie ice cream by mixing pie filling into vanilla ice cream. The result is a creamy, fruity dessert that’s perfect for hot days.

These 10 recipes offer a variety of ways to enjoy the delightful combination of lemon and blueberry in pie form, from traditional slices to creative twists!

Graham Cracker Crust Recipe

0

Are you planning to make a delectable dessert that requires a graham cracker crust? Look no further!

This simple and foolproof recipe will guide you through creating a delicious graham cracker crust that’s perfect for a 9×13-inch pan.

Whether you’re making cheesecake bars, a key lime pie, or any dessert that calls for a sturdy, sweet base, this crust will be your go-to choice.

Name:Graham Cracker Crust
Cuisine:American
Prep Time:15 minutes
Cooking Time:0 minutes No baking required
Total Time:45 minutes (including chilling time)
Servings:15
Yield:One 9×13-inch graham cracker crust

Ingredients

  • 2 cups graham cracker crumbs (about 16 whole graham crackers)
  • 1/2 cup unsalted butter, melted
  • 1/4 cup granulated sugar
  • A pinch of salt

Instructions

Prepare Your Graham Crackers

Start by crushing the graham crackers into fine crumbs. You can do this by placing them in a large resealable plastic bag and using a rolling pin to crush them. Alternatively, you can use a food processor for a quick and even crumb consistency.

Combine the Ingredients

In a mixing bowl, combine the graham cracker crumbs, melted butter, granulated sugar, and a pinch of salt. Stir everything together until the mixture resembles wet sand and all the crumbs are coated with butter and sugar.

Press into the Pan

Take your 9×13-inch pan and line it with parchment paper or lightly grease it to prevent sticking. Transfer the graham cracker mixture into the pan. Using the back of a measuring cup or your fingers, press the mixture firmly and evenly into the bottom of the pan. Ensure that the crust is compacted to form a solid base for your dessert.

Chill the Crust

Place the pan with the graham cracker crust in the refrigerator for at least 30 minutes to allow it to set. This will help the crust hold its shape when you add your filling.

Use in Your Recipe

Once your graham cracker crust is properly chilled and set, you’re ready to use it in your favorite dessert recipe. Pour your chosen filling over the crust and follow the recipe instructions for baking or refrigerating your dessert.

Tips

If you prefer a sweeter crust, you can add a bit more sugar to taste, but be cautious not to make it too sweet.

For a more flavorful crust, consider adding a teaspoon of vanilla extract or a pinch of cinnamon to the graham cracker mixture.

To make cutting and serving easier, run a knife around the edges of the crust after your dessert has chilled and set.

There you have it—a simple yet scrumptious graham cracker crust that’s ready to be the foundation of your next delightful dessert. Whether it’s a family gathering, a potluck, or just a sweet indulgence for yourself, this crust recipe will never disappoint. Enjoy!

Nutrition Facts

  • Calories: 155 kcal
  • Total Fat: 10g
  • Saturated Fat: 5.5g
  • Trans Fat: 0g
  • Cholesterol: 23mg
  • Sodium: 144mg
  • Total Carbohydrates: 15g
  • Dietary Fiber: 0.5g
  • Sugars: 6.5g
  • Protein: 1g

10 Simple Graham Cracker Crust Recipes For 9×13 Pan

Creating a graham cracker crust for a 9×13 pan is simple and delicious. Crush 2 cups of graham crackers, mix with 1/2 cup melted butter, and press into the pan. Bake at 350°F for 10 minutes, then cool before adding your favorite filling. Enjoy!

1. Classic Cheesecake Bars

Transform your graham cracker crust into a base for creamy cheesecake bars. Mix cream cheese, sugar, eggs, and vanilla, pour over the crust, and bake until set. Top with fresh berries or fruit compote.

2. Key Lime Pie Squares

For a tangy and refreshing treat, whip up key lime pie squares. Combine sweetened condensed milk, key lime juice, and egg yolks, then pour over the crust. After baking and cooling, dust with powdered sugar.

3. Chocolate Pudding Delight

Layer chocolate pudding, whipped cream, and crushed Heath bars on top of your graham cracker crust. This dessert is quick, decadent, and a crowd-pleaser.

4. Lemon Icebox Bars

Mix lemon juice, sweetened condensed milk, and whipped cream to create a luscious lemon filling. Pour it over the graham cracker crust, chill, and enjoy a delightful no-bake dessert.

5. Strawberry Pretzel Salad Bars

A delightful twist on a classic salad. Layer sliced strawberries, a cream cheese mixture, and strawberry gelatin over the crust. Refrigerate until set for a sweet and salty treat.

6. S’mores Bars

Recreate the campfire favorite indoors. Layer graham crackers, chocolate chips, and mini marshmallows on top of the crust, then broil until the marshmallows turn golden brown.

7. Peanut Butter Cup Bars

For a peanut butter lover’s dream, mix peanut butter, powdered sugar, and melted butter. Spread this mixture over the crust, top with melted chocolate, and refrigerate until set.

8. Raspberry Oatmeal Bars

Create a fruity and hearty dessert by mixing raspberry preserves with oats and spreading it over your crust. Bake until golden and enjoy these wholesome bars.

9. No-Bake Tiramisu Bars

Whip up a quick tiramisu-inspired dessert. Combine mascarpone cheese, coffee, and ladyfingers. Layer this mixture over the crust and dust with cocoa powder for a delightful treat.

10. Caramel Apple Streusel Bars

Celebrate autumn with these bars. Layer sliced apples, caramel sauce, and a buttery streusel topping over your crust. Bake until golden brown and enjoy the flavors of the season.

Creating a delectable graham cracker crust for a 9×13 pan is a breeze with these 10 simple recipes. Whether you’re making a cheesecake, pie, or dessert bars, a perfect crust is key. Try variations like chocolate or nut-infused crusts for added flair. These versatile recipes guarantee a crispy, flavorful foundation for your favorite treats. Elevate your baking game with these easy-to-follow graham cracker crust recipes!