Home Blog Page 118

Carrot Cake Pancakes with Maple Cream Cheese

Carrot cake. These are words that instantly put a smile on my face when I hear or see them paired together. This is rather ironic considering I used to harbor a strong distaste for carrot cake. My family can attest to the fact that I much preferred the cream cheese icing, which I would carefully scrape off of the cake and lick from my fingers.

My, how times have changed.

Carrot cake is now one of my very favorite desserts; whether it’s studded with walnuts, pecans, raisins, pineapple, coconut, or just grated carrots, I find this moist and sweet cake hard to resist.

Carrot Cake Pancakes with Maple Cream Cheese

Thus you can imagine my delight when I stumbled upon a recipe for carrot cake pancakes. I don’t typically choose pancakes as my morning meal, mainly because they rarely hold me over until lunch. My version of carrot cake pancakes, however, are hearty enough to satiate hunger while remaining light enough to satisfy a craving for fluffy pancakes.

Whole wheat pastry flour and a generous amount of grated carrots contribute hunger-squashing fiber; a bit of neufchatel cream cheese adds just the right amount of fat to keep your stomach feeling full; and a touch of maple syrup in place of refined sugar maintains your blood sugar so your energy doesn’t crash an hour after eating the pancakes.

I decided to keep my first batch rather basic by omitting the traditional ingredient additions. The pancakes are delicious as is, but I am excited to experiment with various add-ins: Raisins soaked in vanilla extract until plump, juicy pineapple chunks, crunchy toasted nuts, and rich unsweetened coconut flakes are all variations I’d like to try.

Perhaps I’ll even make a batch of carrot cake pancakes with “the works” – a.k.a. all of the above. Now THAT would put a smile on anyone’s face.

Name:Carrot Cake Pancakes with Maple Cream Cheese
Cuisine:Fusion
Prep Time:15 minutes
Cooking Time:20 minutes
Total Time:35 minutes
Servings:4
Yield:12 pancakes

Ingredients for the carrot cake pancakes:

  • 1 1/4 cups whole wheat pastry flour
  • 2 tsp baking powder
  • 1 tsp ground cinnamon
  • 1/4 tsp salt
  • 1/4 tsp ground ginger
  • 1/8 tsp ground nutmeg
  • 1 egg, lightly beaten
  • 2 Tbsp pure maple syrup
  • 1 cup milk (I used 1% – what I had on hand)
  • 1 tsp pure vanilla extract
  • 2 cups finely grated carrots (preferably using a microplane grater)
  • canola oil cooking spray

Ingredients for the maple cream cheese:

  • 4 ounces neufchatel (1/3-less-fat) cream cheese, at room temperature
  • 2 Tbsp pure maple syrup
  • 2 Tbsp milk
  • 1/2 tsp vanilla extract
  • 1/4 tsp ground cinnamon

Directions:

  1. Start off by making the maple cream cheese: place room-temperature neufchatel in a large bowl. Using an electric mixer, beat the cream cheese until smooth. Beat in the maple syrup, milk, vanilla, and cinnamon. Set aside.
  2. In a large bowl, whisk together the flour, baking powder, cinnamon, salt, ginger, and nutmeg.
  3. In a separate bowl, combine egg, maple syrup, milk, and vanilla; mix well.
  4. Stir wet mixture into dry ingredients until moistened. Fold in grated carrots.
  5. Heat a non-stick skillet (or griddle) coated with cooking spray over medium/medium-high heat. Pour pancake batter by 1/4 cupful onto the griddle.
  6. When bubbles form on the top of the pancakes and the edges look dry, (after about 2 minutes of cooking), flip and cook until golden brown (about 1 minute)*.
  7. Serve with a dollop or smear of the maple cream cheese.

*If you’re planning on enjoying leftovers, I suggest slightly undercooking the pancakes and then reheating them in the toaster oven for a quick weekday breakfast.

Estimated Nutrition per Serving:

  • Calories: 355 kcal
  • Total Fat: 15g
  • Saturated Fat: 7g
  • Trans Fat: 0g
  • Cholesterol: 120mg
  • Sodium: 531mg
  • Total Carbohydrates: 48g
  • Dietary Fiber: 2g
  • Sugars: 23g
  • Protein: 8g

Apple Cinnamon Granola

Clearly I absolutely love granola. I have my favorite brands, sure, but with homemade batches you can control the amount of fat and sugar… both of which are notoriously high in most commercial granolas.

Apple Cinnamon Granola

For this Apple Cinnamon Granola, nuts contribute a modest dose of healthy fat and pure maple syrup lends a small amount of unrefined sugar.

Apple Cinnamon Granola

In anticipation of the impending fall season – which is finally discernible in the Boston air – I used autumnal flavors for this granola recipe. Dried apples pay homage to the season of orchards, cider, and pie; a generous amount of cinnamon contributes a fragrant aroma and spicy-sweet flavor. The applesauce-coated clumps of granola turn crunchy in the oven, and are nicely complimented by the chewy dried apples.

Apple Cinnamon Granola

Healthier and less expensive than grocery store granolas, this homemade version tastes every bit as good. Whether you stir it into creamy yogurt, scatter it over hot oatmeal, serve it with ice-cold milk, or eat it by the handful, you are sure to enjoy this Apple Cinnamon Granola.

Apple Cinnamon Granola

Apple Cinnamon Granola

Name:Apple Cinnamon Granola
Cuisine:Fusion
Prep Time:10 minutes
Cooking Time:35 minutes
Total Time:45 minutes
Servings:10 servings
Yield:6 cups

Ingredients

  • 1 1/2 cups rolled oats
  • 1 1/2 cups puffed brown rice cereal
  • 6 Tbsp unsweetened applesauce
  • 1/4 cup pure maple syrup
  • 1/2 tsp pure vanilla extract
  • 1 Tbsp ground cinnamon (yes, it’s a lot of cinnamon, but you want this to be the predominant flavor!)
  • 1/4 tsp salt
  • 1/2 cup chopped nuts, such as walnuts, pecans, or almonds (I used walnuts)
  • 1 cup chopped dried apple rings, preferably unsweetened & unsulfured

Directions

  1. Preheat oven to 325 degrees F. Line a cookie sheet with parchment paper.
  2. Measure the oats and rice cereal into a large bowl, set aside.
  3. In a medium bowl, whisk together the applesauce, maple syrup, vanilla extract, cinnamon, and salt. Whisk until very smooth.
  4. Pour wet ingredients over cereal and stir until evenly coated. Spread mixture on the prepared cookie sheet in an even layer.
  5. Bake for 15 minutes. Remove sheet from the oven, stir the nuts into the granola, and bake for an additional 10-15 minutes, or until the granola is golden brown and crisp.
  6. Remove granola from the oven, toss with the dried apples, and cool completely. Store in an airtight container.

Estimated Nutrition Per Serving

  • Calories: 240
  • Total Fat: 12g
  • Saturated Fat: 6g
  • Trans Fat: 0g
  • Cholesterol: 0mg
  • Sodium: 120mg
  • Total Carbohydrates: 31g
  • Dietary Fiber: 4g
  • Sugars: 15g
  • Protein: 4g

Autumn Spiced Ice Cream

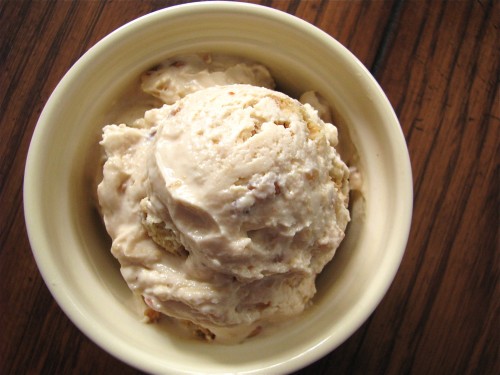
Seeing as we’re about to kick off the last official weekend of summer before the Autumnal Equinox, I thought I’d share with you a recipe that can seamlessly transition from the season of cold ice cream churned on hot days to the season of aromatic spiced treats baked on cool mornings.

Autumn Spiced Ice Cream

I borrowed Wheeler Del Toro’s technique of thickening the ice cream base with arrowroot powder instead of eggs, and used reduced fat milk & half-and-half instead of heavy cream to keep the ice cream on the lighter side. I combined evaporated cane juice, brown sugar, and maple syrup for a complex sweetness, and my favorite warm spices rounded out the autumnal flavor.

Autumn Spiced Ice Cream

This ice cream can be enjoyed sitting in the sun on a warm afternoon or cuddled under a blanket on a cool evening… in other words, it is more than acceptable to indulge in two servings per day ;).

Autumn Spiced Ice Cream
Name:Autumn Spiced Ice Cream
Cuisine:Fusion
Prep Time:15 minutes
Cooking Time:0 minutes (churning time)
Total Time:6 hours (including chilling and freezing time)
Servings:8 servings
Yield:1 quart (4 cups)

Ingredients

  • 2 cups 2% reduced fat milk, divided
  • 2 Tbsp arrowroot powder or cornstarch
  • 1 cup half-and-half
  • 2 Tbsp evaporated cane juice or granulated sugar
  • 1/4 cup packed brown sugar
  • 2 Tbsp pure maple syrup
  • 2 tsp pure vanilla extract
  • 1 tsp pure maple extract
  • 2 tsp ground cinnamon
  • 1/4 tsp ground ginger
  • 1/4 tsp ground nutmeg
  • 1/8 tsp ground cloves

Directions

  1. In a small bowl, whisk together 1/4 cup milk with the arrowroot. Set aside.
  2. In a medium saucepan over medium heat, combine the remaining 1 3/4 cup milk, half-and-half, evaporated cane juice, brown sugar, and maple syrup. Cook over medium heat, gently whisking occasionally, until the mixture just begins to boil, about 10 minutes. When the mixture reaches the soft boiling point (bubbles are just starting to break the surface), remove from heat, and whisk in the milk & arrowroot mixture. Whisk until the mixture noticeably thickens, about 30 seconds. Whisk in the vanilla extract, maple extract, and spices. Transfer ice cream base to a medium bowl. Chill completely in the refrigerator, about 2-3 hours.
  3. Freeze according to ice cream manufacturer’s instructions. Transfer to an air-tight freezable container and freeze until “ripened” (hardened).

~because I had so much fun photographing this ice cream, here are a few additional shots for you to enjoy~

Autumn Spiced Ice Cream

Estimated Nutrition Per Serving

  • Calories: 240
  • Total Fat: 18g
  • Saturated Fat: 10g
  • Trans Fat: 0g
  • Cholesterol: 60mg
  • Sodium: 40mg
  • Total Carbohydrates: 19g
  • Dietary Fiber: 1g
  • Sugars: 15g
  • Protein: 2g

Tropical Dried Fruit & Cashew Butter Bites

0

I plowed my way through the Peanut Butter, Date, & Oat Bites in no time, and reveled in each ball of sweet, dense deliciousness. I loved the portable and filling bites so much that I couldn’t help but whip up another batch… this time featuring a tropical flavor profile.

Tropical Dried Fruit & Cashew Butter Bites

The flavor of these tasty little bites is reminiscent of my Tropical Granola, as I used the same mix of dried fruit. The cashew butter I used for this recipe is the brainchild of Ashley from The Edible Perspective, and it so lusciously thick and creamy that I had to restrain myself from eating it by the spoonful.

The smooth cashew butter is studded with chewy bits of dried banana, mango, pineapple, and coconut, as well as wholesome rolled oats. The pale-hued mixture is rolled into two-bite-sized balls, which can be dusted with additional coconut if you so desire.

Tropical Dried Fruit & Cashew Butter Bites

Pure dried fruit sans added sugar and preservatives can be difficult to find, but are worth the search. I found all of the unsweetened & unsulfured dried fruit (except for the coconut flakes, which I picked up at Whole Foods) for this recipe at Trader Joe’s – each in its own packaging. If there’s any doubt, just sneak a peak at the nutrition label. The ONLY ingredient should be dried ____ [mango, banana, pineapple etc.].

As with the Peanut Butter, Date, & Oat Bites, these Tropical Dried Fruit & Cashew Bites are simple to prepare, easy to stash in a lunch bag or purse, full of healthy ingredients, and of course delicious to eat.

Tropical Dried Fruit & Cashew Butter Bites
Name:Tropical Dried Fruit & Cashew Butter Bites
CuisineFusion
Prep Time15 minutes
Cooking Time0
Total Time45 minutes (including chilling time)
ServingsApproximately 24 bites
YieldVaries based on the size of each bite

Ingredients

  • 1/2 cup store-bought or homemade cashew butter
  • 1/2 cup chopped mixed dried tropical fruit, such as banana, mango, pineapple, and coconut, preferably unsweetened & unsulfured
  • 1/4 cup old-fashioned rolled oats
  • extra coconut ships for rolling, optional

Directions

In a bowl, stir together the cashew butter and chopped dried fruit until well-mixed. Fold in the oats and mix until fully incorporated.

Using a mini ice cream scoop or small spoon, scoop out spoonfuls of the mixture and roll into balls using your palms. If the “dough” is sticking to your hands, refrigerate the mixture until chilled or lightly coat palms with cooking spray.

Roll bites in coconut chips, if desired.

Store in the refrigerator.

Estimated Nutrition Per Serving (1 bite)

  • Calories: 120 kcal
  • Total Fat: 8g
    • Saturated Fat: 3g
    • Trans Fat: 0g
  • Cholesterol: 0mg
  • Sodium: 50mg
  • Total Carbohydrates: 12g
    • Dietary Fiber: 2g
    • Sugars: 7g
  • Protein: 2g

Please note that these nutrition values are estimates and can vary depending on the specific brands of ingredients used and the size of each bite. It’s always a good practice to check the nutrition labels on the ingredients you use if you have specific dietary concerns or requirements. Enjoy your delicious and nutritious Tropical Dried Fruit & Cashew Butter Bites!

Pumpkin & Caramelized Banana Baked Oatmeal

Today marks two momentous occasions. First of all, it’s the FIRST DAY OF FALL! Autumn is by far my favorite season, especially here in New England. Literally everything about this time of year puts a huge smile on my face: cool dry air, vibrantly-hued foliage, squawking migrating geese, back-to-school excitement, cozy sweaters, smoke curling out of chimneys, anticipation of Halloween and Thanksgiving, warm apple cider, apple picking excursions, slow-cooking chili, cinnamon-laden baked goods, and different varieties of autumn squash. Which brings me to the second reason this post is so special to me:

Pumpkin & Caramelized Banana Baked Oatmeal

It’s here, folks. THE moment I’ve been waiting for since a national shortage left me bereft of a favorite ingredient: pumpkin puree is once again gracing the shelves of select grocery stores around the country! For Bostonians: I hunted down this Farmer’s Market Organic Pumpkin at the Brookline Stop & Shop – there were only a few cans left, so I hope they replenish their stock soon.

Pumpkin & Caramelized Banana Baked Oatmeal

At my [desperate] request, my wonderful mom searched for and found (jackpot!) a bunch of canned Libby’s pumpkin puree at a large chain grocery store down where my parents live in PA. THANKS, MOM!!! As irony would have it, a few days later I found the elusive Libby’s pumpkin puree around here (for locals: I’ve now seen it at both the Fenway & Commonwealth/BU Shaw’s branches); but be forewarned… you’re going to have to pay a pretty penny: the 15 oz cans I saw were a whopping $2.69 each.

If store shelves around you are still stripped of pumpkin puree, have no fear. I am going to experiment with roasting sugar pumpkins for homemade puree and will post instructions and photos in a week or so.

Pumpkin & Caramelized Banana Baked Oatmeal

I’m well aware that it is not normal for a person to be this ecstatic about a canned vegetable, (my husband has pointed this out on a few occasions), but pumpkin puree can do wonders for baked goods, desserts, and, of course, oatmeal.

Pumpkin & Caramelized Banana Baked Oatmeal

Even if canned pumpkin had been readily available throughout the spring and summer months, there’s something to be said for waiting until crisp & cool fall weather to break out the bright orange-hued autumn squash.

Pumpkin & Caramelized Banana Baked Oatmeal

Although I’m not a huge fan of unadorned pumpkin puree, I absolutely love it when flavored with a bit of pure maple syrup and seasoned with warm spices such as cinnamon, nutmeg, allspice, and cloves. Mixed into thick Greek yogurt, baked into muffins and quick breads, and stirred into creamy oatmeal, pumpkin puree is a tasty, nutritious, and versatile ingredient to have on hand.

Pumpkin & Caramelized Banana Baked Oatmeal

Stovetop oatmeal using old-fashioned rolled oats is one of my go-to hearty breakfasts during the colder months. That being said written, every now and then it’s fun to make and eat oats in a different way. A batch of baked oatmeal takes longer to cook than the stovetop variety, but you’ll most likely have leftovers that are a snap to reheat on rushed weekday mornings (or pack in a container for lunch – the baked oatmeal is great at room temperature or even cold).

[Hi, Shelby!]

Pumpkin & Caramelized Banana Baked Oatmeal

This baked oatmeal features a layer of sweet & pillowy caramelized bananas topped with pumpkin-infused rolled oats. Chewy raisins, aromatic spices, and molasses-y brown sugar round out the fall-inspired flavors. The top & sides of the baked oatmeal crisp up into a slightly crunchy crust while the interior & base layers remain soft and creamy. As with stovetop or overnight oatmeal, this baked version does a stellar job of satiating your hunger, but won’t make you feel lethargic like other heavy breakfast dishes.

Pumpkin & Caramelized Banana Baked Oatmeal

Pumpkin & Caramelized Banana Baked Oatmeal

Name:Pumpkin & Caramelized Banana Baked Oatmeal
Cuisine:Fusion
Prep Time:15 minutes
Cooking Time:30 minutes
Total Time:45 minutes
Servings:4
Yield:1 8×8-inch baking dish

Ingredients

  • canola oil cooking spray
  • 1 Tbsp unsalted butter
  • 2 large yellow-green bananas, sliced (you want to use slightly under-ripe bananas so they hold up to the sautéing and baking)
  • 1 tsp ground cinnamon
  • 1 Tbsp pure maple syrup
  • 2 cups old-fashioned rolled oats
  • 1/2 cup dried fruit of choice (I used raisins)
  • 1/2 cup chopped toasted nuts or seeds (I didn’t think of this addition until afterwards, but I suggest walnuts, pecans, or pumpkin seeds)
  • 1/4 cup brown sugar, packed
  • 1 tsp baking powder
  • 2 tsp pumpkin pie spice* (recipe follows)
  • 1 1/2 cups milk (low-fat, skim, or non-dairy)
  • 1 cup pumpkin puree, NOT pumpkin pie filling (due to a few batches of overnight & stovetop pumpkin oats, I was a bit short and thus supplemented the final 1/4 cup or so with unsweetened applesauce)
  • 1 large egg, lightly beaten
  • 1 tsp pure maple extract
Ingredients for homemade pumpkin pie spice:
  • 1/4 cup ground cinnamon
  • 1 Tbsp ground ginger
  • 1 Tbsp ground nutmeg
  • 1 tsp ground allspice
  • 1 tsp ground cloves

NOTE: for a different presentation, serve the oatmeal upside-down so the caramelized bananas are facing up:

Pumpkin & Caramelized Banana Baked Oatmeal

Directions

  1. Preheat oven to 375 degrees F. Lightly coat an 8-inch square or round baking dish with cooking spray.
  2. Melt butter in a non-stick skillet over medium-high heat. Add in the sliced bananas and cook for 2 minutes, gently stirring every now and then. Add cinnamon and maple syrup and let mixture boil & thicken for about 30 seconds. Spoon the bananas into the bottom of the prepared dish, and spread in an even layer. Set aside.
  3. In a medium bowl, mix together the oats, dried fruit, nuts or seeds, brown sugar, baking powder, and pumpkin pie spice. Set aside.
  4. In a large bowl, whisk together the milk, pumpkin puree, egg, and maple extract.
  5. Stir the oat mixture into the milk & pumpkin mixture. Pour over the bananas in the dish.
  6. Bake for 35-40 minutes, until the top is lightly browned and crisp. Allow to cool for a few minutes before serving.

Estimated Nutrition Per Serving

  • Calories: 275 calories
  • Protein: 5 grams
  • Carbohydrates: 53 grams
  • Dietary Fiber: 6 grams
  • Sugars: 20 grams
  • Fat: 7 grams
  • Saturated Fat: 1 gram
  • Cholesterol: 2 milligrams
  • Sodium: 159 milligrams
  • Potassium: 385 milligrams
  • Vitamin A: 93% Daily Value (DV)
  • Vitamin C: 7% DV
  • Calcium: 7% DV
  • Iron: 11% DV

Fiery Red Chili

0

It’s football chili season! On any given sunday afternoon during this time of the year you can bet that our T.V. is tuned to a football game John either lounging on the sofa or fist-pumping the air.  I admit that I’m not a huge fan of watching the games in their entirety nor do I have a die-hard allegiance to any one team. What I do get excited about is starting a big pot of chili mid-afternoon and enjoying the spicy aroma wafting throughout the apartment for the remainder of the day.

NameFiery Red Chili
CuisineAmerican
Prep Time15 minutes
Cooking Time1 hour
Total Time1 hour
Servings8
Yield8 cups
Fiery Red Chili

I named this “Fiery Red Chili” because of the multitude of red (ground beef, red bell pepper, tomatoes, tomato sauce, red kidney beans) and spicy (serrano & jalapeno peppers, red pepper flakes) ingredients. Most of you are aware that I don’t often cook with red meat, but when I do I have two guidelines that I follow: use the highest quality & humanely-raised meat that I can find and use it more as a flavor element than as the main ingredient. Specifically, I stick with grass-fed beef (which I usually buy at Whole Foods) and use half as much as a typical recipe would call for. By using these techniques, I’m not only supporting a more humanitarian approach to raising cattle, but am also feeding my husband and myself a healthier meal.

Fiery Red Chili

Now, this chili is on the thicker side. I prefer my chili to be more stew-like, but if you like your chili soupy, simply include the liquid that the beans come canned in rather than rinsing and draining the beans. If you do this, it is especially important to buy low-sodium beans because the liquid is where most of the salt resides.

Fiery Red Chili

The only thing this chili needs is a thick square of cornbread… the recipe of which I will be posting shortly!

Fiery Red Chili

Fiery Red Chili

yields 4 servings

Ingredients

  • extra virgin olive oil
  • 1/2 white onion, chopped (about 1/2 – 3/4 cup)
  • 1 clove garlic, minced
  • 1/2 large serrano or jalapeno chile pepper, seeded and minced (about 2-3 Tbsp, or to taste)
  • 1/2 pound 85/15 or 90/10 lean ground beef (or ground buffalo), preferably grass-fed
  • 1 red bell pepper, preferably organic, seeded and chopped
  • 1 (14.5 oz) can diced tomatoes with jalapenos OR green chiles
  • 1 (8 oz) can low-sodium tomato sauce
  • 1 (16 oz) can low-sodium red kidney beans, rinsed and drained
  • 1 tsp Kosher salt, or more to taste
  • 1 Tbsp chili powder
  • 1 tsp ground cumin
  • 1 tsp ground coriander
  • 1/2 tsp crushed red pepper flakes
  • 1/2 tsp ground oregano
  • freshly ground black pepper, to taste

Optional Accoutrements:

  • dollop of plain 2% Greek yogurt
  • sprinkling of grated 50% reduced fat jalapeno cheddar or pepper jack cheese
  • sliced green onions
  • cornbread (we like to mound the chili on top of a piece)
  • drizzle of hot sauce
  • chopped avocados

Instructions

Brown the meat

In a large pot or Dutch oven heat a drizzle of olive oil over medium-high heat. Add the ground beef or turkey and cook until browned, breaking it up into crumbles as it cooks. Drain any excess fat.

Sauté the aromatics

Add the diced onion minced garlic and diced bell peppers to the pot. Sauté for about 5 minutes until the vegetables are softened and aromatic.

Add the spices

Sprinkle in the chili powder cumin paprika cayenne pepper salt and pepper. Stir well to coat the meat and vegetables with the spices.

Combine the beans and tomatoes

Pour in the diced tomatoes (with their juices) kidney beans and black beans. Stir to combine everything in the pot.

Add the broth

Pour in the beef or vegetable broth and bring the mixture to a boil. Reduce the heat to low cover and let the chili simmer for about 30 minutes stirring occasionally.

Adjust the seasoning

Taste the chili and adjust the seasoning as needed. If you prefer it spicier, add more cayenne pepper. If it’s too spicy, you can balance it with a touch of sugar or more broth.

Serve and garnish

Ladle the piping hot Fiery Red Chili into bowls. Top it with shredded cheddar cheese a dollop of sour cream chopped green onions fresh cilantro sliced jalapeños and avocado slices if desired.

Fiery Red Chili is more than just a meal; it’s an experience for your taste buds. The combination of ground meat, beans, and an array of spices creates a symphony of flavors that will delight spice enthusiasts and comfort food lovers alike. So, when the weather outside is frightful, cozy up with a bowl of this chili that’s anything but mild. Enjoy the heat!

Nutrition Per Serving

The estimated nutrition values provided here are approximate and can vary based on specific ingredients and portion sizes. This calculation is based on a typical serving size of one bowl of Fiery Red Chili.

Calories:400 calories per serving.

Protein:25 grams per serving, depending on the type of meat used.

Carbohydrates:35 grams per serving.

Dietary Fiber:10 grams per serving.

Sugars:10 grams per serving, primarily from the natural sugars in the tomatoes and vegetables.

Total Fat:20 grams per serving, with variations based on the lean or fatty meat used and any added toppings.

Saturated Fat:7 grams per serving, depending on the meat and toppings.

Cholesterol:60 milligrams per serving, depending on the type of meat used.

Sodium:900 milligrams per serving, but this can vary based on the salt content in your ingredients and personal preferences.

Potassium:1000 milligrams per serving, thanks to the beans and vegetables.

Vitamins and Minerals: Fiery Red Chili is rich in essential nutrients like vitamin C, vitamin A, iron, and calcium, thanks to the variety of vegetables and beans used in the recipe.

Directions:

  1. Heat a drizzle of oil in a dutch oven or heavy-bottomed pot over medium heat. Add in the chopped onion and cook, stirring, until tender and translucent, about 5 minutes. Add in the garlic & serrano, and cook, stirring, for 30 seconds. Add in the ground beef and cook, stirring occasionally, until browned, about 5 minutes.
  2. Add in the rest of the ingredients, stir, and bring to a boil over medium heat. Reduce heat to low, and simmer at least 2 hours, stirring occasionally.
  3. Serve with accoutrements.

Cookies & Cream Ice Cream Sandwiches

There’s no denying it at this point: I love cookies & cream. If you harbor any doubt, I invite you to check out this post. Or this one. And if those don’t convince you, this post certainly will.

Cookies & Cream Ice Cream Sandwiches

Yes, I love healthy foods such as wild Alaskan salmon, zucchini, Greek yogurt, brown rice, sweet potatoes, and just about every fruit under the sun; but I have a very intimate relationship with any dessert that features cookies & cream. I don’t recall when this bond was formed, but I do know it won’t easily be broken.

And why on earth would I want it to?

Cookies & Cream Ice Cream Sandwiches

These Cookies & Cream Ice Cream Sandwiches are such a cinch to put together, I’m almost embarrassed to call this a “recipe”. It’s really more of a simple method, which can be altered to suit your taste (perhaps Roasted Banana Soft Serve tucked into a peanut butter sandwich cookie is more up your alley?).

Perhaps what I love most about these ice cream sandwiches is their petit stature. These mini treats are sure to satisfy your sweet tooth, but won’t weigh you down and fill you out like the monstrous Chipwich.  I made a bunch of the little ice cream sandwiches and stored them in a sealed plastic bag in the freezer. You can make as many or as few as you’d like, which is why I neglected to specify ingredient quantities below.

Cookies & Cream Ice Cream Sandwiches
Name:Cookies & Cream Ice Cream Sandwiches
Cuisine:Fusion
Prep Time:30 minutes
Cooking Time:12 minutes per batch
Total Time:2 hours (including freezing time)
Servings:12 sandwiches
Yield:Varies based on scoop size and cookie dimensions

Ingredients

  • chocolate cream-filled sandwich cookies, such as original Newman-O’s or Back to Nature Classic Creme Cookies
  • cookies & cream “lighter” ice cream or fro-yo, such as Cookies ‘N Cream dairy-free soy ice cream from The Vegan Scoop or Stonyfield Organic Cookies ‘n Cream Frozen Yogurt
  • 1 cup (2 sticks) unsalted butter, softened
  • 1 cup granulated sugar
  • 2 large eggs
  • 1 teaspoon pure vanilla extract
  • 2 cups all-purpose flour
  • 1/2 cup unsweetened cocoa powder
  • 1/2 teaspoon baking soda
  • 1/2 teaspoon salt
  • 1 cup semisweet chocolate chips

Directions

  1. wist cookies apart and lay on a plate.
  2. Using a mini ice cream scoop or a small spoon, scoop a bit of soy ice cream or fro-yo onto the cream-filled side of each sandwich cookie. Replace the remaining cookies on top, and gently press down to form an ice cream sandwich.
  3. Transfer assembled ice cream sandwiches to the freezer and enjoy whenever the craving strikes!
Cookies & Cream Ice Cream Sandwiches

Estimated Nutrition Per Serving

  • Calories: 380
  • Total Fat: 20g
  • Saturated Fat: 12g
  • Trans Fat: 0g
  • Cholesterol: 80mg
  • Sodium: 190mg
  • Total Carbohydrates: 47g
  • Dietary Fiber: 3g
  • Sugars: 30g
  • Protein: 6g

Strawberry Oat Muffins

As much as it pains me to write this, strawberry season here in New England will soon come to an end. I’ve been hoarding containers of the organic red berries with the intention of using them in recipes… the problem is, I keep polishing them off before I have a chance to cook or bake with them (with the exception of my Strawberry Sauce, which was comprised of lackluster berries that necessitated culinary intervention).

Strawberry Oat Muffins

That being the indisputable fact of the matter, I purposefully bought twice as many strawberries on my last grocery shopping trip than I usually do in a concerted effort to reserve some for these muffins. I had bookmarked a recipe for oatmeal blueberry muffins (linked below) from Joy The Baker a while back, and it seemed like the perfect recipe to use as a basis for my strawberry muffins.

Strawberry Oat Muffins

I swapped half of the unsweetened applesauce for strawberry puree, which lent a lovely pink hue to the muffin batter. I opted for a modest amount of vanilla agave nectar; if you prefer a sweeter muffin, a few extra tablespoons should do the trick. As for the texture of these muffins, Joy nailed it with her recipe. The equal ratio of delicate whole wheat pastry flour to hearty oats combined with rich buttermilk, a touch of canola oil, and pureed fruit yields a soft and tender muffin.

Strawberry Oat Muffins

This is a great base muffin recipe upon which substitutions can be made. Strawberries not your summer fruit of choice? Swap in equal amounts of another berry. Or how about mango? Maybe stone fruit such as nectarines or peaches? Come autumn, you could replace the strawberry puree with canned pumpkin (if it’s readily available by then – store shelves around here are still bereft of my beloved squash) and swap in chopped apple for the diced strawberries. Perhaps all of the above!

Strawberry Oat Muffins
Name:Strawberry Oat Muffins
Cuisine:American
Prep Time:15 minutes
Cooking Time:20 minutes
Total Time:35 minutes
Servings:12 muffins
Yield:1 muffin per serving

Ingredients

  • 1 1/4 cups whole wheat pastry flour
  • 1 1/4 cups rolled oats
  • 1 tsp baking powder
  • 1/2 tsp baking soda
  • 1/4 tsp salt
  • 1 tsp cinnamon
  • 1/2 cup unsweetened applesauce
  • 1/2 cup strawberry puree (toss a few large hulled berries into a food processor and pulse until you have 1/2 cup of puree)
  • 1/2 cup low-fat buttermilk
  • 1/4 cup pure vanilla agave nectar, or other liquid sweetener of choice (honey, pure maple syrup, etc.)
  • 2 Tbsp canola oil
  • 1 tsp vanilla bean paste or pure vanilla extract
  • 1 large egg
  • 1 cup hulled & diced strawberries (measure after chopping)

Directions

  1. Preheat oven to 350 degrees F.
  2. Coat a 12 cup muffin pan with canola oil cooking spray or line with paper cups.
  3. In a medium bowl, combine the first 6 ingredients (through cinnamon), and set aside.
  4. In a large bowl, whisk together the next 7 ingredients (applesauce through egg).
  5. Add the dry ingredients into the wet, stirring until moistened. Gently fold in the diced strawberries.
  6. Use an ice cream scoop (for uniformly-sized muffins) to spoon batter into prepared muffin pan.
  7. Bake for 20 minutes, or until a toothpick inserted into the middle of a muffin comes out clean.

Estimated Nutrition Per Serving

  • Calories: 220 kcal
  • Total Fat: 10g
  • Saturated Fat: 6g
  • Trans Fat: 0g
  • Cholesterol: 55mg
  • Sodium: 250mg
  • Total Carbohydrates: 29g
  • Dietary Fiber: 2g
  • Sugars: 11g
  • Protein: 4g
  • Vitamin D: 1mcg (5% DV)
  • Calcium: 75mg (6% DV)
  • Iron: 2mg (10% DV)
  • Potassium: 135mg (3% DV)

Stuffed Dates Two Ways

0

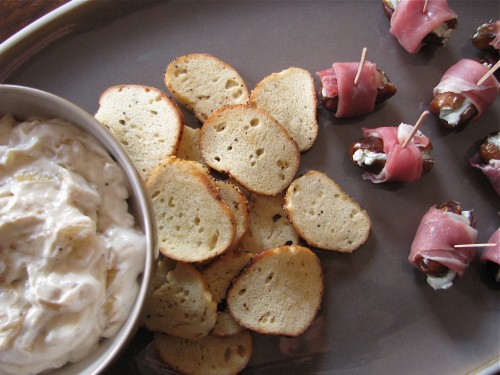
Stuffed dates are an easy but impressive hors d’oeuvre that transcend seasonality. Equally well-suited for an elegant winter dinner party or a backyard summer BBQ, these two-bite delicacies balance sweet, salty, and tangy flavors as well as chewy, creamy, and crunchy textures.

I decided to make two varieties of stuffed dates for a 4th of July get-together with our friends at their lake house. Half of the dates were stuffed with a goat cheese-neufchatel mixture and studded with whole toasted almonds:

Stuffed Dates Two Ways

…and the remaining dates were filled with a blue cheese-neufchatel blend and topped with toasted walnut pieces:

Stuffed Dates Two Ways

Both varieties of stuffed dates taste like sheer heaven. The mild neufchatel cream cheese helps to balance out the piquant flavors of the goat cheese and blue cheese, making the filling more pleasing to a range of palates. Lightly toasting the almonds and walnuts brings out their rich nuttiness, and the added crunch is a nice textural contrast to the soft dates and creamy cheese.

If you have yet to try Medjool dates, I urge you to seek them out at your grocery store. I buy them at Trader Joe’s, but they are also sold at Whole Foods and are becoming increasingly available at large chain grocery stores.

Stuffed Dates Two Ways
Name:Sweet and Nutty Stuffed Dates
CuisineFusion
Prep Time15 minutes
Cooking Time0 minutes (No cooking required)
Total Time15 minutes
Servings12 stuffed dates
YieldApproximately 6 servings

Ingredients

  • 14 large soft Medjool dates, sliced lengthwise halfway through & pitted
  • 1 oz goat cheese, at room temperature
  • 1 oz reduced fat blue cheese (such as Stella), at room temperature
  • 2 oz neufchatel, (1/3-less-fat cream cheese), divided, at room temperature
  • 14 whole almonds
  • about 2 Tbsp walnut pieces

Directions

Preheat toaster oven or conventional oven to 400 degrees F.

Spread the almond and walnuts onto a small baking sheet and toast until fragrant, about 2 minutes. Remove nuts from baking sheet and allow to cool.

In a small bowl, stir together goat cheese and 1 oz neufchatel until well combined. Using a piping bag or a small spoon, stuff 7 pitted dates with goat cheese mixture.

Gently press 2 almonds into each goat cheese-stuffed date.

In a separate small bowl, stir together the blue cheese and remaining 1 oz neufchatel until well combined. Using a piping bag or a small spoon, stuff the remaining 7 pitted dates with blue cheese mixture.

Gently press a few walnut pieces into each blue cheese-stuffed date.

If preparing stuffed dates a day in advance, refrigerate until a few hours prior to serving. Best when served at room temperature.

Stuffed Dates Two Ways

Estimated Nutrition Per Serving (Sweet Stuffed Dates)

  • Calories: 120 kcal
  • Carbohydrates: 22 g
  • Sugars: 20 g
  • Protein: 2 g
  • Fat: 4 g
  • Saturated Fat: 1.5 g
  • Fiber: 2 g
  • Sodium: 50 mg

Chipotle Shrimp Tacos with Avocado & Mango Salsa

0

Phew! It has been H-O-T here in Boston this week. I don’t know about you but when the temperature soars I have little interest in spending a prolonged amount of time over the stove or in front of the oven. Even though I could happily enjoy a bowl of fruit and yogurt for dinner on nights like these my desire to prepare a legitimate meal usually wins out over the heat-induced ennui.

Name:Chipotle Shrimp Tacos with Avocado & Mango Salsa
CuisineMexican
Prep Time20 minutes
Cooking Time5 minutes
Total Time25 minutes
Servings4
Yield8

One of the easiest and quickest meals I’ve made in a while, these Chipotle Shrimp Tacos with Avocado & Mango salsa were on the table in 10 minutes… including prep time. I tossed the already peeled & deveined shrimp with a drizzle of olive oil, a squeeze of lime juice, a touch of salt, and a generous sprinkling of chipotle chili powder before briefly sautéing them.

The salsa came together in an equally short amount of time, and tasted so good by itself that I had trouble keeping my spoon out of it. I’m glad I restrained myself from scarfing down the whole bowlful because the pairing of the sweet mango & creamy avocado salsa with the spicy chipotle shrimp was nothing short of delicious.

To complete this light summer-on-a-plate meal, I made a corn salad that mimicked the flavors in the salsa. Red onion, cilantro, lime juice, and minced jalapeno pepper were tossed with corn, olive oil, and a bit of ground cumin. Yep, I should’ve made twice as much so I could have enjoyed another serving the following day for lunch.

Simplistic. Fresh. Healthy. Colorful. Flavorful. In other words, perfect after a day of near triple digit temperatures in the city!

Mango Salsa

Chipotle Shrimp Tacos with Avocado & Mango Salsa

serves 4

Ingredients for the tacos

  • 1 lb peeled & deveined shrimp
  • 1 Tbsp extra virgin olive oil
  • juice from 1 lime
  • 2 tsp chipotle chili powder
  • 1 tsp Kosher salt
  • 8 taco-sized flour or corn tortillas

Ingredients for the Avocado & Mango Salsa

  • 2 ripe mangos, peeled, pitted, & finely chopped
  • 1 ripe but firm avocado, peeled, pitted, & finely chopped
  • 2 Tbsp diced red onion
  • 2 Tbsp chopped cilantro
  • 1 jalapeno pepper, seeded and minced
  • juice from 1 lime
  • Kosher salt, to taste

Accoutrements:

  • plain Greek yogurt, optional
  • lime wedges, optional
  • hot sauce, optional

Directions for the salsa:

  1. Combine mango through salt in a small bowl. Stir to mix and set aside. If preparing a few hours in advance refrigerate until ready to serve.

Directions for the tacos:

  • Combine shrimp through salt in a medium bowl. Toss to coat shrimp.
  • Heat a non-stick skillet over medium-high heat. Add coated shrimp to hot skillet and cook until opaque and curled about 1-2 minutes per side.
  • Meanwhile place the tortillas in between two pieces of slightly damp paper towel and microwave for 30-45 seconds or until warm.
  • Spoon cooked shrimp into warmed tortillas and serve with salsa and accoutrements.

Nutrition Facts (Per Serving)

Calories:280 calories per serving.

Protein:20 grams per serving.

Carbohydrates:27 grams per serving.

Dietary Fiber:5 grams per serving.

Sugars:8 grams per serving.

Fat:11 grams per serving.

Saturated Fat:2 grams per serving.

Cholesterol:175 milligrams per serving.

Sodium:350 milligrams per serving.

Please note that these are rough estimates and can vary depending on the specific brands and quantities of ingredients used. Additionally, these estimates do not include any optional toppings or additional ingredients that individuals may choose to add to their tacos.