Home Blog Page 119

Trail Mix Granola Bars & Saratoga Peanut Butter Company

0

If you read my post on Flourless White Chocolate Peanut Butter Cookies, you are well aware of my loyalty to the Peanut Butter and Co. product line. I’ve never tried a peanut butter from that company that I didn’t absolutely love, so it hadn’t crossed my mind to seek out other brands. That is, until a couple of weeks ago when I discovered Saratoga Peanut Butter Company. My interest was immediately piqued upon browsing through the wide variety of delicious-sounding peanut butters on their website. Here’s a sampling: Blizzard Butter, a creamy white chocolate peanut butter; Chillin’ Chocolate, a peanut butter infused with dark chocolate; New York Maple made with local syrup; Monkey Boy featuring bananas and raisins; and Adirondack Jack, a peanut-and-almond butter hybrid studded with dried cranberries, flaxseeds & sunflower seeds, and sweetened with honey & cinnamon.

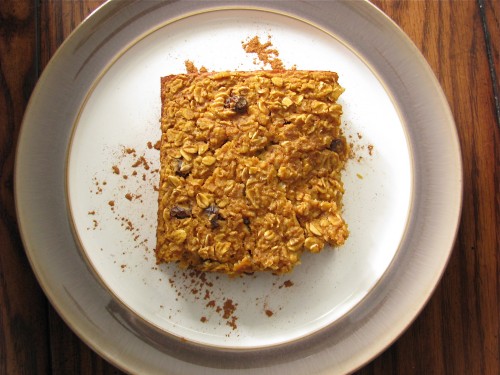
Trail Mix Granola Bars

As if those descriptions weren’t enough to get me excited about Saratoga Peanut Butter, the background story of the company certainly was.  The company commenced in the kitchen of owner Jessica Arceri, a single mother who longed to feed her son healthy peanut butter. In Jessica’s words, “We make all the pb in small batches on a weekly basis to ensure freshness and quality.  I do not believe in adding any unnecessary ingredients and keep all the recipes simple and healthy…and delicious of course!”

Trail Mix Granola Bars

I was fortunate enough to receive a package from Jessica the other day, which I immediately tore into and found a jar each of the previously mentioned Blizzard Butter and Adirondack Jack. I wasted no time sampling both nut butters, both of which lived up to my high expectations. The white chocolate Blizzard Butter is similar to – but a smidgen less sweet than – my beloved PB & Co. White Chocolate Wonderful (per 2 Tbsp serving, the Saratoga version has 4 grams of sugars, whereas the PB & Co. version has 7 grams).  Blizzard Butter is a tad bit grainier than White Chocolate Wonderful, which gives it more of a homemade consistency. Look for a blondie recipe featuring this delectable peanut butter on Healthy Food For Living soon!

Trail Mix Granola Bars

Ok, now we’re finally getting to those Trail Mix Granola Bars you’re probably wondering about. Upon tasting the Adirondack Jack I instantly thought of trail mix, perhaps because the name reminded me of mountain hiking or maybe because some of my favorite trail mix (or as my pseudo-ex-hippie parents would call it, gorp) ingredients made their way into this nutrient-packed nut butter. I’ve been meaning to make another version of my Cherries & Chocolate Peanut Butter Granola Bars, and it didn’t take me long to decide on this trail mix version.

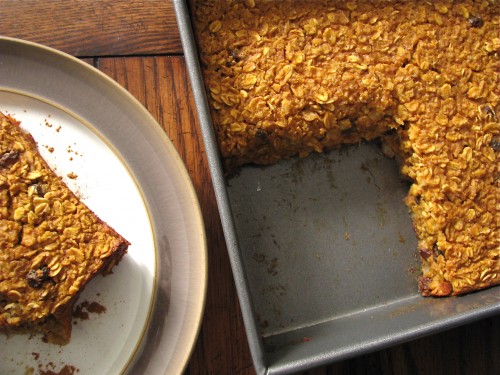
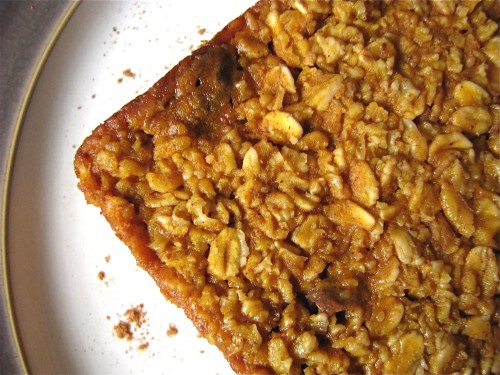
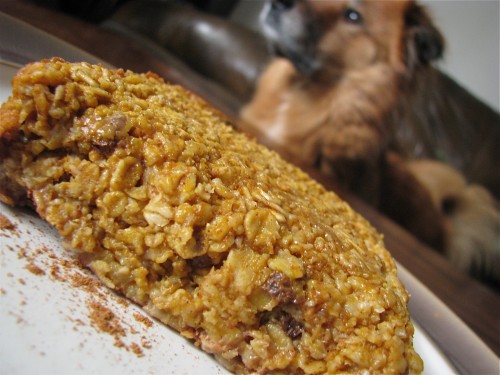
Soft and chewy, these granola bars are a great on-the-go snack. I’ve also been enjoying them crumbled on top of Greek yogurt or cold cereal. As is noted following the recipe, I suggest a) chopping the dried fruit and b) baking the bars in an 8 x 8 inch square pan in order to yield granola bars that hold together well. The bars photographed here were a bit crumbly, but that could easily be remedied by following the noted tips.

Trail Mix Granola Bars
NameGluten-Free Strawberry Shortcake Recipe
CuisineFusion
Prep Time20 minutes
Cooking Time20 minutes
Total Time40 minutes
Servings6 servings
Yield6 individual shortcakes

Ingredients

  • canola oil cooking spray
  • 1/2 cup unsweetened applesauce
  • 2 Tbsp brown rice syrup (alternately, you could use the equivalent amount of honey, agave nectar, or  pure maple syrup)
  • 1/4 cup natural nut butter, (I used Saratoga Peanut Butter Company Adirondack Jack), at room temperature
  • 1 tsp vanilla extract
  • 1 cup old fashioned rolled oats
  • 1 cup puffed brown rice cereal
  • 1/4 tsp salt
  • 1 tsp ground cinnamon
  • 1/2 cup unsweetened & unsulfured dried fruit, such as cherries or cranberries*
  • 1/2 cup chopped nuts and/or seeds, (I used 1/4 cup chopped almonds + 1/4 cup sunflower seeds)

Directions

Preheat oven to 350 degrees F.

Line an 8 x 8 inch square baking pan (or a 9 x 5 inch loaf pan for thicker bars)** with parchment paper so the sides hang over the edge of the pan. Lightly coat with canola oil cooking spray; set aside.

In a medium bowl, combine the applesauce, liquid sweetener of your choice, nut butter, and vanilla extract; stir until the mixture is completely homogenous.

Fold in the rolled oats, puffed rice cereal, salt, cinnamon, dried fruit, and nuts and/or seeds. Spoon batter into the prepared pan, spreading into an even layer, and bake until lightly golden brown, about 20 minutes (add about 5 additional minutes of baking time if you’re using a loaf pan).

Allow to cool in pan for about 10 minutes, then remove by picking up the sides of the parchment paper. Allow to cool completely on a wire rack before cutting into bars.

*If using dried fruit that comes in larger pieces, such as cherries, I suggest roughly chopping them before adding to the batter.

**Having made two batches of these granola bars, one in an 8 x 8 inch pan and the other in a 9 x 5 inch loaf pan, I can say that the bars hold together better when baked in the 8 x 8 square pan. Although I like the traditional rectangular shape of the bars from the 9 x 5 loaf pan, their thickness made them a bit more crumbly.

Estimated Nutrition Per Serving

  • Calories: 320 kcal
  • Carbohydrates: 45g
  • Protein: 4g
  • Fat: 14g
  • Saturated Fat: 7g
  • Cholesterol: 35mg
  • Sodium: 220mg
  • Fiber: 2g
  • Sugars: 20g

Caramelized Red Onion, Blue Cheese, and Nectarine Pizza

0

Oh, and fresh mozzarella. But hey, I had to cut the title off at some point – it’s long enough as is.

I know what you may be thinking. Fruit? On a pizza? What? Let me just stop you right there. Indulge me for a moment and think about how fantastic fruit and cheese taste together: apples & cheddar, peaches & ricotta, dried figs & goat cheese, pears & blue cheese, dried cranberries & brie, grapes & gouda… you get the idea. So I ask you, why not take that delicious pairing a step further and make a fruit and cheese pizza?!

Nectarine Pizza

If you are still not convinced that fruit belongs on a pizza, then rest assured that this recipe is still incredibly tasty minus the nectarines. I enjoyed a few slices, one without the nectarines and two with the fruit, and both versions are delicious. That being said, I encourage you to step outside of your gustatory safe zone and go a little wild with a slice of this pizza in all of its sweet & juicy fruited glory.

Name:Caramelized Red Onion, Blue Cheese, and Nectarine Pizza
Cuisine:Italian-American
Prep Time:20 minutes
Cooking Time:40 minutes
Total Time:1 hour
Servings:4
Yield:1 large pizza
Nectarine Pizza

Caramelized Red Onion, Blue Cheese, and Nectarine Pizza

Ingredients:

  • homemade or store-bought dough for 1 pizza
  • extra virgin olive oil
  • Kosher salt
  • 1 medium red onion, peeled & thinly sliced
  • 1 tsp brown sugar
  • 8 oz fresh mozzarella, patted dry to remove excess moisture and thinly sliced using a serrated knife
  • 1/2 cup crumbled reduced fat blue cheese (such as Stella)
  • 2 nectarines, preferably organic, washed, pitted, and thinly sliced

Directions:

  1. Bring the pizza dough to room temperature by placing on the counter, covered, for at least 1-2 hours prior to rolling out.
  2. Preheat oven to 450 degrees F.
  3. Meanwhile, heat a drizzle of olive oil in a skillet over medium heat. Add in sliced onions and cook, stirring occasionally, until translucent and softened, about 10 minutes. Reduce stove heat to low. Add in the brown sugar and a pinch of salt and continue to cook until onions are caramelized, about 20 minutes, stirring occasionally.
  4. Lightly flour a large clean work surface, and roll the dough out to about 1/4 inch thickness using a rolling pin. Carefully transfer the rolled-out dough to a non-rimmed baking sheet. Pierce the dough lightly with a fork 7-8 times and place in the oven. Pre-bake the dough for 2 minutes.
  5. Remove the baking sheet from the oven, flip the pizza crust over, and drizzle with a bit of olive oil and a light sprinkling of salt. Top with the mozzarella slices, caramelized onions, and blue cheese crumbles.
  6. Bake assembled pizza on the baking sheet for 8 minutes. Remove the pizza from the oven and top with nectarine slices. Carefully transfer the pizza directly onto the oven rack, and cook 1-2 minutes, or until the bottom of the pizza crust is golden brown and crisp.
  7. Allow the cooked pizza to cool for a couple of minutes before slicing and serving.

Estimated Nutrition Per Serving:

  • Calories: 320
  • Total Fat: 13g
    • Saturated Fat: 6g
    • Trans Fat: 0g
  • Cholesterol: 22mg
  • Sodium: 620mg
  • Total Carbohydrates: 43g
    • Dietary Fiber: 3g
    • Sugars: 12g
  • Protein: 9g

White Chocolate, Peanut Butter, & Banana Blondies

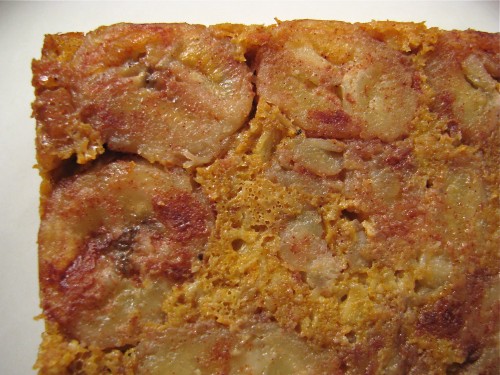
As you might recall from this post, I promised you a recipe for blondies using Saratoga Peanut Butter Company Blizzard [white chocolate] Butter. Well, here it is!

White Chocolate

These cakey blondies deliciously combine the flavors of white chocolate, peanut butter, and banana.  The healthy fat in the peanut butter – along with the moisture from the mashed bananas – negates the need for oil or butter, and the inherent sweetness of the banana allows for using only a minimal amount of added sweetener.  The addition of whole wheat pastry flour yields a light & fluffy texture while contributing the healthy goodness of whole grains.

White Chocolate

If those aren’t reasons enough to try these blondies, I’m not sure what is!

White Chocolate
Name:White Chocolate, Peanut Butter, & Banana Blondies
Cuisine:Fusion
Prep Time:15 minutes
Cooking Time:30 minutes
Total Time:45 minutes
Servings:16
Yield:1 8×8-inch pan

Ingredients

  • 1/4 cup white chocolate peanut butter (I used Saratoga Peanut Butter Company Blizzard Butter)
  • 2 Tbsp unsweetened applesauce
  • 1/4 cup Sucanat or brown sugar
  • 1 egg
  • 1 cup mashed overripe banana (about 3 large)
  • 1/2 tsp pure vanilla extract
  • 1 cup whole wheat pastry flour
  • 1/2 tsp baking soda
  • 1/4 tsp salt
  • 1/2 – 3/4 cup all-natural white chocolate chips, such as Sunspire

Directions

  1. Preheat oven to 350 degrees F. Line an 8-inch square baking pan with parchment paper so the edges hang over the sides of the pan.
  2. Using an electric mixer, cream together the peanut butter, applesauce, and Sucanat. Add in the egg and beat until combined. Add in the mashed banana and vanilla; beat until well combined.
  3. In a separate bowl, whisk together the flour, baking soda, and salt.
  4. Stir white chocolate chips into the dry ingredients (this step prevents the chips from sinking into the batter).
  5. Gently fold the dry ingredients into the wet until just moistened.
  6. Spoon batter into prepared baking pan and bake for 25-30 minutes, or until a toothpick inserted into the center comes out clean.
  7. Remove pan from oven and let cool on a wire rack. Remove the blondies by picking up the edges of the parchment paper and let cool completely; cut into squares and serve.

Estimated Nutrition Per Serving

  • Calories: 245 kcal
  • Total Fat: 14g
  • Saturated Fat: 6g
  • Trans Fat: 0g
  • Cholesterol: 40mg
  • Sodium: 115mg
  • Total Carbohydrates: 26g
  • Dietary Fiber: 1g
  • Sugars: 18g
  • Protein: 4g

Chicken Cobb Salad with Blue Cheese Buttermilk Dressing

0

Nothin’ new & creative this time, folks… just my version of a classic entree salad.  If prepared with a high ratio of fresh produce and lean protein to flavorful but high fat extras, a cobb salad can be a healthy and filling meal. In other words, mound your plate high with plenty of crisp romaine lettuce, sweet grape tomatoes and juicy poached chicken, and top it with a modest serving of creamy avocado, tender hard-boiled egg, a bit of crisp drained bacon if desired, and a lightened homemade blue cheese buttermilk dressing.

There’s so much to love in a cobb salad: the variety of flavors and textures, the spectrum of vibrant colors, and of course the plethora of nutrients from so many fresh & healthy ingredients.

Chicken Cobb Salad
Chicken Cobb Salad with Blue Cheese Buttermilk Dressing
NameChicken Cobb Salad with Blue Cheese Buttermilk Dressing
CuisineAmerican
Prep Time20 minutes
Cooking Time15 minutes
Total Time35 minutes
Servings4 servings
Yield1 salad per serving

Ingredients

  • 2 boneless, skinless chicken breasts
  • Salt and black pepper, to taste
  • 1 tablespoon olive oil
  • 6 cups mixed salad greens (lettuce, spinach, arugula)
  • 1 cup cherry tomatoes, halved
  • 1 cup cucumber, sliced
  • 1 cup red bell pepper, diced
  • 1 cup boiled eggs, sliced
  • 1 cup crispy bacon, crumbled
  • 1 avocado, diced
  • ½ cup blue cheese, crumbled
  • ¼ cup green onions, chopped
  • ¼ cup fresh parsley, chopped

Instructions

Prepare the Chicken
a. Preheat the grill or a stovetop grill pan over medium-high heat. b. Season the chicken breasts with salt, black pepper, and olive oil. c. Grill the chicken breasts for about 6-7 minutes on each side or until fully cooked. Allow them to rest for a few minutes, then slice into strips.

Make the Blue Cheese Buttermilk Dressing
a. In a medium bowl, combine crumbled blue cheese, buttermilk, mayonnaise, sour cream, lemon juice, minced garlic, salt, and black pepper. b. Whisk the ingredients together until smooth and creamy. Adjust seasoning to taste.

Assemble the Salad
a. In a large salad bowl, arrange the mixed greens as the base. b. Arrange the grilled chicken strips, cherry tomatoes, cucumber, red bell pepper, boiled eggs, crispy bacon, avocado, and blue cheese crumbles over the greens in neat sections. c. Drizzle the prepared Blue Cheese Buttermilk Dressing over the salad.

Garnish and Serve
a. Sprinkle chopped green onions and fresh parsley over the salad for a burst of color and flavor. b. Toss the salad gently just before serving to mix the flavors and dressing evenly. c. Serve immediately and enjoy this delightful Chicken Cobb Salad with Blue Cheese Buttermilk Dressing!

Estimated Nutrition Per Serving:

  • Calories: 550 kcal
  • Protein: 32g
  • Carbohydrates: 17g
  • Fat: 40g
  • Fiber: 6g
  • Sugar: 6g
  • Sodium: 1200mg

Please note that the nutrition information is estimated and may vary based on the specific ingredients and portion sizes used. Always refer to the actual product packaging or consult a nutritionist for precise nutritional information.

Another great characteristic of this salad is that it is easily customizable to suit each individuals’ preferences. For instance, John can’t stand hard-boiled eggs and I’m not a big bacon fan, so I only used 1 egg and 2 slices of bacon in total when I prepared this salad. As the recipe is written, there are enough eggs and bacon for both servings, but you can certainly change the amounts according to what you and your dining partner prefer.

Chicken Cobb Salad

Chicken Cobb Salad with Blue Cheese Buttermilk Dressing

Serves 2

Ingredients for the salad:

  • 4-6 cups chopped romaine lettuce or mixed greens, preferably organic
  • 1 large cooked organic chicken breast, (I poached my chicken)*, cooled, and chopped
  • 1 cup halved grape tomatoes, preferably organic
  • 1/2 large avocado, diced
  • 2 peeled & chopped hard-boiled eggs**
  • 4 slices cooked & drained center-cut bacon, chopped
  • Blue Cheese Buttermilk Dressing***

Directions for the salad:

  1. Lay chopped lettuce out onto two plates.
  2. In side-by-side rows, divide the chicken, tomatoes, avocado, eggs, and bacon evenly between the two beds of lettuce.
  3. Either drizzle dressing over the top, or serve alongside the salad.

*Directions for the poached chicken:

  1. Bring a small pot of cold water to a boil over high heat. Slide chicken into the hot water, reduce heat to low, and cook for 15-20 minutes, depending on size of chicken breast.
  2. Remove cooked chicken breast from water, let cool a few minutes, and cut into bite-sized pieces.
  3. Chill until ready to use.

**Directions for the hard-boiled eggs:

  1. Place eggs into a small pot and completely cover eggs with cold water. Bring water to a boil over high heat.
  2. As soon as water comes to a rolling boil, cover pot tightly and remove from heat. Let eggs sit in hot water, covered, for 15 minutes.
  3. Drain hot water from pot and gently shake to lightly crack the shells. Cover cooked eggs with cold water and let sit until cool, a few minutes.
  4. Dry eggs, peel, and refrigerate until ready to use.

***Ingredients & Directions for Blue Cheese Buttermilk Dressing:

yields about 1 1/2 cups, more than you will need for the Chicken Cobb Salad

  • 3/4 cup low-fat buttermilk
  • 3/4 cup 2% plain Greek yogurt
  • 1 Tbsp white vinegar
  • 3/4 cup crumbled reduced-fat blue cheese
  • Kosher salt & freshly ground black pepper, to taste
  1. In a bowl, whisk together the buttermilk, yogurt, and vinegar until smooth.
  2. Stir in the crumbled blue cheese and season to taste with salt and pepper.
  3. Refrigerate until ready to use.
  4. Keep leftover dressing in a sealed container in the refrigerator for up to a week.

Maple Date Granola

I so much enjoyed my Pumpkin Spice Granola, that I had to make another batch of homemade whole-grain goodness. I switched up the ingredients a bit, opting this time for the simple – but delectable – pairing of maple and dates. Toasted walnuts or pecans would be a delicious addition, if you so choose.

Although not as prominent in the culinary world as vanilla extract, maple extract is a fantastic ingredient. The viscous extract adds an unparalleled aroma and flavor to foods, and is absolutely necessary for this granola recipe. Frontier makes an all-natural, alcohol-free maple extract that it readily available in most natural-foods stores.

I once again borrowed Nicole’s idea of subbing in applesauce for oil, which does a surprisingly great job of creating a crunchy granola.  This slightly sweetened Maple Date Granola is the perfect topping for oatmeal, cereal, or yogurt, but my favorite way to enjoy it just might be straight out-of-hand.

Maple Date Granola
Name:Maple Date Granola
Cuisine:Fusion
Prep Time:10 minutes
Cooking Time:30 minutes
Total Time:40 minutes
Servings:8 servings
Yield:4 cups

Ingredients

  • 3 cups rolled oats
  • 1 tsp ground cinnamon
  • 1/4 tsp salt
  • 1/4 cup + 2 Tbsp unsweetened applesauce
  • 1/4 cup pure maple syrup
  • 1/4 tsp vanilla extract
  • 1/4 tsp maple extract
  • 1 cup pitted & chopped Medjool dates (about 8 plump dates)

Directions

  1. Preheat oven to 325*F. Line a cookie sheet with parchment paper.
  2. Meaure the oats into a large bowl, set aside.
  3. In a medium bowl, whisk together the cinnamon, salt, applesauce, maple syrup, and both extracts. Whisk until very smooth.
  4. Pour wet ingredients over oats and stir until the oats are evenly coated. Spread mixture on the prepared cookie sheet in an even layer.
  5. Bake for 30 minutes. Remove sheet from the oven, stir the granola, and bake for an additional 10-15 minutes, or until the granola is golden brown and crisp.
  6. Remove granola from the oven, toss with chopped dates, and cool completely. Store in an airtight container.
Maple Date Granola

Estimated Nutrition Per Serving

  • Calories: 300 calories per serving
  • Total Fat: 15g
  • Saturated Fat: About 5-7g
  • Cholesterol: 0mg
  • Sodium: 100mg
  • Total Carbohydrates: 35g
  • Dietary Fiber: 5g
  • Sugars:15g
  • Protein: 7g

Curried Chicken Salad Sandwich

0

Did you know that August is National Sandwich Month?

Curried Chicken Salad Sandwich

Well, what better month to feature the the two sandwich recreations I made, both of which were inspired by the awesome Mendocino Farms sandwich shop John and I visited twice while in L.A.

Name:Curried Chicken Salad Sandwich
Cuisine:Fusion
Prep Time:15 minutes
Cooking Time:0 minutes (no cooking required)
Total Time:15 minutes
Servings:4 sandwiches
Yield:Approximately 4 servings
Curried Chicken Salad Sandwich

The first copycat sandwich I made was this Curried Chicken Salad Sandwich.

Curried Chicken Salad Sandwich

Tender chunks of poached chicken are folded into a creamy yogurt dressing, which is spiced up with mango chutney and curry powder. Tart dried cherries and crisp diced apples are added in, and then the salad gets sandwiched between two slices of fruit-and-nut bread.

I especially love the addition of diced apple in the chicken salad, given my aversion to celery (I know… weird, right?). The crisp apples replace the crunch of the celery, and the bit of sweetness is a nice complement to the sweet/savory curry-yogurt dressing.

Happy National Sandwich Month!

Curried Chicken Salad Sandwich

Curried Chicken Salad Sandwich

Printer-Friendly Recipe

yield: 1 sandwich

Ingredients:

  • 4 oz skinless, boneless chicken breast (about 1/2 of a medium-sized breast)
  • enough low-sodium chicken broth to cover the chicken breast in a small saucepan, about 2-3 cups
  • 1/4 cup 2% plain Greek yogurt
  • 2 tsp mango chutney
  • 1/4 tsp curry powder
  • pinch of Kosher salt
  • 2 Tbsp chopped unsweetened & unsulfured dried sweet cherries
  • 1/4 cup diced Granny Smith apple
  • romaine lettuce
  • 2 slices of your favorite sandwich bread with nuts & fruit (I used When Pigs Fly Harvest Bread, with apples, raisins, walnuts, and seeds)

Directions:

  1. Heat the chicken broth in a small saucepan over medium-high heat until boiling. Slide chicken breast in, partially cover saucepan with a lid, and reduce heat to a simmer. Poach for 15 minutes or until cooked through. Remove chicken from the broth and let cool on a cutting board. When cool, chop chicken into bite-sized pieces.
  2. Meanwhile, combine yogurt, mango chutney, curry powder, salt, cherries, and apples in a small bowl. Stir to combine and coat the fruit. Stir in the cooled chopped chicken. Taste, and add salt if desired. Cover and chill in the fridge for at least 1 hour.
  3. Layer the lettuce and chicken salad onto a slice of bread, and top with remaining piece of bread.

Nutritional Information (this will vary depending on what kind of bread you use):

475.2 calories, 4.8 grams fat, 1.1 gram saturated fat, 3.8 grams fiber, 24.6 grams sugar, 37.3 grams protein.

Estimated Nutrition Per Serving:

Calories: Approximately 400 calories per serving.

Protein: About 20 grams.

Carbohydrates: Approximately 35 grams.

Fat: About 22 grams.

Fiber: Around 3 grams.

Sugars: Approximately 12 grams.

Sodium: About 500 milligrams.

Coconut Carrot Cake Granola

Since making this most recent batch of granola, (other recipes I’ve posted are Pumpkin Spice Granola and Maple Date Granola), I’ve been repeatedly asking myself why I don’t make homemade granola more often. Preparing this breakfast staple at home allows you not only to control the quality of ingredients, but also to be creative with flavor combinations.

When I stumbled upon Allie’s recipe for Carrot Cake Granola on her blog Live Laugh Eat, it was nearly impossible to get out of my head the idea of making my own version. Although my recipe is quite different than Allie’s, I must give her credit for providing the inspiration behind my Coconut Carrot Cake Granola.

Coconut Carrot Cake Granola

While brainstorming what ingredients to include in this recipe, I focused on a few of the common add-ins for carrot cake. Although there are plenty of purists who would argue that extraneous additions only sully the tender cake, I enjoy the underlying rich flavor of coconut as well as the crunch of buttery pecans and the chewiness of sweet raisins. Even though I decided to omit these ingredients from my Carrot Cake Pancakes, I think they are essential for the granola.

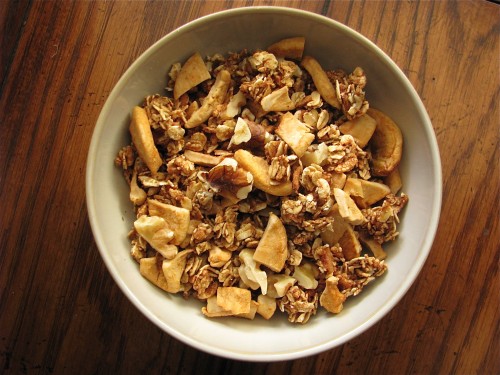
The aroma of the granola while baking could easily have fooled our neighbors into thinking I had a cake in the oven. The warm spices mingled with the tropical coconut and nutty pecans to create an irresistible fragrance that perfumed our whole apartment. My first taste test took the form of a handful straight from the oven, but soon thereafter I sat down to fully enjoy a serving accompanied by coconut extract-infused Greek yogurt and banana slices.  Although the grated carrot was visibly unidentifiable amidst the golden brown clusters, the traditional carrot cake flavors were unmistakable.

This is the perfect breakfast for a beautiful spring morning!

Name:Coconut Carrot Cake Granola
Cuisine:Fusion
Prep Time:15 minutes
Cooking Time:35 minutes
Total Time:45 minutes
Servings:8 servings
Yield:4 cups

Ingredients

  • 1 1/2 cups rolled oats
  • 1 1/2 cups puffed brown rice cereal
  • 1/4 cup unsweetened applesauce
  • 1/2 cup finely grated carrots (a microplane grater works best here)
  • 1/4 cup agave nectar
  • 1/2 tsp coconut extract
  • 1 tsp ground cinnamon
  • 1/2 tsp ground ginger
  • 1/4 tsp ground nutmeg
  • 1/4 tsp salt
  • 1/2 cup chopped pecans
  • 1/2 cup unsweetened flaked coconut
  • 1/2 cup raisins

Directions

  1. Preheat oven to 325 degrees F. Line a cookie sheet with parchment paper.
  2. Measure the oats and puffed rice into a large bowl, set aside.
  3. In a medium bowl, whisk together the applesauce, grated carrot, agave nectar, coconut extract, cinnamon, ginger, nutmeg, and salt. Whisk until very smooth.
  4. Pour wet ingredients over cereal and stir until evenly coated. Spread mixture on the prepared cookie sheet in an even layer.
  5. Bake for 30 minutes. Remove sheet from the oven, stir the nuts and flaked coconut into the granola, and bake for an additional 10-15 minutes, or until the granola is golden brown and crisp.
  6. Remove granola from the oven, toss with raisins, and cool completely. Store in an airtight container.

Estimated Nutrition Per Serving

  • Calories: 220
  • Total Fat: 12g
  • Saturated Fat: 7g
  • Trans Fat: 0g
  • Cholesterol: 0mg
  • Sodium: 50mg
  • Total Carbohydrates: 25g
  • Dietary Fiber: 4g
  • Sugars: 10g
  • Protein: 4g

Pumpkin Spice Granola

*Note: this is an updated post from 12/9/09. I have slightly changed the initial recipe that I posted, and updated the photos, as well. Enjoy!

Pumpkin is inarguably one of the quintessential flavors of Autumn. Most people reserve pumpkin treats for the months of October and November. I, on the other hand, enjoy the squash in its canned pureed form well beyond the fall holidays. Baked into muffins and breads, stirred into yogurt and smoothies, cooked into oatmeal and risotto, pumpkin puree is a staple in my year-round diet.

Pumpkin Spice Granola

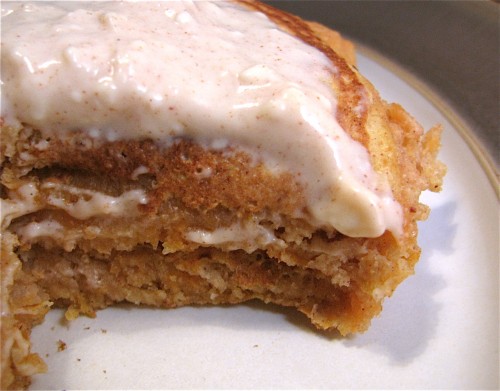
I have so many pumpkin-centric recipes saved that I should devote a separate folder, (on my computer and in my recipe binder), just for this ingredient. One of these recipes is Pumpkin Spice Granola. I don’t know why it took me so long to make this granola, but I am glad I finally got around to it! Less sweet and lower in fat than my favorite cereal-topper, this granola sill manages to give Nature’s Path Pumpkin Flax Plus Granola a run for its money.

Pumpkin Spice Granola

My modifications to the original recipe include halving the recipe and cutting down a bit on the brown sugar. I opted to include walnuts, pumpkin seeds, golden raisins, and regular raisins to the mix, but any combination of nuts and dried fruit would be delicious.

Pumpkin Spice Granola

The spiced granola is surprisingly crunchy considering the lack of butter or oil in the recipe. I love the crunch factor, but if you prefer a chewier granola, simply bake the mixture for less time.

Pumpkin Spice Granola
Name:Pumpkin Spice Granola
Cuisine:American
Prep Time:15 minutes
Cooking Time:30 minutes
Total Time:45 minutes
Servings:12 servings
Yield:6 cups

Ingredients

  • 1 1/2 cups rolled oats
  • 1 1/2 cups puffed rice cereal
  • 1 tsp pumpkin pie spice
  • 1/4 tsp salt
  • 1/4 cup light brown sugar
  • 1/4 cup pumpkin puree
  • 2 Tbsp unsweetened applesauce
  • 2 Tbsp pure maple syrup
  • 1/2 tsp vanilla extract
  • 3/4 cup chopped nuts and/or seeds (such as pecans, walnuts, and/or pumpkin seeds)
  • 1/2 cup dried fruit (such as unsulfured dried cranberries, cherries, or raisins)

Directions

  1. Preheat oven to 325 degrees F. Line a cookie sheet with parchment paper or a silicone baking mat.
  2. Measure the oats & rice cereal into a large bowl, set aside.
  3. In a medium bowl, whisk together the pumpkin pie spice, salt, brown sugar, pumpkin puree, applesauce, maple syrup, and vanilla extract. Whisk until very smooth.
  4. Pour wet ingredients over dry and stir until the oats & rice cereal are evenly coated. Spread mixture on the prepared cookie sheet in an even layer.
  5. Bake for 20 minutes. Remove sheet from the oven, stir the nuts & seeds into the granola, and bake for an additional 10-15 minutes, or until the granola is golden brown and crisp.
  6. Remove granola from the oven, toss with dried fruit, and cool completely. Store in an airtight container.

Estimated Nutrition Per Serving

  • Calories: 215 kcal
  • Total Fat: 10g
  • Saturated Fat: 2g
  • Trans Fat: 0g
  • Cholesterol: 0mg
  • Sodium: 102mg
  • Total Carbohydrates: 28g
  • Dietary Fiber: 4g
  • Sugars: 12g
  • Protein: 5g

Crispy Baked Chicken Tenders

0

Sure, chicken tenders are typically reserved for the kid’s menu at restaurants, but there’s no reason we adults can’t enjoy them as well.

There’s also no reason why you can’t make a perfectly healthy baked version at home.

Chicken Tenders

Chicken breasts are simply sliced into long strips, soaked in buttermilk, and then run through a three-step breading process before being baked to crispy perfection.

Seriously, the hardest aspect of this recipe is finding room in your my overcrowded fridge to store the buttermilk-soaked chicken overnight.

Name:Gluten-Free Strawberry Shortcake Recipe
Cuisine:Fusion
Prep Time:20 minutes
Cooking Time:20 minutes
Total Time:40 minutes
Servings:8 servings
Yield:8 individual shortcakes
Chicken Tenders

The tiny lightless refrigerator that came with our rented apartment seems to be endlessly packed to the brim.

I blame a nasty little habit called food blogging.

Chicken Tenders

I digress.

Chicken Tenders

When is the last time you bit into a warm piece of succulent chicken enveloped in a crispy crust?

Chicken Tenders

If you can’t remember, then it’s time to make these chicken tenders!

Chicken Tenders

I think the key to fantastic breaded chicken (or pork, or tofu, or fish) is homemade breadcrumbs.

Please tell me you don’t throw away old bread. If you do, let this post be the catalyst that changes your ways. Toss leftover bread (any kind!) into a food processor, pulse until crumbs form, then toast in the oven until crunchy… and voila! Homemade panko breadcrumbs. I’ve fallen into the habit of keeping a stash in the fridge, and you can mark my words that I won’t ever use store-bought breadcrumbs again.

Chicken Tenders

Even if I haven’t compelled you to make your own breadcrumbs, I bet the photo above will convince you make these chicken tenders.

Chicken Tenders

Juicy chicken + a crisp coating + condiment(s) of your choice = a  healthy meal that you don’t have to be six years old to enjoy.

Chicken Tenders

Crispy Baked Chicken Tenders

Name:Gluten-Free Strawberry Shortcake Recipe
Cuisine:Fusion
Prep Time:20 minutes
Cooking Time:20 minutes
Total Time:40 minutes
Servings:8 servings
Yield:8 individual shortcakes

Ingredients for Crispy Chicken Tenders

  • 2 medium/large-sized chicken breasts, (about 1/2 – 3/4 lb total) preferably organic, each cut lengthwise into three or four long pieces
  • 2 cups low fat buttermilk
  • 1 cup  flour (I used whole wheat pastry)
  • 1 cup whole grain flaked cereal, such as Nature’s Path Organic Heritage Heirloom Whole Grains, pulsed in a food processor until crumbs form (alternately, you can place the cereal in a plastic bag and use a rolling pin to smash into crumbs)
  • 1 cup homemade whole wheat breadcrumbs, recipe follows* (alternately, you could use 1 cup whole wheat panko breadcrumbs)
  • 1 egg, whisked
  • Kosher salt and freshly ground black pepper
  • olive oil cooking spray (I used a misto)

Homemade Whole Wheat Breadcrumbs

  1. Preheat oven to 400°F.
  2. Pulse coarsely torn leftover whole wheat bread (I’ve successfully used sandwich bread, baguettes, and burger buns) in a food processor until crumbs form.
  3. Scatter breadcrumbs in an even layer on a rimmed baking sheet. Bake for 5-7 minutes, or until crumbs begin to turn golden. Stir and rearrange breadcrumbs into an even layer and bake an additional 5-7 minutes, or until fragrant and slightly crisp.
  4. Cool completely, and store in an airtight container in the fridge.

Instructions

Preheat Your Oven

Start by preheating your oven to 400°F (200°C). Line a baking sheet with parchment paper to prevent sticking.

Prepare the Coating

In a shallow bowl, combine the breadcrumbs, grated Parmesan cheese, garlic powder, onion powder, paprika, salt, and pepper. Mix well to distribute the seasonings evenly.

Coat the Chicken

Dip each chicken tender into the breadcrumb mixture, making sure to coat it thoroughly. Press the breadcrumbs onto the chicken to ensure they stick.

Arrange on the Baking Sheet

Place the coated chicken tenders on the prepared baking sheet. Leave some space between each tender to allow for even cooking.

Add a Touch of Crispiness

Lightly spray the tops of the chicken tenders with cooking spray or drizzle them with olive oil. This will help achieve that extra crispiness in the oven.

Bake to Perfection

Place the baking sheet in the preheated oven and bake for 18-20 minutes, or until the chicken tenders are golden brown and cooked through. Make sure the internal temperature reaches 165°F (74°C).

Prepare the Dipping Sauce

While the chicken is baking, mix together the mayonnaise, ketchup, Dijon mustard, honey, Worcestershire sauce, salt, and pepper in a small bowl. This creamy dipping sauce pairs perfectly with the crispy chicken tenders.

Serve and Enjoy

Once the chicken tenders are done, remove them from the oven and let them cool slightly. Serve them with the dipping sauce on the side, and watch them disappear!

Directions for Crispy Chicken Tenders

  1. Lay chicken strips in a wide, shallow dish (such as a pie plate or cake pan) and cover with buttermilk. Cover bowl with plastic wrap and refrigerate at least 2 hours and up to overnight.
  2. Preheat oven to 400°F. Place a wire rack on top of a rimmed cookie sheet. Set aside.
  3. Combine 1 cup homemade breadcrumbs & 1 cup flaked cereal crumbs and mix until homogenous. Lay mixture out in an even layer on a large plate. Place flour on another large plate. Pour whisked egg onto yet another plate.
  4. Remove chicken pieces from the buttermilk, letting the extra milk drip off, and place on a clean large plate. Season with salt and pepper, to taste.
  5. Dredge each pieces of chicken in flour. Run each piece of chicken through the egg until fully coated. Finally, dredge each piece of chicken in the breadcrumb/cereal mixture and press so that the mixture adheres fully to all sides of the chicken pieces.
  6. Place coated chicken pieces onto the wire rack/baking sheet. Spray the tops of each piece of chicken with olive oil spray. Bake for 8 minutes; flip each piece of chicken over and coat with olive oil spray. Bake for another 8 minutes, or until done.
  7. Serve with barbeque sauce, honey mustard (I like an equal ratio of honey to coarse ground mustard), or ketchup.

Estimated Nutrition Per Serving

  • Calories: 260 calories per serving
  • Total Fat: 13g
  • Saturated Fat: 8g
  • Trans Fat: 0g
  • Cholesterol: 40mg
  • Sodium: 240mg
  • Total Carbohydrates: 33g
  • Dietary Fiber: 2g
  • Sugars: 12g
  • Protein: 3g

Crispy Chicken Sandwiches

0

John and I liked the Crispy Baked Chicken Tenders so much that it was an easy decision to make them again for these sandwiches…

NameCrispy Chicken Sandwiches
CuisineAmerican
Prep Time20 minutes
Cooking Time15 minutes
Total Time35 minutes
Servings4 servings
Yield4 sandwiches
Crispy Chicken Sandwiches

… just a few days later.

Crispy Chicken Sandwiches

Now, I rarely make the same thing twice… but the same thing twice over the span of 5 days?

That’s saying something.

Crispy Chicken Sandwiches

And that something is this: clearly I’m developing a fixation on crispy baked chicken.

Crispy Chicken Sandwiches

Simply sandwich the still-warm chicken tenders in between layers of whole wheat bread, juicy tomatoes, and fresh lettuce, and you’re good to go.

Crispy Chicken Sandwiches

Oh! I almost forgot to mention the easy but perfect accompaniment of honey mustard. I just stirred together 2 Tbsp honey and 2 Tbsp coarse ground mustard – feel free to alter the ratio to suit your taste preference.

Barbeque sauce is also an excellent condiment for this sandwich.

Crispy Chicken Sandwiches

Crispy Chicken Sandwiches

Printer-Friendly Recipe

Ingredients:

  • 2 whole wheat rolls, split in half
  • barbeque sauce or honey mustard sauce (I made my own with equal parts honey and coarse mustard)
  • lettuce (I used organic mixed baby greens)
  • 1 beefsteak tomato, preferably organic, cut into 4-6 thin slices
  • 2-4 Crispy Baked Chicken Tenders, depending on size of rolls

Directions

  1. Toast split rolls if you’d like.
  2. Spread barbeque sauce or honey mustard onto the top piece of each roll. On the lower half, layer on the lettuce, tomato slices, and chicken tenders. Sandwich the pieces of roll together and enjoy!

Estimated Nutrition Per Serving

Calories: 600 calories

Protein: 30 grams

Carbohydrates: 45 grams

Fat: 25 grams

Sodium: 1000 mg

Fiber: 3 grams

Sugar: 5 grams