I am tired.

Being a stay-at-home-mom is no joke. It’s exhausting especially when your kiddo still doesn’t – gasp! – sleep through the night. That’s right. Lily, at 13 months, still wakes up throughout the night and needs to be nursed, rocked, or bounced back to sleep. This is neither the “right” nor the “wrong” approach to infant & toddler sleep. It’s just OUR approach.
John and I decided early on in our parenting adventure that sleep training wasn’t for us, and I’ve found an amazing group of like-minded moms who have been an indispensable support system for me.

But I’m still tired.

I cut caffeine out of my system back when John and I starting thinking about trying for a baby. It was no hardship to avoid coffee throughout pregnancy, as I was nauseated by the aroma alone. I further denounced caffeine during Lily’s early months because I didn’t want any to enter her system via my breastmilk. After talking with many breastfeeding moms and doing my own research, I finally hopped back on the caffeine wagon when Lily was about 4 months, the point at which all hell broke loose sleep-wise.
I still limit my daily caffeine intake to about 1-2 cups, but those 1-2 cups have become a vital component of my mornings. Pre-baby, I drank coffee for the flavor and sheer enjoyment of sipping a hot mug in the colder months – and a chilled glass in the warmer months – but I never seemed to notice an energy surge from the caffeine. The way my body metabolizes caffeine must have changed because I now rely on coffee to help wake me up in the morning.

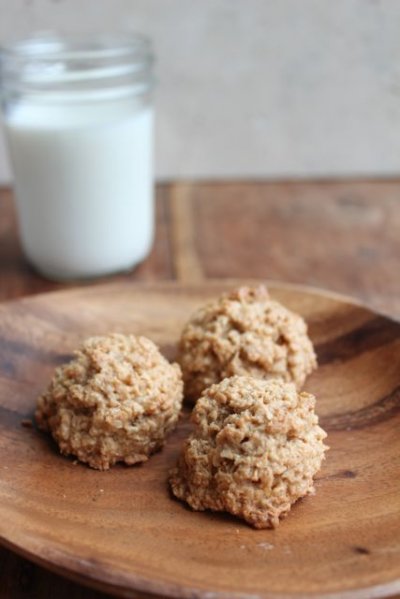
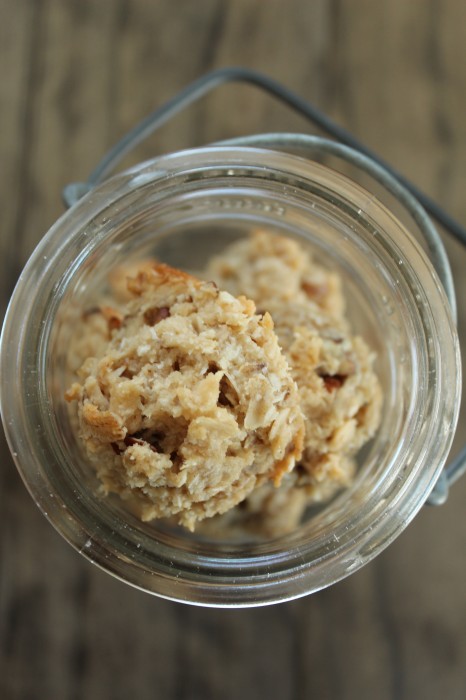
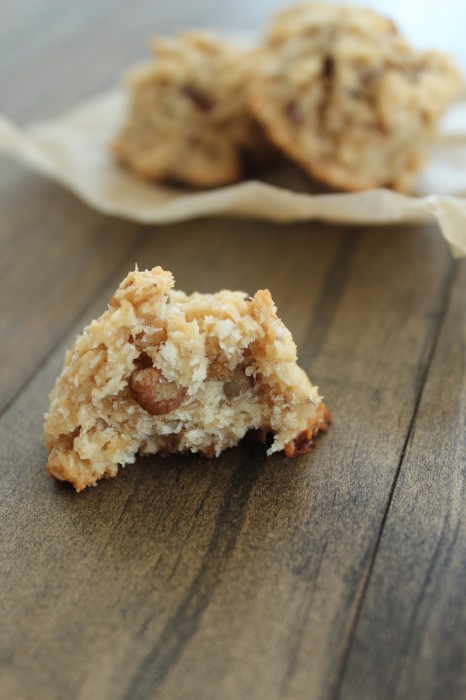
On mornings when a cup of coffee alone won’t cut through the haze of exhaustion, these cookies offer an extra hit of caffeine in a ready-to-eat, portable, delicious package. They are thick, chewy, slightly sweet, and amped up with both brewed coffee and instant espresso powder.

I managed to bake a batch of these cookies (bleary eyed and half asleep) last week while Lily was recovering from an ear infection-induced fever and battling a virus. I was averaging 3 hours of sleep a night, and I NEEDED extra caffeine just to make it through the morning. I was so glad I did make the cookies, though, because for the next several days I had breakfast ready and waiting for me when I stumbled downstairs.
As you can see from the photos throughout this post, I’m partial to Dunkin’ Donuts original blend coffee. It’s a Massachusetts thing.

Caffeinated Breakfast Cookies
| Name: | Caffeinated Breakfast Cookies |
|---|---|
| Cuisine | Fusion |
| Prep Time | 15 minutes |
| Cooking Time | 15 minutes |
| Total Time | 30 minutes |
| Servings | 12 |
| Yield | 1 dozen cookies |
Ingredients (14 large cookies)
- 2 cups whole wheat pastry flour
- 2 cups old fashioned rolled oats
- 1/2 tsp baking soda
- 1/2 tsp baking powder
- 1/2 tsp salt
- 2 tsp instant espresso powder
- 1/2 cup neutral flavored vegetable oil
- 1/4 cup pure maple syrup
- 1 cup strongly brewed coffee, cooled
- 1/4 cup lightly packed brown sugar
- 1 tsp pure vanilla extract
Instructions
Preheat oven to 350°F. Line two baking sheets with silicone baking mats or parchment paper.
In a medium mixing bowl whisk together flour oats baking soda baking powder salt and instant espresso powder.
In a large mixing bowl combine oil maple syrup coffee brown sugar and vanilla extract. Whisk until smooth.
Add dry ingredients to wet and stir until combined.
Scoop out 1/4 cup portions of dough and roll into balls place on prepared baking sheets and slightly flatten. Cookies will spread slightly.
Bake for 12 minutes.
Nutrition Per Serving
Calories: 180 calories per serving
Total Fat:10 grams
Saturated Fat:2 grams
Trans Fat: Minimal
Cholesterol: Negligible
Sodium:80 milligrams
Total Carbohydrates:20 grams
Dietary Fiber:3 grams
Sugars:7 grams
Protein:5 grams
Caffeine Content:10-15 milligrams per cookie (may vary depending on the coffee used)
Please note that these values are approximate and can vary based on specific brands of ingredients used and portion sizes. Additionally, the caffeine content can vary based on the type and strength of the coffee used in the recipe. It’s always a good idea to check labels on ingredient packaging for precise nutritional information.