Aaahhh, cheesecake. One of my all-time favorite desserts… but admittedly a fairly an extremely decadent indulgence. Slices of restaurant cheesecake are loaded with fat and sugar, and appear to weigh a hefty 1/2 pound each.
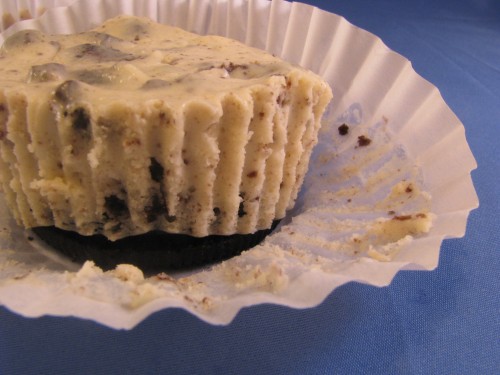
Enter mini cheesecakes, baked in individual muffin cups for instant portion control. This is not a new concept, as the Individual Cookies & Cream Cheesecakes have been circulating the foodie blogosphere for a few years now. I stuck with my lightened version (also used for my Individual Maple Cheesecakes) and subbed in neufchatel (1/3-less-fat cream cheese) for full-fat cream cheese and lowered the overall amount of sweetener.

I further carried over components of those recipes by using a sandwich cookie “crust” for these peanut butter cheesecakes. I rarely buy prepackaged cookies, but when I do I rely on Newman’s Own Organics and Back to Nature for tasty treats without hydrogenated oils, high fructose corn syrup, artificial flavors, colors, or preservatives.

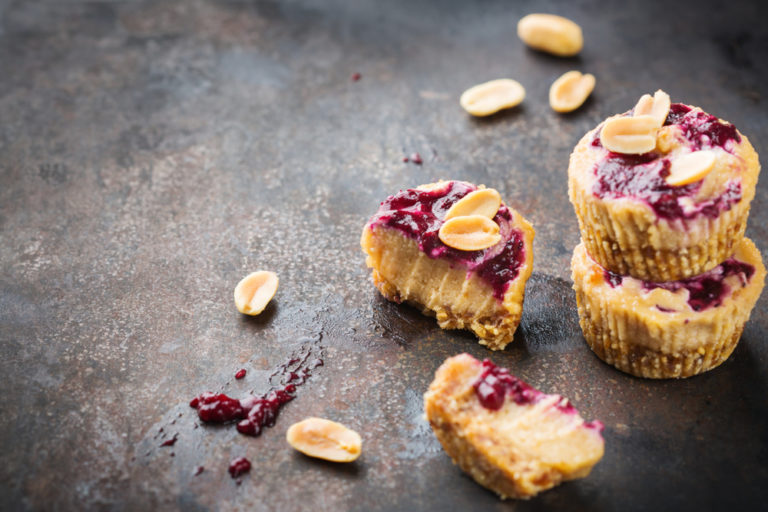
Poured on top of these yummy cookies is an incredibly delicious neufchatel-and-peanut butter filling that bakes into a dense, almost fudge-like cheesecake.

Although it’s difficult to be patient, the cooked cheesecakes must be completely chilled in the refrigerator…
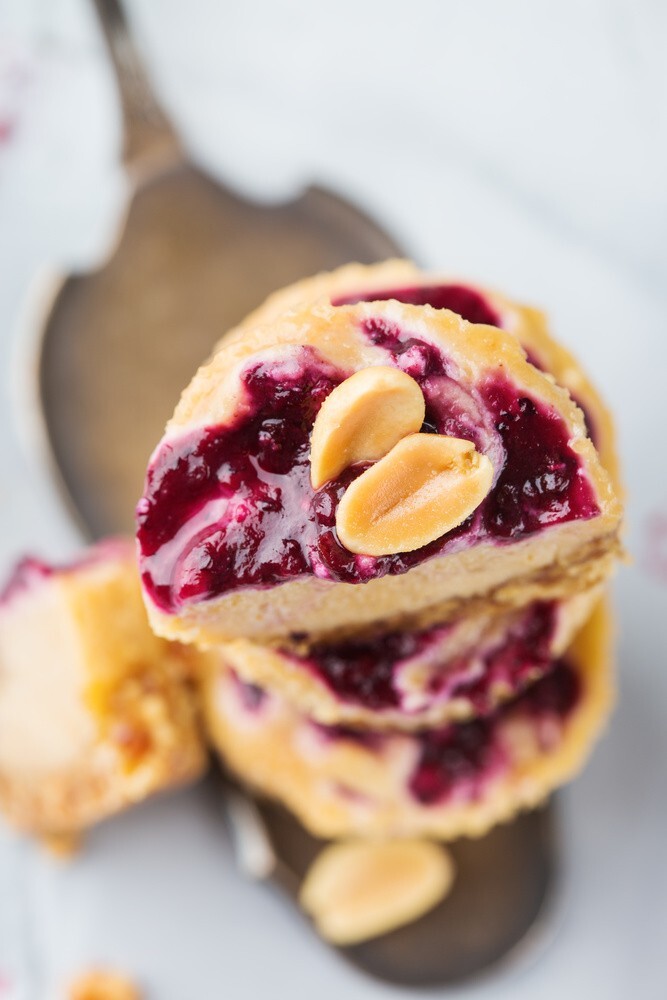
… before being unwrapped and devoured.
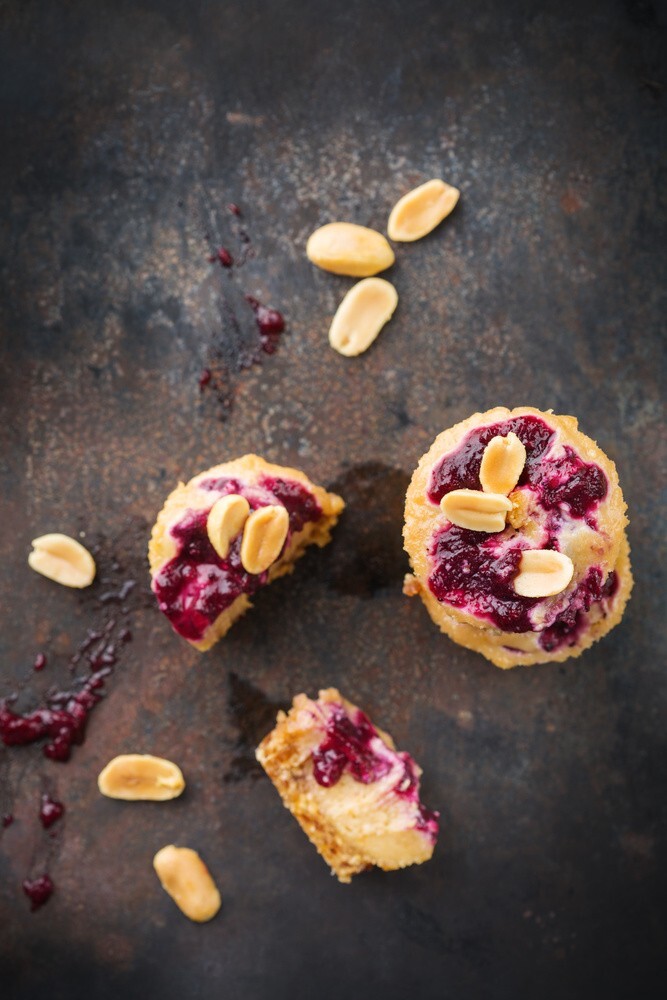
The creamy, perfectly sweet, peanut buttery filling is so delicious on it’s own, that you could omit the eggs and serve it as a cheesecake dip for fresh fruit or cookies if you’d like. However, I highly suggest following the recipe using the cookie crust because there is nothing like biting into layers of luscious peanut butter cheesecake, slightly crisp peanut butter cookies, and smooth peanut butter cream… all the while knowing that this little piece of nirvana won’t undo all of the hard work you’ve put in at the gym!

| Name: | Individual Peanut Butter Cheesecakes |
|---|---|
| Cuisine: | Fusion |
| Prep Time: | 20 minutes |
| Cooking Time: | 25 minutes |
| Total Time: | 3 hours (includes chilling time) |
| Servings: | 12 |
| Yield: | 12 individual cheesecakes |
Ingredients
- 18 peanut butter cream sandwich cookies (such as Back to Nature)
- 16 oz neufchatel (1/3-less-fat) cream cheese, at room temperature
- 1/2 cup creamy peanut butter
- 1/2 cup evaporated cane juice (edited to add: an equal amount of granulated sugar may be substituted)
- 1/2 tsp pure vanilla extract
- 2 large eggs, at room temperature
- 1/2 cup 2% plain Greek yogurt
- pinch of salt
Directions
- Preheat oven to 275*F. Line standard muffin tins with paper liners. Place 1 whole cookie in the bottom of each of 18 lined cups.
- In the bowl of an electric mixer, beat the neufchatel and peanut butter at medium speed until smooth, scraping down sides of bowl as needed. Add in evaporated cane juice and beat until combined. Beat in vanilla.
- Beat in one egg at a time, scraping down the sides of the bowl as needed. Beat in yogurt and salt.
- Spoon batter evenly among the 18 lined cups, filling each almost to the top. With the back of a spoon, smooth out the top of each filled cup.
- Bake, rotating pans halfway through, until filling is set, 22-24 minutes. Let cool on a wire rack. Chill in the refrigerator for at least 4 hours, or up to overnight, before serving.
Estimated Nutrition Per Serving
- Calories: 350 kcal
- Total Fat: 26g
- Saturated Fat: 11g
- Trans Fat: 0g
- Cholesterol: 75mg
- Sodium: 260mg
- Total Carbohydrates: 24g
- Dietary Fiber: 2g
- Sugars: 16g
- Protein: 8g







![home
who is lauren and why does she enjoy healthy food?
recipes + photos
CommentsPosts
search this blog
Peanut Butter Chocolate Chip Cookie Dough “Truffles”
BY LAUREN, ON FEBRUARY 8TH, 2011
Mama Pea strikes again!
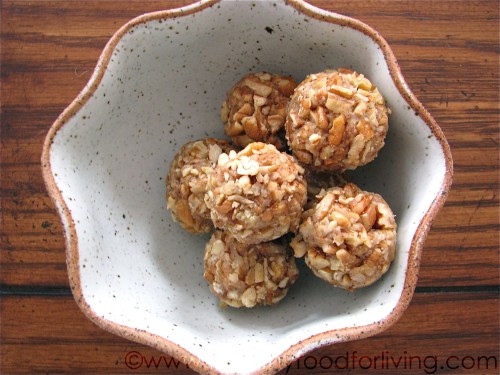
I ever so slightly altered her recipe for Chocolate Chip Cookie Dough Balls Light, (by subbing in peanuts for the almonds), and am quite smitten with the end result.
If ever there was a doubt in your mind that a dessert comprised merely of nuts, dates, vanilla extract, salt, and a few non-refined chocolate chips could fully satisfy a craving for cookies, then let this recipe serve as your wake-up call…
… because these are damn good! I’m fairly certain that I’ve never used the word “damn” on this blog before, (and now I’ve written it twice in one post – oops), but it is completely necessary in order to get across how amazingly delicious these babies are.
Think about peanut butter chocolate chip cookie dough for a moment (I’m sure I don’t have to twist your arm on this one). Now take away the refined flour, copious amounts of butter and sugar, and eggs. Keep the rich peanut butter flavor dotted with lightly sweetened chocolate chips, and you have these truffles.
Oh, and the tiny bit of Kosher salt added into the dough is completely necessary! It imparts not only a kiss of salty flavor, but also an unexpected crunch.
And so, Mama Pea, I raise my glass now-empty paper muffin liners to you in appreciation for an awesome recipe that I know I will be using over and over again!
Peanut Butter Chocolate Chip Cookie Dough “Truffles”
slightly adapted from Mama Pea’s Chocolate Chip Cookie Dough Balls Light
yield: 10 “truffles”
Ingredients:
1/2 cup raw (or dry-roasted) unsalted peanuts
1/2 cup raw (or dry-roasted) unsalted cashews
6 large soft Medjool dates, pitted
1 tsp pure vanilla extract
1/2 tsp Kosher salt
2 Tbsp grain sweetened chocolate chips, such as Sunspire, coarsely chopped
Directions:
In the bowl of a food processor, combine the peanuts and cashews. Process until finely crumbled – mixture will resemble coarsely ground flour. Remove from food processor bowl and set aside.
Place dates, vanilla extract, and salt into the food processor bowl, and blend until a thick paste forms. Add the ground nuts to the date paste and process until the mixture comes together to form a crumbly “dough”. Remove mixture from food processor.
Knead the chopped chocolate chips into the dough by hand, until well-incorporated. Form mixture into a large ball and refrigerate for about 5-10 minutes.
When the dough has chilled for a bit, take it out of the fridge and roll into 10 balls.
Store in an airtight container in the refrigerator.
21 COMMENTS DESSERTS, SNACKS
Peanut Butter Granola
BY LAUREN, ON FEBRUARY 6TH, 2011
Prior to discovering the wonders of homemade granola, I kept our pantry stocked with Nature’s Path Granola. My favorite varieties were the Pumpkin Flax Plus Granola and the Peanut Butter Granola. The latter granola is crunchy, sweet, and packed with peanuts. I ate it for breakfast, adding in a few extra spoonfuls to help “finish off” the milk; I ate it for lunch, sprinkled over yogurt & fruit; I ate it for snacks and desserts, by the [double] handful.
It’s just that good.
Well, considering I successfully adapted a recipe for homemade pumpkin granola, it was high time that I set to work creating a homemade peanut butter granola.
Here is the end result!
The base of the granola is comprised of crunchy clusters of rolled oats and puffed brown rice, lightly sweetened with Turbinado sugar and brown rice syrup.
The rich flavor of the peanut butter is heightened by the addition of roasted unsalted peanuts, which also adds extra crunch to the granola.
This serves as an impetus to make homemade granola more often!
Homemade granola is easily customizable, allowing for near endless possibilities of ingredient additions. How scrumptious would this granola be with mashed banana in place of the applesauce, and a scattering of grain-sweetened chocolate chips tossed in after baking?! Another idea is to keep the recipe as is, and mix in your favorite dried fruit after baking for a spin on the classic pb&j flavor combination.
Peanut Butter Granola
Ingredients:
1 1/2 cups rolled oats
1 1/2 cups puffed brown rice cereal
1/4 cup unsweetened applesauce
6 Tbsp (1/4 cup + 2 Tbsp) smooth or crunchy all-natural peanut butter
1 Tbsp canola oil
2 Tbsp Turbinado sugar (or granulated sugar)
2 Tbsp brown rice syrup (or other liquid sweetener, such as maple syrup, agave nectar, or honey)
1/2 tsp pure vanilla extract
1/4 tsp salt
1/2 cup unsalted raw or dry-roasted peanuts
Directions:
Preheat oven to 325°F. Line a cookie sheet with parchment paper.
Measure the oats and rice cereal into a large bowl, set aside.
In a medium bowl, whisk together the applesauce, peanut butter, oil, sugar, brown rice syrup, vanilla extract, and salt. Whisk until well-mixed.
Pour wet ingredients over cereal and stir until evenly coated. Spread mixture on the prepared cookie sheet in an even layer.
Bake for 15 minutes. Remove sheet from the oven, stir the peanuts into the granola, and bake for an additional 10-15 minutes, or until the granola is golden brown and crisp.
Remove granola from the oven and cool completely. Store in an airtight container.
24 COMMENTS BREAKFAST/BAKED GOODS
100% Whole Wheat Anadama Bread
BY LAUREN, ON FEBRUARY 3RD, 2011
Diving into the sphere of homemade yeasted bread-making took me a while to pursue; I’ve taken a few tentative steps over the years, but now I’m determined to take the plunge.
Those who know me are aware of my love affair with bread, but I’ve noticed that even some of my favorite “healthy” brands have unnecessary ingredients in them; thus my interest in baking my own bread with nothing but yeast, whole grains, unrefined sweeter, a bit of unsaturated fat, and a touch of salt. No refined sugar. No refined flour. No preservatives or hydrogenated oils. No soy products.
One of my go-to homemade bread recipes is a partial whole wheat version of Jim Lahey’s No Knead Bread, made famous by Mark Bittman’s column in the NY Times. Although this bread is delicious, I wanted to push myself with the challenge of mastering a few recipes for 100% whole wheat yeasted bread.
Although I won’t claim to have mastered this recipe, (it didn’t rise as much as I’d hoped), my version of Anadama bread fulfills my previously mentioned requirements for a homemade loaf.
The flavor, which is slightly sweet and rich, perfectly fits the bill; the texture, which exceeded my expectations, is hearty, moist, and dense with a touch of crunch from the cornmeal. The bread slices beautifully, rendering it ideal for sandwiches, french toast, and panini. The molasses imparts a dark amber color as well as a robust sweetness that pairs well with both savory sandwich fillings and sweet spreads.
I admit that I initially harbored reservations about sharing this post due to the disappointing short stature of the bread, (and therefore rather lackluster photos); but after tasting the bread, I concluded that looks can be deceiving, as the flavor and texture were spot-on.
100% Whole Wheat Anadama Bread
yield: 1 loaf, about 14-18 slices
adapted from this recipe
Ingredients:
1/2 cup water
1/4 cup cornmeal
2 Tbsp canola oil
1/2 cup unsulphured molasses
1 (0.25 oz) package active dry yeast
1/2 cup warm water (110°F)
2 cups whole wheat flour
1 cup white whole wheat flour
1 tsp salt
canola oil cooking spray
NOTE: Bread made with whole wheat flour needs a little more love (in the form of kneading) and time (in the form of rising) than bread made with white flour.
Directions:
In a small saucepan set over medium-low heat, combine 1/2 cup water and cornmeal; whisk continuously until it starts to thicken, about 30-60 seconds. Reduce heat to low and whisk in canola oil and molasses. Set aside to cool.
In a small bowl, scatter yeast over 1/2 cup warm (110°F) water. Let sit until foamy; about 10 minutes.
In the bowl of a stand mixer, (or a large mixing bowl), combine the cooled cornmeal mixture with the yeast mixture; stir until well blended. Add the whole wheat flour and the salt; mix well with paddle attachment (or a wooden spoon if using a mixing bowl). Add the white whole wheat flour, 1/2 cup at a time, stirring well after each addition. Once the dough has pulled together, switch to the dough hook attachment and knead on low speed until smooth and elastic, about 15 minutes. Alternatively, you can turn the dough out onto a lightly floured surface and knead it with your hands.
Preheat oven to 375°F.
Lightly coat a large bowl (I use the bowl of my stand mixer) with cooking spray, place the dough in the bowl and turn to coat. Cover and put in a warm place to rise until doubled in volume, about 1 to 1 1/2 hours (I like to place the bread on top of the heating oven).
Place dough on a clean work surface and roll out into a rectangle (about 12 x 7 inches). Starting with a short end, fold the dough into thirds. Pinch seams closed. Place the loaf in a lightly greased 9 x 5 inch loaf pan. Cover and let rise until doubled in volume, about 1 to 1 1/2 hours.
Bake for about 28-30 minutes or until the top is golden brown and the bottom of the loaf sounds hollow when tapped.
Turn loaf out onto a wire rack and let cool before slicing and serving.
Store bread in the refrigerator, wrapped tightly in plastic wrap and sealed in a zip-top plastic bag.
27 COMMENTS BREAKFAST/BAKED GOODS
Chocolate Chip Banana Pancakes for One (aka feeding my hibernation mentality)
BY LAUREN, ON FEBRUARY 2ND, 2011
As the snow turned to sleet this morning, I was more than content to burrow farther under the flannel sheets and down-filled comforter… beyond happy that the school at which I work announced today’s cancellation yesterday afternoon. After a few luxurious minutes of snoozing, I got up around 7-which is considered sleeping in for me-and pitter pattered around the apartment until my stomach alerted me that it was used to being fed an hour earlier.
I can’t imagine a better way to spend my snow day morning than sitting down in front of this welcoming sight:
As is evidenced in the following photos, I’m not the only one whose hibernation instinct has been kicked into high gear.
Here is how Shelby spent the morning:
Roxie’s new obsession is to crawl underneath the throw blanket on the bed, (strategically placed there to keep her from shedding all over our duvet cover – oh well), and sleeping for hours on end.
There she is!
I don’t think she’s very happy with me in this picture.
As the pets napped, I enjoyed a pancake breakfast for one.
I don’t often crave pancakes, rendering the rare occasions that I make them extra special.
These pancakes are my new favorite recipe. The whole wheat pastry flour is not at all detectable; in fact, these pancakes are perfectly light and fluffy.
The batter is sweetened with a touch of unrefined sugar, speckled with grain-sweetened chocolate chips, and topped with banana slices before being flipped on the griddle.
Cooking the pancakes over moderate heat allows them to develop a crisp golden brown “crust” while remaining soft on the inside.
The only addition that would have put these pancakes over the top is peanut butter.
Maybe I’ll have to make them again this weekend?!
Chocolate Chip Banana Pancakes for One
makes 4 pancakes… all for you ;)
Ingredients:
1/2 cup whole wheat pastry flour
1 1/2 tsp evaporated cane juice
1/2 tsp baking powder
1/4 tsp baking soda
tiny pinch of salt
1 egg white
1/2 cup low fat buttermilk
1 Tbsp grain sweetened chocolate chips
1 banana, sliced, divided
canola oil cooking spray
pure maple syrup, preferably grade B
Directions:
In a medium mixing bowl, whisk together the flour through salt.
In a large mixing bowl, whisk together the egg white and buttermilk.
Stir dry ingredients into the wet just until moistened. Fold in chocolate chips. Set aside to rest.
Heat a large nonstick skillet or griddle over medium/medium-low heat. Coat with cooking spray.
When hot, spoon the batter into the skillet by the 1/4 cupful. Evenly distribute most of the banana slices on top of the pancakes, reserving a few slices for garnish.
When bubbles appear on the surface of the batter, (about 1-2 minutes), the pancakes are ready to be flipped.
Flip pancakes and let cook for another minute or so, or until golden brown.
Serve with the remaining banana slices and maple syrup.
35 COMMENTS BREAKFAST/BAKED GOODS
Super Bowl Recipe Round-Up
BY LAUREN, ON JANUARY 31ST, 2011
Fact:
I don’t love football.
[image credit]
Fact:
I love preparing football-watching food for John and I to enjoy while we he watches the game.
Here’s a round-up of some Super Bowl snacks, meals, and desserts that are sure to please both Steelers and Packers fans alike next weekend.
Let’s kick things off with some snacks:
Caramelized Onion & Yogurt Dip
Creamy, a bit sweet, and perfect when served with crunchy pita chips or crisp crudite.
Cinnamon & Sugar Roasted Mixed Nuts
Crunchy, sweet, and a bit salty… these nuts are highly addictive!
Peanut Butter & Chocolate Chip Cheesecake Dip
Clearly a dessert dip, this is best served at room temperature with sliced apples, cinnamon & sugar pita chips, or a big spoon ;).
Next up, chili! Ubiquitous football-watching food, for sure.
Fiery Red Chili
This spicy chili has just enough meat in it to satisfy any carnivore, but a hefty dose of beans keeps it healthy.
White Chicken Chili
Different, yes. Delicious? Absolutely! This white chicken chili takes a little bit of time to prepare, but the creamy end result is so worth it.
If you’re less than thrilled with the idea of a slow-cooking dish, how about some quick-to-make chili cheese fries?
Chili Cheese Fries
I used leftover chili for these beauties, but you could use canned chili in a pinch.
Another classic Super Bowl offering is pizza. And calzones. Which are basically pizzas rolled up into their own crust.
Eggplant Parm Pizza
Eggplant Parmesan. Pizza. What’s not to love?
Jalapeno Ranch BBQ Chicken Pizza
One of John’s favorites. Barbecue chicken meets pizza in the Southwest.
Potato Pesto Pizza
One of my favorites! Who knew thinly sliced potatoes could be such a delicious pizza topping?
Southwestern Pizza
There are quite a few toppings on this pizza, so a couple of slices are all you will need to feel satisfied. That being said, I won’t judge if you go for a third ;).
Buffalo Chicken Calzones
If you’re a fan of wings, you will LOVE these!
Taco Calzones with Avocado Cream
This Italian-Mexican hybrid is one of my all-time favorite creations. And let’s be honest… avocados make everything better.
What’s a Super Bowl party without something sweet to accompany the fourth quarter?
Cookies & Cream Cheesecake Bars
A lightened version of what is rapidly becoming a classic. These cheesecake bars – which are packed with cookie bits – are absolutely delectable.
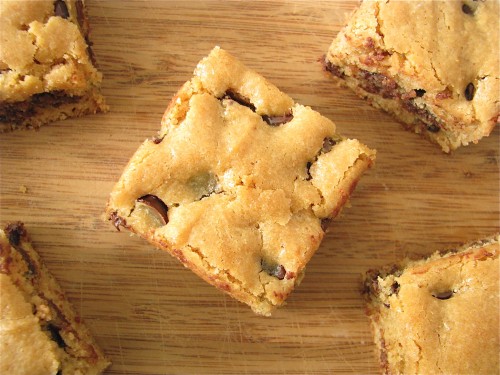
Peanut Butter Chocolate Chip Cookie Bars
Like peanut butter chocolate chip cookies. Only better. Thick, rich & mouthwatering.
Happy Super Bowl eating!
25 COMMENTS UNCATEGORIZED
Apple Crisp Truffles
BY LAUREN, ON JANUARY 27TH, 2011
I really enjoyed my Maple Apple Crisp, and found myself yearning for the sweet apples and nutty topping well after the baking dish was empty. Sure, I could have made another batch, but I thought it would be fun to take the flavors of the apple crisp and turn them into bite-sized treats.
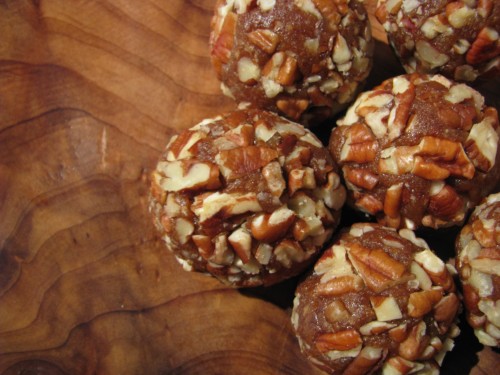
I used my recipe for Pecan Pumpkin Pie Bites as a base for these Apple Crisp Truffles, and followed the same principle of pulsing together dried fruit, nuts, a bit of fruit puree, and some spice.
It never ceases to amaze me how naturally sweet dried fruit is. Medjool dates are a longtime absolute favorite of mine, and unsweetened dried apple rings clock in at a close second place.
These little bites truly do encompass the flavors of apple crisp and really are sweet enough to satiate a dessert craving!
If there are any moms or dads reading, I bet your kids would love these as much as you are sure to. You can make the truffles even smaller for little mouths, or you can form the mixture into bars for a more traditional shape.
I know I will be making another batch of these truffles soon, and I urge you to try them as well!
Apple Crisp Truffles
yields 6-8 truffles
Ingredients:
heaping 1/4 cup chopped soft Medjool dates (about 3 pitted dates)
heaping 1/4 cup finely chopped dried apple rings, preferably unsweetened & unsulfured (about 4 full rings)
1/3 cup raw pecan or walnut pieces
1 Tbsp unsweetened applesauce
1/2 tsp apple pie spice
1/4 cup finely chopped raw pecans or walnuts
Directions:
Place chopped dates and dried apples into the bowl of a food processor, and process until they form a chunky paste, about 20-30 seconds.
Place 1/3 cup pecan pieces into the food processor bowl along with the dried fruit paste, and process until mixed, about 10-20 seconds.
Add the applesauce and apple pie spice to the mixture. Process until incorporated, about 10-20 seconds. Remove mixture from food processor.
Form 6-8 small balls out of the mixture by rolling them between your palms. Set aside.
Place the 1/4 cup finely chopped pecans onto a cutting board or plate and roll the balls around in the nuts until fully coated.
Once again, roll the balls between your palms so that the nuts adhere and create a “crust”.
Store in the refrigerator.
39 COMMENTS DESSERTS, SNACKS
Orange Creamsicle Ice Cream [Vegan]
BY LAUREN, ON JANUARY 26TH, 2011
The blogosphere seems to have been bitten by the creamsicle bug.
Jessica kicked things off with these wholesome Whole Wheat Creamsicle Muffins; Angela bestowed upon us her healthy Flu Buster Clementine Creamsicle Smoothie; and Ashley presented her version of Angela’s creation with a tempting Orange Coconut Creamsicle.
Determined to come up with my own creamsicle-inspired treat, I set out to create a vegan orange vanilla ice cream.
I browsed through my trusty dairy-free ice cream cookbook The Vegan Scoop and found a recipe for orange ice cream using soy milk, soy creamer, orange zest, and freshly squeezed orange juice. I used Wheeler’s recipe as a starting point, but subbed in unsweetened vanilla almond milk for the soy products, added extra vanilla in the form of vanilla bean paste, and poured in a splash of vodka.
Wait… vodka? Let me explain.
If you’ve made homemade ice cream or frozen yogurt, you are probably aware that it can be difficult to scoop once fully frozen. In an attempt to keep this frustration from occurring, I turned to the technique of adding in a bit of flavorless vodka to the ice cream base. Since alcohol does not freeze, adding it to ice cream before churning should theoretically yield a softer end result… which is to say easier to scoop.
Oh, and you can’t taste the vodka, I promise!
My ice cream was still somewhat hard straight from the freezer, but it was noticeably softer than others I’ve made… which is impressive given the negligible amount of fat in this recipe.
I initially hesitated to call this ice cream, as it is more icy than the traditional creamy frozen dessert. I’d describe the consistency as somewhere between sorbet and ice cream.
As for the taste, this citrus-scented and vanilla bean-speckled ice cream is quite refreshing. I wouldn’t say the flavor is a spot-on replica of an orange creamsicle, but it is reminiscent of the classic treat.
Have you ever tried homemade ice cream with almond milk? Please share links if you have!
Vegan Orange Creamsicle Ice Cream
adapted liberally from Wheeler Del Torro’s The Vegan Scoop
Ingredients:
3 cups unsweetened vanilla almond milk, divided (Trader Joe’s carries a super creamy version)
2 Tbsp arrowroot powder
2 Tbsp freshly grated orange zest
1 cup freshly squeezed orange juice (from about 4 medium-sized oranges)
3/4 cup evaporated cane juice (I might reduce this to 1/2 cup next time – the ice cream is very sweet)
1 1/2 Tbsp vanilla bean paste or pure vanilla extract
1 Tbsp vodka, optional (I picked up this trick for keeping the ice cream softer from David Lebovitz)
Directions:
In a small bowl, whisk together 1/4 cup almond milk and arrowroot powder; set aside.
In a medium saucepan over medium heat, combine the remaining 2 3/4 cup almond milk, orange zest, orange juice, and evaporated cane juice. Bring mixture to a gentle boil, stirring often; remove from heat, and immediately whisk in the almond milk/arrowroot mixture. Mixture will thicken noticeably. Whisk in the vanilla bean paste or extract and vodka (if using).
Pour thickened ice cream base into a large bowl and refrigerate until completely chilled, at least 2-3 hours. Freeze according to ice cream manufacturer’s instructions. Serve immediately as soft serve or chill in the freezer until “ripened” (hardened).
13 COMMENTS DESSERTS
Tofu Egg Salad
BY LAUREN, ON JANUARY 24TH, 2011
I know that many of you have resolved to eat less meat in the new year, and I thought Meatless Monday would be an apropos day of the week to share this vegetarian recipe with you (*read on for the vegan version).
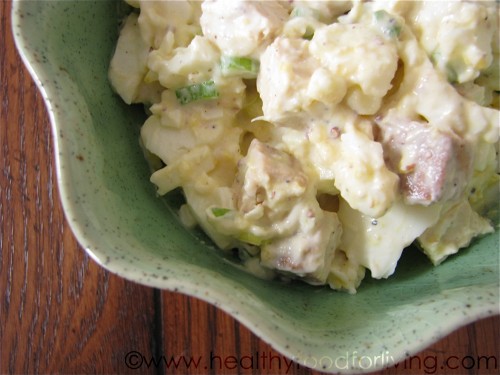
Perfectly cooked (and easy to peel!) hard-boiled eggs – along with baked tofu – are folded into a creamy Greek yogurt-based dressing in this Tofu Egg Salad.
A bit of light canola oil mayonnaise adds richness, a touch of coarse ground mustard lends a flavor punch, a splash of white white vinegar adds a nice acidic bite, and some sliced green onions give the dressing a welcomed freshness.
I prefer this salad at room temperature rather than chilled, as I think the flavors are more pronounced. That being said, you obviously don’t want to keep a dish containing yogurt, eggs, and mayonnaise out of the fridge for too long. I like to let the prepared salad sit on the counter, covered, for about 30 minutes before digging in.
My favorite way to enjoy this salad is scooped up with a couple of tasty crackers (pictured here are Back to Nature Multigrain Flax Flatbread Crackers). The soft salad just begs for a crunchy accompaniment, but is equally delicious if served on top of fresh greens or sandwiched between two slices of hearty whole wheat bread.
*You can easily make this recipe vegan by omitting the hard-boiled eggs, doubling the amount of tofu, and subbing in extra canola oil mayo (Spectrum makes an eggless version) for the yogurt.
I’m curious: are you trying to eat less meat?
Tofu Egg Salad
serves 1
Ingredients:
2 large eggs, preferably organic
Kosher salt
1 slab marinated and baked tofu (I used 1/2 serving of Trader Joe’s Organic Baked Tofu – savory flavor)
2-3 Tbsp plain Greek yogurt, 0% or 2%
2-3 tsp light canola oil mayonnaise, such as Spectrum
1/4 tsp white wine vinegar
1/2 tsp coarse ground mustard
1 Tbsp thinly sliced green onion
freshly ground black pepper
Directions:
Place eggs in a small saucepan and cover completely with water. Add in a pinch of salt. Bring to a rolling boil over medium-high heat; immediately cover and remove from heat. Let eggs sit, covered & off of the heat, for 15 minutes.
Drain water from the saucepan and give it a few shakes to crack the eggshells in numerous places. Submerse cracked eggs in cold water, drain, and peel. Set aside to cool.
Chop tofu into bite-sized pieces and set aside.
In a small bowl, stir together the yogurt, mayonnaise, vinegar, mustard, and green onion. Season to taste with salt and pepper.
When the eggs have cooled, cut them open and remove one of the yolks. Discard (or feed to your dog – Shelby loves egg yolks and they are great for dog’s coats).
Gently mash the eggs, and then fold them, as well as the tofu, into the yogurt-mayo mixture.
Serve chilled or at room-temperature on a bed of lettuce, between two slices of whole wheat bread, or with whole grain crackers (such as Back to Nature).
*Vegan Tofu Salad
Ingredients:
1 piece baked tofu (such as 1 serving of Trader Joe’s Organic Baked Tofu – savory flavor)
3 1/2 Tbsp light canola oil [vegan] mayonnaise, such as Spectrum
1/4 tsp white wine vinegar
1/2 tsp coarse ground mustard
1 Tbsp thinly sliced green onion
Kosher salt and freshly ground black pepper
Directions:
Chop tofu into bite-sized pieces and set aside.
In a small bowl, stir together the canola mayonnaise, vinegar, mustard, and green onion. Season to taste with salt and pepper.
Fold the tofu into the mayo mixture.
Serve chilled or at room-temperature on a bed of lettuce, between two slices of whole wheat bread, or with whole grain crackers (such as Back to Nature).
23 COMMENTS MAIN COURSES, SIDE DISHES/ACCOMPANIMENTS
5th Recipe for PB & Co.
BY LAUREN, ON JANUARY 23RD, 2011
I just finished photographing my fifth – and final – recipe for the PB & Co. All-Star Recipe Blog… and thought I’d share a photo with you!
Oh. Yeah.
15 COMMENTS UNCATEGORIZED
Peanut Butter & Co. All-Star Recipe Blog](https://www.healthyfoodforliving.com/wp-content/uploads/2021/09/IMG_84002-500x375-1.jpg)


![Orange Creamsicle Ice Cream [Vegan] Orange Creamsicle Ice Cream [Vegan]](https://www.healthyfoodforliving.com/wp-content/uploads/2021/09/Orange-Creamsicle-Ice-Cream-Vegan.jpg)
![Orange Creamsicle Ice Cream [Vegan]](https://www.healthyfoodforliving.com/wp-content/uploads/2021/09/IMG_8596-500x375-1.jpg)
![Orange Creamsicle Ice Cream [Vegan]](https://www.healthyfoodforliving.com/wp-content/uploads/2021/09/IMG_8612-500x375-1.jpg)
![Orange Creamsicle Ice Cream [Vegan]](https://www.healthyfoodforliving.com/wp-content/uploads/2021/09/IMG_84881-500x375-1.jpg)
![Orange Creamsicle Ice Cream [Vegan]](https://www.healthyfoodforliving.com/wp-content/uploads/2021/09/IMG_84931-500x375-1.jpg)
![Orange Creamsicle Ice Cream [Vegan]](https://www.healthyfoodforliving.com/wp-content/uploads/2021/09/IMG_8495-375x500-1.jpg)
![Orange Creamsicle Ice Cream [Vegan]](https://www.healthyfoodforliving.com/wp-content/uploads/2021/09/IMG_8601-500x375-1.jpg)
![Orange Creamsicle Ice Cream [Vegan]](https://www.healthyfoodforliving.com/wp-content/uploads/2021/09/IMG_8607-375x500-1.jpg)
![Orange Creamsicle Ice Cream [Vegan]](https://www.healthyfoodforliving.com/wp-content/uploads/2021/09/IMG_8604-500x375-1.jpg)
