There’s something undeniably comforting about the aroma of freshly baked bread filling your home. It’s a warm invitation to gather around the kitchen and savor the simple pleasures of life. If you’re a fan of sweet, nutty, and slightly spicy flavors, then you’re in for a treat.
We’re going to explore the delightful world of Maple Pecan Streusel Bread. This delectable bread combines the rich sweetness of maple syrup with the crunchy goodness of pecans, all wrapped up in a tender, buttery loaf. Get ready to embark on a culinary journey that will leave your taste buds singing!
John’s parents brought back this huge jug of maple syrup from a trip to Vermont, and it was the inspiration for this quick bread.

It’s starting to feel like fall here in New England, and the cool weather lends itself to baking and maple-flavored goodies. I also associate pecans with autumn, probably because my mom always makes a killer pecan pie for Thanksgiving. I’m hosting my first Thanksgiving this November, and we will be carrying on my family’s tradition with her pecan pie (and pumpkin, and apple!).

The original Cooking Light recipe that this one is adapted from calls for sugar, butter, and all-purpose flour; I lightened it further by swapping in a few generous glugs of that delicious Vermont maple syrup, Greek yogurt, and whole wheat pastry flour.

The bread isn’t super sweet, (as many quick breads are), but that just makes it more suitable for breakfast. Most quick breads, muffins, and pastries are basically dessert masquerading as breakfast what with their ridiculous amounts of sugar, butter, and refined white flour. They have their place for certain special occasions, but I’d much rather make my own healthier versions to enjoy on a regular basis.

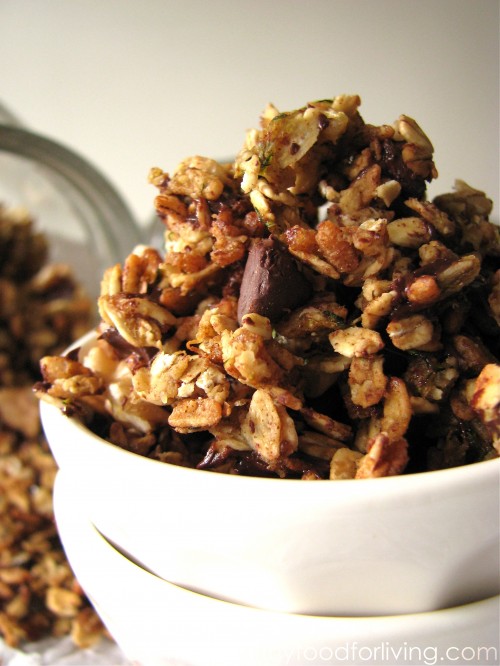
The pecan streusel swirled into the batter and strewn over the top of the bread is the obvious highlight; but the bread itself is moist and flavorful thanks to the robust maple syrup and maple extract.
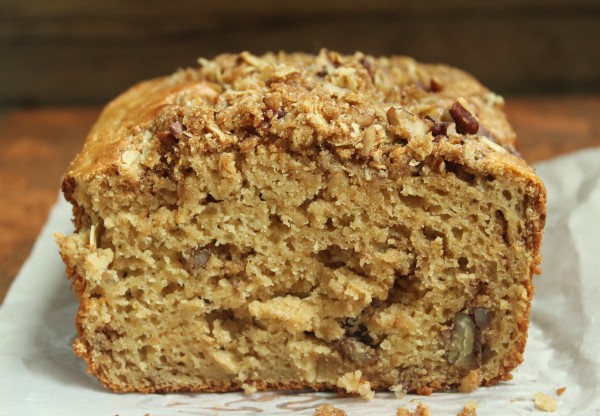
Served with a steaming cup of freshly brewed coffee, a couple slices of this bread is a cozy & tasty way to wake up on a chilly morning!

| Name | Maple Pecan Streusel Bread |
| Cuisine | American |
| Prep Time | 15 minutes |
| Cooking Time | 50-60 minutes |
| Total Time | 1 hour 15 minutes |
| Servings | 12 slices |
| Yield | 1 loaf |
Ingredients for the Pecan Streusel
- 1/3 cup lightly packed brown sugar
- 1/3 cup old fashioned rolled oats
- 1 Tbsp whole wheat pastry flour
- 1/2 tsp cinnamon
- pinch of salt
- 2 Tbsp butter, melted
- 1/3 cup chopped pecans
Ingredients for the Bread
- 2 cups whole wheat pastry flour
- 1/2 tsp baking soda
- 1/2 tsp baking powder
- 1/2 tsp salt
- 1/4 cup 2% plain Greek yogurt
- 1 Tbsp butter, at room temperature
- 1/2 cup pure maple syrup, preferably grade B
- 3 large eggs, preferably organic
- 2 tsp maple extract
- 1 cup low fat buttermilk, well-shaken
Estimated Nutrition Per Serving
Calories: 320 calories
Total Fat: 15g
Saturated Fat: 7g
Cholesterol: 65mg
Sodium: 320mg
Total Carbohydrates: 42g
Dietary Fiber: 1g
Sugars: 24g
Protein: 4g
Instructions
Preheat and Prepare
Preheat your oven to 350°F (175°C). Grease and flour a 9×5-inch loaf pan.
Mix Dry Ingredients
In a medium-sized bowl, whisk together the flour, baking powder, baking soda, and salt. Set aside.
Cream Butter and Sugar
In a large mixing bowl, cream together the softened butter and granulated sugar until light and fluffy. This should take about 2 minutes.
Add Eggs and Vanilla
Beat in the eggs one at a time, ensuring each is fully incorporated before adding the next. Stir in the vanilla extract.
Combine Wet and Dry Ingredients
Gradually add the dry ingredients to the wet ingredients, alternating with the Greek yogurt. Begin and end with the dry ingredients. Mix until just combined.
Add Maple Syrup
Gently fold in the pure maple syrup, creating a smooth, fragrant batter.
Make Streusel Topping
In a separate bowl, combine the chopped pecans, flour, granulated sugar, cold butter, and ground cinnamon. Use a pastry cutter or your fingers to work the mixture until it resembles coarse crumbs.
Layer and Bake
Pour half of the bread batter into the prepared loaf pan. Sprinkle half of the pecan streusel topping evenly over the batter. Repeat with the remaining batter and streusel.
Bake to Perfection
Place the pan in the preheated oven and bake for 50-60 minutes or until a toothpick inserted into the center comes out clean.