Home Blog Page 101

Paleo Double Chocolate Peppermint Cookies

0

You may be asking yourself: “How many more posts is she going to publish with food in front of the lit Christmas tree?!” The answer is: none. This is it. My last holiday recipe.

And it’s a gooooooood one!

Paleo Double Chocolate Peppermint Cookies

I’m all about the chocolate/peppermint flavor combination this year. I shared my recipe for Peppermint White Hot Chocolate, I made a batch of peppermint bark to dole out to friends & a batch of Jessica’s Peppermint Pattie Brownies to bring to a friend’s holiday party, and now I bring you these cookies.

Paleo Double Chocolate Peppermint Cookies

Chewy, chocolatey, pepperminty, and PALEO!

No flour, no refined sugar, no butter. That’s right. These are holiday cookies that you can actually feel good about eating because they’re chock full of healthy ingredients.

Paleo Double Chocolate Peppermint Cookies

I bet Santa would be pretty happy to find a couple of these babies waiting for him beside the Christmas tree!

Paleo Double Chocolate Peppermint Cookies

Paleo Double Chocolate Peppermint Cookies

by Lauren Zembron

Name:Paleo Double Chocolate Peppermint Cookies
Cuisine:Paleo
Prep Time:15 minutes
Cooking Time:10-12 minutes
Total Time:27-29 minutes
Servings:18
Yield:18

Keywords: bake dessert gluten-free chocolate Christmas cookies winter

Paleo Double Chocolate Peppermint Cookies

Ingredients (6-8 large cookies)

  • 2 cups blanched almond flour
  • 1/4 cup unsweetened cocoa powder
  • 1/4 tsp Kosher salt
  • 1/4 tsp baking soda
  • 6 Tbsp melted coconut oil (make sure to melt before measuring)
  • 1/4 cup honey
  • 1 tsp peppermint extract
  • 2 Tbsp water
  • 1/2 cup dark chocolate chips or dairy-free chocolate chips (such as Enjoy Life)

Instructions

Preheat oven to 350°F. Line a large cookie sheet (or two smaller ones) with a silicone baking mat or parchment paper.

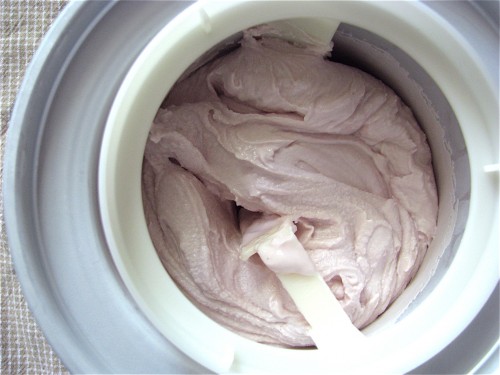
In a large bowl, combine almond flour, cocoa powder, salt, and baking soda. Whisk, making sure to break up any clumps of flour.

In a small bowl, whisk together the melted coconut oil, honey, peppermint extract, and water.

Add wet ingredients to dry and stir with a rubber spatula or spoon until combined.

Fold in the chocolate chips.

Scoop out approximately 1/4 cup portions and place 2 inches apart on prepared cookie sheet(s). Using the back of a spoon or your fingers, gently press down on the scoops of cookie dough so they form discs.

Bake for 12-14 minutes, or until cooked through. Cookies will be very soft.

Estimated Nutrition Fact

Serving Size: 1 cookie

Calories: 140

Protein: 2-3 grams

Carbohydrates: 10-12 grams

Dietary Fiber: 2-3 grams

Sugars: 6-8 grams (naturally occurring from honey or maple syrup)

Total Fat: 10 grams

Saturated Fat: 4-5 grams (from coconut oil and chocolate)

Cholesterol: 10-15 milligrams (from the egg)

Sodium: 50-70 milligrams

Please keep in mind that these are rough estimates and can vary based on the specific ingredients and brands you use. Additionally, if you need more precise nutritional information, it’s advisable to use a nutritional calculator or consult with a registered dietitian.

Allow cookies to cool on the cookie sheet for 10 minutes before transferring to a baking rack to cool completely.

Stone Fruit Almond Breakfast Crisp

0

If you’re looking for a delightful and nutritious way to start your day, look no further than this Stone Fruit Almond Breakfast Crisp. Bursting with the flavors of ripe stone fruits and the satisfying crunch of almonds, this breakfast dish is not only delicious but also a fantastic source of vitamins and minerals to kickstart your morning.

Whether you enjoy it as a special weekend treat or a weekday indulgence, this recipe will quickly become a breakfast favorite in your household.

Starting in spring, I literally count down the weeks until stone fruit comes into season.

Stone Fruit Almond Breakfast Crisp

Peaches. Nectarines. Plums. Apricots.

Stone Fruit Almond Breakfast Crisp

And cherries. Oh, cherries! I just can’t seem to get enough of these crimson orbs during the summer months.

Stone Fruit Almond Breakfast Crisp

The vast majority of cherries I buy throughout the summer are eaten straight up, as nature intended – but I managed to keep a few handfuls from going directly from the bag to my mouth for this breakfast crisp.

Stone Fruit Almond Breakfast Crisp

You might be wondering: “What is a breakfast crisp?” Well, I’m glad you asked! Basically, it’s a fruit crisp with less sugar and fat than the traditional dessert would call for; rendering it perfect for a morning meal.

Stone Fruit Almond Breakfast Crisp

The crisp topping I used is comprised of almond meal (ground almonds – not almond flour), oats, sliced almonds, Sucanat (an unrefined brown sugar), and canola oil… all of which are healthy, but also fairly calorie-heavy. By using less crumb topping, not only do you save calories, but you also allow the sweet ripe fruit to – literally – shine through!

Stone Fruit Almond Breakfast Crisp

In order to highlight the double dose of almonds in the crisp topping, I added almond extract to the fruit filling. Almond extract is a strong flavor, and one that I know not everyone loves. If that is the case, feel free to sub in pure vanilla extract.

Stone Fruit Almond Breakfast Crisp

Leftovers are fantastic served cold, spooned over thick & creamy Greek yogurt; I also blended up a leftover serving along with frozen banana slices, Greek yogurt, and almond milk for a crazy delicious breakfast smoothie.

Stone Fruit Almond Breakfast Crisp
Name:Stone Fruit Almond Breakfast Crisp
CuisineAmerican
Prep Time15 minutes
Cooking Time30-35 minutes
Total Time45-50 minutes
Servings6 servings
Yield1

IngredientsEstimated Nutrition per Serving:

  • 1 cup stemmed, pitted, & halved sweet dark red cherries
  • 2 medium-sized ripe peaches, pitted & chopped
  • 2 medium-sized ripe nectarines, pitted & chopped
  • 2 ripe ripe plums, pitted & chopped
  • 2 ripe ripe apricots, pitted & chopped
  • 1 Tbsp evaporated cane juice OR granulated sugar
  • 2 Tbsp pure maple syrup
  • 1 Tbsp arrowroot powder or cornstarch
  • 1 tsp almond extract
  • 1/2 tsp ground cinnamon
  • 1/4 cup almond meal
  • 1/4 cup old-fashioned rolled oats
  • 1/4 cup sliced almonds
  • 2 Tbsp Sucanat or brown sugar
  • 1/4 tsp salt
  • 2 Tbsp canola oil

Estimated Nutrition per Serving

Calories: 320 calories

Protein: 5 grams

Carbohydrates: 50 grams

Dietary Fiber: 5 grams

Sugars: 30 grams

Fat: 12 grams

Saturated Fat: 5 grams

Cholesterol: 20 milligrams

Sodium: 45 milligrams

Potassium: 280 milligrams

Vitamin C: 10%

Calcium: 4%

Iron: 8%

Instructions

1. Preheat the Oven

Preheat your oven to 350°F (175°C). Grease a baking dish or an ovenproof skillet with butter or cooking spray.

2. Prepare the Fruit Filling

In a large bowl, combine the sliced stone fruits with lemon juice, granulated sugar, vanilla extract, and ground cinnamon. Toss gently to coat the fruit evenly.

3. Transfer to Baking Dish

Spread the fruit mixture evenly in the prepared baking dish.

4. Make the Almond-Oat Topping

In another bowl, mix together the rolled oats, all-purpose flour, sliced almonds, brown sugar, melted butter, ground cinnamon, and a pinch of salt. Stir until the mixture becomes crumbly.

5. Add the Topping

Sprinkle the oat-almond topping evenly over the fruit mixture in the baking dish.

6. Bake

Place the baking dish in the preheated oven and bake for 30-35 minutes, or until the topping is golden brown and the fruit is bubbling.

7. Serve

Remove the Stone Fruit Almond Breakfast Crisp from the oven and let it cool slightly. Serve warm, preferably with a dollop of Greek yogurt or a scoop of vanilla ice cream for an extra treat.

Tart Pomegranate Frozen Yogurt

0

I was contacted not long ago by Ryan from POM Wonderful, who offered to send me a case of the company’s 100% pomegranate juice. Never one to turn down something delicious, (I’ve tasted – and really liked – POM in the past), I immediately responded in the affirmative. A week later, a box of chilled POM bottles was delivered to my door and I set to work brainstorming what tasty treats I could make featuring the sweet & tart juice.

Tart Pomegranate Frozen Yogurt

I’ve been fixated on homemade tart frozen yogurt since churning the batch of basic vanilla, so I figured my first POM experiment might as well be a pomegranate flavored yogurt. Although my friend and fellow blogger Shannon beat me to it, (I love her addition of the chocolate chips!), I decided to go ahead and post my own version.

Tart Pomegranate Frozen Yogurt

The pomegranate flavor infused into the yogurt comes from a homemade pomegranate syrup, which couldn’t be simpler to make as evidenced below.  I find homemade frozen yogurt to be at its best consistency when served straight from the ice cream maker; but if timing dictates a trip to the freezer first, the yogurt softens up nicely if kept out out on the counter for a little while prior to serving.

Tart Pomegranate Frozen Yogurt
Name:Tart Pomegranate Frozen Yogurt
Cuisine:Fusion
Prep Time:15 minutes
Cooking Time:0 minutes (no cooking required)
Total Time:6 hours (including freezing time)
Servings:4 servings
Yield:1 quart (1 liter)

Tart Pomegranate Frozen Yogurt

Ingredients

  • 2 cups plain 0% fat Greek yogurt, (such as Fage)
  • 1 cup plain 2% fat Greek yogurt, (such as Fage)
  • 1/4 cup evaporated cane juice (or granulated sugar)
  • 1/4 cup pomegranate syrup (recipe follows)

Directions

  1. In a large bowl, combine yogurts, evaporated cane juice, and pomegranate syrup. Stir until the evaporated cane juice is completely dissolved.
  2. Freeze according to ice cream maker manufacturer’s instructions.
  3. Serve immediately as soft serve, or spoon into a freezer-safe container and place in freezer until “ripened” (hardened).

Pomegranate Syrup

Ingredients

  • 2 cups 100% pomegranate juice, such as POM Wonderful
  • 1 Tbsp pure maple syrup

Directions

  1. Combine pomegranate juice and maple syrup in a small saucepan over medium-low heat.
  2. Cook until the mixture has thickened slightly and has reduced to approximately 1/2 cup, about 1 hour.

Instructions

1. Extract the Pomegranate Juice

  • Start by extracting the fresh pomegranate juice. Cut the pomegranates in half and gently squeeze the juice out using a citrus juicer or by manually pressing and rolling the seeds against a sieve. Discard any solids, leaving you with pure pomegranate juice.

2. Mix the Yogurt and Sugar

  • In a mixing bowl, combine the Greek yogurt and granulated sugar. Stir well until the sugar is completely dissolved into the yogurt. You can adjust the amount of sugar to your desired level of sweetness.

3. Add Pomegranate Juice

  • Pour the fresh pomegranate juice into the yogurt mixture. Stir until the yogurt and pomegranate juice are fully combined. The mixture will have a beautiful, pinkish hue.

4. Flavor with Vanilla and Lemon Zest (optional)

  • For an extra layer of flavor, add the vanilla extract to the mixture. If you want a subtle citrusy twist, grate the zest of one lemon into the mixture and mix well.

5. Freeze the Mixture

  • Pour the yogurt and pomegranate mixture into a freezer-safe container. Make sure it’s spread evenly.

6. Freeze Until Firm

  • Cover the container with a lid or plastic wrap and place it in the freezer. Let it freeze for about 4-6 hours or until it’s firm.

7. Serve and Garnish

  • When the Tart Pomegranate Frozen Yogurt is ready, scoop it into bowls or cones. Top it with fresh pomegranate arils and a few mint leaves for an extra burst of flavor and a touch of elegance.

Estimated Nutrition Per Serving

  • Calories: 120 calories per serving
  • Total Fat: 4 grams
  • Saturated Fat: 2.5 grams
  • Cholesterol: 15 milligrams
  • Sodium: 30 milligrams
  • Total Carbohydrates: 15 grams
  • Dietary Fiber: 0.5 grams
  • Sugars: 12 grams
  • Protein: 6 grams

Please note that these are approximate values and can vary based on the specific brands of ingredients used and any modifications to the recipe.

Frozen yogurt is generally lower in fat and calories compared to ice cream, making it a healthier dessert option. Enjoy your Tart Pomegranate Frozen Yogurt in moderation as part of a balanced diet!

Macaroon Truffles

0

These delectable little bites are – if you will – the love child of my Coconut-Oat Macaroons and chocolate truffles.

Macaroon Truffles

They are almost completely raw, sweetened only with maple syrup, and easy to make. No oven. No refined sugar. No long hours spent in the kitchen.

Sounds like a pretty good summer dessert, no?

Macaroon Truffles

The filling is simply unbaked macaroon dough – which is egg-free, so no worries about salmonella! – and the coating is a mixture of coconut oil, cocoa powder, and maple syrup. Yep, we’re actually making our own chocolate “sauce” for these truffles! It may sound like too much trouble to go to, but I promise you it’s just as easy and quick as melting store-bought chocolate.

Just a note: if your maple syrup is cold, the chocolate will seize up because coconut oil solidifies when cool. A quick round in the microwave softens it right back up. You probably won’t end up with perfectly smooth and shiny chocolate-coated truffles, but their flavor absolutely makes up for their appearance. You’ll want to keep the truffles in the fridge if – like here in Massachusetts lately – it’s hot where you live.

Macaroon Truffles

Next time I’ll have to add some finely chopped almonds for an Almond Joy version!

Macaroon Truffles

Macaroon Truffles

by Lauren Zembron

Name:Macaroon Truffles
Cuisine:Fusion
Prep Time:15 minutes
Cooking Time:0 minutes
Total Time:1 hour
Servings:24 truffles
Yield:24 truffles

Ingredients (24 truffles)

  • 1 batch unbaked Coconut-Oat Macaroon dough
  • 2/3 cup organic virgin coconut oil, melted until liquid
  • 2/3 cup unsweetened dark cocoa powder, sifted to remove any clumps
  • 1/4 cup pure maple syrup, preferably grade B

Instructions

Make macaroon dough through step 3 according to recipe directions. NO NOT BAKE.

Using a mini ice cream scoop or spoon, scoop out dough and roll into balls with your palms. Place dough balls onto cookie sheet, cover with plastic wrap, and refrigerate until chilled & hardened, at least 30 minutes.

In a microwave-safe bowl, combine the liquid coconut oil, sifted cocoa powder, and maple syrup. If the mixture seizes up, (like mine did – this happens if your maple syrup is cold), heat in the microwave until pourable, about 15-20 seconds.

Dunk dough balls into chocolate sauce, roll around until completely coated, remove with a fork, and place on a parchment paper-lined cookie sheet.

Place truffles in the refrigerator and chill until fully set, at least 10 minutes.

Store in refrigerator.

Estimated Nutrition Per Serving

  • Calories: 120 calories
  • Total Fat: 7g
  • Saturated Fat: 6g
  • Cholesterol: 4mg
  • Sodium: 18mg
  • Total Carbohydrates: 13g
  • Dietary Fiber: 1g
  • Sugars: 11g
  • Protein: 1g

Please note that these nutrition values are approximate and may vary depending on the specific brands of ingredients used and the size of the truffles.

White Chocolate Cake Batter Truffle Pops

0

This is my first venture into the field of cake pops – yet another foodie trend that took over the blogosphere this past year or so.

You can probably guess from the photos that I didn’t actually use cake for the pops… but rather Cake Batter Cashew Butter “truffles”.

White Chocolate Cake Batter Truffle Pops

I combined Ashley’s cake batter-flavored cashew butter with Medjool dates and rolled oats to form “truffles”…

White Chocolate Cake Batter Truffle Pops

… which I then pierced with wooden skewers and coated in melted white chocolate.

White Chocolate Cake Batter Truffle Pops

If you don’t have lollipop sticks or wooden skewers, no problem; just drop the truffles into the melted chocolate, roll ‘em around until evenly coated, and remove with a fork, allowing any excess chocolate to drip off.

White Chocolate Cake Batter Truffle Pops

Although the texture of these little pops aren’t similar to cake, their flavor is!

White Chocolate Cake Batter Truffle Pops

Just imagine orbs of super dense almond cake enrobed in sweet white chocolate.

Oh. Yes.

White Chocolate Cake Batter Truffle Pops

Fun. Cute. Portion-controlled. Decadent. Delicious!

White Chocolate Cake Batter Truffle Pops

White Chocolate Cake Batter Truffle Pops

Printer-Friendly Recipe

Name:White Chocolate Cake Batter Truffle Pops
Cuisine:Fusion
Prep Time:15 minutes
Cooking Time:0 minutes
Total Time:45 minutes (Including chilling time)
Servings: 24 truffle pops
Yield:24 truffle pops

Ingredients

  • 6 soft Medjool dates, pitted
  • 1/2 cup of Ashley’s Cake Batter Cashew Butter (I didn’t add in the sprinkles)
  • 1/4 cup old fashioned rolled oats
  • 1/2 cup white chocolate chips (I’m partial to the Sunspire brand)

Instructions

Step 1: Prepare the Cake Batter Mixture

  1. In a mixing bowl, combine the white cake mix, softened butter, sweetened condensed milk, vanilla extract, and a pinch of salt. Mix everything together until you have a smooth and creamy cake batter consistency.
  2. Gently fold in the rainbow sprinkles, adding a pop of color and a burst of fun to your truffle pops.

Step 2: Shape the Truffles

  1. Using your hands, scoop out small portions of the cake batter mixture and roll them into bite-sized truffle balls. Place them on a baking sheet lined with parchment paper.
  2. Insert a lollipop stick into each truffle ball, making sure it’s secure but not poking through the other side.
  3. Once all the truffles have sticks, place them in the freezer for about 30 minutes to firm up.

Step 3: Coat the Truffle Pops

  1. In a microwave-safe bowl, combine the white chocolate chips and vegetable oil. Heat in 30-second intervals, stirring each time until the chocolate is completely melted and smooth.
  2. Remove the truffle pops from the freezer. Dip each one into the melted white chocolate, allowing any excess to drip off.
  3. Place the coated truffle pops back on the parchment paper-lined baking sheet.

Step 4: Decorate and Set

  1. Before the chocolate coating sets, you can add extra sprinkles or decorations for a festive touch.
  2. Allow the truffle pops to cool and harden. You can speed up the process by placing them in the refrigerator for about 15-20 minutes.

Step 5: Enjoy!

Your White Chocolate Cake Batter Truffle Pops are now ready to enjoy! These sweet treats are perfect for any celebration, and they make great gifts too.

Directions

  1. Place the dates and cashew butter in the bowl of a food processor; process until well-mixed, scraping down the sides of the bowl as necessary. Pulse in the oats until the mixture comes together as a crumbly “dough”.
  2. Using a mini ice cream scoop or small spoon, scoop out spoonfuls of the mixture and roll into 10 balls using your palms.
  3. Push lollipop sticks (or small wooden tester sticks) into the truffles. Place on a plate and chill in the refrigerator until firm, about 1 hour.
  4. Melt the chocolate chips one of two ways: place in a heat-proof bowl and microwave in 30 second increments, stirring in between each, until chocolate is fully melted; OR place in a heat-proof bowl set over a pot with 1 inch if simmering water and stir until melted.
  5. Holding on to the sticks, dip each truffle pop into the melted chocolate and place on a piece of wax or parchment paper. Chill in the fridge until set, at least 30 minutes.

Nutritional Information Per Truffle Pop

  • Calories: 120 calories per truffle pop
  • Total Fat: 7 grams per truffle pop
  • Saturated Fat: 4 grams per truffle pop
  • Cholesterol: 10 milligrams per truffle pop
  • Sodium: 75 milligrams per truffle pop
  • Total Carbohydrates: 14 grams per truffle pop
  • Dietary Fiber: 0 grams per truffle pop
  • Sugars: 10 grams per truffle pop
  • Protein: 1 gram per truffle pop

Please note that these values are rough estimates and can vary based on the specific ingredients and portion sizes used.

It’s always a good idea to calculate precise nutritional information based on the exact brands and quantities of ingredients you use, especially if you have specific dietary requirements or restrictions.

White Chocolate Cake Batter Truffle Pops

Chocolate Chip Peanut Butter Brownie Dough “Truffles”

0

For all of you fans of my dried fruit and nut “truffles”: I am sorry for abandoning you for so long. It’s been about two months since I posted the Ginger and White Chocolate Truffles, and it’s high time for another version.

Chocolate Chip Peanut Butter Brownie Dough “Truffles”

Consider these truffles the more decadent, evil, dark chocolate cousin to those angelic white chocolate treats.

Chocolate Chip Peanut Butter Brownie Dough “Truffles”

Of course, these two-bite brownie impostors aren’t as indulgent as they sound… or taste for that matter; they are actually quite healthy.

Chocolate Chip Peanut Butter Brownie Dough “Truffles”

Ground peanuts and medjool dates comprise the bulk of these truffles; an ingredient combination that is delicious enough all by its lonesome… but when you add in cocoa powder and chocolate chips, you get a healthy snack that truly does taste like dessert.

Chocolate Chip Peanut Butter Brownie Dough “Truffles”

So the next time you’re contemplating baking a pan of brownies, (which, don’t get me wrong, certainly shows up in my kitchen from time to time… in fact, I just made these), consider whipping up a batch of these truffles in the same time it would take to preheat your oven.

Chocolate Chip Peanut Butter Brownie Dough “Truffles”

Chocolate Chip Peanut Butter Brownie Dough “Truffles”

Printer-Friendly Recipe

Name: Chocolate Chip Peanut Butter Brownie Dough TrufflesCuisine: Fusion
Prep Time: 20 minutesCooking Time: 0 minutes
Total Time: 50 minutes (including chilling time)Servings: 24 truffles
Yield: 24 truffles

Ingredients

  • 1 cup roasted salted peanuts, (alternately, you can use unsalted peanuts + 1/4 tsp salt, or to taste)
  • 6 large soft Medjool dates, pitted
  • 2 Tbsp unsweetened cocoa powder
  • 1/2 Tbsp pure maple syrup
  • 1/4 tsp pure vanilla extract
  • 2 Tbsp grain sweetened chocolate chips, such as Sunspire, coarsely chopped

Instructions

Making the Brownie Dough

  1. In a large mixing bowl, combine the all-purpose flour and cocoa powder.
  2. In another bowl, cream together the granulated sugar, brown sugar, softened butter, and 1/4 cup of peanut butter until the mixture is smooth and creamy.
  3. Add the vanilla extract and milk to the sugar-butter mixture, and mix until well combined.
  4. Gradually add the dry ingredients to the wet ingredients, mixing until a smooth brownie dough forms.
  5. Fold in the mini chocolate chips.

Forming the Truffles

  1. Using your hands, shape small portions of the brownie dough into bite-sized truffle balls and place them on a baking sheet lined with parchment paper.
  2. Place the tray in the freezer for about 30 minutes to firm up the truffle balls.

Coating the Truffles

  1. In a microwave-safe bowl, melt the semi-sweet chocolate in 30-second intervals, stirring after each interval until it’s smooth and glossy.
  2. Stir in 1/4 cup of peanut butter until fully incorporated.
  3. Remove the brownie dough truffle balls from the freezer.
  4. Using a fork, dip each truffle ball into the chocolate-peanut butter mixture, ensuring it’s evenly coated. Allow any excess chocolate to drip off.
  5. Place the coated truffles back on the parchment paper-lined tray.

Finishing Touches

  1. If desired, sprinkle crushed peanuts on top of each truffle while the chocolate coating is still soft.
  2. Allow the truffles to set in the refrigerator for at least 30 minutes or until the chocolate coating is firm.

Serve and Enjoy

  1. Once set, these delectable Chocolate Chip Peanut Butter Brownie Dough Truffles are ready to be enjoyed. Share them with friends and family or savor them all to yourself!

Directions

  1. In the bowl of a food processor, process the peanuts until finely crumbled – mixture will resemble coarsely sand. Remove from food processor bowl and set aside.
  2. Place dates in the food processor bowl, and blend until sticky clumps from. Add in the cocoa powder, maple syrup, and vanilla extract and blend until a thick paste forms. Add the ground nuts to the date paste and process until the mixture comes together to form a crumbly “dough”.
  3. Add in the chopped chocolate chips and pulse until incorporated. Remove mixture from food processor, making sure to scrape the sides of the bowl.
  4. Form mixture into a large ball, wrap tightly in plastic wrap, and refrigerate for about 5-10 minutes.
  5. When the dough has chilled for a bit, take it out of the fridge and roll into 12 balls.
  6. Store in an airtight container in the refrigerator.

Nutritional Information Per Truffle

  • Calories: 120
  • Total Fat: 8g
  • Saturated Fat: 4g
  • Trans Fat: 0g
  • Cholesterol: 10mg
  • Sodium: 25mg
  • Total Carbohydrates: 11g
  • Dietary Fiber: 1g
  • Sugars: 7g
  • Protein: 2g

Please note that these nutritional values are approximate and can vary based on the specific brands of ingredients used and the size of the truffles.

It’s always a good idea to consult the packaging of individual ingredients for precise nutritional information if you have dietary restrictions or specific dietary needs.

Annie’s Mexican Pizza

0

I love pizza.

I love the crispy crust and melty cheese.

I love that a homemade pie can be healthy if you use a whole wheat crust, a small amount of sharply flavored cheese, and wholesome add-ons.

I love the variety of cuisines that can be morphed into pizza with a wide array of toppings.

This one is from Annie’s Eats and it is superb! A spiced black bean puree serves as the sauce, which I topped with sharp jalapeno cheddar cheese + a bit of mozzarella, diced red onion, corn, and fresh tomatoes.

Annie’s Mexican Pizza

Clearly, I didn’t photograph the pizza until after I devoured a couple of slices… I hadn’t originally planned on blogging about the pizza, but it was too delicious to not share with you!

Name:Annie’s Mexican Pizza
Cuisine:Mexican/Italian
Prep Time:20 minutes
Cooking Time:15 minutes
Total Time:35 minutes
Servings:6 servings
Yield:1 large pizza

Ingredients

  • 1 lb ball pizza dough, homemade or store-bought, preferably whole wheat, at room temperature
  • flour, for rolling out dough
  • 3/4 can black beans, rinsed and drained
  • 1/2 tsp cumin
  • 1/4 tsp paprika
  • 1/4 tsp cayenne
  • 2-3 Tbsp chicken broth, vegetable broth, or water
  • 1/2 cup freshly shredded sharp jalapeno cheddar cheese
  • 1/2 cup freshly shredded part-skim mozzarella cheese
  • 1/4 cup red onion, finely chopped
  • 1 ripe but firm tomato, seeded and diced
  • 1/3 cup corn (fresh or frozen)

Estimated Nutrition Per Serving

  • Calories: 350-400 calories per serving (1/6 of the pizza)
  • Protein: 15-20 grams per serving
  • Carbohydrates: 30-35 grams per serving
  • Dietary Fiber: 4-6 grams per serving
  • Total Fat: 18-22 grams per serving
  • Saturated Fat: 7-9 grams per serving
  • Cholesterol: 40-50 milligrams per serving
  • Sodium: 600-700 milligrams per serving
  • Sugar: 3-4 grams per serving

Instructions

  • 1. Preheat the Oven

Preheat your oven to 450°F (230°C). If you have a pizza stone, place it in the oven to preheat as well.

2. Prepare the Pizza Dough

Roll out the pizza dough on a floured surface into your desired shape. If you prefer a thicker crust, don’t roll it out too thin.

3. Make the Taco Sauce

In a small saucepan, combine the tomato sauce, chili powder, cumin, garlic powder, salt, and pepper. Heat over low heat, stirring occasionally, until the sauce is warmed through. Remove from heat and set aside.

4. Assemble the Mexican Pizza

Spread the refried beans evenly over the pizza dough, leaving a small border around the edges for the crust. Next, sprinkle the cooked ground beef or meat substitute evenly over the beans. Scatter the diced bell peppers, red onion, and corn kernels on top. Drizzle with olive oil and sprinkle with chili powder, cumin, salt, and pepper.

5. Add the Cheese

Sprinkle the shredded cheddar and Monterey Jack cheese evenly over the pizza.

6. Bake the Pizza

If you’re using a pizza stone, carefully transfer the pizza onto the hot stone using a pizza peel or the back of a baking sheet. If not, place the pizza on a baking sheet. Bake in the preheated oven for 12-15 minutes or until the crust is golden and the cheese is bubbly and slightly browned.

7. Finish and Serve

While the pizza is baking, combine the diced tomatoes, sliced black olives, and chopped cilantro in a bowl. Once the pizza is done, remove it from the oven and let it cool for a minute or two. Then, scatter the tomato and olive mixture over the top.

8. Slice and Enjoy

Use a pizza cutter or a sharp knife to slice your Annie’s Mexican Pizza into wedges. Serve it hot and enjoy the delicious blend of Mexican and Italian flavors!

Tart Vanilla Frozen Yogurt

0

Pinkberry. Red Mango. BerryLine. Chances are you are geographically close to one of these tart frozen yogurt shops that keep gaining in popularity throughout the nation. Touting a lower fat and sugar content than ice cream, frozen yogurt is obviously a lighter choice than its traditional frozen dessert counterpart.

Tart Vanilla Frozen Yogurt

Now, I am a devout ice cream fan. Always have been. Probably always will be. That being said, I eat the sweet treat only on occasion given how rich it is. I indulge in fro-yo more frequently, but up until now I hadn’t found a variety that I absolutely loved. This easy recipe for tart vanilla frozen yogurt has changed that. I’m IN LOVE with the surprisingly creamy and slightly sweet concoction that I spooned out of my ice cream maker.

Tart Vanilla Frozen Yogurt

If you have yet to jump on the fro-yo bandwagon, I suggest following this recipe as your first jaunt; but be forewarned: you might not want to go back to ice cream.

Tart Vanilla Frozen Yogurt

adapted from Heidi Swanson’s Vanilla Frozen Yogurt Recipe, originally from David Lebovitz’s The Perfect Scoop

Name:Tart Vanilla Frozen Yogurt
Cuisine:Fusion
Prep Time:10 minutes
Cooking Time:0 minutes (No cooking required)
Total Time:3 hours (Includes chilling and freezing time)
Servings:6 servings
Yield:1 quart (4 cups) of frozen yogurt

Ingredients

  • 2 cups plain 0% fat Greek yogurt, such as Fage
  • 1 cup plain 2% fat Greek yogurt, such as Fage
  • 1/2 cup evaporated cane juice (or granulated sugar)
  • 1 tsp pure vanilla extract

Instructions

1. Prepare your Equipment

Before you start crafting this delicious frozen yogurt, make sure you have all the necessary equipment on hand. You’ll need a mixing bowl, a whisk, a spatula, and an ice cream maker.

2. Mix the Ingredients

In a mixing bowl, combine the Greek yogurt, granulated sugar, pure vanilla extract, fresh lemon juice, and a pinch of salt. The Greek yogurt provides creaminess and a tangy flavor that’s perfect for frozen yogurt.

3. Whisk it Together

Use a whisk to thoroughly blend all the ingredients. Make sure the sugar is completely dissolved and the mixture is smooth. Taste the mixture and adjust the sugar to your liking. If you prefer it sweeter, you can add a bit more sugar.

4. Chill the Mixture

Once the mixture is well combined, cover the bowl and place it in the refrigerator. Let it chill for at least 1-2 hours. Chilling the mixture not only enhances the flavor but also helps it freeze more efficiently in the ice cream maker.

5. Freeze the Yogurt

After the mixture has chilled, pour it into your ice cream maker. Follow the manufacturer’s instructions for churning. Typically, it takes about 20-25 minutes for the mixture to achieve a creamy, frozen yogurt consistency.

6. Serve or Store

Once your Tart Vanilla Frozen Yogurt is ready, you can serve it immediately for a soft-serve texture, or transfer it to an airtight container and place it in the freezer for a few hours for a firmer consistency.

7. Enjoy!

Scoop your homemade frozen yogurt into bowls or cones, and garnish it with fresh berries, a drizzle of honey, or some crushed nuts for that extra crunch. Your taste buds are in for a treat!

Directions

  1. In a large bowl, combine yogurts, evaporated cane juice, and vanilla extract. Stir until the evaporated cane juice is completely dissolved.
  2. Freeze according to ice cream maker manufacturer’s instructions.
  3. Serve immediately as soft serve, or spoon into a freezer-safe container and place in freezer until “ripened” (hardened).

Estimated Nutrition Per Serving

  • Calories: 180 calories per serving
  • Total Fat: 2g (Varies depending on the type of Greek yogurt used)
  • Saturated Fat:1g
  • Cholesterol: 10mg (Depends on the type of Greek yogurt)
  • Sodium: 50mg
  • Total Carbohydrates: 35g
  • Dietary Fiber: 0g
  • Sugars: 30g (Natural sugars from yogurt and added sugar)
  • Protein: 8g

Please note that these are approximate values and can vary based on the specific ingredients and brands you use. Additionally, the nutrition values can change if you adjust the recipe, such as by using low-fat Greek yogurt or reducing the amount of sugar.

Always check the nutrition labels on the ingredients you use for the most accurate information, especially if you have dietary restrictions or specific health concerns.

Vegan Brown Rice Pudding

0

Rice pudding – to me – is a dessert that transcends seasonality.

Vegan Brown Rice Pudding

Whether you cozy up to a steaming bowl of the comforting dessert on a blustery winter evening or relax with a dish of the chilled treat on a sweltering summer afternoon, rice pudding is a delicious indulgence.

Vegan Brown Rice Pudding

Here I offer you a vegan version that is fantastic served either warm or cold!

Vegan Brown Rice Pudding

A combination of light coconut milk and homemade brown rice milk strikes the ideal balance between rich and light, and a moderate amount of added sugar renders this rice pudding breakfast-appropriate.

Brown sweet rice is cooked right in the coconut milk/rice milk mixture, and the resulting pudding is perfectly thick and creamy right out of the saucepan.

Vegan Brown Rice Pudding

Even though they’re not quite in season up here in Massachusetts (and won’t be until June) I couldn’t help but pick up a package of juicy & sweet organic strawberries to serve with the rice pudding.

Other serving options include crumbled graham crackers, granola, sliced banana, drizzled maple or brown rice syrup, and all-fruit preserves… but honestly the rice pudding is scrumptious all on its own.

Vegan Brown Rice Pudding

How would you enjoy this rice pudding?

Vegan Brown Rice Pudding

Vegan Brown Rice Pudding

By Lauren Zembron

Name:Vegan Brown Rice Pudding
Cuisine:Fusion
Prep Time:5 minutes
Cooking Time:60 minutes
Total Time:65 minutes
Servings:4 servings
Yield:4 cups of pudding

Keywords: simmer dessert breakfast vegan coconut rice pudding rice pudding

Vegan Brown Rice Pudding

Ingredients (4 servings)

  • 1 (13.5 oz) can light coconut milk, well-shaken
  • 1 1/2 cups unsweetened rice milk (I used homemade brown rice milk)
  • 1/2 cup brown sweet rice, such as Lundberg
  • 1/4 cup unrefined granulated sugar, such as evaporated cane juice
  • pinch of salt
  • 1 Tbsp brown rice syrup
  • 1 tsp pure vanilla extract

Instructions

Combine coconut milk, non-dairy milk, rice, sugar, and salt in a medium saucepan set over medium heat.

Bring to a simmer; reduce heat to low, partially cover, and cook until the rice is tender and the mixture is thick, stirring often, about 1 hour. If a “skin” forms on the top of the pudding while cooking, just stir it back into the mixture. It is especially important to tend to the pudding near the end of cooking, as it could burn.

Remove from heat, stir in the brown rice syrup & vanilla extract, and let cool for a bit. Serve warm, at room temperature, or chilled.

Nutritional Information Per Serving

  • Calories: 240 calories per serving.
  • Total Fat: 5g
  • Saturated Fat: Less than 1g
  • Trans Fat: 0g
  • Cholesterol: 0mg
  • Sodium: 200mg
  • Total Carbohydrates: 47g
  • Dietary Fiber: 2g
  • Sugars: 20g
  • Protein: 3g

Keep in mind that the nutritional content may vary based on the type of plant-based milk and sweetener you use in your recipe.

Adjustments can be made to meet your dietary preferences and requirements. Enjoy your vegan brown rice pudding in moderation as part of a balanced diet!

Pumpkin Spice Latte Streusel Muffins

0

HAPPY AUTUMN!!!

Now that it’s officially fall, I can start posting pumpkin recipes with reckless abandon ;).

Last fall – in the foodie blogosphere – was the year of homemade Pumpkin Spice Lattes; you know, the seasonal Starbucks beverage that clocks in at 200 calories and 37 grams of sugar for a tall (12 oz) latte made with skim milk and served without whipped cream. Order a grande (16 oz) with 2% milk and whipped cream, and you’ll be set back 380 calories, 13 grams of fat, and 49 grams of sugar.

NamePumpkin Spice Latte Streusel Muffins
CuisineAmerican
Prep Time15 minutes
Cooking Time18-20 minutes
Total Time35 minutes
Servings12 muffins
Yield12 servings
Pumpkin Spice Latte Streusel Muffins

Yikes.

No wonder food bloggers everywhere offered up their own healthier versions.

To be honest, I was never a huge fan of the pricey, over-sweetened, slightly artificial-tasting original, but I did find a few blogger “knock-offs” that were just a tad sweet and actually tasted like pumpkin.

Here’s my recipe for an Iced Pumpkin Spice Latte.

Pumpkin Spice Latte Streusel Muffins

{There will be many of these made over the next few weeks, until the temperature drops… at which point I’ll switch over to a hot homemade version!}

Pumpkin Spice Latte Streusel Muffins

Anyway… I have a premonition that this fall will be the year of pumpkin spice latte-inspired recipes. The first I encountered was one for cupcakes over on Annie’s Eats. For those of you not familiar with Annie’s blog, let me be the first to tell you that she is über-talented at cupcake (and cookie… and cake… and everything pastry) decorating. Head on over to check out her beautiful cupcakes, complete with whipped cream and a caramel drizzle.

Pumpkin Spice Latte Streusel Muffins

Now, although I enjoy a delicious cupcake as much as the next person, I very rarely make them at home because a) I would be the only one eating them as John isn’t a big dessert person [= dangerous], b) I am pretty terrible at piping frosting, and c) there is typically a ton of sugar in ‘em [see a) above].

Pumpkin Spice Latte Streusel Muffins

The clear line of logic, then, was to morph those gorgeous cupcakes into (less pretty but more healthful) muffins.

Pumpkin Spice Latte Streusel Muffins

I subbed in whole wheat pastry flour, cut down on the sugar, and swapped in unsweetened applesauce for some of the oil.

I also baked brewed coffee (well, decaf) right into the muffins rather than brushing it on top after baking.

Finally, I omitted the whipped cream and caramel finishing touches and instead created a cinnamon-espresso streusel to give the muffins some extra oomph.

Pumpkin Spice Latte Streusel Muffins

With these muffins baking in the oven, your nose will convince you that you’re standing right between a bakery and coffee shop.

The sugary fragrance of warmly spiced baked goods intermingled with the aroma of freshly brewed coffee is so intoxicating that I wish I could bottle it and spray it on as perfume.

Or at least infuse a candle with it.

Pumpkin Spice Latte Streusel Muffins

As with the aroma, the flavor of these muffins beautifully marries together pumpkin spice and espresso. The soft and tender muffins are delicious enough on their own, but the cinnamon-espresso streusel pushes them over the top.

Pumpkin Spice Latte Streusel Muffins

This is juuuuuust the beginning of the copious amount of pumpkin recipes I have stockpiled in my drafts folder.

I hope you’re ready!

Ingredients

  • 1 1/3 cup whole wheat pastry flour
  • 1 1/2 Tbsp espresso powder
  • 1 tsp baking soda
  • 1 tsp baking powder
  • 1/2 tsp ground cinnamon
  • 1/8 tsp ground nutmeg
  • 1/8 tsp ground cloves
  • 1/8 tsp ground ginger
  • 1/2 tsp salt
  • 3/4 cup pure pumpkin puree
  • 1/4 cup unrefined granulated sugar
  • 1/4 cup lightly packed brown sugar
  • 1/4 cup unsweetened applesauce
  • 2 Tbsp canola oil
  • 2 large eggs
  • 1/4 cup room-temperature brewed strong coffee or espresso

Cinnamon-Espresso Streusel:

  • 1/3 cup whole wheat pastry flour
  • 1 Tbsp brown sugar
  • 2 tsp Turbinado sugar
  • 2 Tbsp rolled oats
  • 1/2 tsp ground cinnamon
  • 1 tsp espresso powder
  • 2 Tbsp canola oil

Estimated Nutrition Per Serving

Calories: 230 calories

Total Fat: 10g

Saturated Fat: 6g

Cholesterol: 54mg

Sodium: 238mg

Total Carbohydrates: 31g

Dietary Fiber: 2g

Sugars: 17g

Protein: 3g

Pumpkin Spice Latte Streusel Muffins

Instructions

1. Preheat and Prepare

Preheat your oven to 350°F (175°C). Line a muffin tin with paper liners or grease it lightly with cooking spray.

2. Make the Streusel Topping

In a small bowl, combine the flour, sugar, oats, ground cinnamon, and a pinch of salt.

Cut in the cold cubed butter using a pastry cutter or your fingers until the mixture resembles coarse crumbs. Set aside.

3. Prepare the Muffin Batter

In a medium-sized bowl, whisk together the flour, baking powder, baking soda, salt, ground cinnamon, nutmeg, and cloves. Set aside.

In a separate large bowl, whisk together the granulated sugar, brown sugar, and melted butter until well combined.

Add the eggs, one at a time, mixing well after each addition.

Stir in the pumpkin puree, instant espresso powder, milk, and vanilla extract until the mixture is smooth.

4. Combine Dry and Wet Ingredients

Gradually add the dry ingredients to the wet ingredients, mixing until just combined. Be careful not to overmix; a few lumps are okay.

5. Fill the Muffin Cups

Fill each muffin cup with the batter until they are about 2/3 full.

6. Add Streusel Topping

Sprinkle a generous amount of the streusel topping over each muffin.

7. Bake

Place the muffin tin in the preheated oven and bake for 18-20 minutes or until a toothpick inserted into the center of a muffin comes out clean.