Home Blog Page 97

Healthy Chocolate Fudge

0

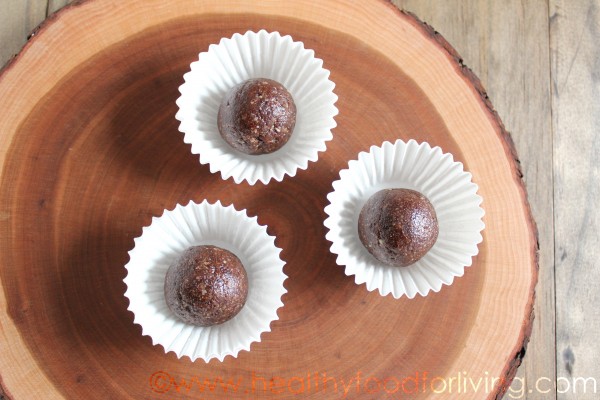
I’m going to risk sounding cliché by saying that there are some desserts that I find to be way too sweet. Classic fudge is one of those desserts. Well, I’ve gone ahead and fixed that “problem” with a less-sweet fudge recipe… that isn’t technically fudge; but these little squares of rich chocolate bliss have a similarly dense & fudgy consistency.

Healthy Chocolate Fudge

The key to achieving said consistency is combining smooth creamy & cashew butter with coconut oil; the latter ingredient of which hardens when chilled. Just enough coconut oil is added to the chocolate cashew butter to allow the mixture to set up in the freezer without turning rock hard.

You don’t need a fancy dancy candy thermometer to make this fudge, which is yet another plus!

Healthy Chocolate Fudge

With the holidays coming up (seriously, already?!), this is an easy, healthy, and delicious recipe to have on hand for doling out to visitors, sending to loved ones, or sharing with your family.

Healthy Chocolate Fudge
Name Healthy Chocolate Fudge
CuisineFusion
Prep Time15 minutes
Cooking Time0 minutes
Total Time2-3 hours
Servings16
Yield16

Keywords: boil dessert chocolate Christmas candy winter

Ingredients (16 servings)

  • 1 cup dark (or semi-sweet) chocolate chips
  • 2 tsp coconut oil
  • 1 cup cashew butter

Instructions

Line a square or rectangular glass container with parchment paper. How thick you’d like your fudge will determine what size container you use. I used one that measured 6×4 inches.

Combine chocolate chips, coconut oil, and cashew butter in a double boiler (I make my own with a heat-proof bowl set over a small saucepan with 1 inch of simmering water. Stir until fully melted and smooth. Let cool for 5 minutes.

Spread mixture evenly in pan. Freeze for 1 hour or – chill in fridge for 2-3 – before cutting into pieces. Store in the freezer.

Nutrition Facts (per serving)

  • Calories: 146 kcal
  • Total Fat: 12g
    • Saturated Fat: 5g
    • Trans Fat: 0g
  • Cholesterol: 0mg
  • Sodium: 16mg
  • Total Carbohydrates: 9g
    • Dietary Fiber: 2g
    • Sugars: 5g
  • Protein: 3g

Note: Nutrition facts are approximate and may vary based on the specific ingredients and brands used. These values are based on a 16-serving yield for the entire recipe. Adjust the serving size accordingly for more accurate personal nutrition information.

*for the cashew butter: Preheat oven to 350°F. Evenly spread 4 cups raw cashews on a rimmed baking sheet. Roast for 15 minutes, stirring once. Place roasted cashews in a food processor fitted with the steel blade; process until smooth & creamy, at least 10 minutes, scraping down sides of food processor bowl as needed. You can also stream in a bit of vegetable oil – 1/4 tsp at a time – if the cashew butter needs to be thinned out.

Monday Musings (flapJacked, T Shirt Printing, & Yumvelope)

0

1. Saturday morning offered the perfect opportunity to try the Buttermilk flapJacked Protein Pancake Mix sent to me from the company’s owners.

Stirred with a cup of cold water and ladled into a warm skillet, this mix yielded light and fluffy pancakes that rival your favorite diner short stack; though they are a bit less sweet (that’s what maple syrup is for!). The simple mix-and-stir method is especially appealing to me now that mornings aren’t quite as laid-back as they were B.L. (Before Lily).

One 4 oz pack serves 2; each serving clocking in at 200 calories, 3 grams fat, 1.5 grams saturated fat, 6 grams fiber, and a whopping 17 grams of protein. Not too shabby when it comes to pancakes!

I still have two other varieties to taste and share with you, so stay tuned.

2. The sweet Emily from T Shirt Printing offered to emblazon a tee shirt with my blog’s logo, and it turned out perfectly!

Monday Musings (flapJacked, T Shirt Printing, & Yumvelope)

It took zero effort on my part; the company was able to download the image directly from my blog and print it onto a high-quality, soft, fitted tee. Unfortunately, the shirt is a bit too snug on me, (I mistakenly requested a small), but I’ll save it for Lily when she gets older ;).

3. Yet another freebie (I love being a food blogger)!

I was lucky enough to be able to sample this month’s snack box from Yumvelope.

Monday Musings (flapJacked, T Shirt Printing, & Yumvelope)

So far I have only sampled the granola (which was really tasty!) but I’m eyeing the dark chocolate bar and bagged cookies ;).

Monday Musings (flapJacked, T Shirt Printing, & Yumvelope)

4. Speaking of cookies, I made – yet another – version of my beloved coconut-oat macaroons, and will be sharing the recipe with you this week. If you’re a chocolate-lover, you’re not going to want to miss it!

Monday Musings + Crab Cake Burgers (revisited)

0

The weather this weekend in Boston was utterly gorgeous! On Saturday night we went out with some friends for a Mexican dinner, mine consisting of the following:

Braised Short Rib Taco (shredded beef, jicama, radish, cilantro, cotija) & Grilled Fish Taco (Mahi-Mahi, dijon cilantro, spring mix, pico).

I had a great night, which was – unfortunately – followed by a crummy day. Sunday was spent curled up on the couch. I hate wasting a beautiful spring day inside, but I did NOT feel good (hopefully not due to the tacos!).

Ugh.

Once I felt like eating again, I dove into this exciting new find from Whole Foods:

Monday Musings + Crab Cake Burgers (revisited)

Nature’s Path Love Crunch CARROT CAKE Granola.

Yes, carrot cake granola. I guess the big-name granola companies finally caught on to the food blogger trend.

This stuff is GOOD. At 130 calories, 4 grams of fat, 8 grams of sugar, and 2 grams each of fiber & protein per 1/4 cup you get huge clusters of oats, pecans, carrot, pineapple, raisins, & cinnamon + little yogurt chips to complete the carrot cake experience.

Now, I know that as a food blogger I’m supposed to say that homemade is waaaay better than store-bought… but in this case, the packaged stuff is pretty damn good!

My parents brought me this olive oil from their trip to Italy!

Monday Musings + Crab Cake Burgers (revisited)

I foresee loaves of crusty bread dipped into bowls of the liquid gold, stacks of caprese salad finished off with a generous drizzle, and simple but heavenly heaps of fresh linguine bathed in parmesan-laden pools of this authentic olive oil.

Yes.

I immediately thought of my Crab Cake Burgers for this week’s “cookout” theme over at The Back Burner.

This is a fantastic way to ring in the impending unofficial start to summer over Memorial Day weekend!

Name:Crab Cake Burgers (revisited)
Cuisine:Seafood
Prep Time:20 minutes
Cooking Time:10 minutes
Total Time:30 minutes
Servings:4
Yield:4 Crab Cake Burgers

Ingredients

  • 1 pound of lump crabmeat
  • 1/2 cup breadcrumbs (preferably Panko)
  • 1/4 cup mayonnaise
  • 1 large egg
  • 1 teaspoon Dijon mustard
  • 1 teaspoon Worcestershire sauce
  • 2 tablespoons chopped fresh parsley
  • 1/2 teaspoon Old Bay seasoning (or your favorite seafood seasoning)
  • Salt and pepper to taste
  • 1/4 cup vegetable oil (for frying)

Instructions

1. Prepare the Crab Cake Mixture

In a large mixing bowl, gently pick through the crabmeat to remove any shell fragments.

In a separate bowl, combine the breadcrumbs, mayonnaise, egg, Dijon mustard, Worcestershire sauce, parsley, Old Bay seasoning, salt, and pepper.

Gently fold the breadcrumb mixture into the crabmeat, being careful not to break up the crab chunks. You want to maintain those delicious lumps of crab in the cakes.

2. Form the Crab Cakes

Divide the mixture into equal portions and shape them into crab cake patties. You can make them as big or as small as you like, depending on the size of your burger buns.

3. Heat the Oil and Fry

In a large skillet, heat the vegetable oil over medium-high heat. Once hot, carefully add the crab cakes to the skillet.

Fry the crab cakes for about 4-5 minutes on each side or until they turn golden brown and crispy.

4. Assemble the Crab Cake Burgers

Toast the hamburger buns until they’re lightly browned.

Spread tartar sauce (or your preferred seafood sauce) on the bottom half of the buns.

Place a lettuce leaf on each bun, followed by a crab cake patty.

Top with sliced tomatoes and red onion.

Add the top half of the bun, and your Crab Cake Burgers are ready to enjoy!

Estimated Nutrition Per Serving

  • Calories: 350-400 kcal
  • Protein: 15-20g
  • Carbohydrates: 25-30g
  • Dietary Fiber: 1-2g
  • Sugars: 3-4g
  • Fat: 20-25g
  • Saturated Fat: 2-3g
  • Cholesterol: 60-80mg
  • Sodium: 800-1000mg

Watermelon & Cucumber Cooler

0

Does it feel like summer where you live?

Beat the heat and stay hydrated with this revitalizing Watermelon & Cucumber Cooler.

This refreshing drink is a perfect blend of succulent watermelon and crisp cucumber, making it an excellent choice for hot summer days.

Not only is it hydrating, but it’s also packed with essential vitamins and minerals to keep you energized. Let’s dive into making this simple and revitalizing beverage!

PropertyValue
NameWatermelon & Cucumber Cooler
CuisineBeverage
Prep Time10 minutes
Cooking Time0 minutes (no cooking required)
Total Time10 minutes
Servings4 servings
Yield4 cups

Ingredients

  • 3 cups watermelon, seedless and cubed
  • 1 cup cucumber, peeled and chopped
  • Juice of 2 limes
  • 1-2 tablespoons honey (optional, adjust to taste)
  • A handful of fresh mint leaves
  • Ice cubes
  • Garnish: Watermelon slices, cucumber wheels, and mint sprigs

Instructions

Prepare the Ingredients

  • Wash and cut the watermelon into cubes, removing any seeds.
  • Peel the cucumber and chop it into small pieces.
  • Juice the limes to extract fresh lime juice.

Blitz the Watermelon and Cucumber

  • Blend until smooth and well combined.
  • In a blender, combine the watermelon cubes and chopped cucumber.

Add Lime Juice and Honey

  • Add the freshly squeezed lime juice to the blended mixture.
  • If you desire a touch of sweetness, add honey according to your taste preference. Blend again to incorporate the flavors.

Strain (optional)

  • If you prefer a smoother drink, strain the mixture using a fine mesh sieve or cheesecloth to remove any pulp.

Chill the Mixture

  • Transfer the mixture to a pitcher and refrigerate for at least 30 minutes to chill.

Serve

  • When ready to serve, add ice cubes to individual glasses.
  • Pour the chilled watermelon-cucumber mixture over the ice.

Garnish and Enjoy

  • Garnish with a slice of watermelon, cucumber wheel, and a sprig of fresh mint.
  • Stir gently before sipping and relish the delightful taste of this revitalizing Watermelon & Cucumber Cooler.

Estimated Nutrition Per Serving

  • Calories: 60
  • Carbohydrates: 15g
  • Sugars: 10g
  • Protein: 1g
  • Fat: 0.5g
  • Fiber: 1.5g
  • Vitamin C: 25% DV
  • Vitamin A: 20% DV
  • Calcium: 2% DV
  • Iron: 4% DV

Please note that the nutrition values are approximate and may vary based on the exact quantities and specific brands of ingredients used. It’s always a good practice to calculate the nutrition based on the exact products you use.

Watermelon & Cucumber Cooler

The really hot weather has yet to descend upon New England for the season, but this Memorial Day weekend is actually forecast to be pretty warm. After what feels like day after day of cool rainy days, I’m welcoming the sunshine with open arms and this refreshing cooler is the perfect way to ring in the unofficial start of summer.

Watermelon & Cucumber Cooler

Simply a strained puree of sweet juicy watermelon and crisp cool cucumber, this agua fresca-like beverage  is an ideal antidote to a hot day.

Watermelon & Cucumber Cooler

Watermelon is a staple in my summertime diet, and apparently I’ve started early this year because I can’t seem to get enough of the delicious fruit. I can easily put away a few big bowlfuls of chopped watermelon in one sitting… I mean it is mainly water, right?!

Watermelon & Cucumber Cooler

Feel free to play around with the ratio of watermelon to cucumber to suit your taste preference. Regardless, I hope you find this cooler as delicious and refreshing as I do!

Watermelon & Cucumber Cooler

Stay cool and refreshed with this delightful Watermelon & Cucumber Cooler. A fusion of hydrating watermelon, crisp cucumber, and zesty lime, blended to perfection. Sweetened with a hint of honey and garnished with fresh mint. A sip of this revitalizing drink is like a burst of summer in your mouth. Enjoy the ultimate summer cooler!

Fudgy Walnut Brownie Dough “Truffles”

0

This week we’re featuring heart healthy snacks as part of Love Your Heart month.

Amy and Nathalie are hosting today’s giveaway items; one winner will receive the Sweet Freedom cookbook by Ricki Hellier and another winner will receive 2 variety boxes of Simply Bars.

Be sure to check out all of the hearty-healthy snack recipes featured today:

  • Cara’s Oatmeal Cookie Dip
  • Nicole’s Buffalo Wing Humus
  • Amy and Nathalie’s Baked Wonton Crisps and Bean Dip (this week’s hostesses)

Now, about these truffles…

Fudgy Walnut Brownie Dough “Truffles”

… they just might be my favorite dried-fruit-and-nut truffles to date!

Fudgy Walnut Brownie Dough “Truffles”

Fudgy, chocolaty, dense, rich, and sweet, (sound familiar?), these little two-bite “truffles” are basically healthy mini brownies.

Fudgy Walnut Brownie Dough “Truffles”

What makes them heart-healthy?

First and foremost: cocoa can decrease blood pressure, improve blood vessel health, lower LDL cholesterol & raise HDL cholesterol, and reduce risk factors for diabetes.

As far as nuts go, walnuts may be the #1 pick for heart health. Packed with antioxidants and omega-3 fatty acids, walnuts can lower LDL cholesterol as well as unhealthy inflammation.

Fudgy Walnut Brownie Dough “Truffles”

Walnuts + cocoa + Medjool dates + a bit of pure maple syrup = a decadent-tasting but inarguably healthy treat that travels well as an on-the-go snack.

Fudgy Walnut Brownie Dough “Truffles”

If you’d like to go the extra mile, you can roll the brownie dough balls in cocoa powder to achieve the traditional truffle look; but I actually prefer the way they taste without that final step.

Fudgy Walnut Brownie Dough “Truffles”

I tore through these truffles in no time. In fact, making another batch is on my list of tasks to accomplish STAT.

Fudgy Walnut Brownie Dough “Truffles”

One more heart-healthy recipe coming next week… and it’s dessert.

That means one thing: more chocolate!

Fudgy Walnut Brownie Dough “Truffles”
NameFudgy Walnut Brownie Dough “Truffles”
CuisineFusion
Prep Time20 minutes
Cooking Time0 minutes
Total Time50 minutes
Servings24 truffles
Yield24 Fudgy

Ingredients (12 truffles)

  • 1 cup toasted walnuts halves
  • 6 large Medjool dates, pitted
  • 1/8 tsp Kosher salt
  • 2 Tbsp unsweetened cocoa powder + more for rolling, optional
  • 1/2 Tbsp pure maple syrup
  • 1/4 tsp pure vanilla extract

Instructions

In the bowl of a food processor, process the walnuts until finely crumbled – mixture will resemble coarse sand. Be sure not to over-process, or you will end up with walnut butter! Remove from food processor bowl and set aside.

Place dates in the food processor bowl, and blend until sticky clumps from. Add in the salt, cocoa powder, maple syrup, and vanilla extract and blend until a thick paste forms. Add the ground walnuts to the date paste and process until the mixture comes together to form a crumbly “dough”.

Remove mixture from food processor, making sure to scrape the sides of the bowl.

Form mixture into a large ball, wrap tightly in plastic wrap, and refrigerate for about 10 minutes.

When the dough has chilled, take it out of the fridge and roll into 12 balls. Refrigerate balls for another 5 minutes.

If you’d like, you can roll the balls in cocoa powder for more of a true truffle appearance.

Nutrition Facts (Approximate, per truffle)

  • Calories: 170 kcal
  • Total Fat: 12g
  • Saturated Fat: 7g
  • Cholesterol: 25mg
  • Sodium: 45mg
  • Total Carbohydrates: 15g
  • Dietary Fiber: 2g
  • Sugars: 10g
  • Protein: 3g

Keep in mind that these values can vary based on the size of the truffles and the specific ingredients you use, especially the chocolate and nuts. It’s a good idea to use a nutrition calculator or consult the nutritional information on your ingredient packages for more accurate details.

Gingerbread ‘Nog Steel Cut Oats

0

Sitting down to a bowl of this oatmeal is like eating Christmas for breakfast.

Gingerbread ‘Nog Steel Cut Oats

It not only includes eggnog – a holiday classic – but it also beautifully mimics the flavor of gingerbread. The combination of molasses and warm spices makes this oatmeal truly taste like the traditional cookie that graces many a holiday party platter.

Some of my favorite holiday memories are of making gingerbread cookies with my mom. I remember how difficult it was to be patient while the freshly made dough rested in the fridge, waiting to be rolled out and stamped into all varieties of shapes.  My favorite cookie cutter was a cute little rocking horse, and I would always sneak the remaining scraps of raw dough left over from the cut out cookies.

I like my gingerbread cookies just slightly crisp around the edges and soft & chewy everywhere else.

Gingerbread ‘Nog Steel Cut Oats

Obviously this oatmeal does not have crisp edges, but it is chewy thanks to the steel cut oats!

Gingerbread ‘Nog Steel Cut Oats

This would be a fabulously delicious – and healthy! – way to start of Christmas morning… or any morning, for that matter.

Gingerbread ‘Nog Steel Cut Oats
NameGingerbread ‘Nog Steel Cut Oats
CuisineFusion
Prep Time5 minutes
Cooking Time30 minutes
Total Time35 minutes
Servings4 servings
YieldApproximately 4 cups

Ingredients

  • 1 cup steel-cut oats
  • 2 cups water
  • 2 cups eggnog
  • 1/4 cup molasses
  • 1 teaspoon ground ginger
  • 1/2 teaspoon ground cinnamon
  • 1/4 teaspoon ground nutmeg
  • 1/4 teaspoon ground cloves
  • A pinch of salt
  • Optional toppings: chopped nuts, raisins, or whipped cream

Estimated Nutrition Per Serving

Calories: 280 calories

Protein: 7 grams

Carbohydrates: 50 grams

Dietary Fiber: 4 grams

Sugars: 25 grams

Fat: 6 grams

Saturated Fat: 3 grams

Cholesterol: 75 milligrams

Sodium: 150 milligrams

Instructions

Toast the Oats

Start by toasting the steel-cut oats in a dry saucepan over medium heat. Stir them continuously for about 2-3 minutes until they become fragrant and lightly golden. This step enhances the nutty flavor of the oats.

Boil the Water

In a separate pot, bring 2 cups of water to a boil. Once boiling, add a pinch of salt and the toasted oats.

Simmer and Cook

Reduce the heat to low, cover the pot, and let the oats simmer for about 20-25 minutes. Stir occasionally to prevent sticking. The oats should become tender but still have a slight chew.

Add the Spices

Stir in the ground ginger, ground cinnamon, ground nutmeg, ground cloves, and molasses. These spices will infuse the oats with the warm, comforting flavors of gingerbread.

Pour in the Eggnog

Gradually add the eggnog while continuing to stir. Simmer for an additional 5-10 minutes, or until the oats have absorbed most of the eggnog and the mixture becomes creamy.

Serve and Garnish

Once the oats reach your desired consistency, remove them from heat. Spoon them into bowls and, if desired, top with chopped nuts, raisins, or a dollop of whipped cream for extra indulgence.

Enjoy

Grab your spoon and savor the delightful blend of gingerbread and eggnog flavors in every bite. These Gingerbread ‘Nog Steel Cut Oats are a fantastic way to start a festive morning.

Spiced Pear & Date Chutney + White Chocolate PB Cups

0

I really struggled with getting a good shot of this chutney. Some foods just aren’t very photogenic, and this is definitely one of them!

I suppose I could have just slapped another slice of bread on top and called it a day, but then you wouldn’t have been able to see it all. Just do me a favor and don’t judge this chutney by its appearance… looks can be deceiving.

Spiced Pear & Date Chutney

After the third photo shoot, I threw up my hands and decided that these pictures would have to do. If I had waited any longer, there would have been nothing left to photograph… I couldn’t stop eating the chutney by the spoonful ;).

Spiced Pear & Date Chutney

Chutneys are great for those of us who adore sweet & savory pairings (who’s with me?),  and they are extremely versatile.

So far, I’ve enjoyed the chutney in a salad along with blue cheese and on a sandwich with almond butter and fig jam (photographed); but I bet it would also be fantastic served alongside roasted pork or chicken and spread on crackers with goat cheese or sharp cheddar.

I’d love to hear your ideas about how you would enjoy this chutney!

Spiced Pear & Date Chutney
NameSpiced Pear & Date Chutney + White Chocolate PB Cups
CuisineFusion
Prep Time15 minutes
Cooking Time60 minutes
Total Time1 hour 15 minutes
Servings2 cups
Yield2 cups

Ingredients

  • 1 tsp extra virgin olive oil
  • 2 Tbsp minced shallots
  • 1 large Bartlett pear, preferably organic, finely chopped
  • 1/4 cup finely chopped pitted soft Medjool dates, about 2 large
  • 1/4 cup apple cider
  • 1 Tbsp pure maple syrup
  • 1/2 Tbsp apple cider vinegar
  • tiny pinch Kosher salt
  • 1 (3-inch) cinnamon stick
  • 5 whole cloves

Directions

  1. Heat olive oil in a small saucepan set over medium-high heat. Add in the shallots and cook, stirring, for 2 minutes or until softened.
  2. Add in the pear, dates, cider, maple syrup, vinegar, salt, cinnamon, and cloves; bring mixture to a boil. Reduce heat to low; cook for 15 minutes or until the pear is tender and the mixture has thickened, stirring occasionally. Cool to room temperature. Remove the cinnamon stick and all 5 cloves.

In other news, (as promised in yesterday’s post), today you can find my recipe for White Chocolate Peanut Butter Cups on the PB & Co. blog.

Spiced Pear & Date Chutney

If the recipe isn’t the first one listed when you click over to the blog, check back a little later in the day… trust me, it’s worth your time!

Spiced Pear & Date Chutney

Yeah, these are fantastic ;).

Nutrition Facts (per 1 tablespoon serving)

  • Calories: 35
  • Total Fat: 0g
  • Cholesterol: 0mg
  • Sodium: 5mg
  • Total Carbohydrates: 9g
  • Dietary Fiber: 1g
  • Sugars: 7g
  • Protein: 0g

Creamy Pesto Sauce

0

Creamy pesto sauce is a delightful twist on the classic pesto sauce, adding a luxurious and velvety texture to your favorite pasta dishes. Bursting with the flavors of fresh basil, garlic, pine nuts, and Parmesan cheese, this sauce will take your meals to the next level. Whether you’re a pasta enthusiast or simply looking to elevate your culinary repertoire, this creamy pesto sauce recipe is a must-try.

Name:Creamy Pesto Sauce
CuisineItalian
Prep Time10 minutes
Cooking Time5 minutes
Total Time15 minutes
ServingsAbout 8 servings
Yield2 cups

Ingredients

  • 2 cups fresh basil leaves, packed
  • 1/2 cup grated Parmesan cheese
  • 1/2 cup pine nuts, toasted
  • 3 cloves garlic, minced
  • 1/2 cup extra-virgin olive oil
  • 1/2 cup heavy cream
  • Salt and freshly ground black pepper, to taste
  • 1/2 cup grated Pecorino Romano cheese (optional)
Creamy Pesto Sauce

Instructions

Toast the Pine Nuts

Begin by toasting the pine nuts in a dry skillet over medium-low heat. Stir frequently until they turn golden brown and release a nutty aroma, which should take about 3-4 minutes. Be careful not to overcook them, as they can burn quickly. Remove them from the skillet and let them cool.

Prepare the Basil

Wash and dry the fresh basil leaves thoroughly. You want them to be clean and dry for the best flavor. Remove any tough stems and pack the basil leaves into a measuring cup.

Blend the Ingredients

In a food processor, combine the toasted pine nuts, minced garlic, and grated Parmesan cheese. Pulse the mixture until it becomes a coarse paste.

Add the Basil

Add the fresh basil leaves to the food processor and pulse until the basil is finely chopped and well combined with the other ingredients.

Stream in the Olive Oil

With the food processor running, slowly stream in the extra-virgin olive oil. Continue blending until the mixture is smooth and creamy.

Incorporate the Cream

Transfer the pesto mixture to a saucepan and warm it over low heat. Pour in the heavy cream and stir until the sauce is heated through and becomes creamy. Season with salt and freshly ground black pepper to taste.

Optional Cheese

If you desire a richer flavor, add grated Pecorino Romano cheese to the sauce at this stage. Stir until the cheese is fully melted and the sauce is well combined.

Serve

Your creamy pesto sauce is now ready to use! Pour it over your favorite cooked pasta, such as linguine or fettuccine, and toss until the pasta is well coated. You can also use this sauce as a delicious topping for grilled chicken or roasted vegetables.

Garnish

For a final touch, garnish your pasta dish with additional grated Parmesan cheese and a few fresh basil leaves.

Creamy Pesto Sauce

Estimated Nutrition per Serving

Calories: 220 kcal

Total Fat: 22g

Saturated Fat: 5g

Trans Fat: 0g

Cholesterol: 20mg

Sodium: 190mg

Total Carbohydrates: 2g

Dietary Fiber: 0g

Sugars: 0g

Protein: 4g

Chocolate Peanut Butter Banana Muffins

0

Chocolate.

Chocolate Peanut Butter Banana Muffins

Peanut butter.

Chocolate Peanut Butter Banana Muffins

Bananas.

Chocolate Peanut Butter Banana Muffins

Unquestionably one of my all-time favorite combinations of flavors, and a healthy trifecta of wholesome ingredients when you use antioxidant-rich unsweetened cocoa powder and protein-rich peanut flour.

Chocolate Peanut Butter Banana Muffins

Although the entire batch calls for only 1/2 cup of unrefined sugar, the muffins are quite sweet thanks to the inherent sweetness of overripe bananas.

Chocolate Peanut Butter Banana Muffins

The muffins are also perfectly moist, despite the lack of both oil and butter. Applesauce never fails to impress me as a replacement for fat in muffins and quick breads.

Chocolate Peanut Butter Banana Muffins

While on the topic of healthy substitutions, I am becoming increasingly dependent on peanut flour in baking. No need to fret about the discontinued Trader Joe’s brand… there is a wide array of peanut flours available for purchase online, and I absolutely think it is worth the shipping charges! Low in fat, high in protein, and similar in calories to regular flour, the peanut variety contributes fantastic flavor to baked goods.

Chocolate Peanut Butter Banana Muffins

And what better flavor to accompany peanut butter than chocolate, right?!

The rich chocolate flavor of these muffins is heightened by espresso powder and grain-sweetened chocolate chips, which have also become a baking staple in my pantry. Sweetened only with whole grain malted barley and corn, [unsweetened chocolate, cocoa butter, soy lecithin (a non-GMO emulsifier), and pure natural vanilla are the remaining ingredients], these morsels are the perfect way to healthfully satisfy a chocolate craving.

Chocolate Peanut Butter Banana Muffins

As is fairly typical unfailingly routine for me when I make baked goods, I dove right into a still-warm muffin this morning and fully enjoyed it alongside a cup of cocoa-brewed decaf coffee (just add a spoonful of unsweetened cocoa powder to the coffee granules before brewing).

Chocolate Peanut Butter Banana Muffins

Certainly healthy enough for breakfast, these muffins are also decadent-tasting enough to serve for dessert. Pop one into the toaster or microwave for that fresh-from-the-oven gooeyness, and serve with a scoop of vanilla frozen yogurt or ice cream and I promise you it will taste like a brownie sundae ;).

Chocolate Peanut Butter Banana Muffins

I’m also envisioning a trifle with alternating layers of crumbled leftover muffins, Greek yogurt, and all-fruit raspberry jam.

That just might be breakfast tomorrow morning!

Chocolate Peanut Butter Banana Muffins
NameChocolate Peanut Butter Banana Muffins
CuisineAmerican
Prep Time15 minutes
Cooking Time18-20 minutes
Total Time35 minutes
Servings12
Yield1

Ingredients

  • 2 ripe bananas, mashed
  • 1/3 cup creamy peanut butter
  • 1/4 cup unsweetened cocoa powder
  • 1/3 cup granulated sugar
  • 1 egg
  • 1 teaspoon pure vanilla extract
  • 1 teaspoon baking soda
  • A pinch of salt
  • 1/2 cup all-purpose flour
  • 1/2 cup chocolate chips

Estimated Nutrition Per Serving

Calories: 190 kcal

Fat: 9g

Saturated Fat: 3g

Cholesterol: 16mg

Sodium: 187mg

Carbohydrates: 25g

Fiber: 2g

Sugars: 12g

Protein: 4g

Instructions

Preheat the Oven

Start by preheating your oven to 350°F (175°C) and line a muffin tin with paper liners or grease it lightly.

Mash the Bananas

In a mixing bowl, mash the ripe bananas until they are smooth and creamy. The riper the bananas, the sweeter your muffins will be.

Add Peanut Butter and Sugar

Add the creamy peanut butter and granulated sugar to the mashed bananas. Mix well until the ingredients are thoroughly combined.

Incorporate the Wet Ingredients

Stir in the egg and pure vanilla extract into the banana mixture. Mix until everything is well incorporated.

Sift Dry Ingredients

In a separate bowl, sift together the cocoa powder, all-purpose flour, baking soda, and a pinch of salt. Sifting helps ensure a smoother batter and even distribution of leavening agents.

Combine Wet and Dry Mixtures

Gradually add the dry mixture to the wet mixture, stirring until just combined. Be careful not to overmix, as this can make your muffins tough.

Add Chocolate Chips

Gently fold in the chocolate chips into the batter. The chocolate chips will add bursts of chocolatey goodness to each bite.

Fill Muffin Cups

Using a spoon or an ice cream scoop, evenly distribute the muffin batter into the prepared muffin cups, filling each one about two-thirds full.

Bake

Place the muffin tin in the preheated oven and bake for approximately 18-20 minutes or until a toothpick inserted into the center of a muffin comes out clean.

Monday Musings + Egg Salad

0

Monday mornings can be a bit of a drag, but what better way to start your week than with some delicious and nutritious food? We’ve got just the recipe to kickstart your week – a hearty and satisfying Egg Salad.

This dish not only offers a burst of flavors but is also a breeze to prepare. So, let’s dive into this Monday Musings + Egg Salad recipe and add some zest to your start-of-the-week routine.

Name:Monday Musings + Egg Salad
CuisineAmerican
Prep Time15 minutes
Cooking Time12 minutes (for boiling eggs)
Total Time27 minutes
Servings4 servings
Yield4 cups
Monday Musings + Egg Salad

I actually prefer thin crust pizza, but this was a fun change of pace

I found a couple of great bathing suits that I’m actually excited to wear in Barbados next week. Both are Kenneth Cole Reaction (found at TJ Maxx & Marshalls) and are super flattering on my figure.

For any of you hourglass figures out there, these suits are really fantastic! The adjustable tie halter gives good support for a C/D cup size, and the length gives flattering coverage for us girls with hips. Unlike other one piece swimsuits with skirts, these are actually sexy rather than dowdy. The front dips down to reveal just enough cleavage, and the back is cut out to show off toned shoulders and lats.

Finally a bathing suit silhouette that I feel confident in

This week’s assignment for The Back Burner is “fast & delicious”… so I just had to go with my stand-by easy lunch: egg salad.

Monday Musings + Egg Salad

Ingredients

  • 6 large eggs
  • 1/4 cup mayonnaise
  • 1 tablespoon Dijon mustard
  • 1/4 cup celery, finely chopped
  • 1/4 cup red onion, finely chopped
  • 2 tablespoons fresh parsley, chopped
  • Salt and pepper to taste

Instructions

1. Boil the Eggs

  • Place the eggs in a saucepan and cover them with cold water.
  • Bring the water to a boil over high heat.
  • Once the water boils, remove the saucepan from the heat, cover it, and let the eggs sit for about 9-12 minutes for hard-boiled eggs or 6-8 minutes for slightly softer yolks.
  • After the desired cooking time, transfer the eggs to a bowl of ice water to cool quickly.

2. Prepare the Dressing

  • In a small bowl, mix together the mayonnaise, Dijon mustard, chopped celery, red onion, and fresh parsley.
  • Season the dressing with salt and pepper to taste. Adjust the seasoning to your preference.

3. Peel and Chop the Eggs

  • Once the boiled eggs are cool, peel them and chop them into small pieces.

4. Combine and Toss

  • In a large bowl, combine the chopped eggs and the prepared dressing.
  • Gently toss the ingredients until the eggs are well coated with the dressing.

5. Assemble the Salad

  • To serve, line a plate or bowl with fresh lettuce leaves.
  • Spoon the egg salad onto the lettuce.
  • Garnish with sliced tomatoes, cucumbers, and avocado (if using).
  • Serve the egg salad as a sandwich by placing it in a crusty bread roll or wrap, if desired.

6. Enjoy

  • Your Monday Musings + Egg Salad is ready to be devoured! It’s perfect for a quick and nutritious lunch or a light dinner.

Estimated Nutrition Per Serving

  • Calories: 200 kcal
  • Total Fat: 17g
  • Saturated Fat: 3g
  • Cholesterol: 223mg
  • Sodium: 273mg
  • Total Carbohydrates: 2g
  • Dietary Fiber: 0.5g
  • Sugars: 1g
  • Protein: 11g

Please note that these nutritional values are approximate and can vary based on specific ingredients and portion sizes used. It’s always a good idea to calculate nutrition based on the exact ingredients you use in your recipe.