Quesadillas are neither inherently healthy nor unhealthy — it all comes down to how they’re prepared. With the right ingredients and mindful portions, they can be a satisfying and nutritious part of a balanced diet. Making small changes can help you enjoy quesadillas while still supporting your overall health goals.
“The quesa, quesadilla, the tastiest snack north of Havana!”, the great Latin American delicacy that almost all of us crave. The simplicity in making quesadillas leaves a light aftertaste, which is why we appreciate it as a good appetizer.
It is rare to doubt the healthiness of a snack that causes no physical discomfort. That is the exact reason why I found myself wondering, are quesadillas healthy? Is there any chance that quesadillas have the obscure traits of junk food?
Well, let’s find out!
Why the Healthiness of Quesadillas Matters
Quesadillas are a popular choice for quick lunches, easy dinners, and satisfying snacks, but many people wonder whether they fit into a healthy eating pattern.
Because quesadillas can vary widely in ingredients, portion size, and preparation method, their nutritional value isn’t always obvious. The quesadilla can help you decide how often to enjoy it and how to make it.
Tips for Making Healthier Quesadillas
Small changes can make a big difference in improving the nutritional quality of a quesadilla:
- Choose whole-grain or corn tortillas for added fiber
- Use moderate amounts of cheese instead of overloading
- Add lean protein such as grilled chicken, beans, or tofu
- Include plenty of vegetables like peppers, onions, spinach, or mushrooms
- Cook with minimal oil or use a non-stick pan
These adjustments help create a more balanced and satisfying meal.
Are Quesadillas a Good Option for Weight Loss?
Quesadillas can fit into a weight-loss plan when portions are controlled and ingredients are chosen carefully. Opting for whole grains, lean protein, and vegetables while keeping cheese portions reasonable can help reduce excess calories while still providing satiety.
Are Quesadillas Suitable for Kids?
Quesadillas are often appealing to children because of their simple flavors and easy-to-eat format. Adding vegetables and using whole-grain tortillas can make them a more nutritious option for kids, while still keeping them familiar and enjoyable.
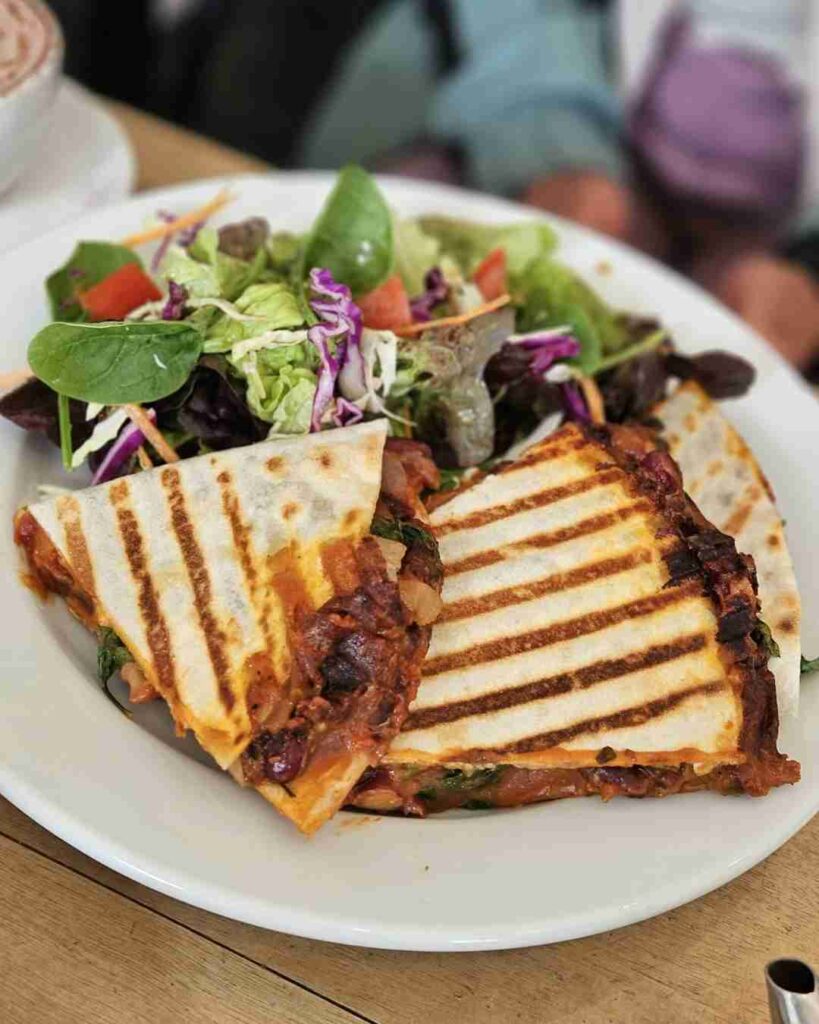
Quesadillas with several ingredients
Quesadillas are a frenzy of several ingredients. We need to discuss all of these separately to understand their potential benefits or detriments. Let us dissect a quesadilla for that purpose:
Tortilla:
The basic ingredient is the tortilla, a Mexican traditional staple often compared to bread. Tortillas are considered healthy. The ones made from corn are healthier than those made from flour. Corn contains more vitamins and minerals.
Whole-grain tortillas are a better choice; they provide you with a relatively larger amount of plant-based compounds and nutrients. Tortillas are superior to your average white bread (health-wise, if not calorie-wise). So, I think it’s ten points to quesadilla for the first ingredient.
Cheese:
The more, the merrier — the same goes for cheese in a quesadilla. But cheese is loaded with calories! We are conscious when we are taking cheese with a hamburger. But when cheese is taken absent-mindedly, as we do in the case of quesadillas, we tend to overindulge.
If we ignore calories for a moment and consider only the health factors, it turns out that cheese is great for you. It is an excellent source of calcium, protein, and vitamin B12.
Some types of cheese, such as mozzarella, blue cheese, tofu, etc., might even aid weight loss and prevent osteoporosis. Meanwhile, some of the types are alarmingly high in sodium and fat.
So, it comes down to choosing the exact right type of cheese that will determine the healthiness of your quesadillas.
Vegetables:
This one is self-explanatory. Hail to all the veggies out there! I think there are no bad vegetables unless you have an enmity (or allergy) with a particular one on a medical level.
For example, cabbage taken excessively can interfere with the treatment of someone on therapy for thyroid issues. Or pumpkin can be detrimental for someone with diabetes (but who puts pumpkin in quesadillas?).
So, you get my point, vegetables are your best friend. They don’t ruin the healthiness of quesadillas; rather, they increase the nutritional importance!
Oil:
Sometimes quesadillas are sauteed in oil, or they are baked in the oven without any oil. If the former is applicable, then it all comes down to the kind of oil being used. Olive oil is one of the healthiest types of oils (although it might be a little expensive).
Other healthy oils are canola oil, grape seed oil, rice bran oil, peanut oil, etc. If you are making your quesadillas daily, I suggest you rethink your choice of oil.
But when quesadillas are baked, they contain little to no oil, which is the best-case scenario, calorie-wise as well as health-wise.
Meat:
Who doesn’t love meat? (Spoiler alert: vegans don’t) Quesadillas made of chicken are healthy. Needless to say, meat is the greatest source of protein and is rich in iron, calcium, vitamins, minerals, and folic acid.
Meat replenishes your body and strengthens your immunity. Although a gram of meat will produce the same amount of energy as a gram of bread, the former will keep you satiated for a longer time, reducing your calorie intake.
However, quesadillas made of beef, mutton, or pork are incredibly high in calories. They are also classified as red meat, which means they will be slowly clogging your arteries. To whoever said that food won’t fill the void in your heart, share this piece of information with them.
If you can’t give up on red meat, try using low-fat lean meat.
Sour Cream:
I can swear that you don’t eat ketchup on your quesadillas. You most likely take sour cream or yogurt as an aside. In that case, you have to think about whether or not those are ultra-processed.
If they are, I suggest making your sour cream or yogurt. Try to keep them sugarless as well. A good alternative is Greek yogurt, which you can easily make at home or request in a restaurant while eating out.
Seasoning:
Not to be that person, but we have to talk about the seasonings as well. Some of the spices or seasonings that are used to marinate quesadillas can contain too much salt. This will cause the sodium content of your body to skyrocket (I am talking to you, hypertensive people).
Some seasonings to look out for are monosodium glutamate, soy sauce, oyster sauce, etc. Anything that adds the extra salty crisp to your food likely has excessive sodium.
If you are eating at a restaurant, I am sorry to inform you that they will be using too much of these potentially harmful seasonings because they make the food taste incredibly good, duh.
But if you are making quesadillas on your own, now you know what not to do.
What Makes a Quesadilla Healthy or Unhealthy?
The healthiness of a quesadilla largely depends on its ingredients. Tortillas, cheese, fillings, and cooking methods all play a role in determining whether a quesadilla is a nutrient-dense meal or a calorie-heavy indulgence.
A quesadilla made with whole-grain tortillas, lean protein, and vegetables can be far different nutritionally from one made with refined flour tortillas, large amounts of cheese, and processed meats.
A General Quesadilla Inspection

Now that we are done taking apart everything that goes in a quesadilla, let’s take a generalized approach to judge this scrumptious beauty. One serving of quesadilla contains about 360 calories. Whether this is too much or just fine depends on your calorie requirement.
But the ratio of protein, fat, and carbohydrate that is considered ideal is found in a quesadilla. So even if the calorie seems a bit high, the proportion of all the macros is great, and you wouldn’t need to apprehend any malnutrition.
Nutrition Facts Snapshot (Per 1 Quesadilla)
To better understand how quesadillas fit into a balanced diet, it helps to look at their basic nutrition. Values will vary depending on ingredients and portion size.
| Nutrient | Approximate Amount |
|---|---|
| Calories | 300–500 kcal |
| Protein | 10–20 g |
| Fat | 15–25 g |
| Carbohydrates | 30–40 g |
| Fiber | 2–6 g |
| Sodium | 400–700 mg |
This snapshot highlights why ingredient choices can significantly change the nutritional impact of a quesadilla.
Potential Benefits of Eating Quesadillas
When prepared thoughtfully, quesadillas can offer several nutritional benefits. Cheese and protein fillings contribute protein and calcium, while whole-grain tortillas and vegetable fillings add fiber and important micronutrients.
Quesadillas can also be filling, which may help with portion control when paired with nutrient-rich sides like salads or vegetables.
Possible Downsides to Consider
Traditional quesadillas can be high in saturated fat, sodium, and refined carbohydrates, especially when made with large amounts of cheese and white flour tortillas.
These factors may make them less ideal for frequent consumption, particularly for individuals watching their calorie intake or managing conditions like high cholesterol.
Frequently Asked Questions (FAQs)
Are quesadillas healthy to eat regularly?
Quesadillas can be enjoyed regularly if they’re made with balanced ingredients like whole grains, lean protein, and vegetables.
Are quesadillas high in calories?
They can be, especially when made with large amounts of cheese or refined tortillas. Healthier versions tend to be lower in calories.
Is a quesadilla healthier than a burrito?
It depends on portion size and ingredients. Burritos are often larger, while quesadillas may contain more cheese.
Can quesadillas be part of a balanced meal?
Yes, pairing a quesadilla with vegetables, salad, or a healthy protein source can create a balanced plate.
Can I eat quesadillas for weight loss?
A calorie is a calorie; it doesn’t matter where you get it from. If you are staying within your calorie budget while having a quesadilla as a staple, I don’t see why not.
Are quesadillas bad for people with co-morbidities e.g cardiac problems, hypertension?
As long as it doesn’t contain too much fat or salt, there is absolutely nothing to worry about.
Is there a vegan alternative to quesadilla?
Definitely, replace the meat with compact vegetables such as potatoes, pumpkins, yams, etc.
Are quesadillas a good idea for meal prep?
No, quesadillas need to be eaten fresh. Meal prepping quesadillas in advance can make your tortilla soggy and gross, while the veggies and chicken lose their texture.
Conclusion
Quesadillas are healthy, especially if you are making them at home. Even if you are eating at a restaurant, a quesadilla is a better deal than a pizza or a hamburger.
Incorporating the options mentioned above, you can make your quesadillas healthy to the point of being able to eat them every day without any health concerns!
After a successful quest in finding the answer to the question, Are quesadillas healthy, I hope to have made your day by confirming that yes, quesadillas are indeed healthy.