Home Blog Page 82

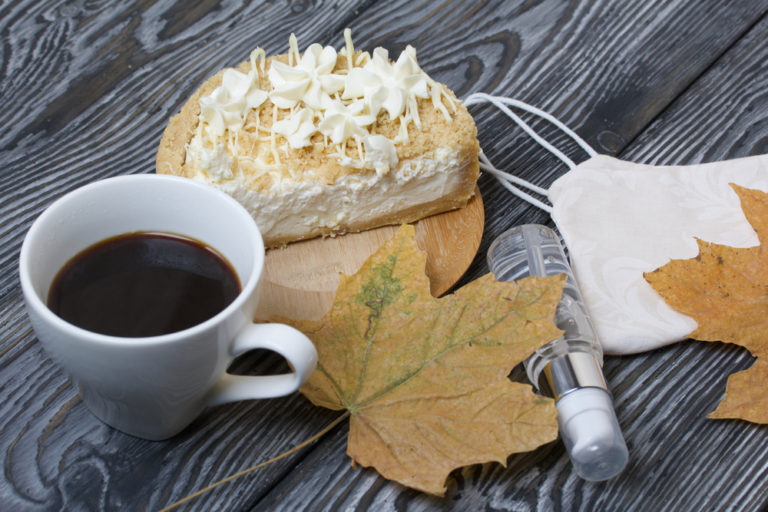
Individual Maple Cheesecakes

0

Remember these? The Individual Cookies & Cream Cheesecakes were so delectable that I’ve been thinking of flavor variations ever since we polished them off.

Then I stumbled upon this recipe for Maple Creme Cheesecake featuring one of my favorite packaged cookies – Trader Joe’s Maple Leaf Cookies – and knew that I wanted needed to make Individual Maple Cheesecakes.

Individual Maple Cheesecakes

Let’s talk maple for a bit, shall we?

Bear with me for a moment while I get a little nostalgic.

I grew up taking family summer vacations to the Western coastline of Cape Breton Island, Nova Scotia. Sparsely populated and boasting breathtaking panoramic vistas of Cape Breton Highlands National Park, Prince Edward Island, and the Northumberland Strait, I have nothing but splendid memories of this magnificent place. Included in these memories is the unmistakable flavor of maple permeating through candies, cookies, syrup, and other goodies.

Individual Maple Cheesecakes

Although I doubt much maple syrup is tapped on Cape Breton, maple treats are sold all over the island. We would rarely return home to PA without jugs of pure maple syrup and maple sugar candies shaped like maple leaves. I also fell in love with melt-in-your mouth maple cream sandwich cookies (much like the cookies from Trader Joe’s, shown in these photographs).

Individual Maple Cheesecakes

Well, these mini maple cheesecakes are an homage to Canada’s sweet nectar. As I savored one of these little cheesecakes, I couldn’t help but be transported back to that magical place.

A trifecta of maple flavor – maple syrup, maple extract, and maple cream sandwich cookies – yields an outstanding taste sensation. The firm cookie crust provides the perfect textural contrast to the light & creamy filling, and the 3-4 bite cheesecakes are perfectly portion controlled.

Individual Maple Cheesecakes

These maple cheesecakes just might have earned a spot at the top of my “favorite maple treats” list!

Individual Maple Cheesecakes

Individual Maple Cheesecakes

NameIndividual Maple Cheesecakes
CuisineFusion
Prep Time20 minutes
Cooking Time25 minutes
Total Time2 hours and 45 minutes
Servings12
Yield12

Ingredients

  • 7 maple cream sandwich cookies (such as Trader Joe’s Maple Leaf Cookies)
  • 2 tsp unsweetened applesauce
  • 8 oz neufchatel (1/3-less-fat) cream cheese, at room temperature
  • 3 Tbsp pure maple syrup (or 4 Tbsp for a sweeter cheesecake filling)
  • 1/4 tsp pure maple extract
  • 1 large egg, at room temperature
  • 1/4 cup plain Greek yogurt, (fat free or 2%), at room temperature
  • pinch of salt

Directions

  1. Preheat oven to 275*F. Line standard muffin tins with paper liners and lightly coat bottoms with canola oil cooking spray.
  2. Place the cookies in the bowl of a food processor fitted with a steel blade. Process until fine crumbs form. Add in the 2 tsp applesauce, process until the crumbs stick together when pinched. Divide the moistened crumbs evenly among the prepared muffin cups, pressing down with the back of a spoon to form an even crust. Bake for about 10 minuets, or until the crust is golden. Let cool while you prepare the cheesecake filling.
  3. In the bowl of an electric mixer, beat the softened neufchatel at medium speed until smooth, scraping down sides of bowl as needed. Add in maple syrup and beat until combined. Beat in maple extract.
  4. Beat in egg, scraping down the sides of the bowl as needed. Beat in yogurt and salt.
  5. Spoon batter evenly among the muffin cups. Bake, rotating pans halfway through, until filling is set, 22-24 minutes. Let cool on a wire rack. Chill in the refrigerator for at least 4 hours, or up to overnight, before serving.

Estimated Nutrition Per Serving:

Please note that the nutritional values are approximate and can vary depending on specific ingredients and serving sizes.

  • Calories: 270 kcal
  • Total Fat: 19g
    • Saturated Fat: 10g
    • Trans Fat: 0g
  • Cholesterol: 85mg
  • Sodium: 200mg
  • Total Carbohydrates: 21g
    • Dietary Fiber: 0g
    • Sugars: 17g
  • Protein: 4g

Enjoy your delicious Individual Maple Cheesecakes while being mindful of your dietary preferences and restrictions.

Jalapeno Chicken & Corn Chowder

0

Not too long ago I made Cooking Light‘s Cheddar Chicken Chowder. Although we liked the creaminess of the chowder, John and I concurred that it lacked a complex and exciting flavor profile. I was inspired on the spot to adapt the recipe to better suit our palates. Although not quite masochists when it comes to spicy food, we are not ones to shy away from heat. A collection of different hot sauces grace our refrigerator’s door, our cabinets are stocked with all sorts of spices, and we are more likely to order the “spicy” than “mild” curry dishes at our local Indian restaurant.

In order to elevate the spice level of this chowder, I swapped plain chicken breasts with jalapeno chicken sausage, (I love the Trader Joe’s brand), added a seeded jalapeno pepper, and tossed in some ground cumin, cayenne, and chipotle chili powder. Much better.

The sweet corn and red bell pepper are a welcomed gustatory compliment to the fairly spicy components of the chowder, and the addition of 1% milk yields a surprisingly thick and creamy consistency. This chowder comes together quickly enough to be prepared on a weeknight, and reheats very well as leftovers. At approximately 300 calories per 1 1/2 cup serving, you get a filling one-pot meal packed with veggies, protein, low-fat dairy, and best of all, delicious flavor.

Jalapeno Chicken & Corn Chowder
NameJalapeno Chicken & Corn Chowder
CuisineAmerican
Prep Time15 minutes
Cooking Time35 minutes
Total Time50 minutes
Servings6 servings

Ingredients

  • 1 Tbsp extra virgin olive oil
  • 1 (12 oz) package pre-cooked jalapeno chicken sausage, sliced or chopped into bite-sized pieces
  • 1  cup chopped onion
  • 1  cup diced red bell pepper
  • 1 jalapeno pepper, seeded and minced
  • 4 garlic cloves, minced
  • 1/2 tsp ground cumin
  • 1/2 tsp ground chipotle chili powder
  • 1/4 tsp cayenne (ground red pepper), or more to taste
  • 4 cups fat-free low-sodium chicken broth
  • 2 cups scrubbed & chopped baby red or yukon gold potatoes
  • 2 1/2 cups frozen whole-kernel corn
  • 1/2 cup all-purpose flour
  • 2 cups 1% milk
  • 3/4 cup shredded 50% reduced fat sharp cheddar cheese
  • 1 teaspoon Kosher salt, or more to taste
  • 1 teaspoon freshly cracked black pepper, or more to taste

Directions

  1. Heat the olive oil in a large Dutch oven over medium-high heat. Add chicken sausage, onion, bell pepper, garlic, and jalapeno pepper; sauté 5 minutes. Add the spices into the mixture, and sauté for 1 minute.
  2. Add broth and potatoes; bring to boil. Cover, reduce heat to low, and simmer 10-15 minutes or until potatoes are tender. Add corn; stir well. Raise stove heat to medium.
  3. Place flour in a bowl. Gradually add milk, stirring with a whisk until blended; add to soup. Cook over medium heat 15 minutes or until thick, stirring frequently. Stir in cheese, salt, and pepper.

Estimated Nutrition Per Serving

  • Calories: 375 kcal
  • Protein: 19g
  • Carbohydrates: 28g
  • Dietary Fiber: 3g
  • Sugars: 6g
  • Total Fat: 22g
  • Saturated Fat: 10g
  • Cholesterol: 100mg
  • Sodium: 800mg

Melon Yogurt Popsicles

0

Why on earth did I put off buying popsicle molds for so long?? These star-shaped cutie pies were a mere $7.99 at Marshalls, and are both dishwasher safe and BPA free.

However, you could certainly use little paper cups and popsicle sticks from a craft store to make these.

Melon Yogurt Popsicles

Regardless of what vessel you choose, I suggest using a measuring cup with a spout to fill the molds or cups – otherwise it might be pretty messy.

Melon Yogurt Popsicles

Be sure to leave about 1/2 inch of room at the top if using molds, as the popsicles will expand slightly while freezing.

Melon Yogurt Popsicles

Have some fruit & yogurt puree remaining after filling the molds?

No problem. Chug it.

Now, the most difficult step of the popsicle-making process is waiting for them to freeze solid. Don’t even think about removing them from their molds for at least 4 hours – this is precisely why I made these pops right after breakfast ;).

Melon Yogurt Popsicles

See those Caribbean popsicles on the left? Yeah… now that I can make my own, I don’t think purchased popsicles will be taking up room in my freezer ever again.

These creamsicle-hued popsicles are sweet, refreshing, and fun! The Greek yogurt lends a touch of creaminess, but the melon takes center stage. If you can track down Tuscan melons, (I found ‘em at Trader Joe’s), grab a few… it might just be the most delicious type of melon I’ve ever tasted. Its orange flesh is incredibly sweet and slightly floral; I didn’t need much honey, but you can certainly add it to taste, depending on the sweetness of the melon you use.

I’ve caught the popsicle-making bug, and am certifiably giddy about all of the ingredient combination possibilities.

What type of popsicle should I make next?!

Melon Yogurt Popsicles

Melon Yogurt Popsicles

NameMelon Yogurt Popsicles
CuisineDessert, Snack
Prep Time15 minutes
Cooking Time0 minutes
Total Time4-6 hours
Servings6
Yield6

Ingredients

  • 3 cups roughly chopped melon (I used Tuscan melon)
  • 1/2 Tbsp freshly squeezed lemon juice
  • 1/2 cup 0% plain Greek yogurt
  • 1/2 Tbsp honey, or more to taste

Instructions

Prepare the Melon

Begin by selecting a ripe melon of your choice (cantaloupe or honeydew work wonderfully). Cut it in half and scoop out the seeds using a spoon. Remove the rind and cut the melon into small, manageable chunks.

Blend the Melon

Place the diced melon chunks into a blender. Blend until you have a smooth and creamy puree.

Sweeten the Yogurt

In a separate bowl, combine the Greek yogurt, honey or maple syrup, and vanilla extract (if using). Mix well until the sweetener is fully incorporated into the yogurt. Adjust the sweetness to your liking.

Layer the Popsicles

Now, it’s time to create those beautiful layers. Start by pouring a spoonful of the melon puree into each popsicle mold, filling it about one-third of the way up.

Next, add a layer of the sweetened yogurt mixture, filling the mold another third of the way.

Repeat the process with alternating layers of melon puree and yogurt until the molds are filled, leaving a small gap at the top for the popsicles to expand as they freeze.

Insert Popsicle Sticks

Gently insert popsicle sticks into each mold, ensuring they stay upright.

Freeze

Place the filled popsicle molds in the freezer and let them set for at least 4-6 hours, or until completely frozen.

Unmold and Enjoy

Once the popsicles are frozen solid, remove them from the molds. You can run the molds briefly under warm water to help release the popsicles if needed.

Serve and Savor

Now, your homemade melon yogurt popsicles are ready to be enjoyed! Serve them on a hot summer day and relish the cooling, fruity goodness.

Estimated Nutrition Per Serving

Please note that the nutrition values are approximate and can vary based on the specific ingredients used.

  • Calories: 80 kcal
  • Protein: 3g
  • Carbohydrates: 18g
  • Dietary Fiber: 1g
  • Sugars: 16g
  • Fat: 0g
  • Saturated Fat: 0g
  • Cholesterol: 2mg
  • Sodium: 16mg
  • Potassium: 208mg
  • Vitamin A: 67% DV
  • Vitamin C: 49% DV
  • Calcium: 7% DV
  • Iron: 1% DV

These values are estimated based on the use of cantaloupe as the melon variety and Greek yogurt. The actual values may vary depending on the specific ingredients and brands used.

Mango Frozen Yogurt

0

Here we go! Recipe # 2 of “Tropical Week”.

As many of you are well aware, I eat ice cream and frozen yogurt throughout the year, (yes, even during the frigid New England winters), but it is around this time that my yearning for frozen treats is pushed into high gear.

Mango Frozen Yogurt

I’m especially drawn to fruity ice cream and frozen yogurt flavors during the spring, as ripe produce starts piling up on grocery store and farmer’s market shelves.

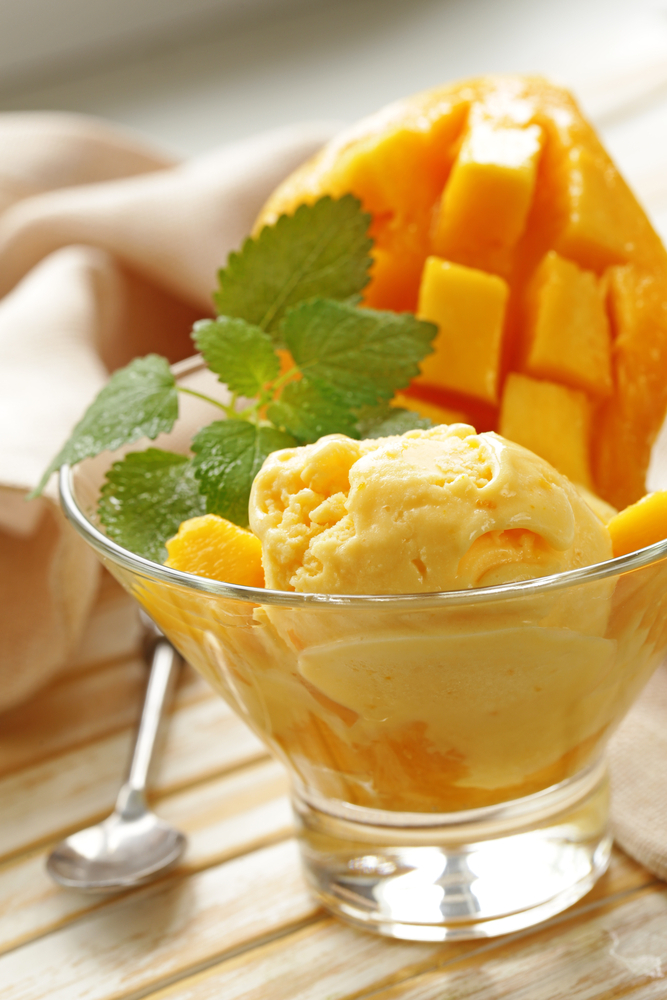
This mango fro yo is super simple to whip together, and is refreshingly delicious piled into a bowl… but melting into a serving of warm Tropical Fruit Crisp, (recipe coming in a couple of days!), is a perfectly decadent way to enjoy the sweet flavor and creamy texture.

Mango Frozen Yogurt

Despite the addition of a splash of vodka, the fro yo still managed to freeze pretty hard; but 10 minutes on the counter – or 30 seconds in the microwave – render it soft enough to scoop.

Mango Frozen Yogurt

As long as mangos are in season, I will have a batch of this frozen yogurt hanging out in the freezer!

Mango Frozen Yogurt

Mango Frozen Yogurt

NameMango Frozen Yogurt
CuisineDessert
Prep Time15 minutes
Cooking Time0 minutes (no cooking)
Total Time3-4 hours
Servings6 servings
Yield1.5 quarts

Ingredients

  • 2 cups peeled, pitted, & chopped very ripe mango
  • 1 1/2 cups plain 2% Greek yogurt, such as Fage
  • 1/4 cup agave nectar
  • 1/4 tsp pure vanilla extract
  • 1/2 Tbsp vodka, optional (this is used to keep the frozen yogurt a bit softer in the freezer)

Directions

Place the chopped mango into a food processor and puree until smooth. Add in the remaining ingredients and puree until well-mixed.

Chill mixture in the refrigerator until cold.

Freeze according to ice cream maker manufacturer’s instructions.

Serve immediately as soft serve, or spoon into a freezer-safe container and place in freezer until “ripened” (hardened).

Nutritional Information per serving (about a scant 1/2 cup): 174 calories, 1.9 grams fat, 1.2 grams saturated fat, 1.5 grams fiber, 33 grams sugar (this is mostly from the naturally sweet mango!), 0.5 grams protein

Estimated Nutrition Per Serving (1/2 cup)

  • Calories: 140
  • Total Fat: 0g
    • Saturated Fat: 0g
    • Trans Fat: 0g
  • Cholesterol: 0mg
  • Sodium: 20mg
  • Total Carbohydrates: 31g
    • Dietary Fiber: 1g
    • Sugars: 29g
  • Protein: 5g
  • Vitamin D: 0%
  • Calcium: 8%
  • Iron: 1%
  • Potassium: 161mg

Please note that these nutritional values are approximate and may vary depending on the specific brands and quantities of ingredients you use. Additionally, the serving size mentioned here is for reference, and actual serving sizes may vary based on individual preferences.

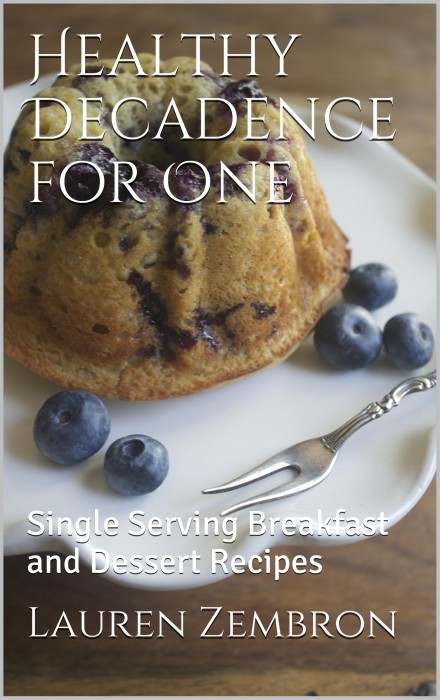
Healthy Decadence for One: Single Serving Breakfast and Dessert Recipes

0
e-cookbook

My first e-cookbook is chock full of healthy, yet decadent-tasting, single serving breakfast and dessert recipes.

An e-cookbook solely for singletons this is not; rather, the recipes are geared toward anyone who is looking for single serving breakfasts and desserts (perhaps you don’t love leftovers or you want to practice portion control). If you prefer recipes that will feed your entire family, the recipes in this cookbook can easily be doubled or quadrupled.

There are vegan, paleo, dairy-free, grain-free, and gluten-free recipes included in this e-cookbook to cater to a variety of dietary considerations and allergies.

All of the recipes have been tested and are accompanied by full sized, high resolution images.

The e-cookbook is available exclusively through the Amazon Kindle store, (click on this link), but you do not need a Kindle to purchase and view the ebook; you only need the Kindle App.

Potato Pesto Pizza

0

Just like with the cannoli debate, Bostonians are divided over where the best pizza in the city can be found. Although both The Upper Crust and Regina’s are strong contenders for the #1 spot, a case can easily be made for Cambridge, 1.This refined pizza place serves thin crust, charcoal-grilled pies featuring unique ingredient combinations. One offering in particular that caught my eye when John and I went to Cambridge, 1 was the potato, fontina, parmesan, romano, rosemary, and garlic pizza. This was my first experience eating potato slices on pizza, and I was hooked.

Re-creating this tasty pizza remained in the back of my mind for a while, but was brought to the forefront when I came across this recipe for pizza with pesto, potatoes, and roasted garlic.  I figured I’d follow this recipe – with a few adaptations – as my first foray into making potato-topped pizza.

The verdict? Although the flavors were different than the potato pizza at Cambridge, 1, this pesto version was every bit as delicious. I’m completely sold on the potato-topped pizza concept, and I’m looking forward to attempting a replica of the rosemary, garlic, and three cheese pie that initially piqued my interest!

Potato Pesto Pizza
NamePotato Pesto Pizza
CuisineItalian
Prep Time20 minutes
Cooking Time15 minutes
Total Time35 minutes
Servings4 servings

Ingredients

  • 1 ball store-bought or homemade pizza dough
  • all-purpose flour for rolling out the dough
  • 1 medium Yukon Gold potato (preferably organic), scrubbed and sliced into 1/8 inch thick slices (a mandolin works best here)
  • 1/4 cup store-bought or homemade basil pesto
  • 1 cup shredded 2% mozzarella cheese, divided
  • olive oil cooking spray
  • Kosher salt
  • Italian seasoning
  • crushed red pepper flakes

Directions

  1. Bring the pizza dough to room temperature by placing on the counter, covered, for at least 1-2 hours prior to rolling out.
  2. Preheat oven to 450 degrees F.
  3. Lightly flour a large clean work surface, and roll the dough out to about 1/4 inch thickness using a rolling pin. Carefully transfer the rolled-out dough to a non-rimmed baking sheet. Pierce the dough lightly with a fork 7-8 times and place in the oven. Pre-bake the dough for 2 minutes. Remove the baking sheet from the oven, flip the pizza crust over, and spoon on the pesto sauce. Set aside.
  4. While the pizza dough is pre-baking, cook the potato slices in rapidly boiling water for 1 minute. Drain well and pat dry with paper towel. Lightly coat the dried potato slices with olive oil cooking spray and season with salt and Italian seasoning.
  5. Spread 1/2 cup of the cheese over the pesto sauce. Layer the seasoned potato slices on top, then add the rest of the cheese. Season with a pinch of salt and crushed red pepper flakes.
  6. Bake assembled pizza on the baking sheet for 8 minutes. Carefully remove the baking sheet from under the pizza, and cook the pizza directly on the oven rack for 1-2 minutes, or until the bottom of the pizza crust is golden brown and crisp.
  7. Allow the cooked pizza to cool for a couple of minutes before slicing and serving.

Estimated Nutrition Per Serving

  • Calories: 425 calories
  • Protein: 11g
  • Carbohydrates: 53g
  • Dietary Fiber: 4g
  • Sugars: 2g
  • Fat: 19g
  • Saturated Fat: 4g
  • Cholesterol: 10mg
  • Sodium: 590mg
Potato Pesto Pizza

Pumpkin Pie Cheesecake Truffles {Thanksgiving Leftovers Series}

0

I saved the best 2014 Thanksgiving leftovers recipe for last!

I know you’re probably SO over seeing pumpkin recipes from food bloggers right about now, but if – like me – you are also sick of looking at the leftover pumpkin pie sitting in your fridge (and stealing bites every now and then… ssshhh!) then these truffles are a must.

Pumpkin Pie Cheesecake Truffles {Thanksgiving Leftovers Series}

The sweet & velvety pumpkin pie filling is mixed with reduced-fat cream cheese, rolled into balls, enrobed with a coconut butter mixture, then coated in graham cracker crumbs.

Pumpkin Pie Cheesecake Truffles {Thanksgiving Leftovers Series}

The resulting “truffles” taste just like pumpkin cheesecake, but with the addition of a decadent-tasting coconut butter shell. You could skip the coconut butter component and coat the pumpkin cheesecake balls with melted white chocolate, but I actually prefer this less-sweet version.

Pumpkin Pie Cheesecake Truffles {Thanksgiving Leftovers Series}

These truffles are so good, it’s totally worth it to make a pumpkin pie just so you can use the leftovers!

Pumpkin Pie Cheesecake Truffles {Thanksgiving Leftovers Series}

Pumpkin Pie Cheesecake Truffles {Thanksgiving Leftovers Series}

by Lauren Zembron

NamePumpkin Pie Cheesecake Truffles
CuisineAmerican
Prep Time20 minutes
Cooking TimeNone
Total Time1 hour
Servings24 truffles
Yield1 truffle per serving

Keywords: dessert cream cheese pumpkin Thanksgiving cheesecake truffles

Ingredients (8-10 truffles)

  • 3/4 cup leftover pumpkin pie filling (no crust), at room temperature
  • 4 oz neufchâtel (1/3-less-fat cream cheese), at room temperature
  • 5 full graham cracker sheets
  • 1/4 cup softened coconut butter
  • 1 Tbsp coconut oil
  • 1/2 tsp pure maple syrup

Instructions

In a large bowl, whip together the softened pumpkin pie filling and neufchâtel using an electric mixer until very well mixed; set aside.

Place graham cracker sheets in a food processor and process until the texture resembles sand (no big pieces).

Measure out 1/2 cup graham cracker crumbs and add to the pumpkin cheesecake mixture; stir until well-combined. Place remaining graham cracker crumbs on a plate; set aside.

Using a mini ice cream scoop or spoon, scoop out spoonfuls of the pumpkin cheesecake mixture and place on a parchment paper-lined cookie sheet or plate. Refrigerate until firm, about 2 hours. Roll into balls using your palms; set aside.

In a microwave-safe bowl, combine the coconut butter, coconut oil, and maple syrup. Heat for 30 seconds, or until soft & melted. Stir well to combine. Roll each pumpkin cheesecake ball in the coconut butter mixture, using a spoon to help “paint” it on and wipe off any excess. You want just a thin layer.

Roll the coconut butter-coated pumpkin cheesecake balls in the remaining graham cracker crumbs and place on the parchment paper-lined cookie sheet or plate again; refrigerate until firm, about 10-15 minutes.

Store in an airtight container in the refrigerator.

Estimated Nutrition Per Serving

  • Calories: 90 kcal
  • Fat: 5g
  • Saturated Fat: 3g
  • Cholesterol: 9mg
  • Sodium: 60mg
  • Carbohydrates: 11g
  • Fiber: 0.5g
  • Sugars: 7g
  • Protein: 1g

Please note that these nutrition values are approximate and can vary based on specific ingredients and serving sizes. Always consult specific product labels or use a nutritional calculator for precise values, especially if you have dietary restrictions or specific nutritional needs. Enjoy your Pumpkin Pie Cheesecake Truffles in moderation!

Roasted Banana Soft Serve

0

Let’s take a moment to silently thank Gena for introducing the foodie blog world to the now well-known – and widely enjoyed – Banana Soft Serve. I for one have never tasted anything so decadent that consisted merely of one simple ingredient. When the weather turns warm, I freeze mass quantities of bananas for the sole purpose of whipping them into oblivion and slowly savoring scarfing down the creamy chilled deliciousness.

With the temperature in Boston hovering around 70 these past few days, I found myself caught between two opposing cravings: one was for a cold and creamy sweet treat and the other was for baking something delicious.  During the summer, I have a tough time letting go of the homey aromas of baked goods emanating from the oven until the return of crisp fall weather. I decided to take advantage of the seasonally cool temperatures and crank the oven up to satisfy my desire for baking. The ingredient destined for the heat (and, ultimately, the freezer)? Bananas.

Roasted Banana Soft Serve

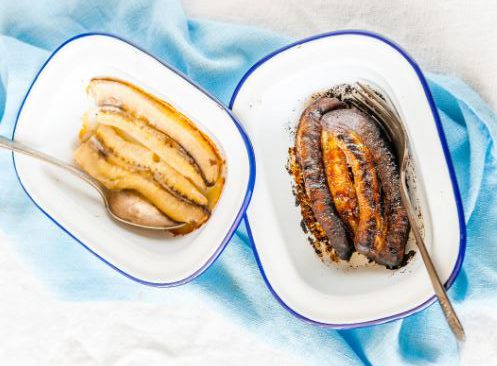
I cut up a few ripe bananas and roasted them until soft, caramelized, and fragrant. I allowed the roasted bananas to cool before chilling them in the freezer. Once the roasted bananas were completely frozen, they took a ride in the food processor until silky smooth and creamy.

The roasting process not only intensifies the flavor of the bananas, but also adds a rich caramel hue and sugary aroma. Although the original recipe for banana soft serve closes in on perfection, this adaptation is a special variation that I will certainly be repeating. If you have a bunch of ripe bananas sitting on your counter and are interested in using them to make something other than banana bread, give this Roasted Banana Soft Serve a try!

Roasted Banana Soft Serve

Roasted Banana Soft Serve

NameRoasted Banana Soft Serve
CuisineFusion
Prep Time10 minutes
Cooking Time20 minutes (for roasting)
Total Time2 hours and 30 minutes
Servings4 servings
Yield2 cups per serving

Ingredients

  • 3 very ripe large bananas
  • For the Roasted Bananas
  • 4 ripe bananas
  • 2 tablespoons honey or maple syrup (for drizzling)
  • 1 teaspoon cinnamon (optional)
  • For the Soft Serve
  • 2 cups frozen banana chunks (about 3-4 bananas, peeled and sliced before freezing)
  • 1/2 teaspoon vanilla extract
  • 1/4 cup unsweetened almond milk (or your choice of milk)
  • A pinch of salt

Directions

  1. Preheat oven to 400 degrees F.
  2. Line a baking sheet with parchment paper or aluminum foil.
  3. Peel the bananas and cut into 1-inch pieces. Arrange banana pieces on the prepared baking sheet and roast for 30 minutes.
  4. Remove baking sheet from the oven and allow the roasted bananas to cool completely.
  5. Place cooled roasted banana pieces on a parchment paper-lined plate and freeze until solid. Transfer frozen roasted bananas to a freezer-safe zip-top plastic bag for future use OR proceed to step 6.
  6. When ready to transform the frozen roasted bananas into soft serve, remove the bananas from the freezer and place in a food processor or high-speed blender. Process or blend until the roasted frozen bananas take on a creamy & smooth consistency.
  7. Eat immediately!

Estimated Nutrition Per Serving

(Nutritional values may vary depending on ingredients used and portion sizes.)

  • Calories: 123 calories
  • Total Fat: 0.4 grams
  • Saturated Fat: 0.1 grams
  • Cholesterol: 0 milligrams
  • Sodium: 38 milligrams
  • Total Carbohydrates: 31.2 grams
  • Dietary Fiber: 3.3 grams
  • Sugars: 15.6 grams
  • Protein: 1.3 grams
  • Vitamin D: 0%
  • Calcium: 18%
  • Iron: 0%
  • Potassium: 420 milligrams

Please note that these nutritional values are approximate and can vary based on the specific ingredients and quantities used in your recipe. It’s always a good practice to calculate the exact nutritional content based on the brands and ingredients you use if you have specific dietary requirements or restrictions.
BBQ Pizza with Caramelized Onions & Blue Cheese

0

Since when does the sun set at 7:15 p.m.?

I made this pizza last week – on “Pizza Friday” of course – and by the time it came out of the oven in all of its bubbly cheesy glory, it was too dark in our apartment to take any decent photographs.

The pictures were thus relegated to being taken via Instagram on my iPhone.

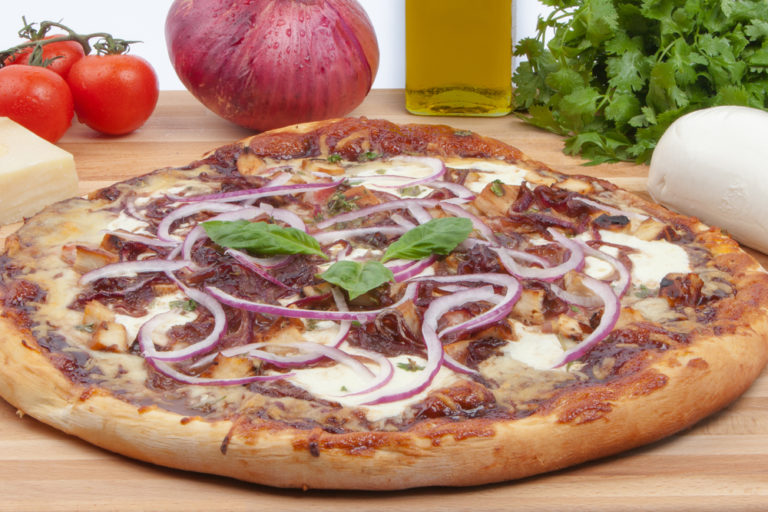
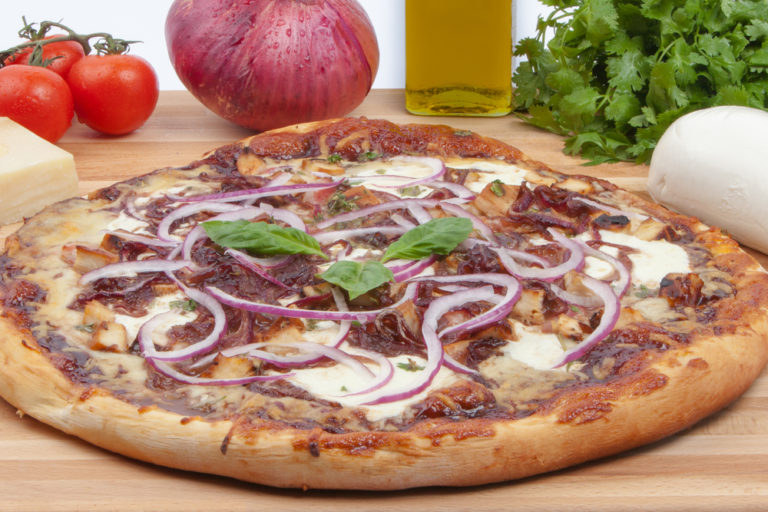
Use your imagination and picture a thin crisp whole wheat crust topped with tangy BBQ sauce, sweet caramelized onions, gooey cheddar cheese, and pockets of melted blue cheese.

A classic flavor combination. A surefire way to elicit many “mmm-mmmms” from your guy (or girl). A delicious way to leave the workweek behind you and welcome the weekend.

Sure, the photos from this post won’t make their way onto Foodgawker or Tastespotting, but hopefully this pizza will make its way onto your plate sometime soon.

How about tonight?

BBQ Pizza with Caramelized Onions & Blue Cheese
NameBBQ Pizza with Caramelized Onions & Blue Cheese
CuisineAmerican
Prep Time20 minutes
Cooking Time30 minutes
Total Time50 minutes
Servings4 servings

Ingredients

  • 1 lb wheat pizza dough (I buy mine from the freezer section of Whole Foods)
  • 3 medium yellow or white onions
  • 1 Tbsp extra virgin olive oil
  • 1 tsp Kosher salt
  • 1 tsp cane sugar
  • cornmeal, for dusting pizza pan
  • flour, for rolling out dough
  • 1/2 cup of your favorite BBQ sauce
  • 1 1/2 cups freshly shredded 50% reduced fat sharp cheddar cheese
  • 1/4 cup freshly crumbled blue cheese

Directions

  1. Bring pizza dough to room temperature
  2. Sliced the onions in half lengthwise (through the “poles”) and then remove the papery skin. Thinly slice the onions widthwise (around the “equator”), discarding the ends. You should have about 3 cups of sliced onions.
  3. Heat olive oil in a large non-stick skillet set over medium heat. Add onions to skillet, spreading them out into an even layer.  Let onions cook, stirring occasionally, for 10 minutes.
  4. Sprinkle salt and sugar over the onions, reduce stove heat to low, and cook (stirring occasionally) for 45 minutes, or until they are soft and golden-brown. If the onions are sticking to the pan, you can add a few teaspoons of water to the onions.
  5. Preheat oven to 450°F. Sprinkle cornmeal onto a pizza pan or baking sheet.
  6. On a lightly floured flat surface, roll the room-temperature pizza dough out to desired thickness (I like a very thin pizza crust).
  7. Carefully transfer the rolled-out pizza dough onto the cornmeal-dusted baking sheet.
  8. Spoon BBQ sauce onto the pizza dough, leaving a 1/2-inch border around the edge.
  9. Top with the caramelized onions, followed by the cheeses.
  10. Bake pizza for 8 minutes. Carefully remove the baking sheet from underneath the pizza and continue to cook the pizza until the cheese has melted and the bottom of the crust is golden-brown and crisp, about 5 more minutes.
  11. Using a pizza peel (or the  baking sheet), carefully remove the pizza from the oven and let cool for 5 minutes before cutting into slices.

Nutritional Information Per Serving

  • Calories: 380 calories
  • Total Fat: 16g
    • Saturated Fat: 8g
  • Cholesterol: 30mg
  • Sodium: 860mg
  • Total Carbohydrates: 45g
    • Dietary Fiber: 3g
    • Sugars: 14g
  • Protein: 15g

Throwback Thursdays: BBQ Pizza with Caramelized Onions & Blue Cheese

0

I clearly haven’t learned my lesson when it comes to trying to take decent photos of dinner recipes once the sun starts its descent in late summer/early fall. The first time I made this pizza was in early September of 2011. Sure, I could have taken the photos outside as I did for this post, but it would have looked a little very odd to carry a pizza down the stairs and to take photos of a pizza outside of our apartment (where we lived at the time). Now that we’re in our own house it’s much easier to just step outside onto the deck that’s off of our kitchen and snap a handful of quick photos.

BBQ Pizza with Caramelized Onions & Blue Cheese

I’m still not thrilled with the pictures, but these are a drastic improvement from the Instagram shots I took last time. You’ll just have to trust me that this pizza is GOOD.

I did make a few revisions to my initial recipe, but nothing too drastic. Tangy barbeque sauce stands in for the traditional tomato sauce, and is topped with sweet caramelized onions and a trio of cheeses.

The flavor combination makes for one delicious pizza, and I should remember to toss this pie into our rotation (yep, we still do Pizza Friday every week) on a more regular basis!

BBQ Pizza with Caramelized Onions & Blue Cheese

BBQ Pizza with Caramelized Onions & Blue Cheese

by Lauren Zembron

NameBBQ Pizza with Caramelized Onions & Blue Cheese
CuisineAmerican
Prep Time30 minutes
Cooking Time40 minutes
Total Time1 hour, 10 minutes
Servings4
Yield1 14-inch pizza

Keywords: bake entree main pizza cheese

Ingredients (1 pizza)

  • 1 lb wheat pizza dough (I buy mine from the freezer section of Whole Foods)
  • 3 medium yellow or white onions
  • 1 Tbsp extra virgin olive oil
  • 1 tsp Kosher salt
  • 1 tsp sugar
  • olive oil, for coating baking sheet
  • flour, for rolling out dough
  • 1/2 cup of your favorite BBQ sauce (we like Stubbs)
  • 3/4 cup freshly shredded part-skim mozzarella cheese
  • 3/4 cup freshly shredded sharp cheddar cheese
  • 1/4 cup freshly crumbled blue cheese

Instructions

Bring pizza dough to room temperature (I like to thaw the frozen dough in the fridge overnight, and then take it out in the morning to sit at room temperature for the day).

Slice the onions in half lengthwise (through the “poles”) and then remove the papery skin. Thinly slice the onions widthwise (around the “equator”), discarding the ends. You should have about 3 cups of sliced onions.

Heat olive oil in a large non-stick skillet set over medium heat. Add onions to skillet, spreading them out into an even layer. Let onions cook, stirring occasionally, for 10 minutes.

Sprinkle salt and sugar over the onions, reduce stove heat to low, and cook (stirring occasionally) for 45 minutes, or until they are soft and golden-brown. If the onions are sticking to the pan, you can add a few teaspoons of water to the skillet.

Preheat oven to 450°F. Lightly & evenly coat baking sheet with olive oil.

On a lightly floured flat surface, roll the room-temperature pizza dough out to desired thickness (I like a very thin pizza crust).

Carefully transfer the rolled-out pizza dough onto the oiled baking sheet.

Spoon BBQ sauce onto the pizza dough, leaving a 1/2-inch border around the edge.

Top with the caramelized onions, followed by the cheeses.

Bake pizza for 10 minutes. Carefully remove the baking sheet from underneath the pizza and continue to cook the pizza until the cheese has melted and the bottom of the crust is golden-brown and crisp, about 5 more minutes.

Using a pizza peel (or the baking sheet), carefully remove the pizza from the oven and let cool for 5 minutes before cutting into slices.

Estimated Nutrition Per Serving

  • Calories: 480 kcal
  • Total Fat: 18g
    • Saturated Fat: 9g
    • Trans Fat: 0g
  • Cholesterol: 30mg
  • Sodium: 980mg
  • Total Carbohydrates: 62g
    • Dietary Fiber: 4g
    • Sugars: 22g
  • Protein: 18g

Note: Nutrition values are approximate and may vary based on specific ingredients used and portion sizes.