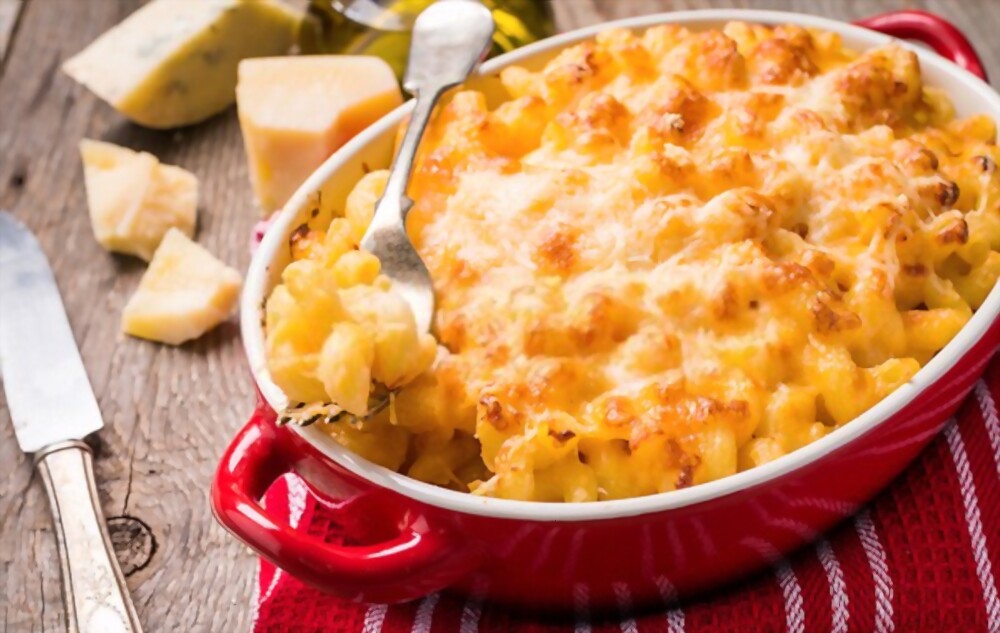
What you don’t need to know (but I’m going to tell you anyway): these truffles were a pain in the you-know-what to photograph, hence the measly two images in this post.
What you do need to know (and I’m definitely going to tell you): these truffles are really, really good. The inside is raw macaroon dough studded with grated carrot and flavored with warm spices; the outside is a simple mixture of white chocolate and coconut oil that hardens when chilled to create a delicious truffle coating.
Make them this weekend for Easter. Make them on a random weekday. Make them for your family and friends. Make them for yourself.
Just make them.
Carrot Cake Macaroon White Chocolate Truffles
by Lauren Zembron
Name:
Carrot Cake Macaroon White Chocolate Truffles
Cuisine:
Fusion
Prep Time:
30 minutes
Cooking Time:
30 minutes
Total Time:
1 hour
Servings:
24 truffles
Yield:
24 truffles
Keywords: dessert carrots coconut white chocolate truffles cookies
Ingredients (24 truffles)
Ingredients for the macaroon dough
8 oz unsweetened flaked coconut, full fat
1 cup unsweetened finely shredded coconut, full or reduced fat
1/2 cup finely grated carrot (I used a microplane grater)
1 cup old-fashioned rolled oats
1/2 cup pure maple syrup, preferably Grade B
1 Tbsp + 1 tsp pure vanilla extract
2 tsp ground cinnamon
1/2 tsp ground ginger
1/8 tsp ground nutmeg
scant 1/2 tsp Kosher salt
Ingredients for white chocolate coating
1 cup all-natural white chocolate chips (such as Sunspire)
2 Tbsp coconut oil
Instructions
In a food processor fitter with the steel blade, process the flaked coconut until a thick, smooth coconut butter forms, scraping down the sides as necessary, about 5-8 minutes.
Combine coconut butter and remaining macaroon dough ingredients in a large bowl; stir until very well combined.
Using a mini ice cream scoop or spoon, scoop out the dough and roll into balls (about 24) with your palms. Place dough balls on a baking sheet or plate, cover with plastic wrap, and refrigerate until chilled & hardened, at least 30 minutes.
In a microwave-safe bowl, combine the white chocolate chips and coconut oil. Heat in 30 second intervals, stirring after each interval, until fully melted and smooth. This should take about 1 minute total.
Dunk the dough balls into the melted chocolate and roll around until completely coated. Remove with a fork, allowing any excess chocolate to drip back into the bowl, and place truffles on a parchment paper-lined baking sheet or plate.
Place truffles in the refrigerator and chill until fully set, at least 30 minutes.
Store in the refrigerator and serve chilled.
Estimated Nutrition Per Serving
Calories: 150 kcal
Total Fat: 9g
Saturated Fat: 6g
Trans Fat: 0g
Cholesterol: 15mg
Sodium: 70mg
Total Carbohydrates: 15g
Dietary Fiber: 1g
Sugars: 12g
Protein: 2g
Please note that these nutrition estimates are approximate and can vary based on specific brands and quantities of ingredients used. Always consult a professional for precise dietary information. Enjoy your truffles!
Are you sick of seeing recipes featuring leftover Easter ham? I hope not, because I have one more for ya.
My in-laws sent us home with a generous portion of the delicious ham that we enjoyed last weekend in CT, and I was dreaming about this sandwich before we even got back to MA.
Sweet-smoky ham paired with sharp cheddar and maple-y caramelized apples makes for one fantastic spin on the classic grilled cheese!
Ingredients
1/2 large apple, preferably organic, sliced thinly
1 tsp butter, plus more for spreading on bread
2 tsp pure maple syrup, preferably grade B
2 slices hearty whole wheat bread
1 thick slice leftover baked ham
enough slices of sharp cheddar to cover one slice of bread
Estimated Nutrition Per Serving
Calories: 470 kcal
Protein: 16g
Carbohydrates: 44g
Dietary Fiber: 4g
Sugars: 18g
Fat: 26g
Saturated Fat: 14g
Cholesterol: 85mg
Sodium: 900mg
Instructions
Heat 1 tsp butter in a medium skillet set over medium-high heat. Add in the apple slices and cook, stirring occasionally until light brown, about 2 minutes. Add in the maple syrup, reduce heat to medium, and continue to cook, stirring occasionally, until caramelized, about 2-3 additional minutes.
Layer the ham, caramelized apples, and cheddar slices onto one slice of bread. Top with remaining slice of bread. Lightly spread butter over top of sandwich. Place sandwich, buttered side down, in the skillet over medium heat and cook until browned, about 2-3 minutes. Flip sandwich, lightly spread top side with butter, cover skillet, and cook until the bread is browned and the cheese has melted, about 2-3 minutes.
For a while (probably close to a year), every Friday was “Homemade Pizza Night” at our house. We’d always have a ball of Whole Foods pizza dough stashed in the freezer waiting to be turned into whatever creation we dreamed up. It was a night that John, Lily, and I looked forward to all week… until I got in a rut of making plain old cheese pizza week after week and we all grew tired of the monotony.
I recently got bit by the pizza bug once again… but this time in the form of stromboli. I made a pepperoni stromboli, and pizza was once again a big hit in our house!
Name
Breakfast Stromboli
Cuisine
Italian-American
Prep Time
15 minutes
Cooking Time
25 minutes
Total Time
40 minutes
Servings
4 servings
Yield
1 stromboli
In an effort to avoid falling into the same rut as last time, I brainstormed different filling ideas for stromboli, and was instantly inspired to make a breakfast version.
We often have breakfast for dinner, which I love because of how easy and quick it is to prepare. It’s also a meal I look forward to nearly every week because I rarely eat eggs in the morning.
So for this stromboli, I cooked up some breakfast sausage, scrambled some eggs, and layered them on pizza dough with cheddar cheese, rolled the whole shebang up, then baked it to a golden brown and served it with ketchup.
I never ate ketchup with eggs as a kid, but it’s one of Lily’s favorite condiments, so I’ve grown accustomed to enjoying the two together.
Now you could certainly indulge in this stromboli as your morning meal – and it would be perfect for a weekend brunch – but for me it’s more a breakfast-for-dinner type meal.
Regardless of what time of day you make it, you’re definitely going to love this breakfast stromboli!
Ingredients
1 (1 lb) ball pizza dough, at room temperature (my go-to is the pizza dough from Whole Foods)
flour for rolling out dough
1 lb breakfast sausage (if still in links, remove from the casings)
6 large eggs, preferably organic
1 1/2 cups freshly grated cheddar cheese
1 Tbsp olive oil
Estimated Nutrition Per Serving
Calories: 350-400 calories per serving
Protein:15-20 grams
Carbohydrates: 25-30 grams
Dietary Fiber: 2-3 grams
Sugars: 2-3 grams
Fat: Around 20-25 grams
Saturated Fat: 6-8 grams
Cholesterol: 200-250 mg
Sodium: 600-700 mg
Instructions
Preheat the Oven
Preheat your oven to 375°F (190°C).
Prepare the Dough
Roll out the pizza dough on a lightly floured surface to create a rectangular shape. If using store-bought dough, follow the package instructions for rolling it out.
Scramble the Eggs
In a bowl, whisk the eggs together and season with salt and pepper. Heat a non-stick skillet over medium heat, add a little oil, and scramble the eggs until they are just set. Remove from heat.
Assemble the Stromboli
Spread the scrambled eggs evenly over the rolled-out dough, leaving about an inch of dough around the edges. Top with diced bell peppers, onions, cooked breakfast sausage, and shredded cheddar cheese.
Roll it Up
Carefully roll up the dough, starting from one of the long edges, and pinch the seam to seal the stromboli.
Bake
Place the stromboli seam side down on a baking sheet lined with parchment paper. Brush the top with olive oil and sprinkle with additional shredded cheddar cheese. Bake in the preheated oven for about 20-25 minutes or until the stromboli is golden brown and the cheese is melted and bubbly.
Serve
Remove the stromboli from the oven, let it cool for a few minutes, and then slice it into thick, delicious rounds. Garnish with diced tomatoes and chopped fresh parsley, if desired.
Blueberries and kale are nutritional powerhouses, each packed with vitamins, minerals, and antioxidants.
When combined in a delicious salad, they create a medley of flavors and textures that make for a vibrant and satisfying meal.
This Blueberry & Toasted Coconut Kale Salad recipe is not only a feast for the taste buds but also a healthful choice for your well-being.
Blueberry & Toasted Coconut Kale Salad
Name
Blueberry & Toasted Coconut Kale Salad
Cuisine
American
Prep Time
15 minutes
Cooking Time
5 minutes (toasting)
Total Time
20 minutes
Servings
4 servings
Yield
About 6 cups
Ingredients
4 cups kale, washed and chopped
1 cup fresh blueberries
1/2 cup shredded coconut, toasted
1/4 cup sliced almonds
1/4 cup crumbled feta cheese (optional)
1/4 cup extra virgin olive oil
2 tablespoons freshly squeezed lemon juice
1 tablespoon honey or maple syrup
Salt and pepper to taste
Instructions
Prepare the Kale
Start by washing the kale thoroughly and removing the tough stems. Chop the kale into bite-sized pieces and place them in a large mixing bowl.
Massage the Kale
Drizzle a bit of olive oil over the kale and gently massage it for a few minutes. This process helps to tenderize the kale and enhance its flavor.
Prepare the Dressing
In a small bowl, whisk together the remaining olive oil, lemon juice, honey or maple syrup, salt, and pepper. Set the dressing aside.
Toast the Coconut and Almonds
In a dry skillet over medium heat, toast the shredded coconut and sliced almonds until they turn golden brown and fragrant. Stir frequently to prevent burning. Once toasted, remove from heat and set aside.
Assemble the Salad
Add the fresh blueberries and toasted coconut and almonds to the massaged kale. Toss gently to combine.
Drizzle with Dressing
Pour the prepared dressing over the salad and toss until all the ingredients are well coated.
Garnish
Top the salad with crumbled feta cheese for an additional burst of flavor and creaminess.
Serve
Divide the Blueberry & Toasted Coconut Kale Salad into individual servings and serve immediately. Enjoy this nutritious and delightful salad as a side or a main dish.
Estimated Nutrition Per Serving (approximate values)
Calories: 230 kcal
Total Fat: 18g
Saturated Fat: 8g
Trans Fat: 0g
Cholesterol: 6mg
Sodium: 160mg
Total Carbohydrates: 16g
Dietary Fiber: 4g
Sugars: 7g
Protein: 5g
Vitamin D: 0%
Calcium: 10%
Iron: 15%
Potassium: 380mg
Please note that the nutrition values are approximate and can vary based on specific ingredients used and portion sizes. It’s always a good practice to calculate nutrition based on the exact products and quantities you use in your recipe.
Massaged kale salads hit their heyday a few years ago, but I still love ’em. If you haven’t heard about – or tasted – this type of salad, let me break it down for you. The name actually says it all: you literally massage a bit of oil into the kale in order to tenderize the somewhat tough green leaves.
I usually use olive oil for my massage kale salads, but I opted for coconut oil in this case because it (obviously) complements the toasted coconut flakes. Which brings me to my second note about this recipe. Flaked coconut is brought to a whole new level when toasted to a light golden hue, but in the blink of an eye it can go from perfectly golden to burnt black. Keep an eye on the coconut while it’s in the toaster oven!
So we’ve discussed kale and coconut. What’s left? Blueberries! My favorite berry, both for their flavor and nutrients. Lauded for their antioxidants, blueberries are often labeled by those in the nutritional field as one of the healthiest foods you can eat. I love the tiny wild Maine variety, but they can be tough to come by – even here in Massachusetts – so I stock up on any organic blueberries I can find at a reasonable price throughout the summer months.
Enjoy this salad alongside grilled chicken for a healthy summer dinner, or all on its own as a light lunch.
Blueberries, kale, and toasted coconut blend in this vibrant salad. Begin by massaging fresh kale, then mix in blueberries and toasted coconut. Drizzle with a zesty lemon-honey dressing. Top with sliced almonds and optional feta. A delightful, nutrient-packed dish ready in under 20 minutes. Healthy eating never tasted so good!
Most of you probably don’t know this, but John and I lived in Texas from 2007-2008. During my final year of graduate school at Boston College, John was offered a relocating promotion… so after graduation, I packed up and joined him in Houston. Along with moderate winter temperatures, affordable real estate prices, drawling southern accents, and – unfortunately – Gulf coast hurricanes and sticky-hot humidity, we were introduced to a variety of delicious novel foods including migas and huevos rancheros, tilapia tacos and boiled crawfish, spicy & sweet cinnamon-infused coffee from The Buffalo Grille, and Shiner Bock beer at pretty much every eating and drinking establishment we frequented.
Perhaps the most decadent Texan meal we encountered was biscuits and gravy during a weekend stay at our friend Pat’s family’s ranch. After sleeping off an impressive spread of smoked beef, secret-ingredient-chili, and a melange of other stick-to-your-rib eats, we awoke to a breakfast of flaky biscuits smothered in a rich sausage gravy. Needless to say, I felt a bit weighed down after the hefty weekend splurges, so I tucked away the idea for “healthified” biscuits and gravy for later brainstorming.
A little over a year – and a move back to our beloved Boston – later, I finally got around to re-inventing the classic southern breakfast of biscuits and gravy.
If you are a purist at heart, be forewarned that this dramatically lightened recipe deviates from traditional recipes. However, If you are a health-conscious foodie like myself, there is no question that the ingredients in this recipe will appeal to you. Homemade chicken breakfast sausage is cooked until crumbly and browned before being folded into a silky gravy made with 1% milk and without butter. The sage-scented sausage gravy is draped over light buttermilk biscuits, and then topped with a dusting of freshly cracked black pepper.
Regardless of what type of diet you follow, I can say with a certain degree of certainty that once you taste my version of biscuits and gravy, you will have a new go-to meal to work into your breakfast, (or in our case, breakfast-for-dinner), rotation. Although I am thrilled to be back in the wonderful city of Boston, it’s nice to reminisce about our time spent in Houston; and what better way to do that than through food?!
*Please excuse the lackluster photographs… taking pictures of beige food (x3: beige chicken, beige biscuits, beige gravy) is no easy feat!*
Name:
Biscuits and Gravy with Homemade Chicken Breakfast Sausage
Split each biscuit on a separate plate; set aside.
Heat a drizzle of olive oil in a skillet over medium-high heat. Add the chicken sausage, and stir with a wooden spoon to crumble. Cook until lightly browned, about 5-6 minutes. Set aside.
In a small bowl, whisk together the flour through sage. Slowly add milk, and whisk to combine.
Heat a small saucepan over medium heat. Add in the flour-milk mixture, and bring to a simmer, whisking constantly. Reduce heat to low and simmer until thickened, 1-2 minutes, whisking constantly.
Stir the cooked sausage into the warm gravy, and spoon over the split biscuits. Finish with an extra grinding of black pepper.
If like me, you get overly excited about the array of tempting offerings at the Whole Foods salad bar, then this gorgeous salad has your name written all over it.
No hum-drum rice salad, this dish is rife with fresh flavors and pleasing textures. Crisp pieces of apple and pear combine nicely with chewy dried cranberries and wild rice, all of which are complemented by crunchy toasted walnuts.
The salad is dressed in a vinaigrette that is a perfect balance of rich olive oil, tangy vinegar, and sweet honey.
Name:
Fruited Wild Rice Salad with Dried Cranberries & Walnuts
Cuisine:
American
Prep Time:
15 minutes
Cooking Time:
50 minutes (for wild rice)
Total Time:
1 hour 5 minutes
Servings:
6
Yield:
About 6 cups
Ingredients
1 cup wild rice
2 cups water
1/2 cup dried cranberries
1/2 cup chopped walnuts
1/2 cup chopped celery
1/4 cup green onions, finely chopped
1/4 cup fresh parsley, chopped
1/4 cup olive oil
2 tablespoons apple cider vinegar
1 tablespoon honey
Salt and pepper to taste
Instructions
Cooking the Wild Rice:
Rinse the wild rice under cold water to remove excess starch.
In a medium-sized saucepan, bring 2 cups of water to a boil.
Add the rinsed wild rice and reduce the heat to low. Cover and simmer for about 45-50 minutes, or until the rice is tender and has absorbed the water. Allow it to cool to room temperature.
Preparing the Dressing:
In a small bowl, whisk together the olive oil, apple cider vinegar, honey, salt, and pepper until well combined. Set aside.
Mixing the Salad:
In a large mixing bowl, combine the cooked wild rice, dried cranberries, chopped walnuts, chopped celery, green onions, and fresh parsley.
Adding the Dressing:
Pour the prepared dressing over the salad and toss gently to ensure all the ingredients are well coated.
Chilling and Serving:
Before serving, taste and adjust the seasoning if necessary.
Refrigerate the salad for at least 1-2 hours to allow the flavors to meld and the salad to chill.
Garnish and Serve:
Garnish with additional parsley or walnuts, if desired, for a decorative touch.
Serve the Fruited Wild Rice Salad as a delightful side dish, a light meal, or a colorful addition to your buffet spread.
Estimated Nutrition Per Serving:
Calories: 250
Total Fat: 12g
– Saturated Fat: 1.5g
– Trans Fat: 0g
Cholesterol: 0mg
Sodium: 150mg
Total Carbohydrates: 32g
– Dietary Fiber: 3g
– Sugars: 9g
Protein: 4g
Please note that the nutrition information is an estimate and may vary based on specific ingredients used and portion sizes. It’s always a good idea to calculate nutrition based on the exact ingredients and quantities you use.
Light enough to accompany an entree, but hearty enough to serve as a main course, this fruited wild rice salad is a fantastic dish to make on the weekend and have on hand throughout the week. The ingredients continue to soak up the vinaigrette as the salad sits in the fridge, so it only gets better with time.
I enjoyed this salad so much that I have no doubt it will become a staple dish in our kitchen. I’m already daydreaming about various ingredient substitutions, such as fresh & dried cherries and toasted pecans. You can also change the flavor of the salad by experimenting with different kinds of vinegar, though I suggest sticking to vinegars with fruity notes.
I’m planning to serve this rice salad for lunch when my mom arrives later today for a girls weekend in Boston. Amongst the comfortable couch chats, strolls along the Esplanade with Shelby (John’s and my dog) and Zack (my parent’s puppy), and leisurely glasses of wine up on the roof deck, we just might have to sneak in a granola-making session (I can’t seem to get enough!). I’m looking forward to a great weekend…
Fruited Wild Rice Salad with Dried Cranberries & Walnuts is a vibrant, wholesome dish. Combining the earthy richness of wild rice, the tanginess of cranberries, and the crunch of walnuts, it’s a delightful fusion of flavors and textures. Quick to prepare and bursting with nutrition, this salad is a perfect addition to any meal, adding color and taste to your table.
Bursting with fresh & sweet in-season fruit, topped with a generous layer of crumbly whole wheat oatmeal crisp, and no butter or refined sugar in sight.
It does not get any better than this!
Let’s start with the fruit filling.
I think I choose a different favorite summer fruit every day, but peaches and blueberries have both been exceptionally good lately. You’ll want to choose large peaches that are ripe (sniff the stem end… they should smell sweet) but not too soft; otherwise, they’ll be difficult to slice.
To help make a juicy saucy filling, we’re going to use unsweetened blueberry juice (which I had to take a few sips of before snapping these photos… you know to “test” it). This sweet/tart juice is reduced on the stovetop until thick and syrupy, and is then poured over the fresh fruit.
That’s it! No sweetener at all is added to the filling.
While we’re here, let’s just take a quick closer look at the label of this blueberry juice.
There are so many fruit juices on store’s shelves these days, but most are glorified uncarbonated sodas in terms of how much added sugar they have. Opt instead for a no-sugar added all-fruit juice if possible.
I found the Lakewood brand at Whole Foods, and though quite pricey at $9.99, it uses organic blueberries NOT from concentrate… and nothing else! No sugar, no preservatives, no additional fruit juice. Just “Fresh Pressed Juice and Puree From Whole Ripe Certified Organic Blueberries.”
Perfect!
So the reduced syrupy blueberry juice is poured over the fruit…
… and then topped with a thick blanket of oatmeal crisp topping.
Let’s pull over for a second.
If you prefer a higher ratio of fruit to crisp, you’ll want to halve the topping ingredient amounts. But, let’s be honest, isn’t the topping the best part of a fruit crisp?!
First of all, this raw crisp topping tastes like oatmeal cookie dough; and it’s comprised merely of rolled oats, whole wheat pastry flour, salt, cinnamon, oil, and maple syrup (and not a whole lot of those last two ingredients – in fact, 1 Tbsp or less of each per serving). I literally had to slap my own hands away from eating the raw oatmeal mixture.
And when it bakes to perfection on top of the fruit? Oh, it’s heaven I tell you!
The crumbly granola-like topping sinks into the bubbly fruit filling, creating the ideal (for me) ratio of fruit to crisp.
One of the many great things about a fruit crisp recipe is that you can swap in different fruits depending on taste preference and seasonality. This summer, try cherries & nectarines or apricots. In the fall, you can bet that I’ll be trying this recipe with apples. You’ll just want to use a corresponding unsweetened fruit juice; many grocery stores carry apricot juice, and apple juice is everywhere.
Regardless of the type of fruit you use, any crisp simply begs for a scoop of vanilla ice cream or frozen yogurt… or a few dollops of Greek yogurt if you’re enjoying leftovers for breakfast, which of course I did ;).
Another nice aspect of fruit crisps is that you can serve them at any temperature, which means you can easily make this in advance to serve at room temperature for a 4th of July celebration tomorrow! Choose your favorite locally grown organic fruit, serve the crisp with ice cream, and you have a crowd-pleasing all-American dessert worthy of the holiday.
Keywords: bake breakfast dessert vegan vegetarian July 4th crisp American summer
Ingredients (8 servings)
Ingredients for the fruit filling
3 large ripe but slightly firm peaches, preferably organic, pitted and thinly sliced (no need to peel)
1 pint blueberries, preferably organic
1 Tbsp freshly squeezed lemon juice
1 3/4 cup unsweetened blueberry juice (not from concentrate), preferably organic, divided use
1 Tbsp arrowroot powder
2 tsp pure vanilla extract
pinch of salt
Ingredients for the crisp topping
2 cups old-fashioned rolled oats
1 1/2 cups whole wheat pastry flour
1/4 tsp salt
1/4 tsp ground cinnamon
1/3 cup neutral-flavored vegetable oil
1/2 cup pure maple syrup, preferably grade B
Instructions
Preheat oven to 350°F. Toss the sliced peaches, blueberries, and lemon juice together and spread in an even layer in a 9 inch baking pan.
For the filling: Heat 1 1/2 cups blueberry juice in a small saucepan set over medium-high heat until simmering. Meanwhile, in a small bowl, whisk together the remaining 1/4 cup blueberry juice and arrowroot powder until no lumps remain. Whisk the arrowroot “slurry” into the simmering blueberry juice. Bring mixture to a low boil, reduce heat to medium-low, and let simmer until mixture is has thickened and reduced by half – whisking every now and then – about 20 minutes. Remove from heat, stir in vanilla extract and salt, and pour over the fruit in the pan.
For the crisp topping: In a medium mixing bowl, combine the oats, flour, salt, & cinnamon; whisk to combine. Stir in oil and maple syrup; stir to combine. Evenly crumble the crisp topping over the fruit.
Cover with aluminum foil and bake at 350°F for 30 minutes (you’ll probably want to place a baking sheet underneath the crisp to catch any overflow). Remove the foil and bake for an additional 20 minutes, until the crisp topping is golden brown and the fruit filling is hot and bubbling.
Let sit at room temperature for at least 20 minutes before serving.
Estimated Nutrition Per Serving
Calories: 320 calories per serving.
Total Fat: 14g per serving.
Saturated Fat: 8g per serving.
Cholesterol: 30mg per serving.
Sodium: 70mg per serving.
Total Carbohydrates: 49g per serving.
Dietary Fiber: 5g per serving.
Sugars: 31g per serving.
Protein: 3g per serving.
Please note that these nutritional values are approximate and can vary depending on factors such as the specific ingredients and brands used in the recipe. It’s always a good idea to use a nutrition calculator for precise values, especially if you have specific dietary requirements or restrictions. Enjoy your Blueberry Peach Crisp!
Monday sets the tone for the rest of the week, making it crucial to start off on a healthy note. Embrace the beginning of the week with a delicious and nutrient-packed Chef Salad.
This wholesome salad combines an array of fresh vegetables, proteins, and a zesty dressing, providing you with the energy and motivation you need to conquer the week ahead.
Let’s dive into the details of creating this revitalizing and satisfying Monday Musings Chef Salad.
Property
Value
Name
Monday Musings + Chef Salad
Cuisine
Mixed
Prep Time
20 minutes
Cooking Time
10 minutes (for hard-boiled eggs)
Total Time
30 minutes
Servings
4 servings
Yield
1 salad bowl (4 servings)
Ingredients
Romaine lettuce, chopped
Tomatoes, diced
Cucumbers, sliced
Red bell peppers, chopped
Red onions, thinly sliced
Hard-boiled eggs, sliced
Grilled chicken breast, sliced
Turkey or ham slices, chopped
Swiss or cheddar cheese, cubed
Avocado, sliced
Black olives, pitted and sliced
Croutons
Fresh parsley, chopped (for garnish)
Instructions
Prepare the Base Begin by arranging a generous layer of chopped romaine lettuce as the base of your salad in a large serving bowl.
Layer the Vegetables
Arrange the diced tomatoes, sliced cucumbers, chopped red bell peppers, and thinly sliced red onions over the lettuce, creating a colorful and visually appealing display.
Add the Proteins
Arrange the sliced hard-boiled eggs, grilled chicken breast slices, chopped turkey or ham, and cubed cheese over the vegetables.
Incorporate Avocado and Olives
Layer the sliced avocado and pitted, sliced black olives for a creamy and briny addition to the salad.
Top with Croutons and Fresh Parsley
Sprinkle croutons generously over the top and garnish with freshly chopped parsley to add a delightful crunch and burst of flavor.
Prepare the Dressing
In a small bowl, whisk together olive oil, balsamic vinegar, Dijon mustard, honey, lemon juice, minced garlic, salt, and pepper to create a tangy and refreshing dressing.
Drizzle Dressing and Toss Gently
Drizzle the dressing over the salad and gently toss the ingredients to ensure even distribution of the flavors and dressing.
Serve and Enjoy
Transfer the salad to individual plates or bowls, and relish this nutritious and delicious Chef Salad to kickstart your week on a healthy and tasty note.
Estimated Nutrition Per Serving
Calories: 450 kcal
Total Fat: 26g
Saturated Fat: 7g
Cholesterol: 295mg
Sodium: 800mg
Total Carbohydrates: 16g
Dietary Fiber: 7g
Sugars: 7g
Protein: 38g
Please note that the nutritional values are estimated and may vary based on the specific ingredients and portion sizes used. Adjustments to the recipe will affect the nutrition content.
I think Alex – who hails from England – sounds a bit like Chris Martin (from Coldplay) in certain tracks, but he definitely has his own sound. Some of my favorite songs are “Treading Water”, “Relax My Beloved”, “Too Close“, (the live unplugged version is awesome too), and “I Love You”.Check him out!2. I’m looking for a new novel to start once I finish this behemoth. Any suggestions are greatly appreciated :).3. My Avocado & Strawberry Grilled Cheese sandwich somehow won the Cabot Strawberry Contest.
4. Game of Thrones is back for its second season on HBO.Thank god, because yesterday was the Shameless season finale. Sundays are still on!5. With visions of leftover ham – from the Easter dinner I’ll be hosting next weekend – lingering in the back of my mind, I came up with this delicious Chef Salad… the recipe for which you can find here on The Back Burner.
Incorporate a burst of freshness into your week with Monday Musings Chef Salad. Packed with vibrant vegetables, hearty proteins, and a zesty dressing, this salad is the perfect start to your Monday. Enjoy the crunch of fresh greens and the delightful medley of flavors as you nourish your body and gear up for the week ahead. Bon appétit!
Start your day off right with a mouthwatering breakfast that’s easy to make and bursting with flavor. These Ham & Cheese Griddle Cakes for one are the perfect solution for those mornings when you crave something savory and satisfying.
Whether you’re a fan of classic griddle cakes or just looking for a quick and delicious breakfast option, this recipe is sure to hit the spot.
Name
Ham & Cheese Griddle Cakes for One
Cuisine
Mix
Prep Time
10 minutes
Cooking Time
6 minutes
Total Time
16 minutes
Servings
1 serving
Yield
1 griddle cake
Griddle cakes.
As far as I know, they’re synonymous with pancakes, but I’m using the term for this recipe to distinguish the more savory stack from my sweet pancakes.
We still have a huge hunk of baked Easter ham sitting in our fridge, and I’ve been challenging myself to use it in unique ways; which is to say, other than ham sandwiches and Chef salads.
Here we have a stack of my basic whole wheat buttermilk pancakes-for-one stuffed with sweet ham and gooey cheese…
… covered in maple syrup, of course.
Gotta love the sweet/savory flavor combination!
Now you might be thinking that cheese has no place in pancakes. Let me stop you right there, because it is a fantastic addition!
I’m pretty sure I say this about every most recent pancakes-for-one recipe, but I think this might be my favorite so far.
Breakfast, lunch, or dinner… these griddle cakes are simply fabulous.
Ham & Cheese Griddle Cakes for One
Ingredients
1/2 cup whole wheat pastry flour
1/2 tsp baking powder
1/4 tsp baking soda
pinch of salt
1 egg white
1/2 cup low fat buttermilk, well-shaken
1/4 cup chopped thickly sliced baked ham
2 Tbsp cubed cheese (I used Gruyere)
pure maple syrup, preferably grade
Estimated Nutrition Per Serving
Calories: 350 kcal
Protein: 18g
Carbohydrates: 30g
Dietary Fiber: 1g
Sugars: 2g
Fat: 17g
Saturated Fat: 7g
Cholesterol: 210mg
Sodium: 980mg
Instructions
Preheat Your Griddle
Start by preheating a griddle or non-stick skillet over medium heat. You want it hot enough to cook the griddle cakes evenly.
Prepare the Dry Ingredients
In a mixing bowl, whisk together the all-purpose flour, baking powder, and salt. This forms the base for your griddle cakes.
Add the Wet Ingredients
Beat the egg and add it to the dry mixture. Pour in the milk as well. Mix everything together until you have a smooth batter.
Fold in the Goodness
Gently fold in the diced ham, shredded cheddar cheese, and chopped green onions (if using). These ingredients will add a delightful savory flavor to your griddle cakes.
Grease the Griddle
Lightly grease your hot griddle or skillet with a small amount of butter or cooking oil.
Cook the Griddle Cakes
Pour a ladleful of the batter onto the griddle to form a pancake-like circle. Use the back of your ladle to spread it out a bit if needed. Cook for about 2-3 minutes on each side or until the griddle cake is golden brown and the cheese is melty.
Serve and Enjoy
Transfer your Ham & Cheese Griddle Cake to a plate. You can serve it plain, with a dollop of sour cream, or a drizzle of maple syrup for a touch of sweetness.
It appears as though I’ve developed quite a fixation on eggs lately.
Whether draped over sweet potato home fries, served atop avocado toast, baked onto an individual breakfast pizza, or paired with arugula, bacon, & blue cheese in a breakfast sandwich, one thing simply MUST remain constant: a perfectly runny yolk!
Speaking of that Sweet Potato Breakfast Pizza, I was one of the three runners-up in the No More ‘Mallows recipe contest!
Judges Kate Rockwood, Senior Editor at Oprah Magazine, Ruth Lowenberg, “culinary professional extraordinaire”, and Matt Timms, the creator of The Takedown, “America’s most important food competition”, bestowed the grand prize upon The Tolerant Vegan for her Maple Sweet Potato Pecan Burgers (how amazing does that sound?!), and the other runners-up were The Type A Housewife (Sweet Potato French Toast Cups) and Willow Bird Baking (Sweet Tater & Chorizo Hand Tarts).
Congratulations, ladies! I’m going to try out all of your delicious-sounding sweet potato creations :).
As amazing as these Trader Joe’s dark chocolate bars are, there just isn’t enough speculoos cookie butter in ‘em.
Start by preparing the asparagus. Trim off the tough ends and cut the spears into 2-inch pieces. You can blanch them for about 2 minutes in boiling water, then immediately transfer them to an ice bath to retain their vibrant green color. Alternatively, you can roast them in the oven at 400°F (200°C) with a drizzle of olive oil for about 10-12 minutes until they’re tender and slightly crispy.
In a large salad bowl, combine the baby arugula, sliced strawberries, and asparagus.
For the dressing, whisk together the balsamic vinegar, extra-virgin olive oil, honey, salt, and pepper in a small bowl. Adjust the seasoning to your liking.
Drizzle the dressing over the salad ingredients and gently toss to coat everything evenly.
Sprinkle the crumbled feta cheese and toasted chopped almonds over the top of the salad. These add a delightful contrast of textures and flavors.
Serve your Springtime Asparagus, Strawberry, & Arugula Salad immediately. The combination of sweet strawberries, slightly nutty asparagus, peppery arugula, and the tangy balsamic dressing is a true delight for the palate.