Home Blog Page 89

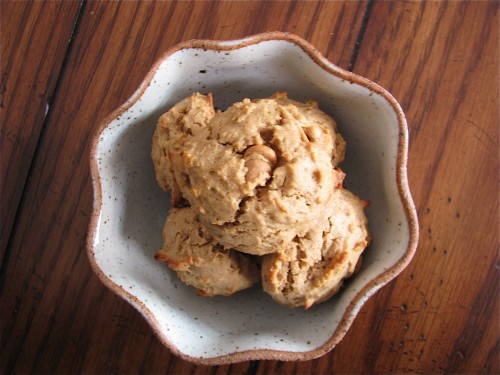
Whole Wheat Oatmeal Peanut Butter Cookies

We’re now halfway through “Resolution Month”, and I have just the recipe for those of you who are interested in having a batch of healthy cookies on hand.

Whole Wheat Oatmeal Peanut Butter Cookies

These cookies have neither refined flour, sugar, nor butter or oil in them, but taste delicious nonetheless.

Whole Wheat Oatmeal Peanut Butter Cookies

Nutrition Facts (per cookie)

  • Calories: 120
  • Total Fat: 7g
    • Saturated Fat: 3g
    • Trans Fat: 0g
  • Cholesterol: 15mg
  • Sodium: 100mg
  • Total Carbohydrates: 12g
    • Dietary Fiber: 2g
    • Sugars: 5g
  • Protein: 3g
  • Vitamin D: 1%
  • Calcium: 1%
  • Iron: 3%
  • Potassium: 2%

Please note that these nutrition facts are approximate and can vary based on the specific brands and quantities of ingredients used. Be sure to adjust the serving size if you make smaller or larger cookies. Enjoy your delicious and healthier Whole Wheat Oatmeal Peanut Butter Cookies!

Whole Wheat Oatmeal Peanut Butter Cookies

I assure you that the whole wheat flour is not in the least bit discernible, and the subtle sweetness of the brown rice syrup beautifully complements the rich peanut butter flavor.

Whole Wheat Oatmeal Peanut Butter Cookies

As for the texture, I can’t sing these cookies’ praises enough! A crisp outer shell gives way to a soft, chewy, and almost muffin-like interior.

Whole Wheat Oatmeal Peanut Butter Cookies

Lower in calories, fat, and sugar than most cookies, but higher in fiber and protein, these tasty little treats are a great way to satiate your sweet tooth without wrecking havoc on your healthy diet… newly adopted or not!

Whole Wheat Oatmeal Peanut Butter Cookies
Name Whole Wheat Oatmeal Peanut Butter Cookies
CuisineAmerican
Prep Time15 minutes
Cooking Time12 minutes
Total Time27 minutes
Servings24
Yield24

Ingredients

  • 1/2 cup natural smooth peanut butter
  • 1/4 cup brown rice syrup (I used Lundberg)
  • 1 large egg
  • 1/2 tsp pure vanilla extract
  • 1/4 cup 100% whole wheat flour
  • 1/4 cup old fashioned rolled oats
  • 1/2 tsp baking soda
  • 1/4 tsp cinnamon
  • 1/4 tsp salt
  • 1/4 cup natural peanut butter chips (such as Sunspire)

Directions

  1. Preheat oven to 350°F and line a baking sheet with parchment paper or a silicone mat.
  2. In a large bowl, (or stand mixer), beat together peanut butter and brown rice syrup. Beat in egg until incorporated. Beat in vanilla extract.
  3. In a medium bowl, whisk together the flour, oats, baking soda, cinnamon, and salt.
  4. Add dry ingredients into the wet, and stir just until combined. Fold in the peanut butter chips.
  5. Using a mini ice cream scoop or small spoon, drop cookie dough onto prepared baking sheet.
  6. Bake for about 8-10 minutes, or until cookies are golden but still soft. Transfer to wire rack to cool completely.

Vanilla Bean Coconut Steel Cut Oats “Rice” Pudding

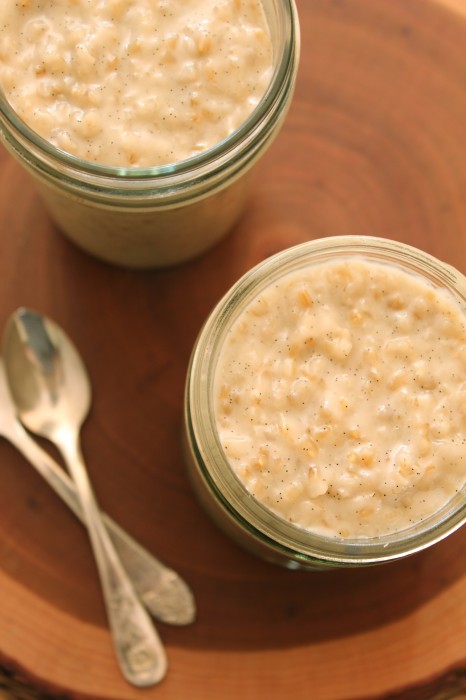
I have a whole slew of brown rice pudding recipes on the blog, and although I enjoyed each of those varieties, I wanted to try something new.

Why the idea of using steel cut oats in a pudding recipe has evaded me until now, I don’t know… but I’m thrilled that it finally occurred to me to use the rice-shaped oats because this pudding is really, really good!

Vanilla Bean Coconut Steel Cut Oats “Rice” Pudding

The steel cut oats cook right in the milk mixture, which in this case in a combination of coconut milk and almond milk (yep, this “rice” pudding is vegan), and act just like rice would by slowly plumping & tenderizing in the simmering liquid.

I also tossed a whole vanilla bean into the pot, as the little black flecks add such a lovely aesthetic touch in addition to an enticing aroma and sweet flavor. The sweetness also comes from evaporated cane juice, rendering this pudding a true dessert and not one of my “breakfast-or-dessert” recipes (despite the usage of oatmeal).

Typically rice pudding can be served warm or chilled, but I definitely prefer this one warm and suggest you serve/eat it that way as well.

Vanilla Bean Coconut Steel Cut Oats “Rice” Pudding

I’m officially a steel cut oats convert when it comes to making rice pudding!

Vanilla Bean Coconut Steel Cut Oats “Rice” Pudding
NameVanilla Bean Coconut Steel Cut Oats “Rice” Pudding
CuisineFusion
Prep Time5 minutes
Cooking Time45 minutes
Total Time50 minutes
Servings6 servings
Yield4 cups

Keywords: simmer dessert vegan oatmeal coconut rice pudding pudding

Ingredients (2 generous servings)

  • 1/2 cup steel cut oats
  • 1 1/2 cups full-fat coconut milk (just about one 13.5 oz can)
  • 1 cup unsweetened vanilla almond milk
  • 1/3 cup evaporated cane juice, or other unrefined granulated sugar
  • 1 vanilla bean, split

Instructions

Combine oats, coconut milk, almond milk, and evaporated cane juice in a heavy-bottomed medium-sized saucepan. Using the flat side of a knife, scrape out the vanilla bean seeds. Add the vanilla bean seeds and remaining vanilla bean to the saucepan.

Bring ingredients to a boil, reduce heat to low, and simmer, stirring often, until thickened, about 30 minutes. It is especially important not to walk away from the stove towards the end of the cooking time, as that is when the milk is most likely to scorch.

Remove pudding from heat and carefully remove vanilla bean. Pudding will continue to thicken as it cools.

Serve warm or at room temperature.

Nutrition Facts (per serving, based on 4 servings)

  • Calories: 336 kcal
  • Total Fat: 17g
    • Saturated Fat: 12g
    • Trans Fat: 0g
  • Cholesterol: 0mg
  • Sodium: 155mg
  • Total Carbohydrates: 43g
    • Dietary Fiber: 5g
    • Sugars: 16g
  • Protein: 6g
  • Vitamin D: 0%
  • Calcium: 18%
  • Iron: 18%
  • Potassium: 288mg

Nutrition facts are approximate and may vary based on specific ingredients and serving sizes.

Banana Stuffed Crispy Peanut Butter French Toast for One

If you’re a fan of breakfast that’s sweet, indulgent, and bursting with flavor, then you’re in for a treat! This Banana Stuffed Crispy Peanut Butter French Toast is the perfect morning pick-me-up for those moments when you want to pamper yourself with something special.

The combination of creamy peanut butter, ripe bananas, and crispy French toast is simply irresistible. The best part? It’s designed for a single serving, so you can enjoy it all to yourself.

Would it sound obnoxious if I said this was the best french toast I’ve ever had?

Because it is, hands-down.

Banana Stuffed Crispy Peanut Butter French Toast for One

I completely lost interest in french toast for a while after watching this scene in Road Trip, but man am I glad I got over that revulsion… because this. Is. Amazing.

Banana Stuffed Crispy Peanut Butter French Toast for One

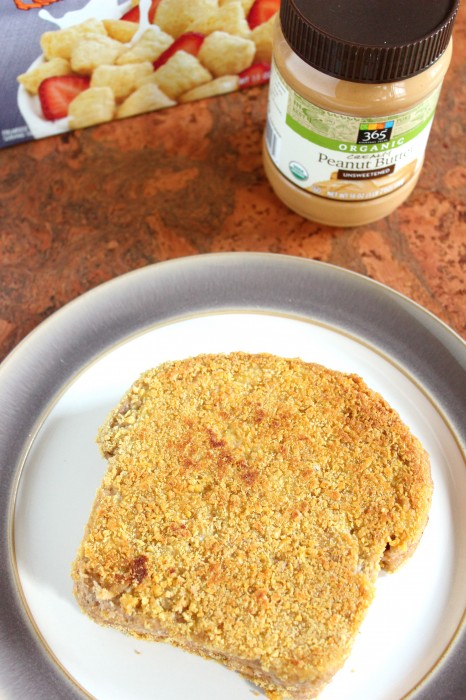
Creamy mashed banana is sandwiched between two slices of wicked good whole wheat bread, then the sandwich is soaked in a peanut butter “custard” and coated in crunchy Peanut Butter Puffins crumbs before being pan-fried to crispy golden-brown perfection.

Banana Stuffed Crispy Peanut Butter French Toast for One

A generous drizzle of maple syrup seals the deal.

Banana Stuffed Crispy Peanut Butter French Toast for One

My brain is already in overdrive thinking up variations on this absolutely delicious breakfast, so you can definitely expect to see more french toast posts in the near future!

Banana Stuffed Crispy Peanut Butter French Toast for One
NameBanana Stuffed Crispy Peanut Butter French Toast for One
CuisineFusion
Prep Time10 minutes
Cooking Time6 minutes
Total Time16 minutes
Servings1
Yield1

Ingredients

  • 2 slices of your favorite bread (thicker slices work best)
  • 1 ripe banana
  • 2 tablespoons of creamy peanut butter
  • 1 large egg
  • 1/4 cup of milk
  • 1/2 teaspoon of vanilla extract
  • 1/4 teaspoon of ground cinnamon
  • Butter or oil for frying
  • Maple syrup or honey for drizzling (optional)
  • Sliced strawberries or blueberries for garnish (optional)

Estimated Nutrition Per Serving

Calories: 485 calories

Fat: 22g

Saturated Fat: 5g

Cholesterol: 210mg

Sodium: 417mg

Carbohydrates: 54g

Fiber: 6g

Sugars: 22g

Protein: 17g

Instructions

1. Prepare the Banana Filling

Start by peeling the ripe banana and mashing it in a small bowl with a fork. Once you have a creamy consistency, add the peanut butter and mix well until you have a smooth banana-peanut butter filling.

2. Make the French Toast Sandwich

Take two slices of your favorite bread and spread the banana-peanut butter mixture evenly over one slice. Place the other slice of bread on top to create a sandwich.

3. Prepare the Egg Mixture

In a shallow bowl, whisk together the large egg, milk, vanilla extract, and ground cinnamon. This mixture will be the custard for your French toast.

4. Dip and Coat

Carefully dip your banana-stuffed sandwich into the egg mixture, ensuring both sides are coated. Allow any excess mixture to drip off.

5. Fry to Perfection

Heat a skillet or frying pan over medium heat and add a small amount of butter or oil. Once hot, place your stuffed sandwich in the pan. Cook for about 2-3 minutes on each side, or until golden brown and crispy.

6. Serve and Enjoy

Transfer your Banana Stuffed Crispy Peanut Butter French Toast to a plate. You can drizzle some maple syrup or honey over the top for added sweetness if desired. Garnish with sliced strawberries or blueberries for a fresh touch.

7. Savor Every Bite

Take a moment to appreciate the crispy exterior giving way to the gooey, sweet, and nutty interior. Each bite is a harmonious blend of flavors and textures, making this breakfast a true treat for your taste buds.

Meyer Lemon Ricotta Muffins

Meyer lemons are a delightful citrus fruit known for their sweet and slightly tangy flavor. When combined with creamy ricotta cheese, they create a harmonious blend of flavors that make for some seriously mouthwatering muffins.

Whether you’re an experienced baker or just trying your hand at baking, these Meyer Lemon Ricotta Muffins are a perfect treat to brighten up your day.

Well, here we are at the verrrrry end of meyer lemon season and I’m just getting around to posting a recipe featuring this gorgeous citrus fruit.

Meyer Lemon Ricotta Muffins

Less tart and acidic than their light yellow cousins, vibrantly-hued meyer lemons are a hybrid of lemons and mandarins native to China.

They are readily available in grocery stores throughout the States during the winter months, and make a lovely bright addition to baked goods.

Meyer Lemon Ricotta Muffins

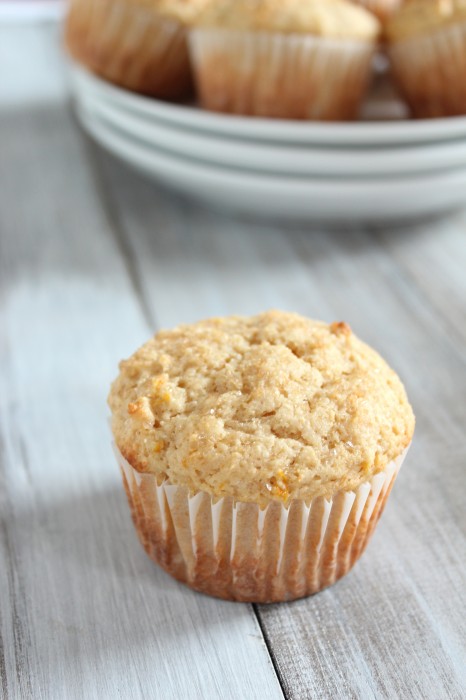
Meyer lemon zest and juice both make their way into these light ricotta muffins. Despite being 100% whole wheat, these slightly sweet muffins have a moist and delicate crumb… and are perfect for breakfast or as a between-meal snack.

Meyer Lemon Ricotta Muffins

Let’s take a peep at a muffin strip tease, shall we?

Meyer Lemon Ricotta Muffins

Yes, it’s sad when that muffin wrapper is empty, but given the light nutritional stats, you can feel just fine about reaching for another one…

Meyer Lemon Ricotta Muffins
NameMeyer Lemon Ricotta Muffins
CuisineItalian
Prep Time15 minutes
Cooking Time18-20 minutes
Total Time33-35 minutes
Servings12 muffins
Yield1 dozen muffins
Meyer Lemon Ricotta Muffins

Ingredients

  • 1 1/2 cups all-purpose flour
  • 1/2 cup granulated sugar
  • 1/2 teaspoon baking powder
  • 1/2 teaspoon baking soda
  • 1/4 teaspoon salt
  • 1/2 cup unsalted butter, softened
  • 2 large eggs
  • 1 cup ricotta cheese
  • Zest and juice of 2 Meyer lemons
  • 1 teaspoon pure vanilla extract
  • Powdered sugar (for dusting)

Estimated Nutrition Per Serving

Calories: 190 calories

Total Fat: 9g

Saturated Fat: 5g

Trans Fat: 0g

Cholesterol: 55mg

Sodium: 180mg

Total Carbohydrates: 23g

Dietary Fiber: 0.5g

Sugars: 11g

Protein: 4g

Instructions:

Preheat the Oven

Preheat your oven to 350°F (175°C) and line a muffin tin with paper liners.

Mix Dry Ingredient

In a large bowl, whisk together the flour, sugar, baking powder, baking soda, salt, and lemon zest.

Combine Wet Ingredients

In another bowl, whisk together the melted butter, ricotta cheese, eggs, lemon juice, and vanilla extract until well combined.

Combine Wet and Dry Mixtures

Pour the wet ingredients into the dry ingredients and gently fold them together until just combined. Be careful not to overmix; a few lumps in the batter are okay.

Fill Muffin Cups

Using a scoop or spoon, divide the batter evenly among the muffin cups, filling each about 2/3 full.

Bake

Bake in the preheated oven for 18-20 minutes or until the muffins are lightly golden on top and a toothpick inserted into the center comes out clean.

Prepare the Glaze

While the muffins are baking, prepare the Meyer lemon glaze. In a small bowl, whisk together the powdered sugar, Meyer lemon juice, and lemon zest until you have a smooth glaze.

Glaze the Muffins

Once the muffins are out of the oven and slightly cooled, drizzle each muffin with the Meyer lemon glaze. Allow the glaze to set for a few minutes.

Meyer Lemon Ricotta Muffins

Trust me, you do NOT want to miss this one!

Check out the post here.

Meyer Lemon Ricotta Muffins

Massaged Kale Salad with Beans, Quinoa, & Hummus

0

Massaged Kale Salad with Beans, Quinoa, & Hummus is a delightful and nutritious dish that’s not only bursting with flavor but also packed with essential nutrients. This recipe combines the earthy taste of kale, the protein punch of beans and quinoa, and the creamy goodness of hummus into a satisfying and wholesome salad. Whether you’re a kale enthusiast or someone looking to incorporate more plant-based meals into your diet, this recipe is sure to impress your taste buds and leave you feeling nourished.

Name:Massaged Kale Salad with Beans, Quinoa, & Hummus
CuisineMediterranean
Prep Time15 minutes
Cooking Time15 minutes (for quinoa, if not pre-cooked)
Total Time30 minutes (including prep and optional cooking)
Servings4 servings
Yield6 cups of salad
Massaged Kale Salad with Beans, Quinoa, & Hummus

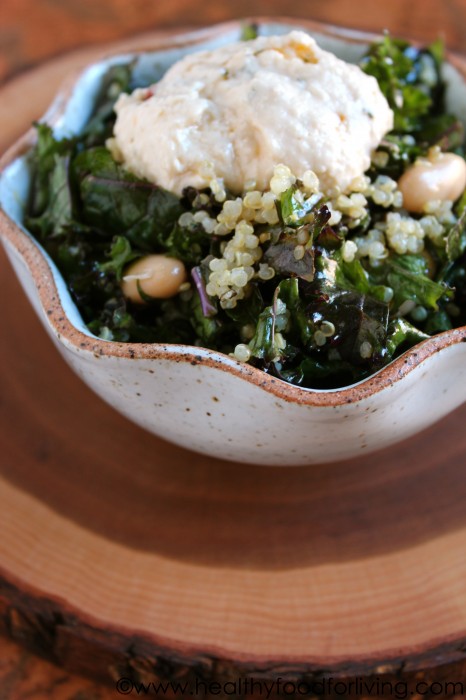
There’s no limit to what kind of ingredients you can add to a massaged kale salad; I opted for protein-rich add-ins this time around.

Cannellini (white kidney) beans, quinoa, and hummus team up with massaged kale to create a satisfying salad.

Massaged Kale Salad with Beans, Quinoa, & Hummus

I very rarely eat meat for lunch – and only make it about twice a week for dinner – and I’ve found that vegetarian protein is a great substitute in terms of satiating my appetite and keeping me energized.

Greek yogurt, cottage cheese, nuts and nut butter, beans, and hummus are all protein-rich foods I rely on as lunchtime staples. This salad brings quinoa to the game, which – although treated as a grain – is packed with protein.

Massaged Kale Salad with Beans, Quinoa, & Hummus

If you’re looking to up your vegetarian protein intake without resorting to powders and supplements, give this salad a try!

Massaged Kale Salad with Beans, Quinoa, & Hummus

Ingredients

  • 4 cups stemmed kale leaves, washed and dried
  • 2 tsp extra virgin olive oil
  • 2 tsp freshly squeezed lemon juice
  • Kosher salt and freshly ground black pepper, to taste
  • 1/2 cup rinsed and drained white cannellini beans
  • 3/4 cup cooked quinoa
  • 1/4 cup of your favorite hummus

Instructions

1. Prepare the Kale

  • Wash the kale leaves thoroughly and remove the tough stems.
  • Stack the leaves, roll them up, and thinly slice them into ribbons.

2. Massage the Kale

  • Place the sliced kale in a large mixing bowl.
  • Drizzle 1-2 tablespoons of olive oil over the kale and add a pinch of salt.
  • Gently massage the kale with your hands for 2-3 minutes until it begins to soften and wilt. Massaging the kale helps to break down its tough fibers and improve the texture.

3. Prepare the Dressing

  • In a small bowl, whisk together the hummus, remaining olive oil, lemon juice, minced garlic, honey or maple syrup, salt, and pepper until well combined. Adjust the seasoning to taste.

4. Assemble the Salad

  • Add the cooked quinoa, beans, cherry tomatoes, red onion, cucumber, and roasted red bell peppers (if using) to the massaged kale in the mixing bowl.
  • Pour the prepared dressing over the salad ingredients.

5. Toss and Serve

  • Gently toss all the ingredients together until the dressing evenly coats the salad.
  • Top with Kalamata olives and crumbled feta cheese if desired.
  • Allow the salad to sit for a few minutes to let the flavors meld.

6. Serve and Enjoy

  • Divide the Massaged Kale Salad into individual bowls or plates.
  • Garnish with extra lemon wedges or a drizzle of olive oil if desired.
  • Serve immediately and enjoy your wholesome, nutrient-packed meal.

Estimated Nutrition per Serving

  • Calories:290 calories
  • Carbohydrates:36 grams
  • Dietary Fiber:7 grams
  • Sugars:4 grams
  • Fat:13 grams
  • Saturated Fat:2 grams
  • Cholesterol:0 milligrams
  • Sodium:430 milligrams
  • Vitamin A:260% DV
  • Vitamin C:180% DV
  • Calcium:15% DV
  • Iron:20% DV

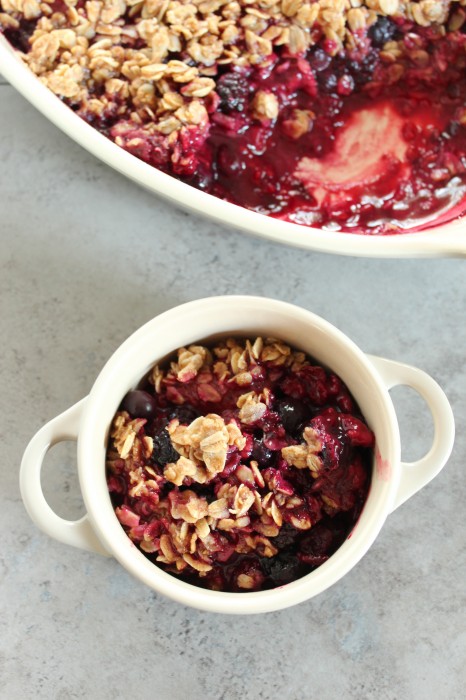
Any Season Berry Crisp

Here we are at the tail end of fresh berry season… pretty soon the prices for organic berries will shoot through the roof and the flavor will be watery & lackluster at best. It is for these two reasons that I only buy fresh organic berries during the summer months, but that doesn’t mean we can’t enjoy a delicious berry crisp during any season of the year!

How exactly do we do that, you ask?

By using organic frozen berries, of course. I picked up this tip from Erin of Texanerin Baking. I made her 100% Whole Grain Raspberry Crumble a few weeks back (using 1/2 frozen organic raspberries and 1/2 frozen organic blackberries) and absolutely loved it. Frozen berries are picked and packed at the peak of freshness and are inexpensive… year-round. Berries in a crisp are cooked down into mushy goodness anyway, so don’t worry about the thawed berries being too soft.

Any Season Berry Crisp

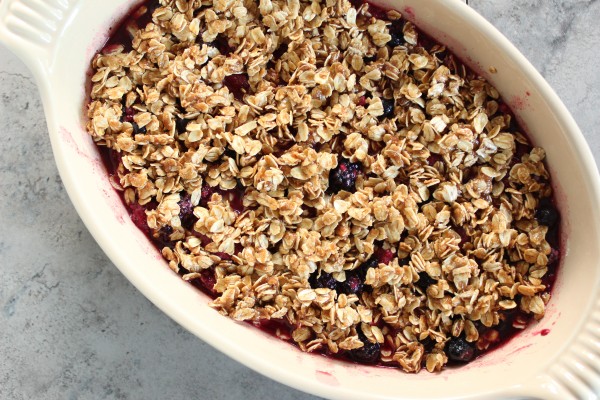
For this crisp, I used an organic frozen mixed berry medley from Trader Joe’s which includes strawberries, blueberries, raspberries, and blackberries. Lots of flavor, texture, and gorgeous color going on here!

Any Season Berry Crisp

The crisp topping comes straight from Erin’s recipe, and involves a mere 2 Tbsp each of oil, brown sugar, maple syrup… pretty healthy in comparison to the vast majority of fruit crisp recipes out there!

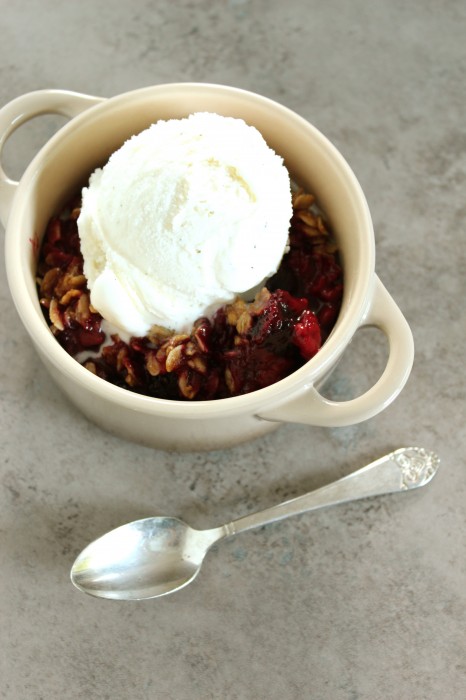
Any Season Berry Crisp

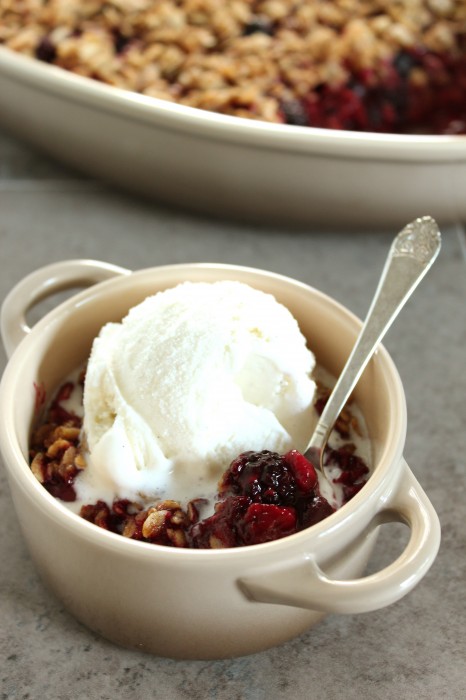
Warm fruit crisp topped with a scoop of vanilla bean ice cream is hands-down one of my favorite desserts. Gooey & crunchy, sweet & slightly tart, warm & cold… it’s a beautiful dichotomy of texture, flavor, and temperature that just works.

Leftovers (if there are any, which is doubtful unless you’re the only dessert-eater in the house as I am) are fantastic mixed with plain Greek yogurt for breakfast the next morning. Sure, it’s a sweet way to start the day, but the added sugar (not including the natural sugars found in the fruit) is probably on par with – or even less than – that found in many breakfast cereals.

Any Season Berry Crisp

Berries are no longer just for summer enjoyment!

Any Season Berry Crisp
NameAny Season Berry Crisp
CuisineFusion
Prep Time15 minutes
Cooking Time40 minutes
Total Time55 minutes
Servings6
Yield9×9-inch baking dish

Keywords: bake dessert vegetarian vegan blackberries blueberries strawberries oatmeal crisp fall spring summer winter

Ingredients (4 servings)

Ingredients for the Fruit Filling

  • 24 oz organic berries, thawed but not drained (I used a medley from Trader Joe’s with organic strawberries, raspberries, blackberries, and blueberries)
  • 2 Tbsp whole wheat pastry flour
  • 1 Tbsp unrefined granulated sugar, such as evaporated cane juice

Ingredients for the Crisp Topping:

  • 1 cup old-fashioned rolled oats
  • 2 Tbsp whole wheat pastry flour
  • 2 Tbsp packed brown sugar
  • 1 tsp ground cinnamon
  • 1/8 tsp salt
  • 2 Tbsp neutral-flavored vegetable oil
  • 2 Tbsp pure maple syrup
  • 2 tsp pure vanilla extract

Instructions

Preheat oven to 350°F. Lightly oil a 9 (or 8) inch baking dish.

For the fruit filling: Pour the thawed berries + any accumulated juices into the prepared baking dish. Add in the flour and sugar and stir until well-combined.

For the crisp topping: In a medium mixing bowl, combine the rolled oats, flour, brown sugar, cinnamon, and salt. Stir with a fork until combined. Pour in the vegetable oil, maple syrup, and vanilla extract. Stir until well-incorporated.

Sprinkle crisp topping evenly over the fruit filling. Bake for 20-25 minutes, or until the fruit filling is hot & bubbly and the crisp topping is golden brown.

Nutrition Facts (Per Serving – Approximately)

  • Calories: 365
  • Total Fat: 16g
    • Saturated Fat: 10g
    • Trans Fat: 0g
  • Cholesterol: 41mg
  • Sodium: 102mg
  • Total Carbohydrates: 56g
    • Dietary Fiber: 5g
    • Sugars: 35g
  • Protein: 3g

Please note that these nutrition facts are approximate and can vary depending on the specific ingredients and brands used. Additionally, these values do not include any optional toppings like ice cream or whipped cream.

Mango & Pineapple Tropical Fruit Crisp

Mango. Pineapple. Coconut.

Can it get any more deliciously tropical?

Okay, maybe a margarita or and a mojito wouldn’t hurt.

Mango & Pineapple Tropical Fruit Crisp

But this post is all about the crisp.

Mango & Pineapple Tropical Fruit Crisp

Why is it that apples and berries typically get all of the love when it comes to crisps, when there are so many other equally worthy fruits?

Mango & Pineapple Tropical Fruit Crisp

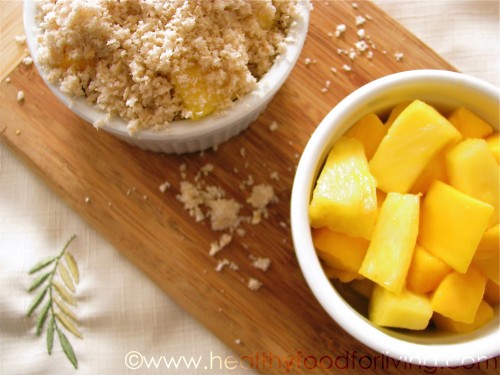
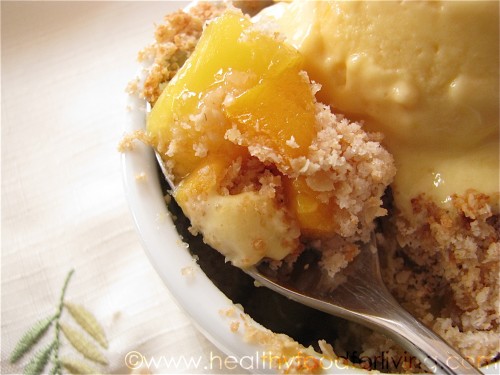
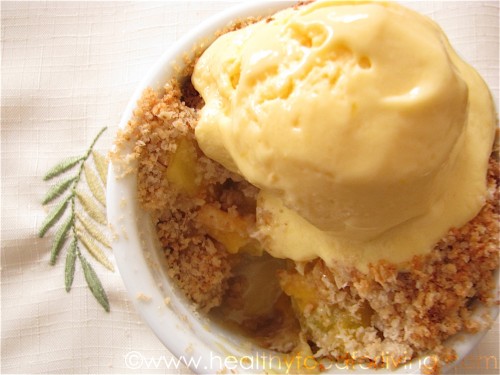
In keeping with the tropical theme, (which turned out to be an appropriate antidote for the dark, cool, and gloomy week we just had in New England), I used ripe mango and juicy pineapple for the fruit filling.

Mango & Pineapple Tropical Fruit Crisp

Just a touch of agave nectar helped to bring out the natural sweetness of the fruit, and a bit of arrowroot powder ensured a thick, saucy filling.

Mango & Pineapple Tropical Fruit Crisp

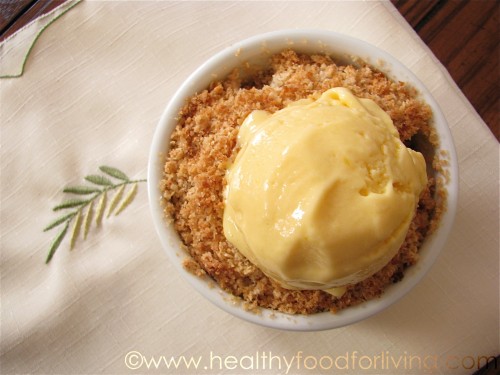
I continued my deviation from the traditional route, and opted to combine rolled oats, whole wheat pastry flour, shredded coconut, and coconut butter for an unexpected – but delectable – crisp topping; the coconut flavor is the perfect accompaniment to the luscious mango and bright pineapple.

Mango & Pineapple Tropical Fruit Crisp

Might I suggest topping the still-warm crisp with a scoop or two of Mango Frozen Yogurt?

Mango & Pineapple Tropical Fruit Crisp
NameMango & Pineapple Tropical Fruit Crisp
CuisineAmerican
Prep Time20 minutes
Cooking Time40 minutes
Total Time60 minutes
Servings8
Yield9×13-inch baking dish

Ingredients

  • 2 cups chopped fresh ripe pineapple
  • 2 cups chopped fresh ripe mango
  • 2 Tbsp agave nectar
  • 1 Tbsp arrowroot powder
  • 1/4 cup evaporated cane juice
  • 1/4 cup whole wheat pastry flour
  • 1/4 cup old-fashioned rolled oats
  • 1/4 cup reduced fat unsweetened shredded coconut
  • 1/4 cup coconut butter, melted

Directions

  1. Preheat oven to 350°F.
  2. Lightly grease an 8×8 inch baking pan or 4 individual ramekins.
  3. In a medium bowl, toss fruit with agave nectar and arrowroot powder. Spoon mixture into prepared pan or ramekins.
  4. In the bowl of a food processor, combine the evaporated cane juice, flour, rolled oats, and coconut. Pulse a few times until mixed. Add melted coconut butter into dry ingredients and pulse until crumbly. Sprinkle crisp mixture evenly over fruit-filled ramekins.
  5. Bake for 20-30 minutes, or until fruit filling is bubbly and crisp topping is golden.

Nutrition Facts (Per Serving)

  • Calories: 314
  • Total Fat: 12g
    • Saturated Fat: 7g
    • Trans Fat: 0g
  • Cholesterol: 31mg
  • Sodium: 73mg
  • Total Carbohydrates: 51g
    • Dietary Fiber: 3g
    • Sugars: 31g
  • Protein: 3g

Please note that the nutrition facts are approximate and can vary based on the specific brands and quantities of ingredients used.

Cookies & Cream Frozen Yogurt

Memorial Day has come and gone, and with it the unofficial start to summer. The weather here in New England certainly contributes to the summer mindset, as does the fact that my school lets out for summer vacation in a mere three weeks!

Cookies & Cream Frozen Yogurt

Given the warm near sweltering temperatures we’ve had in the Boston area for the past couple of weeks, it was a no-brainer to whip up a frosty treat to beat the heat (<– yes, I am THAT person… the one who rhymes three words out of five).

Cookies & Cream Frozen Yogurt

The idea for cookies & cream frozen yogurt had been brewing in the back of my mind for a while, so I was excited to finally bring the concept to fruition.

Cookies & Cream Frozen Yogurt

I opted for less sugar than I’ve used in other frozen yogurt recipes, as the cookies contribute quite a bit of sweetness.

Cookies & Cream Frozen Yogurt

The 2% Greek yogurt contributes a creaminess that I love, but don’t expect this to take just like ice cream.

Cookies & Cream Frozen Yogurt

I adore frozen yogurt for its slightly tangy flavor, and this one delivers on that front. As noted above, the chocolate sandwich cookies are very sweet; thus they are the perfect compliment to the tart yogurt.

Cookies & Cream Frozen Yogurt

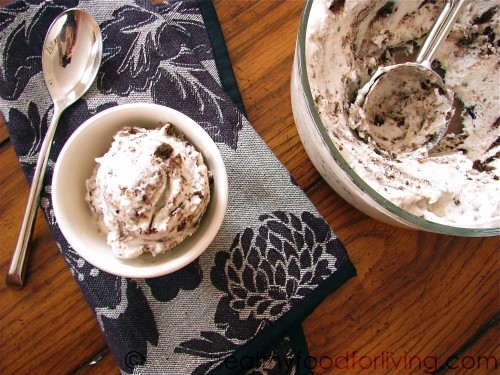
Perfectly smooth frozen desserts certainly have their place, but there’s something about crunchy cookie pieces mixed throughout the creamy frozen yogurt that make eating it just that much more fun.

Cookies & Cream Frozen Yogurt

If you don’t have an ice cream maker, you could most likely get away with just combining the ingredients together and freezing the mixture in a freezer-safe container.

The churning process helps to whip air into the frozen yogurt, leading to a lighter end result… but the mixture is thick enough to freeze without first dumping it into an ice cream maker.

Cookies & Cream Frozen Yogurt

This frozen yogurt is a lighter way to enjoy the classic cookies & cream flavor combination; I’m thinking that a few drops of peppermint extract would be pretty darn delicious, as well!

Cookies & Cream Frozen Yogurt

Want a scoop?

Cookies & Cream Frozen Yogurt
NameCookies & Cream Frozen Yogurt
Cuisinefroyo
Prep Time15 minutes
Cooking Time25 minutes
Total Time3 hours and 40 minutes
Servings6 servings
Yield1 quart (4 cups)

Ingredients

  • 3 cups plain 2% fat Greek yogurt, such as Fage or Chobani
  • 1/3 cup evaporated cane juice (or granulated sugar)
  • 1/2 Tbsp pure vanilla bean paste or extract
  • 8 all-natural chocolate sandwich cookies, such as Newman-O’s, chopped (about 1 cup)

Directions

  1. In a large bowl, combine yogurt, evaporated cane juice, and vanilla bean paste (or extract). Stir until the evaporated cane juice is completely dissolved.
  2. Freeze according to ice cream maker manufacturer’s instructions; adding in the chopped cookies during the last few minutes of churning… OR place mixture into a freezer-safe container and freeze.
  3. Serve immediately as soft serve, or spoon into a freezer-safe container and place in freezer until “ripened” (hardened).

Nutrition Facts (Per Serving)

  • Calories: 240
  • Total Fat: 10g
    • Saturated Fat: 4g
    • Trans Fat: 0g
  • Cholesterol: 15mg
  • Sodium: 140mg
  • Total Carbohydrates: 31g
    • Dietary Fiber: 1g
    • Sugars: 21g
  • Protein: 9g
  • Vitamin D: 1mcg (5% DV)
  • Calcium: 196mg (15% DV)
  • Iron: 1mg (6% DV)
  • Potassium: 294mg (6% DV)

Please note that these nutrition facts are approximate and can vary based on the specific brands and ingredients used. Adjustments may be needed depending on your dietary preferences and any ingredient substitutions. Enjoy your homemade Cookies & Cream Frozen Yogurt responsibly!

Cookies & Cream Frozen Yogurt

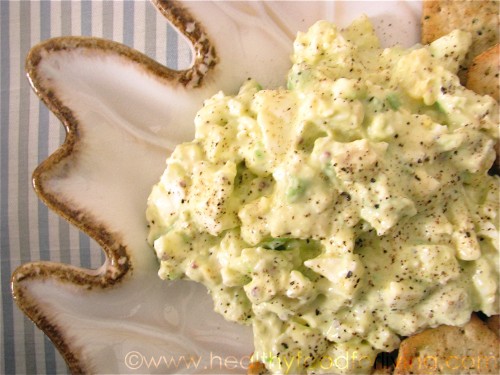
Avocado Egg Salad

Back when I posted my Tofu Egg Salad, Caroline from The Broccoli Hut mentioned that she makes a vegan “egg” salad with avocado… an idea that I just couldn’t get out of my head after I read her comment.

Name:Avocado Egg Salad
Cuisine:Various
Prep Time:15 minutes
Cooking Time:0 minutes
Total Time:15 minutes
Servings:4 servings
Yield:About 4 cups

Ingredients

  • 4 hard-boiled eggs, peeled and chopped
  • 2 ripe avocados, peeled, pitted, and diced
  • 1/4 cup red onion, finely chopped
  • 1/4 cup celery, finely chopped
  • 2 tablespoons fresh cilantro, chopped (optional, for added freshness)
  • Salt and pepper to taste
  • 1/4 cup Greek yogurt (you can also use mayonnaise or sour cream)
  • 1 tablespoon Dijon mustard
  • 1 tablespoon lemon juice (freshly squeezed)
  • 1 clove garlic, minced
  • Salt and pepper to taste
Avocado Egg Salad

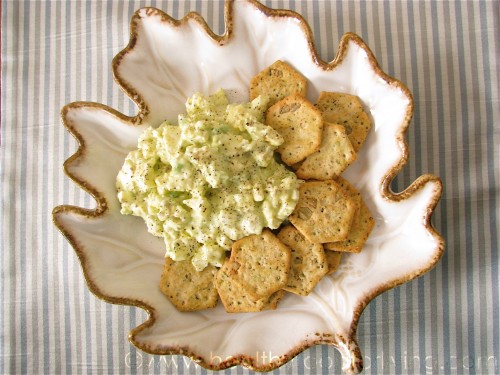
The very next time I made egg salad, I added some avocado to the Greek yogurt/canola oil mayo mixture before folding in the boiled eggs.

Avocado Egg Salad

As expected, the avocado made the egg salad even more rich and creamy, because let’s face it – avocado makes everything better!

Avocado Egg Salad

Instructions

1. Prepare the Eggs

Start by hard-boiling the eggs. Place the eggs in a saucepan and cover them with water. Bring the water to a boil, then reduce the heat to low and simmer for 9-12 minutes. After that, transfer the eggs to a bowl of ice water to cool quickly. Once cooled, peel and chop the eggs.
2. Dice the Avocado

While the eggs are cooling, dice the ripe avocados and place them in a large mixing bowl. You can mash them slightly with a fork if you prefer a creamier texture.

3. Add the Vegetables

To the same bowl, add the finely chopped red onion, celery, and fresh cilantro. These ingredients will add a wonderful crunch and flavor to the salad.

4. Make the Dressing

In a separate bowl, combine the Greek yogurt, mayonnaise, Dijon mustard, minced garlic, and lemon juice. Mix until the dressing is smooth and well combined. Season with salt and pepper to taste.

5. Combine and Toss

Pour the dressing over the diced avocados and vegetables. Gently fold in the chopped hard-boiled eggs, being careful not to mash the avocados too much. The creaminess of the avocado and the dressing will naturally coat the eggs and veggies.

6. Season to Taste

Taste the salad and adjust the seasoning with salt and pepper if needed. You can also add a bit more lemon juice for a tangier flavor if desired.

7. Serve and Enjoy

Transfer the Avocado Egg Salad to a serving bowl or individual plates. Garnish with a few extra cilantro leaves for a burst of color. This salad is delicious on its own, but you can also enjoy it on whole-grain toast, in a wrap, or as a side dish to your favorite main course.

Estimated Nutrition Per Serving

Calories: 290 calories

Protein: 10g

Carbohydrates: 11g

Dietary Fiber: 7g

Sugars: 2g

Fat: 24g

Saturated Fat: 4g

Cholesterol: 192mg

Sodium: 220mg

Please note that these nutritional values are approximate and can vary based on the specific brands and ingredients you use. The values provided are for a single serving of the Avocado Egg Salad. Enjoy your healthy and delicious meal.

Individual Sweet Potato Breakfast Pizzas

When I found out about the 2012 North Carolina Sweet Potato “No More ‘Mallows” Blogger Recipe Contest, my mind went in a dozen different directions with ideas of what to make.

My initial instinct was to make something sweet, but I eventually decided to push the envelope by going the savory route.

Name:Individual Sweet Potato Breakfast Pizzas
CuisineBreakfast
Prep Time15 minutes
Cooking Time30 minutes
Total Time45 minutes
Servings2 servings
Yield2 individual pizzas
Individual Sweet Potato Breakfast Pizzas

I settled on a sweet potato version of my Individual Breakfast Pizzas, and decided that in order to fully pay homage to my very favorite food, I had to incorporate the orange vegetable into the recipe in not one, but two ways.

Individual Sweet Potato Breakfast Pizzas

Pureed:

Individual Sweet Potato Breakfast Pizzas

Roasted:

Individual Sweet Potato Breakfast Pizzas

I baked and pureed one sweet potato to use as the pizza “sauce” and diced & roasted another spud with my favorite home fries spice blend: garlic powder, onion powder, paprika, cayenne pepper, salt, & pepper.

Individual Sweet Potato Breakfast Pizzas

Rich & creamy gouda cheese, eggs, and chopped fresh chives completed the individual pizzas, which are perfect for breakfast, lunch, or dinner.

Individual Sweet Potato Breakfast Pizzas

The pizzas are baked long enough so that the crust gets crisp and golden brown on the bottom but not long enough to fully cook the egg yolk; so you’re gifted with a crunchy crust topped with a velvety smooth sweet potato “sauce”, gooey melted cheese, pillowy sweet potato home fries, and an egg with a luscious golden runny yolk.

Individual Sweet Potato Breakfast Pizzas

Whether or not this recipe ends up winning the contest, I’m thrilled with the way these sweet potato breakfast pizzas turned out!

Individual Sweet Potato Breakfast Pizzas

Estimated Nutrition Per Serving

  • Calories: 340
  • Total Fat: 19g
    • Saturated Fat: 7g
    • Trans Fat: 0g
  • Cholesterol: 255mg
  • Sodium: 450mg
  • Total Carbohydrates: 21g
    • Dietary Fiber: 3g
    • Sugars: 5g
  • Protein: 22g

Ingredients

  • 2 large sweet potatoes (you’ll end up using 1 cup puree and 2 cups diced)
  • 1 Tbsp olive oil + 1 tsp for drizzling
  • 1/4 tsp garlic powder/granulated garlic
  • 1/4 tsp onion powder/granulated onion
  • 1/4 tsp paprika
  • 2 pinches cayenne pepper
  • 1 lb whole wheat pizza dough, at room temperature, divided into 4 equal portions (4 oz each)
  • flour, for rolling out dough
  • 1 cup freshly shredded gouda cheese
  • 4 large eggs, preferably organic
  • Kosher salt and freshly ground black pepper, to taste
  • 1/4 cup diced chives

Instructions

Prepare the Sweet Potato Crust

Preheat your oven to 400°F (200°C) and line a baking sheet with parchment paper.

In a mixing bowl, combine the grated sweet potato, egg, Parmesan cheese, almond flour, garlic powder, salt, and pepper. Mix well until everything is evenly incorporated.

Shape the Crusts

Divide the sweet potato mixture into two portions. Place each portion onto the prepared baking sheet and shape them into two round crusts, about 1/4-inch thick. You can make them as thin or thick as you like.

Bake the Crusts

Place the baking sheet in the preheated oven and bake for about 15-20 minutes, or until the edges are golden brown and the crusts have firmed up.

Prepare the Toppings

While the crusts are baking, prepare your toppings. In a small bowl, beat the eggs and season them with salt and pepper. Dice the bell peppers and red onion and set them aside. If you’re using bacon or sausage, make sure it’s cooked and crumbled.

Assemble the Pizzas

Once the sweet potato crusts are ready, remove them from the oven. Sprinkle half of the shredded mozzarella cheese on each crust, leaving a small well in the center for the eggs.

Add the Eggs and Toppings

Carefully pour an egg into the well of each pizza crust. Then, sprinkle the diced bell peppers, red onion, and cooked bacon or sausage (if using) evenly over the top.

Bake Again

Return the pizzas to the oven and bake for an additional 10-12 minutes, or until the egg whites are set, but the yolks are still slightly runny.

Serve

Once out of the oven, garnish your Sweet Potato Breakfast Pizzas with fresh herbs like parsley or chives. Add more salt and pepper to taste if desired.

Enjoy

These individual breakfast pizzas are best enjoyed hot and fresh out of the oven. Dig in and savor the combination of sweet potato goodness, cheesy goodness, and savory toppings.