
When it comes to breakfast, there’s nothing quite like a warm and comforting bowl of oatmeal.
But what if we told you that you could take your morning oats to the next level with a delicious twist?
Enter Banana Bread Baked Oatmeal for One – a single-serving treat that combines the goodness of oatmeal with the irresistible flavor of banana bread. It’s the perfect way to start your day on a sweet note!
Ingredients
- 1/2 ripe banana, mashed
- 1/4 cup old-fashioned rolled oats
- 1/4 cup milk (any type you prefer)
- 1 tablespoon maple syrup or honey
- 1/4 teaspoon vanilla extract
- 1/4 teaspoon ground cinnamon
- A pinch of salt
- 1/4 teaspoon baking powder
- 1 tablespoon chopped nuts (such as walnuts or pecans) – optional
- 1 tablespoon chocolate chips – optional
Instructions
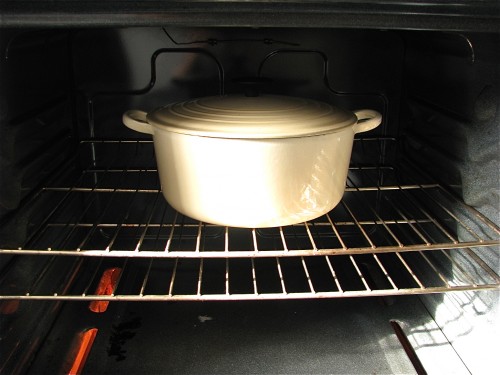
Preheat your Oven
Start by preheating your oven to 350°F (175°C). Grease a small oven-safe ramekin or baking dish.
Mash the Banana
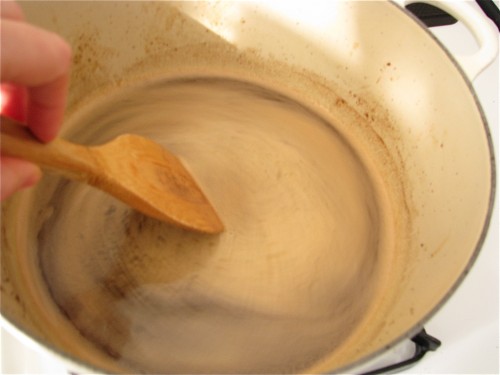
In a mixing bowl, mash the ripe banana until it’s smooth.
Add the Dry Ingredients
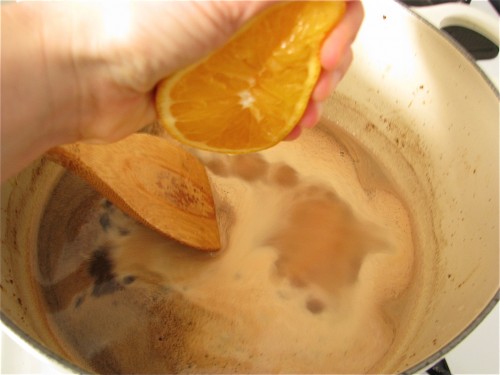
To the mashed banana, add the rolled oats, milk, maple syrup or honey, vanilla extract, ground cinnamon, salt, and baking powder. Stir everything together until well combined. If you like a little crunch and sweetness, add in the chopped nuts and chocolate chips at this stage.
Transfer to the Baking Dish
Pour the oatmeal mixture into the greased ramekin or baking dish.
Bake
Place the dish in the preheated oven and bake for about 20-25 minutes or until the top is golden brown, and the oatmeal is set. The baking time may vary depending on your oven, so keep an eye on it.
Serve
Once baked, remove the Banana Bread Baked Oatmeal from the oven. Top it with sliced banana, more chopped nuts, and a drizzle of honey or maple syrup for extra indulgence.
| Name: | Banana Bread Baked Oatmeal for One |
|---|---|
| Cuisine: | American |
| Prep Time: | 5 minutes |
| Cooking Time: | 20-25 minutes |
| Total Time: | Approximately 25-30 minutes |
| Servings: | 1 |
| Yield: | 1 serving |
Calories: 290 kcal
Protein: 6g
Carbohydrates: 57g
Dietary Fiber: 6g
Sugars: 23g
Fat: 6g
Saturated Fat: 1g
Cholesterol: 2mg
Sodium: 184mg
Potassium: 437mg
Banana bread has long been one of my very favorite baked good items.

The aroma of a freshly baked loaf cooling on the counter is nothing short of intoxicating, and the first few bites of a still-warm piece smeared with a bit of butter is a little slice of heaven.

So, it’s surprising that it took me this long to replicate the flavors of banana bread in a baked oatmeal… but that’s just what I did!

Light and fluffy, this souffle-like baked oatmeal tastes very similar its inspiration, right down to my favorite add-in for banana bread: walnuts.
I opted to top the baked oatmeal with chopped toasted nuts, but folding them into the batter and baking them right in the oatmeal would be fabulous as well.

Want a bite?

Sure ya do ;).

Banana Bread Baked Oatmeal for One


")


![Chocolate Chip Cookie Dough Ice Cream [Vegan]](https://www.healthyfoodforliving.com/wp-content/uploads/2021/09/Chocolate-Chip-Cookie-Dough-Ice-Cream-Vegan.jpg "Chocolate Chip Cookie Dough Ice Cream [Vegan]")
![Chocolate Chip Cookie Dough Ice Cream [Vegan]](https://web.archive.org/web/20121017030125im_/http://www.healthyfoodforliving.com/wp-content/uploads/2011/03/IMG_96271-500x375.jpg "IMG_9627")
![Chocolate Chip Cookie Dough Ice Cream [Vegan]](https://web.archive.org/web/20121017030125im_/http://www.healthyfoodforliving.com/wp-content/uploads/2011/03/IMG_95951-500x375.jpg "IMG_9595")
![Chocolate Chip Cookie Dough Ice Cream [Vegan]](https://web.archive.org/web/20121017030125im_/http://www.healthyfoodforliving.com/wp-content/uploads/2011/03/IMG_9574-500x375.jpg "IMG_9574")
![Chocolate Chip Cookie Dough Ice Cream [Vegan]](https://web.archive.org/web/20121017030125im_/http://www.healthyfoodforliving.com/wp-content/uploads/2011/03/IMG_9575-500x375.jpg "IMG_9575")
![Chocolate Chip Cookie Dough Ice Cream [Vegan]](https://web.archive.org/web/20121017030125im_/http://www.healthyfoodforliving.com/wp-content/uploads/2011/03/IMG_9579-500x375.jpg "IMG_9579")
![Chocolate Chip Cookie Dough Ice Cream [Vegan]](https://web.archive.org/web/20121017030125im_/http://www.healthyfoodforliving.com/wp-content/uploads/2011/03/IMG_9586-500x375.jpg "IMG_9586")
![Chocolate Chip Cookie Dough Ice Cream [Vegan]](https://web.archive.org/web/20121017030125im_/http://www.healthyfoodforliving.com/wp-content/uploads/2011/03/IMG_9587-500x375.jpg "IMG_9587")
![Chocolate Chip Cookie Dough Ice Cream [Vegan]](https://web.archive.org/web/20121017030125im_/http://www.healthyfoodforliving.com/wp-content/uploads/2011/03/IMG_9589-500x375.jpg "IMG_9589")
![Chocolate Chip Cookie Dough Ice Cream [Vegan]](https://web.archive.org/web/20121017030125im_/http://www.healthyfoodforliving.com/wp-content/uploads/2011/03/IMG_96121-500x375.jpg "IMG_9612")
![Chocolate Chip Cookie Dough Ice Cream [Vegan]](https://web.archive.org/web/20121017030125im_/http://www.healthyfoodforliving.com/wp-content/uploads/2011/03/IMG_96001-500x375.jpg "IMG_9600")
![Chocolate Chip Cookie Dough Ice Cream [Vegan]](https://web.archive.org/web/20121017030125im_/http://www.healthyfoodforliving.com/wp-content/uploads/2011/03/IMG_96163-500x375.jpg "IMG_9616")


