Home Blog Page 108

Throwback Thursdays: Purple Cow Frozen Yogurt

Nearly three years ago I posted a recipe for Purple Cow Frozen Yogurt, which I loved… but sadly waited this long to make for the second time (precisely the reason for these Throwback Thursday posts!).

Throwback Thursdays: Purple Cow Frozen Yogurt

This time around I used chopped dark & white chocolate rather than chips, but otherwise followed my recipe as previously written. Thus, I’m stumped as to why the finished product ended up a darker hue. Different blackberries, perhaps?

Color aside, the flavor was just as I remembered it: sweet-tart with a vibrant berry flavor, and speckled with pieces of rich dark chocolate and creamy white chocolate.

We have not one, but two family vacations on Cape Cod coming up this summer (Wellfleet with my folks, Truro with John’s) and I’m hoping to seek out a cup of classic Purple Cow ice cream at some point during our stay. In the meantime, I’ll be enjoying this healthier version at home!

Throwback Thursdays: Purple Cow Frozen Yogurt

Purple Cow Frozen Yogurt

Throwback Thursdays: Purple Cow Frozen Yogurt
Name:Purple Cow Frozen Yogurt
Cuisine:Fusion
Prep Time:10 minutes
Cooking Time:2 hours
Freezing Time:4 hours
Total Time:Approximately 6-9 hours
Servings:8 servings
Yield:About 1 quart of frozen yogurt

Ingredients

  • 2 cups plain 0% fat Greek yogurt (I used Chobani)
  • 1 cup plain 2% fat Greek yogurt (I used Chobani)
  • 1/2 cup + 1 Tbsp evaporated cane juice (or granulated sugar), divided
  • 1 tsp pure vanilla extract
  • 12 oz blackberries (about 1 1/2 cups)
  • 4 oz raspberries (about 1/2 cup)
  • 4 oz dark chocolate, chips or chopped, (about 1/2 cup)
  • 4 oz white chocolate, chips or chopped, (about 1/2 cup)

Instructions

In a large bowl, combine yogurts, evaporated cane juice, and vanilla extract. Stir until the evaporated cane juice is completely dissolved. Place in refrigerator and chill for about 1 hour.

Place all of the berries into a food processor or high-speed blender and process/blend until pureed.

Set a fine mesh sieve over a large bowl and pour the berry puree into the sieve. Using a rubber spatula, stir and gently press down on the puree to separate the puree from the seeds. Be patient, as this might take a little while. You want to extract as much of the thick liquid as possible – don’t forget to scrape the sides and bottom of the sieve with a clean spoon and add any collected puree to that in the bowl. Unless you really hate seeds, you can reserve whatever is left over in the sieve, add a bit of sweetener, and enjoy as no-cook berry preserves. Stir in the remaining 1 Tbsp of evaporated cane juice into the seedless berry puree & place in the refrigerator to chill for about 1 hour.

Stir together the sweetened yogurt and seedless berry puree until well mixed and freeze mixture according to ice cream maker manufacturer’s instructions, slowly adding in both kinds of chocolate in the last few minutes of churning.

Serve immediately as soft serve, or spoon into a freezer-safe container and place in freezer until “ripened” (hardened).

Estimated Nutrition Per Serving

  • Calories: Approximately 180 calories per serving
  • Fat: 2 grams
  • Carbohydrates: 35-40 grams
  • Sugar: 28-32 grams
  • Protein: 3-4 grams

Please note that the nutrition values are approximate and may vary depending on specific brands of ingredients and serving sizes. Adjustments to the recipe, such as using low-fat yogurt or reducing sugar, will also affect the nutritional content.

Mango Coconut Cream Cheese

Why is it that – when it comes to fruity cream cheese flavors – berries get all of the fun? I’ve seen blueberry & strawberry cream cheese… but never a tropical-inspired variety.

That all changes now with this delightfully different mango coconut cream cheese.

Mango Coconut Cream Cheese

Slightly sweet, pale yellow-hued, and reminiscent of leisurely tropical breakfasts, this cream cheese is definitely worth trying if you like fruity spreads on your bagels; and because the rich cream cheese is balanced out by juicy fresh fruit, you don’t have to worry about the fat content.

Win!

Mango Coconut Cream Cheese

Mango Coconut Cream Cheese

Mango Coconut Cream Cheese

by Lauren Zembron

Name:Mango Coconut Cream Cheese
Cuisine:Tropical
Prep Time:20 minutes
Cooking Time:0 minutes (No cooking required)
Total Time:2-3 hours (Chilling time)
Servings:8 servings
Yield:About 2 cups of dessert

Ingredients

  • 1/2 cup whipped or neufchatel (1/3-less-fat) cream cheese, at room temperature
  • 1/2 of a large very ripe red blush mango, peeled, pitted, and chopped
  • 2 Tbsp unsweetened coconut flakes (plus more for garnish, if desired)
  • 1/2 – 1 tsp agave nectar or honey (depending on sweetness of mango; start with 1/2 tsp and add more if desired)

Instructions

Combine room-temperature cream cheese and chopped mango in a mini food processor (or blender) fitted with the steel blade. Process until very smooth and fully combined. Add in the coconut flakes and agave or honey. Process until combined (there will be some tiny pieces of coconut that don’t become fully pulverized).

Estimated Nutrition per Serving

  • Calories: ~300 calories per serving
  • Protein: ~4 grams
  • Carbohydrates: ~20-25 grams
  • Fat: ~15-20 grams
  • Fiber: ~1-2 grams
  • Sugar: ~18-22 grams
  • Cholesterol: ~45-60 mg
  • Sodium: ~90-110 mg

The nutrition values are approximate and may vary depending on the specific brands and quantities of ingredients used. It’s always a good idea to calculate exact nutrition values based on the specific products you use if you have dietary restrictions or specific nutritional requirements. Enjoy your Mango Coconut Cream Cheese in moderation as part of a balanced diet.

Pecan Pie Macaroons

One of the best things about not being pregnant anymore (the ultimate being – of course – enjoying our amazing baby girl!) is that my appetite and ability to eat an entire meal has returned. I struggled with morning all-day sickness (thanks, hormones) throughout the first trimester and could barely clean my plate of downsized portions by the third trimester (thanks, squished organs). Now that Lily is out in the world and is no longer compressing my stomach into half off its normal size, I can once again enjoy full meals.

Add on to that the fact that breastfeeding can burn up to 600 calories per day and you have one hungry mama!

Pecan Pie Macaroons

I’ve been keeping a ziploc bag of homemade trail mix (roasted almonds, salted peanuts, dark chocolate chunks, dried cranberries, & peanut butter chips) on a little table next to the glider in Lily’s nursery, and I snack on a few handfuls during each nighttime feeding (typically 2-4 per night)… which has kept me from eating everything in sight when we get up for breakfast in the morning.

Pecan Pie Macaroons

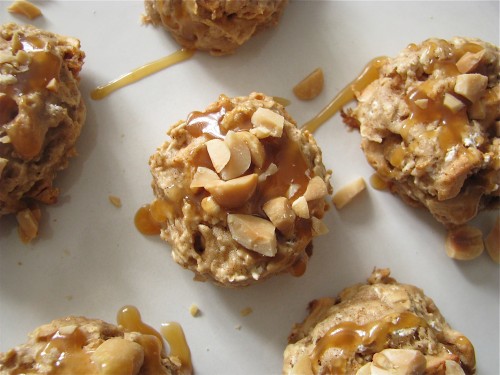
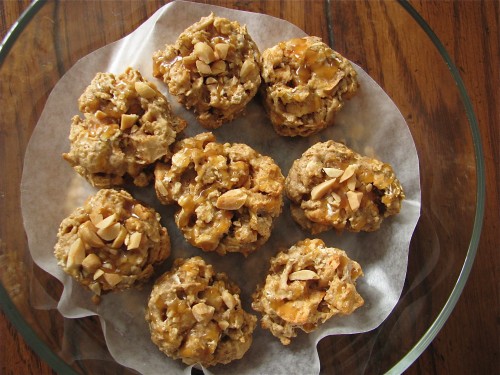
This increase in appetite also has a downside, however… namely, that I could put away an alarming number of these fabulous macaroons throughout the course of a day; I think my record was six  After that “binge” day, I restrained myself and kept the maximum at three per day (one after lunch, two after dinner) until the container was empty (a sad day).

Pecan Pie Macaroons

Whether or not you’re a breastfeeding mom, I have a suspicion you’ll also be able to make these macaroons disappear in just a handful of days. These healthy cookies are vegan, gluten-free (if you use gluten-free oats), and sweetened only with pure maple syrup; the addition of buttery pecans gives the otherwise soft & chewy cookies a bit of crunch.

And yes, I have ideas for even MORE macaroon recipes!

Pecan Pie Macaroons
NamePecan Pie Macaroons
CuisineFusion
Prep Time30 minutes
Cooking Time18 minutes
Total Time1 hour 18 minutes
Servings24 cookies
Yield12 sandwiched macaroons

Ingredients

  • 2 2/3 cup full fat shredded unsweetened coconut (one 8 oz package) OR 1 cup of coconut butter (NOT coconut oil)
  • 1 cup reduced-fat shredded unsweetened coconut
  • 1 cup old-fashioned rolled oats
  • 1/2 cup toasted pecans, finely chopped
  • 3/4 cup pure maple syrup, preferably Grade B
  • 1 Tbsp pure vanilla extract
  • 1/2 tsp Kosher salt

Instructions

Preheat oven to 300°F. Line a baking sheet with a silicone baking mat or parchment paper.

In a food processor, process 2 2/3 cups full fat shredded coconut for about 5-8 minutes, until a thick, smooth coconut butter forms, scraping down the sides as needed (this will yield about 1 cup of coconut butter).

Combine the coconut butter and all of the remaining ingredients in a bowl. Stir until well-combined. Try not to eat too much of the cookie “dough”!

Using a mini ice cream scoop or a small spoon, scoop the dough onto the prepared baking sheet (no need to leave much room in between as they do not spread out). Bake for about 20-25 minutes, or until the bottoms of the macaroons are lightly browned. The macaroons will be very soft at this point.

Allow the macaroons to sit at room temperature on the baking sheet for about 30 minutes, or until they firm up and cool down.

Estimated Nutrition Per Serving

  • Calories: 180 kcal
  • Total Fat: 9g
    • Saturated Fat: 1g
    • Trans Fat: 0g
  • Cholesterol: 10mg
  • Sodium: 25mg
  • Total Carbohydrates: 24g
    • Dietary Fiber: 1g
    • Sugars: 21g
  • Protein: 2g

Please note that the nutrition information provided is an estimate and may vary based on specific ingredients used and portion sizes. Always refer to the actual product packaging or consult a nutritionist for precise nutritional information.

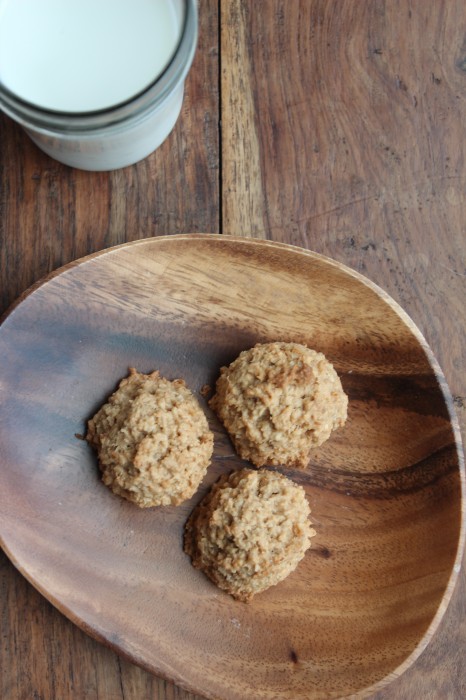
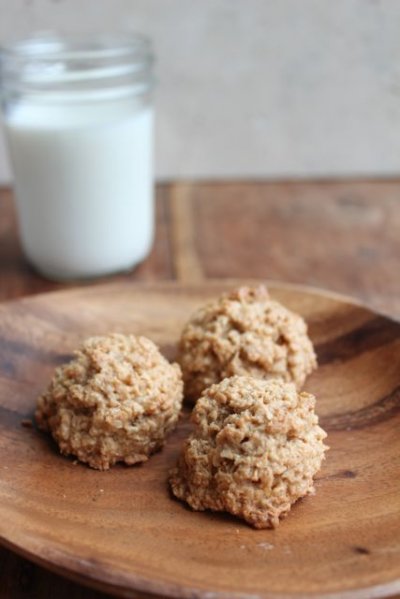
Lemon Coconut-Oat Macaroons

I almost shed a tear the day I polished off my Coconut-Oat Macaroons.

Lemon Coconut-Oat Macaroons

I had been thoroughly enjoying a couple of the chewy cookies after dinner, night after night, and the empty container was a wake-up call: I NEEDED to make another batch.

What with the warmer weather right around the corner, (er, maybe a few corners, huh Boston?), and Easter a couple of days away, I thought I’d give the macaroons a little fresh flavor oomph by the way of lemon.

Lemon Coconut-Oat Macaroons

It was a good decision.

Lemon Coconut-Oat Macaroons

I used mellow agave nectar to sweeten the macaroons, as I didn’t want the slightly tart lemon flavor to be usurped by the robust flavor of maple syrup (which was the sweetener for the other macaroons).

Lemon Coconut-Oat Macaroons

This version is just as tasty as the original, but with the added brightness of fresh lemon zest and juice.

Lemon Coconut-Oat Macaroons

I’d be hard-pressed to choose a favorite, so let’s just say they’re equally delicious, and that perhaps you should make both versions!

Lemon Coconut-Oat Macaroons

You might be wondering what I’ll do when this batch disappears.

Have no worries, my friend, I have yet another flavor of macaroons in the works ;).

Lemon Coconut-Oat Macaroons
Name:Lemon Coconut-Oat Macaroons
Cuisine:Fusion
Prep Time:15 minutes
Cooking Time:15 minutes
Total Time:30 minutes
Servings:18 macaroons
Yield:18 macaroons

Ingredients

  • 2 2/3 cup full fat shredded unsweetened coconut (one 8 oz package) OR 1 cup of coconut butter
  • 1 cup reduced-fat shredded unsweetened coconut
  • 1 cup old-fashioned rolled oats
  • zest of 1 lemon (bright yellow part only; don’t use the white pith)
  • 2 tsp freshly squeezed lemon juice, or more to taste
  • 3/4 cup agave nectar
  • 1 Tbsp vanilla bean paste or extract
  • 1/2 tsp Kosher salt

Directions

Preheat oven to 300°F. Line a baking sheet with a silicone baking mat or parchment paper.

In a food processor, process 2 2/3 cups full fat shredded coconut for about 5-8 minutes, until a thick, smooth coconut butter forms, scraping down the sides as needed (this will yield about 1 cup of coconut butter).

Combine the coconut butter and all of the remaining ingredients (reduced-fat coconut through salt) in a bowl. Stir until well-combined.

Using a mini ice cream scoop or a small spoon, scoop the dough onto the prepared baking sheet (no need to leave much room in between as they do not spread out). Bake for about 18-20 minutes, or until the bottoms of the macaroons are lightly browned. The macaroons will be very soft at this point.

Estimated Nutrition Per Serving

  • Calories: 120 kcal
  • Total Fat: 8g
  • Saturated Fat: 6g
  • Cholesterol: 0mg
  • Sodium: 40mg
  • Total Carbohydrates: 12g
  • Dietary Fiber: 2g
  • Sugars: 7g
  • Protein: 1g

These nutrition values are based on a standard serving size and can vary based on the exact ingredients and portion sizes used in the recipe. It’s always a good idea to calculate the nutrition based on the specific products you use for the most accurate information.

Almond & Dried Cranberry Cookie Bites (gluten-free, paleo, & vegan)

Tis the season when cookies abound; at parties, in stores, on your doorstep, in your mailbox, at work, on blogs… everywhere you look there are cookies, cookies, and more cookies.

Almond & Dried Cranberry Cookie Bites (gluten-free, paleo, & vegan)

The question is, what do you bake for your gluten-free friend, paleo co-worker, and/or vegan family member?

Although these – and other specialty diet – approaches to eating are burgeoning in terms of popularity, there are still many less recipes that fall within their respective guidelines than there are for treats loaded with white flour, sugar, and butter.

Well with these little gems, I’ve got you covered.

Almond & Dried Cranberry Cookie Bites (gluten-free, paleo, & vegan)

Now I’ll be the first to admit that these cookie bites are not going to be the prettiest offering on the holiday table, but what they do have going for them more than makes up for their appearance.

Slightly crisp on the outside and meltingly soft & chewy on the inside, these dried cranberry-studded almond cookies are tough to resist after you’ve tasted one.

The two-bite treats are just about the healthiest cookies I’ve ever made, relying on almond flour for lightness, almond butter for richness, honey for a touch of sweetness (can sub in maple syrup for non honey-eating vegans), and dried cranberries for flavor and texture.

Almond & Dried Cranberry Cookie Bites (gluten-free, paleo, & vegan)

This jar of cookies is one you can definitely feel good about reaching into over and over again!

Almond & Dried Cranberry Cookie Bites (gluten-free, paleo, & vegan)

Almond & Dried Cranberry Cookie Bites (gluten-free, paleo, & vegan)

by Lauren Zembron (inspired by Chocolate Chunk {Paleo} Cookies from Running to the Kitchen)

NameAlmond & Dried Cranberry Cookie Bites (gluten-free, paleo, & vegan)
CuisineFusion
Prep Time15 minutes
Cooking Time10 minutes
Total Time25 minutes
Servings12 cookie bites
Yield12 cookie bites

Keywords: bake dessert snack breakfast gluten-free vegan vegetarian almond butter dried cranberries cookie cookies

Ingredients (18 cookies)

  • 2 cups blanched almond flour (such as Oh Nuts)
  • tiny pinch salt
  • 1/4 tsp baking soda
  • 1/2 tsp ground cinnamon
  • 6 Tbsp smooth all-natural almond butter, at room temperature and well-stirred
  • 1/4 cup honey (if you are making these for a vegan who does not eat honey, you can try subbing in pure maple syrup)
  • 2 tsp pure vanilla extract
  • 2 Tbsp water
  • 1/2 cup dried cranberries, preferably apple-juice sweetened

Instructions

Preheat oven to 350°F. Line a baking sheet with parchment paper or a silicone baking mat.

In a medium bowl, whisk together the almond flour, salt, baking soda, and cinnamon.

In a small bowl, whisk together the almond butter, honey, vanilla extract, and water.

Using a rubber spatula, scrape the wet ingredients into the dry and stir until well-combined. It may at first seem like the dough is too dry; keep stirring until it comes together. Fold in the dried cranberries.

Using a small cookie scoop (or tablespoon) scoop dough out onto prepared baking sheet. Cookies won’t spread while baking, so no need to leave a lot of space in between each scoop.

Bake for 10 minutes, or until the bottoms of the cookies just begin to brown.

Cool cooking on baking sheet for 5 minutes, then transfer to a wire rack to cool completely. Cookies will be soft right out of the oven, but will firm up a bit as they cool.

Estimated Nutrition Per Serving

  • Calories: 90 kcal
  • Total Fat: 7g
  • Saturated Fat: 3g
  • Sodium: 35mg
  • Total Carbohydrates: 6g
  • Dietary Fiber: 1g
  • Sugars: 4g
  • Protein: 1.5g

White Mocha Almond Butter

If you’re a fan of nut butter, you’re in for a delightful treat. We’re about to introduce you to a luscious homemade creation that combines the rich flavors of white chocolate and coffee into a smooth and creamy almond butter. Say hello to White Mocha Almond Butter – it’s like spreading a cozy coffee shop experience onto your morning toast.

Name:White Mocha Almond Butter
CuisineFusion
Prep Time15 minutes
Cooking Time12 minutes (roasting)
Total TimeApproximately 30 minutes
ServingsAbout 24 servings
YieldApproximately 2 cups

Ingredients

  • 2 cups of whole almonds, roasted
  • 1/4 cup of white chocolate chips
  • 2 tablespoons of instant coffee granules
  • 2 tablespoons of powdered sugar (adjust to taste)
  • 1/4 teaspoon of salt
  • 1/2 teaspoon of vanilla extract

Instructions

1. Roast the Almonds:

  • Preheat your oven to 350°F (175°C).
  • Spread the almonds on a baking sheet in a single layer.
  • Roast for about 10-12 minutes until they turn slightly golden and fragrant. Be careful not to overcook, as they can quickly go from golden to burnt.

2. Cool the Almonds:

  • Let the roasted almonds cool for a few minutes.

3. Blend the Almonds:

  • Transfer the roasted almonds to a food processor or high-powered blender.
  • Start processing at low speed and gradually increase it to high.
  • Blend until the almonds turn into a smooth and creamy almond butter consistency. This process can take 10-15 minutes, depending on your equipment. Be patient; it’s worth it!

4. Add the Flavor:

  • While the almond butter is still warm, add in the white chocolate chips, instant coffee granules, powdered sugar, salt, and vanilla extract.
  • Continue blending until all the ingredients are well combined, and the white chocolate chips have melted into the almond butter, creating a marbled appearance.

5. Taste and Adjust:

  • Taste your white mocha almond butter and adjust the sweetness or coffee flavor to your preference by adding more powdered sugar or instant coffee if needed.

6. Store:

  • Transfer your creamy white mocha almond butter to an airtight container. It can be stored at room temperature for a week or in the refrigerator for up to two weeks. If it lasts that long!

7. Enjoy:

  • Spread this delectable creation on toast, pancakes, waffles, or use it as a dip for apple slices. You can even use it as a unique ingredient in baking or as a topping for ice cream.

White Mocha Almond Butter is a versatile and indulgent addition to your kitchen. Whether you’re looking to elevate your breakfast routine or want a tasty and unique ingredient for your desserts, this recipe has got you covered. Plus, it makes a wonderful homemade gift for the nut butter aficionados in your life. So, grab your almonds, whip out your food processor, and indulge in the creamy, coffee-infused good ness of homemade White Mocha Almond Butter. Your taste buds will thank you!

Estimated Nutrition Per Serving

  • Calories: 120
  • Total Fat: 10g
  • Saturated Fat: 2g
  • Cholesterol:1 mg
  • Sodium: 35mg
  • Total Carbohydrates: 5g
  • Dietary Fiber: 2g
  • Sugars: 2g
  • Servings: 24
  • Protein: 4g

I’ve been off of caffeine since before John and I started trying to get pregnant. When I used to enjoy a daily cup (or two), I never felt as though I needed the jolt to get my day started (I’ve always been a morning person), but if I didn’t have my daily dose of caffeine, I would inevitably get the dreaded withdrawal headache by the afternoon.

My solution was to slowly wean myself off by gradually increasing the ratio of decaf:caf in my morning coffee. After a couple of weeks or so, I didn’t miss the caffeine one bit!

White Mocha Almond Butter

I’m still off of caffeine for the most part since I’m nursing Lily – I do savor a small cup of coffee every weekend when John makes a pot – but I just had to make a mocha-flavored almond butter.

White mocha, actually.

That’s white chocolate + coffee. In homemade almond butter. What’s not to love?!

White Mocha Almond Butter

I’ve never had the decadent-sounding white mocha beverage from Starbucks, but it was the inspiration for this deliciously thick and creamy almond butter.

The coffee flavor (from instant espresso powder) is subtle, so add more according to your taste preference.

White Mocha Almond Butter

Food Should Taste Good and this does! {Giveaway}

I’m pleased to bring you a review of – and host a giveaway for – the tasty line of Food Should Taste Good chips; the headquarters of which are just a few towns over from where I live. Needham, MA is the home of this company that produces a variety of delicious chips made with real, wholesome ingredients.

The package I received included a full bag of each of the following flavors: Cheddar, Chocolate, Blue Corn, and Kettle-Cooked Sweet Potato.

The first bag I ripped into ended up being my favorite, although I enjoyed all of the four flavors.

The cheddar tortilla chips boast a real cheddar flavor, (none of that artificial aftertaste that other cheese-flavored chips have), and are super addictive at only 7 grams of fat per serving. These crunchy chips are hearty enough to use for dipping, but the cheddar flavor is so good I suggest eating them solo!

Food Should Taste Good… and this does! {Giveaway}

I was expecting a dessert-like taste when I dipped into the chocolate tortilla chip bag, but these rectangular-shaped chips are more savory than sweet. A nice compliment to the mellow chocolate flavor would be a freshly made strawberry salsa.

Food Should Taste Good… and this does! {Giveaway}

Ah, the classic blue corn tortilla chip! We dunked these tasty little gems (which are actually pretty low in sodium at 80 mg per serving!) into guacamole for the perfect Mexican feast precursor.

Food Should Taste Good… and this does! {Giveaway}

A departure from the tortilla chips were these kettle cooked sweet potato chips, which taste precisely like what they should: sweet potatoes. Sweet potatoes, oil, and sea salt are the only ingredients in these crispy chips, and the sweet potato flavor really shines through.

Name:Food Should Taste Good and this does!
Cuisine:Asian
Prep Time:15 minutes
Cooking Time:15 minutes
Total Time:30 minutes
Servings:4
Yield:4 servings

Ingredients

  • 1 can (15 oz) chickpeas, drained and rinsed
  • 2 cups assorted vegetables (bell peppers, broccoli, snap peas, carrots), chopped
  • 3 cloves garlic, minced
  • 1 tablespoon fresh ginger, grated
  • 2 tablespoons low-sodium soy sauce
  • 1 tablespoon sesame oil
  • 1 tablespoon honey or maple syrup (optional)
  • 1 tablespoon olive oil
  • Salt and pepper to taste
  • Fresh cilantro or green onions for garnish
  • Cooked brown rice or quinoa for serving

Instructions

  • Prepare the Chickpeas:
    • Start by heating olive oil in a pan over medium heat. Add minced garlic and grated ginger, sautéing for about 1-2 minutes until fragrant.
    • Add the chickpeas to the pan and stir well to combine. Cook for about 5-7 minutes until the chickpeas are slightly golden and crispy.
  • Cook the Vegetables:
    • In a separate pan, heat a bit of olive oil over medium heat. Add the assorted chopped vegetables and sauté for 5-7 minutes, or until they’re slightly tender yet still crisp.
  • Combine and Season:
    • Combine the sautéed chickpeas and vegetables in a large bowl. Add low-sodium soy sauce, sesame oil, honey or maple syrup (if using), and toss to coat the mixture evenly. Adjust salt and pepper to taste.
  • Serve:
    • Serve the stir-fry over cooked brown rice or quinoa, garnished with fresh cilantro or green onions for added flavor and color.
Food Should Taste Good… and this does! {Giveaway}

Giveaway

Want to try some Food Should Taste Good chips for yourself? For a chance to win a sample box in the mail, leave a comment on this post by Monday, May 20th. A winner will be randomly chosen and contacted for their mailing address.

Estimated Nutrition Per Serving

  • Calories: 285 kcal
  • Protein: 9g
  • Carbohydrates: 46g
  • Dietary Fiber: 9g
  • Sugars: 9g
  • Total Fat: 8g
  • Saturated Fat: 1g
  • Cholesterol: 0mg
  • Sodium: 380mg

Chocolate Chip Cookie Doughnut Cake Pops

Ok, so I fell pretty hard for those White Chocolate Cake Batter Truffle Pops.

Chocolate Chip Cookie Doughnut Cake Pops

So hard in fact, that I made these doughnut cake pops before I could even polish off their predecessors.

Yep, having both versions in the fridge at once was pretty dangerous.

Chocolate Chip Cookie Doughnut Cake Pops

These are much more similar to actual cake pops considering I used leftover baked doughnuts… Angela’s Chocolate Chip Whole Wheat Doughnuts with Chocolate Chip Cookie Dough Glaze to be precise.

If you haven’t yet seen Angela’s mouthwateringly delicious and insanely creative doughnuts, be sure to hop on over to Oh She Glows (via either of the links above) to read her post and drool over her photographs.

Chocolate Chip Cookie Doughnut Cake Pops

I winged it with the ratio of crumbled doughnut to cookie dough glaze, and was pleased with the resulting texture.

Chocolate Chip Cookie Doughnut Cake Pops

A dense but soft cookie dough-like interior with a hard chocolate shell… how can that be anything but absolutely scrumptious?!

AttributeValue
NameChocolate Chip Cookie Doughnut Cake Pops
CuisineDessert
Prep Time30 minutes
Cooking Time20 minutes
Total Time50 minutes
Servings24 cake pops
Yield24 cake pops

Ingredients

  • 1 cup finely crumbled Chocolate Chip Whole Wheat Doughnuts
  • 2 Tbsp Chocolate Chip Cookie Dough Glaze (or more if needed)
  • 1/4 cup grain sweetened chocolate chips

Directions

In a small bowl, stir together the crumbled doughnuts and glaze. If the mixture is too dry, add a bit more glaze just until it comes together.

Using a mini ice cream scoop or small spoon, scoop out spoonfuls of the mixture and roll into 6 balls using your palms.

Place doughnut cake balls on a parchment-lined plate and chill in the fridge until firm, about 1 hour. Once they’re firm, push a lollipop stick (or wooden skewer) into each doughnut cake ball.

Melt the chocolate chips one of two ways: place in a heat-proof bowl and microwave in 30 second increments, stirring in between each, until chocolate is fully melted; OR place in a heat-proof bowl set over a pot with 1 inch if simmering water and stir until melted.

Holding on to the sticks, dip each doughnut cake pop into the melted chocolate and either place stick-up on a piece of parchment paper or stick-down in a marble-filled glass. Chill until the chocolate is set, at least 30 minutes.

Estimated Nutrition Per Serving

  • Calories: 150 kcal
  • Fat: 9g
  • Saturated Fat: 3g
  • Cholesterol: 15mg
  • Sodium: 75mg
  • Carbohydrates: 16g
  • Fiber: 1g
  • Sugar: 9g
  • Protein: 2g

Please note that nutrition values are approximate and can vary based on the specific ingredients and quantities used in the recipe. It’s always a good idea to calculate the precise nutritional information based on the exact ingredients and amounts you use.

*You can also “paint” on the chocolate using a small spoon.

Pumpkin Muffins with Spiced Cream Cheese Filling

As the leaves begin to change and a chill fills the air, it’s the perfect time to indulge in the warm and comforting flavors of fall. And what better way to do that than with a batch of homemade Pumpkin Muffins with Spiced Cream Cheese Filling? These delightful treats are the embodiment of autumn in a single bite, combining the earthy sweetness of pumpkin with the rich creaminess of spiced cream cheese. Get ready to embark on a culinary journey that will leave your taste buds craving more.

NamePumpkin Muffins with Spiced Cream Cheese Filling
CuisineAmerican
Prep Time15 minutes
Cooking Time20 minutes
Total TimeApproximately 35-40 minutes
Servings12 muffins
Yield12 muffins

Ingredients

  • 2 cups all-purpose flour
  • 1 1/2 teaspoons baking powder
  • 1/2 teaspoon baking soda
  • 1/2 teaspoon salt
  • 2 teaspoons ground cinnamon
  • 1/2 teaspoon ground nutmeg
  • 1/4 teaspoon ground cloves
  • 1/4 teaspoon ground ginger
  • 1/2 cup unsalted butter, softened
  • 1 cup granulated sugar
  • 2 large eggs
  • 1 cup canned pumpkin puree (not pumpkin pie filling)
  • 1 teaspoon vanilla extract

Instructions

1. Preheat Your Oven:

Preheat your oven to 350°F (175°C). Line a muffin tin with paper liners.

2. Make the Pumpkin Muffin Batter:

In a medium-sized bowl, whisk together the flour, baking powder, baking soda, salt, and all the ground spices (cinnamon, nutmeg, cloves, and ginger). Set this dry mixture aside.

In another larger bowl, cream together the softened butter and granulated sugar until the mixture is light and fluffy. Beat in the eggs one at a time, ensuring each is fully incorporated. Stir in the pumpkin puree and vanilla extract.

3. Combine Wet and Dry Ingredients:

Gradually add the dry ingredients to the wet ingredients, mixing until just combined. Be careful not to overmix; you want the batter to be well combined, but a few lumps are okay.

4. Prepare the Cream Cheese Filling:

In a separate bowl, blend together the softened cream cheese, sugar, and spices (cinnamon, nutmeg, cloves, and ginger) until smooth and well combined.

5. Assemble the Muffins:

Spoon a small amount of pumpkin muffin batter into each muffin liner, filling each about one-third full. Add a dollop of the spiced cream cheese filling to each muffin cup. Top with another spoonful of pumpkin muffin batter until the cups are about two-thirds full.

6. Bake and Enjoy:

Place the muffin tin in the preheated oven and bake for approximately 20-25 minutes or until a toothpick inserted into the muffins comes out clean.

7. Cool and Serve:

Allow the muffins to cool in the pan for a few minutes before transferring them to a wire rack to cool completely. Once cooled, you can enjoy these delightful Pumpkin Muffins with Spiced Cream Cheese Filling.

These Pumpkin Muffins with Spiced Cream Cheese Filling are a fantastic way to celebrate the flavors of autumn. The tender and moist pumpkin muffins combined with the creamy, spiced cream cheese filling create a harmony of tastes and textures that will leave you craving more. Whether you enjoy them for breakfast, as an afternoon snack, or as a sweet ending to your day, these muffins are sure to become a seasonal favorite in your household. So, gather your ingredients, preheat your oven, and savor the taste of fall with each delightful bite. Happy baking!

Estimated Nutrition (Per Serving):
Calories280 calories
Total Fat14g
Saturated Fat8g
Cholesterol75mg
Sodium320mg
Total Carbohydrates33g
Dietary Fiber2g
Sugars16g
Protein4g

What better way to usher in the month of October than with a pumpkin muffin recipe?! Now that pumpkin puree is once again sprouting up on grocery store shelves, (still can’t find it? Try my recipe for homemade pumpkin puree), pretty much all I can think about is pumpkin-flavored fall goodies.

Pumpkin Muffins with Spiced Cream Cheese Filling

I’ve made dozens of pumpkin quick breads and muffins over the years, but my favorite recipe by far is Ellie Krieger’s. In true “Lauren form”, I tweaked her pumpkin muffins a bit to suit my preferences by:

  • cutting out some of the sweetener (Ellie’s recipe calls for almost 1 cup of sweetener between the sugar and molasses… these are muffins, not cupcakes!)
  • using all whole wheat pastry flour instead of half all-purpose (personally, I can’t discern a noticeable difference in texture when I use this type of flour in place of the all-purpose variety for muffins or quick breads)
Pumpkin Muffins with Spiced Cream Cheese Filling

I figure why not make a healthy muffin even healthier?!

Pumpkin Muffins with Spiced Cream Cheese Filling

As for the cream cheese filling, credit must be given to Jessica of How Sweet It Is with her Double Decker Pumpkin Bread.

Pumpkin Muffins with Spiced Cream Cheese Filling

I completely swooned when I saw the photos and read the description of this enticing cream cheese-stuffed pumpkin bread, and immediately had visions of pumpkin muffins with cream cheese filling.

Pumpkin Muffins with Spiced Cream Cheese Filling

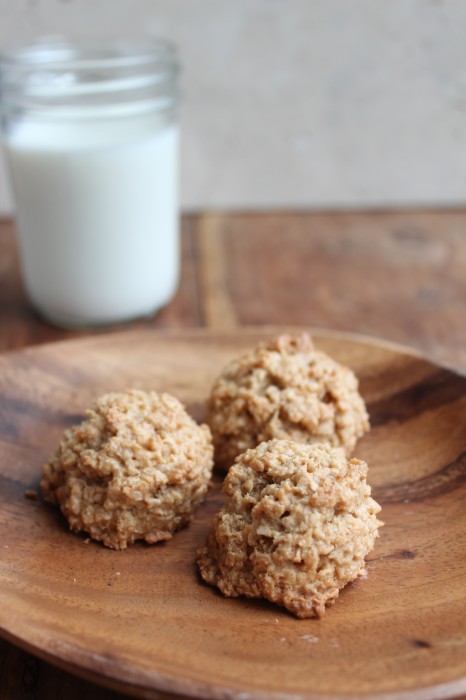
Even when you, as the baker, know about the hidden surprise tucked into the muffins, you can still appreciate that moment when you bite into the tender spiced bread to reveal the sweet creamy filling.

Pumpkin Muffins with Spiced Cream Cheese Filling

Do I even have to describe how delicious these muffins are?

Pumpkin Muffins with Spiced Cream Cheese Filling

The aroma alone is enough to conjure images of crackling fireplaces, impossibly blue autumn skies, mugs of steaming apple cider, soft wool blankets, and flame-colored trees. The warmth of the pumpkin pie spices and the deep caramel notes from the molasses and brown sugar compliment each other beautifully in the muffins. The sweet spiced cream cheese filling is the perfect finishing touch… think of it as a healthier version of frosting tucked into each muffin.
Pumpkin Muffins with Spiced Cream Cheese Filling

Pumpkin Muffins with Spiced Cream Cheese Filling

adapted from and inspired by Ellie Krieger and Jessica, respectively, both linked above

makes 12 muffins

  • 3 oz 1/3-less-fat neufchatel cream cheese, at room temperature
  • 1 Tbsp evaporated cane juice or granulated sugar
  • 1/2 tsp ground pumpkin pie spice
Pumpkin Muffins with Spiced Cream Cheese Filling

*I am in full support of slathering any leftover spiced cream cheese onto a muffin half :).

{One Bowl} Mini Strawberry Banana Muffins + Doughnuts

0

With Memorial Day weekend, we herald in the unofficial start of summer… and summer to me means berries. Sure, you can buy berries year-round nowadays, but they taste soooo much better if you wait until they’re actually in season!

It’s around this time of year that I finally tire of eating apples and get excited for summer produce. I picked up my first package of organic strawberries of the season the other day and demolished half of it while hovering over the sink. I somehow managed to set aside a few for these mini muffins (and doughnuts); the batter of which is mixed in just one bowl.

NameOne Bowl Mini Strawberry Banana Muffins + Doughnuts
CuisineDessert
Prep Time15 minutes
Cooking Time15 minutes
Total Time30 minutes
Servings36
Yield36
IMG_3598

Mini muffins!

{One Bowl} Mini Strawberry Banana Muffins + Doughnuts

Perhaps it’s because I spend every day staring at Lily’s mini fingers, mini toes, and mini – well – everything that I was inspired to turn the overripe banana, and previously mentioned succulent strawberries, sitting on our counter into mini muffins and doughnuts.

{One Bowl} Mini Strawberry Banana Muffins + Doughnuts

In a country obsessed with oversized food items (have you been to a bakery lately? My gosh.), it’s fun to make (and eat) miniature versions of your favorites from time to time.

{One Bowl} Mini Strawberry Banana Muffins + Doughnuts

The only problem with mini baked goods is that it’s way too easy to just pop ‘em into your mouth.

{One Bowl} Mini Strawberry Banana Muffins + Doughnuts

Yes, I photographed this muffin with a tiny bite taken out of it so you could see how moist and tender they are, but – who am I kidding – the rest of the muffins and doughnuts were eaten whole ;).

{One Bowl} Mini Strawberry Banana Muffins + Doughnuts

Now this batter is really more of a muffin batter… so when I say “doughnuts”, please take that term with a grain of salt. Mini muffins are fun, but mini doughnuts might be even more fun; hence why I greased up my mini doughnut pan as well.

{One Bowl} Mini Strawberry Banana Muffins + Doughnuts

Happy Memorial Day weekend (and FOURTH wedding anniversary to my amazing husband, John!).

{One Bowl} Mini Strawberry Banana Muffins + Doughnuts

{One Bowl} Mini Strawberry Banana Muffins + Doughnuts

by Lauren Zembron (adapted from Banana Chocolate Chip Baked Doughnuts)

Ingredients (20 mini muffins/doughntus)

  • 1 small overripe (black-skinned) banana
  • 1/4 cup packed light brown sugar
  • 1/4 cup 0% plain Greek yogurt
  • 2 Tbsp vegetable oil
  • 1/2 tsp pure vanilla extract
  • 1 large egg, preferably organic
  • 1 cup whole wheat pastry flour
  • 1/2 tsp baking powder
  • 1/4 tsp baking soda
  • pinch of salt
  • 5 medium strawberries, preferably organic, hulled and finely chopped

Instructions

Preheat oven to 350°F. Lightly grease 2 mini muffin or doughnut pans.

In a medium mixing bowl, mash the banana until no lumps remain. Whisk in the sugar, yogurt, oil, vanilla extract, and egg until combined.

Add in the flour, baking soda & powder, and salt. Mix just until combined. Fold in chopped strawberries.

Using a mini ice cream scoop or spoon, spoon the batter into prepared pans.

Bake for ~ 8 minutes for the doughnuts and ~ 10 minutes for the muffins.

Estimated Nutrition per Serving

Calories: 100 kcal

Total Fat: 5g

Saturated Fat: 3g

Cholesterol: 20mg

Sodium: 90mg

Total Carbohydrates: 15g

Dietary Fiber: 1g

Sugars: 8g

Protein: 2g