Please keep our wonderful city of Boston in your thoughts and prayers as we recover from the travesty that occurred yesterday during the marathon.
Monday Musings (Boston Strong!)
1. I have never been more proud to be from Boston (well, technically I was born in Newton, MA… moved to PA, and now live in another Boston suburb).
Last week was a roller coaster of emotions: devastation, outrage, fear, confusion, anticipation, hopefulness, satisfaction, comfort, and pride.
To the incredibly courageous and diligent members of the Boston Police Department, FBI, SWAT team, bomb squad, and all others who spent countless hours hunting down – and finally capturing – the suspects (whose names do not deserve to be mentioned) of the Boston Marathon Bombing: THANK YOU a million times over. Your perseverance ensured our safety and proved to the entire world that we are BOSTON STRONG. If I could cook you all a huge meal to show my appreciation, respect, and love I would!
2. Watching coverage of the lives lost at the marathon finish line hit me especially hard now that I am a mom. What a scary and potentially dangerous world I have brought my dear daughter into.
I feel grateful that Lily is not yet old enough to understand what happened, but as a responsible parent I will one day have to do my best to explain to her that unfortunately this world is not always kind or fair; nor does it always make sense.
I will also point out to her – however – that the overwhelming love, support, and spirit exhibited by the first responders, EMTs, doctors, and all other residents of this incredible city overshadowed the evil unleashed by those people who so selfishly took the lives of 29 year old Krystle Campbell, 23 year old Lu Lingzi, and 8 year old Martin Richard and wounded over 170 others.
What we need to remember are not the names or faces of the suspects, but those of the innocent people whose lives were so prematurely lost. We will remember them always, and memorialize their short lives not only on every future Marathon Monday, but also every time we think about the spirit of our great city of Boston.
3. I do have a few new recipes in the works, but wanted to devote this Monday Musings post to my thoughts on the atrocities of last week. If you’re still reading this post, I ask that you please take a moment of silence in remembrance of those who lost their lives, appreciation for those who provided aid, and support of Boston… a city full of heart that I am proud to call home.
Monday Musings
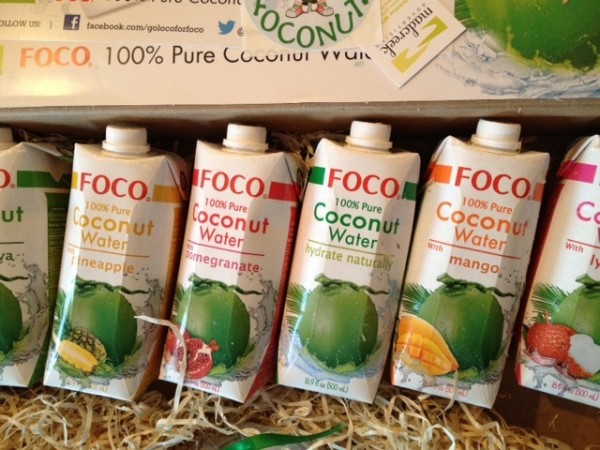
1. Prior to being contacted by a representative of the company to sample their range of products, I had never heard of FOCO coconut water… but of course I jumped at the chance to try it as I love coconut water.
So far I’ve been really impressed with those I’ve tried, and just check out the variety of fun flavors (pink guava, pineapple, pomegranate, regular, mango, and lychee)!
2. We’ve attempted two grocery shopping trips with Lily in tow, and both were rather disastrous… and by that I mean she was NOT a happy camper. Our temporary solution is for John to do the grocery shopping on the weekends.
I’ve benefited from this new set-up in many ways, one of them being the fun snacky items John picks out that I would otherwise overlook.
A few of note: Trader Joe’s Peanut Butter Filled Pretzels (insanely addictive) & Freeze Dried Mango (strangely crunchy, but delicious), and Whole Foods Organic Dried Mango (basically all-natura, one-ingredient fruit leather).
3. Every now and then I come across a song (or a few) that I instantly become obsessed with, immediately download from iTunes, and proceed to play on repeat until I either a) learn the lyrics by heart or b) become sick of it/them.
My current picks are Half Moon by Blind Pilot and Lego House by Ed Sheeran (the unplugged version which – by creepy coincidence – JUST came on the radio via Acoustic Sunrise as I typed its… not joking!!).
4. Which brings me to my next musing. If you’re in the Boston area and aren’t listening to Acoustic Sunrise on 104.1 Sundays from 7-11 AM, you are missing out!
Make it a new weekly tradition.
5. You know how certain men just look better scruffy (case in point: Russell Crowe in Gladiator & Viggo Mortensen in The Lord of the Rings)?
Yes.
Well, my latest favorite scruff-ified celebrity is Thirty Seconds to Mars frontman Jared Leto in the incredibly talented photographer Warwick Saint’s new series of photos.
No-Cook Chocolate Peanut Butter Pudding
If you’re both a food blogger and a new mom, you can empathize with me when I say that the amount of time it takes to prepare a dish, photograph said dish, edit the photos, and then compose a blog post is about tripled when you have a little one attached to you when compared to the time it took prior to having your mini-me.
Hence the decline in my frequency of posts as of late.

Lil’ Belle (one of my many nicknames for our sweet baby girl) has really taken to being “worn” by me for pretty much the entire day, every day. Although I love cuddling her close, baby-wearing has its drawbacks: a) the inevitable backache by the end of the day, which I can also partially blame on my complete lack of abdominal muscles (thanks, pregnancy) and b) it makes everyday activities and chores just a little bit more difficult.
Example 1: Emptying the dishwasher requires mad quad strength, as I have to squat rather than bend over. What I’ve lost in ab muscle, I’ve gained in leg muscle!
Example 2: When stirring something on the stovetop or putting something in the oven, I have to shield Lily with one arm, angling my body so I’m holding her away from potential splatters and burns.
Example 3: Setting up a photo shoot and actually photographing food for the blog takes some finesse as I work around the warm, cooing bundle strapped to my torso.

But you know what?
It’s all worth it.
I wouldn’t trade anything for our little baby girl because she is my world. Lily is the perfect result of two pretty awesome people (If I do say so myself) joined in love.

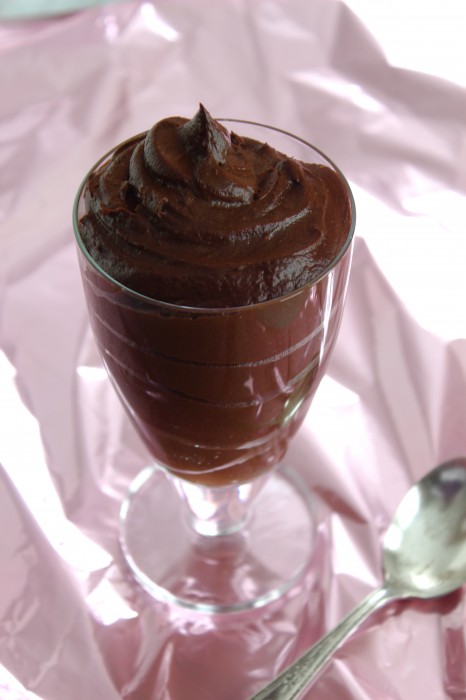
Speaking of two awesome entities joined to create something perfect, let’s talk about this chocolate peanut butter pudding (how do you like that segue?!).
When it comes to food pairings, nothing can top chocolate & peanut butter.
That’s why I’m urging you to make this luscious (and no-cook! and vegan! and easy! and healthy!) pudding for your valentine on Thursday, whether that person is your significant other, child, parent, best friend… or yourself, because let’s face it, you deserve something special and delicious.
This avocado-based pudding is dominated by chocolate, but the peanut butter flavor comes through as well, and the texture is perfectly smooth, creamy, and lush. There’s no denying that it’s high in calories and fat, but there’s no refined sugar and the fat is the healthy kind. Just keep the portions in check, and this pudding is a delicious way to healthfully say “I love you” this Valentine’s Day!

| Name | No-Cook Chocolate Peanut Butter Pudding |
|---|---|
| Cuisine | Dessert |
| Prep Time | 10 minutes |
| Cooking Time | 0 minutes (No cooking required) |
| Total Time | 40 minutes (includes chilling time) |
| Servings | 2 servings |
| Yield | Approximately 1.5 cups of pudding |
Keywords: dessert vegan avocado chocolate peanut butter pudding
Ingredients (4 servings)
- 2 medium-sized ripe Hass avocados, (they should have black skin & yield slightly when gently squeezed), peeled & pitted
- 1/4 cup + 2 Tbsp pure maple syrup
- 1/4 cup smooth peanut butter
- 1 tsp pure vanilla extract
- 1/2 cup + 1 Tbsp unsweetened cocoa powder
- 1 tsp instant espresso powder
- tiny pinch salt
Instructions
Place avocados, maple syrup, peanut butter, and vanilla extract into the bowl of a food processor and process until well-blended, scraping down the sides of the bowl as needed.
Add in the cocoa powder, espresso powder, and salt, and process until well-combined.
Divide pudding evenly among 4 dishes.
Serve cold or at room temperature.
Estimated Nutrition Per Serving
- The nutrition information may vary based on the specific ingredients and quantities used, but here’s an approximate estimation per serving (assuming 2 servings):
Nutritional Information (Approx. per serving):
- Calories: 370 kcal
- Total Fat: 29g
- Saturated Fat: 6g
- Trans Fat: 0g
- Cholesterol: 0mg
- Sodium: 200mg
- Total Carbohydrates: 23g
- Dietary Fiber: 9g
- Sugars: 8g
- Protein: 12g
Please note that these nutritional values are approximate and may vary based on the specific brands of ingredients used and any modifications made to the recipe. It’s always a good idea to calculate nutrition based on the actual ingredients and quantities you use.
Dark Chocolate Swirl Coconut Almond Butter (aka Almond Joy Butter)
I’m finally back with a recipe!

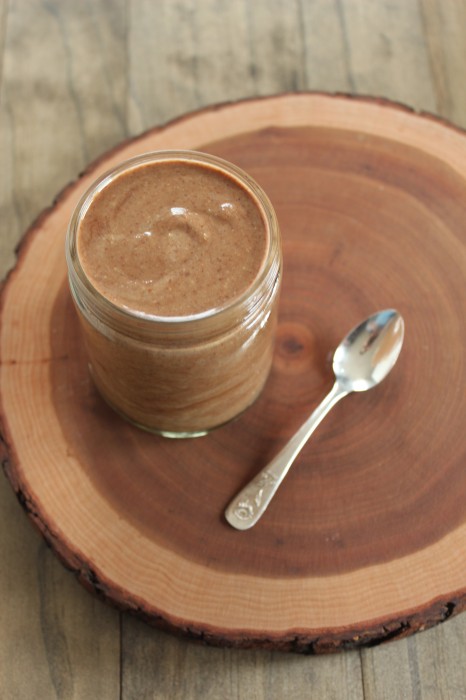
Inspiration for this delectable almond butter came from a cup of Chobani’s Almond Coco Loco flip yogurt. As I savored devoured each bite of the creamy coconut yogurt studded with crunchy almond slices and sweet dark chocolate, it occurred to me that the almond joy flavors would be awesome in a nut butter.

All you need to do is process together some unsweetened coconut flakes and roasted almonds, then toss in some chopped dark chocolate.

So where does the swirl come in? As the food processor works to butterize the almonds and coconut, the steel blade heats up; when you add in the chopped chocolate, it melts and swirls into the coconut almond butter.

Clearly you should make a batch of this dessert-worthy almond butter this weekend!


Dark Chocolate Swirl Coconut Almond Butter
| Name: | Dark Chocolate Swirl Coconut Almond Butter (aka Almond Joy Butter) |
|---|---|
| Cuisine | Fusion |
| Prep Time | 15 minutes |
| Cooking Time | 12 minutes (roasting almonds) |
| Total Time | Approximately 30 minutes |
| Servings | About 16 servings (2 tablespoons per serving) |
| Yield | Approximately 2 cups of almond butter with chocolate swirl |
Ingredients
- 1 cup unsweetened coconut flakes
- 2 cups dry roasted almonds
- 1/4 cup coarsely chopped dark chocolate
Instructions
Place coconut flakes into the bowl of a food processor fitted with the steel blade, and process until a paste forms.
Add in the almonds and process until a smooth, drippy butter forms, scraping down the sides as needed. This may take 5+ minutes… be patient! Let sit for a few minutes to partially cool.
Add in the chopped chocolate and pulse a few times. The heat from blade will partially melt the chocolate.
Store at room temperature.
Estimated Nutrition Per Serving
- Calories: Approximately 120 calories
- Total Fat: 10g
- Saturated Fat: 2g
- Cholesterol: 0mg
- Sodium: 37mg
- Total Carbohydrates: 5g
- Dietary Fiber: 2g
- Sugars: 2g
- Protein: 3g
Individual Breakfast Pizzas
Yes, I know I posted a pizza recipe just last week… and yes, I know I have about a dozen pizzas on my recipes page.
| Name: | Individual Breakfast Pizzas |
| Cuisine: | American |
| Prep Time: | 15 minutes |
| Cooking Time: | 15 minutes |
| Total Time: | 30 minutes |
| Servings: | 4 |
| Yield: | 4 individual pizzas |
Here’s the deal. I enjoy making pizza. John and I love eating pizza. In fact, we eat homemade pizza about once a week. So. Here’s another pizza recipe!
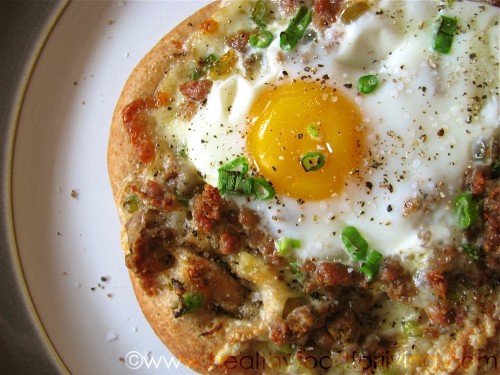
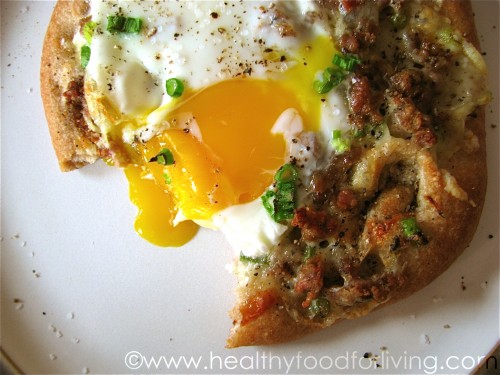
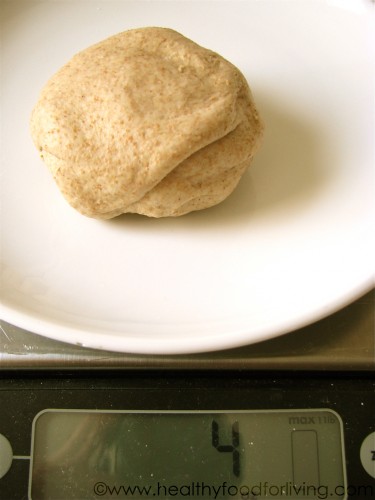
John provided the inspiration for this one; he requested a breakfast pizza and I was happy to oblige. I envisioned a pie topped with breakfast staples, namely crumbled sausage and eggs. I made a game-time decision to make individual pizzas, so I divided the dough into 4 equal portions. I haven’t had a personal pizza in years.
It was a good call.
Here’s something you won’t read on many other cooking blogs: you don’t need to make your own dough to make a great pizza! I use Whole Foods organic wheat pizza dough, which is available in the freezer section of most locations. It’s inexpensive, made with whole wheat flour, thaws beautifully, is easy to roll out and form, crisps up perfectly on the outside while remaining chewy on the inside, and tastes fantastic.
Don’t have a Whole Foods around you? Trader Joe’s carries a variety of decent refrigerated pizza doughs, and you could also check out your local pizza joint.
As for what I topped the dough with, it was clearly all about breakfast foods.
A bit of crisp crumbled breakfast sausage,
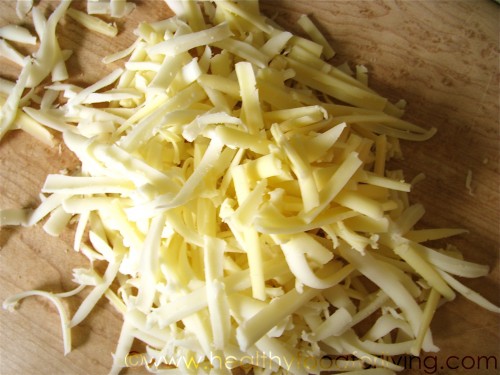
a combination of sharp cheddar and part-skim mozzarella cheeses,
fresh organic eggs,
and bright green onions.
Baked to perfection… no pizza stone necessary!
I swear by my method of baking the pizza on a baking sheet for most of the cooking time, and then finishing it off right on the oven rack for optimal crust crisping. If you have a pizza stone… go for it. Just know that it’s not absolutely required in order to achieve a gorgeously golden brown crust.
John and I enjoyed these pizzas for dinner, but they would be such a fun and unexpected addition to a weekend breakfast or brunch.
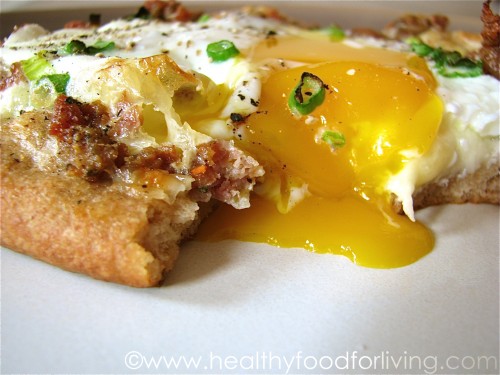
I haven’t always felt this way, but nothing beats a runny yolk… am I right? For a while I preferred my fried eggs over-easy. These days? It’s all about the sunny side up :).
Individual Breakfast Pizzas
Printer-Friendly Recipe
Yield: 4 servings
Ingredients
- 1 lb ball pizza dough, homemade or store-bought, preferably whole wheat (I used a defrosted ball of frozen Whole Foods organic wheat pizza dough)
- flour, for rolling out dough
- 1 Tbsp olive oil, divided
- 1/2 lb uncooked breakfast sausage (I used pork, but chicken or turkey sausage would be fine alternatives – just make sure you seek out uncooked sausage.)
- 1/2 cup freshly grated sharp cheddar cheese
- 1/2 cup freshly grated part-skim low moisture mozzarella cheese
- 4 large eggs, preferably organic
- 1/4 cup sliced green onions, green and white parts
- Kosher salt and freshly ground black pepper
Directions
- Bring dough to room temperature. Divide into 4 equal portions (about 4 oz each). Preheat oven to 450°F.
- Lightly flour a clean, flat work surface. Roll each ball of dough out to about 1/4-inch thickness. Transfer to a rimless baking sheet. Brush olive oil evenly over rolled out dough rounds.
- Heat a medium nonstick skillet oven medium-high heat. Remove casings from sausage, and place sausage into the hot skillet. Cook, breaking up sausage with the back of a wooden spoon, until crumbled and browned, about 5 minutes. Drain on a paper towel-lined plate.
- Sprinkle cheeses evenly over each pizza dough round. Top with crumbled sausage. Crack one egg on top of the sausage in the center of each pizza. Top with sliced green onions.
- Bake pizzas at 450°F for 8 minutes. Carefully remove the baking sheet from underneath the pizzas, and continue to cook – directly on the oven rack – until the crusts are golden brown, the cheese is melted, and the eggs are set, about 2 additional minutes. Carefully remove pizza from oven with a pizza peel and let cool 2 minutes before serving.
- Season to taste with salt and pepper.
Estimated Nutrition Per Serving
- Calories: 320 calories
- Protein: 20 grams
- Carbohydrates: 30 grams
- Dietary Fiber: 3 grams
- Sugars: 3 grams
- Fat: 15 grams
- Saturated Fat: 7 grams
- Cholesterol: 220 mg
- Sodium: 550 mg
Breakfast Tacos
As was the case with my Individual Breakfast Pizzas, we actually enjoyed these tacos for dinner… but apparently I like entitling any recipe featuring eggs as “breakfast” despite the fact that I rarely eat eggs in the morning.
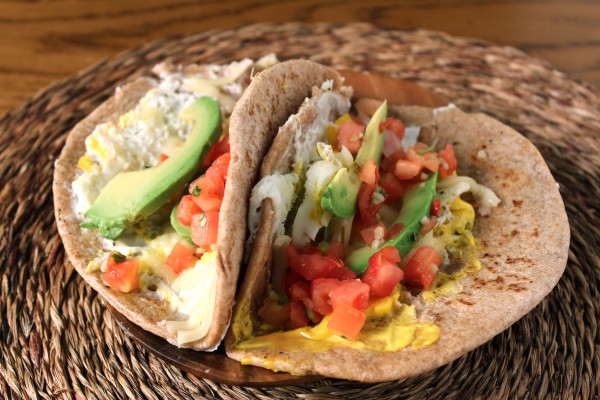
For these tacos, tortillas – or flatbreads, as I used – are crisped up in a skillet before eggs are broken over and cooked directly on them. As far as toppings go, use your favorite accoutrements; I piled on creamy avocado slices, monterey jack cheese, and fresh salsa.

I actually made these breakfast tacos a few months ago, and was putting off posting the recipe until I updated the photos, (as these are less-than-stellar); but given how preoccupied I’ve been lately with our little bundle of joy, I decided to go ahead and share the post as is with you.
The tacos come together quickly enough for breakfast, but are filling enough for dinner. For a more complete meal, you could serve the tacos with black beans scented with freshly squeezed lime juice and chopped cilantro or home fries seasoned with cumin, chili powder, and cayenne.

Breakfast Tacos

Prep Time: 5 minutes
Cook Time: 5 minutes
Keywords: fry breakfast entree main vegetarian eggs
Place the tortillas/flatbreads onto the hot griddle/skillet and let cook until golden and slightly crisp, about 2-3 minutes. Flip the tortillas/flatbreads over, and break one egg over each. Season to taste with salt and pepper. Cover egg-topped tortillas with a lid (or two if using a griddle) and let cook for 2 minutes, or until the eggs start to set. Carefully flip each egg-topped tortilla/flatbread over once again and let cook, uncovered, just until the eggs are fully cooked, about 20-30 seconds
| Name | Breakfast Tacos |
|---|---|
| Cuisine | Mexican |
| Prep Time | 10 minutes |
| Cooking Time | 10 minutes |
| Total Time | 20 minutes |
| Servings | 4 servings |
| Yield | 4 tacos |
Ingredients
- 2 tsp butter
- 4 thick flour tortillas or round flatbreads, preferably whole wheat (I used Middle Eastern Flatbreads from Trader Joe’s)
- 4 large eggs, preferably organic
- sea salt and freshly ground black pepper, to taste
- 1/4 cup shredded monterey jack (or pepper jack) cheese
- 8 slices avocado (from about 1/2 large avocado)
- 1/4 cup fresh salsa (pico de gallo)
Instructions
- Prepare Your Fillings: Cook your choice of fillings. For example, if you’re using bacon, cook it until crispy, then crumble it. Sauté your vegetables until they’re tender and slightly caramelized.
- Scramble the Eggs: In a separate bowl, whisk your eggs and season with salt and pepper. Heat a non-stick skillet over medium heat and add a small amount of butter or oil. Pour in the eggs and cook, stirring gently, until they’re just set.
- Warm the Tortillas: To make your tortillas pliable, warm them in the oven or on a dry skillet for a few seconds on each side.
- Assemble Your Tacos: Lay out your warm tortillas and start assembling your breakfast tacos. Begin with a scoop of scrambled eggs, then add your fillings of choice. Top with cheese, avocados, and a drizzle of salsa.
- Serve and Enjoy: Fold your tortillas over the fillings and serve your breakfast tacos immediately. Don’t forget to add optional toppings like sour cream, hot sauce, cilantro, and a squeeze of lime for an extra burst of flavor.
Say goodbye to boring breakfasts and say hello to the delicious world of breakfast tacos. These versatile and easy-to-make delights are perfect for anyone looking to kickstart their day with a satisfying and flavorful meal. Customize your breakfast tacos to your liking, and you’ll soon find yourself eagerly anticipating breakfast every morning. So, why wait? Start your day with a breakfast fiesta today!
Estimated Nutrition
| Calories | 300 |
| Protein | 12g |
| Carbohydrates | 20g |
| Dietary Fiber | 3g |
| Sugars | 3g |
| Fat | 15-20g |
| Saturated Fat | 6g |
| Servings | 24 |
| Cholesterol | 250mg |
| Sodium | 500mg |
Monday Musings
1. Despite the expected challenges, I LOVE being a mom and I find myself becoming more and more enamored with Lily every day. So much of being first-time parents is figuring things out for ourselves along the way, and – for the most part – it has been a joy thus far. I actually don’t much mind the multiple-times-a-night feedings because snuggling up with our little tater tot has become one of my favorite activities :).
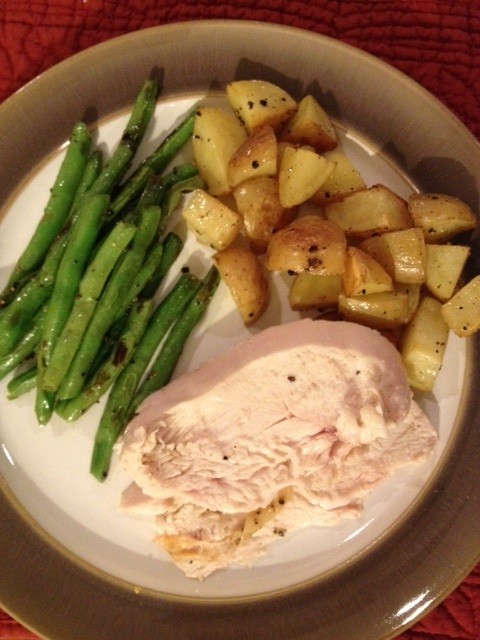
Something I am still getting accustomed to is how to now feed myself and John. It’s no longer possible to plan on meals being served at a given time, as Lily tends to wake up either as I’m cooking or right as we’re about to sit down to eat. John has brought me meals on the couch while I breastfed many times over these past two weeks! I’m glad I had to foresight to make a bunch of freezer meals before Lily was born, and we’ve managed to maintain our healthy diet… such as this dinner of roast chicken, sauteed green beans, and roasted potatoes we enjoyed (on the couch, while breastfeeding) on Saturday night:
| Property | Value |
|---|---|
| Name | Monday Musings |
| Cuisine | Mediterranean |
| Prep Time | 15 minutes |
| Cooking Time | 20 minutes |
| Total Time | 35 minutes |
| Servings | 4 servings |
| Yield | Approximately 4 cups of salad |
Ingredients
- 1 cup quinoa
- 2 cups water
- 1 can chickpeas, drained and rinsed
- 1 cup cherry tomatoes, halved
- 1 cucumber, diced
- 1 red bell pepper, diced
- 1/2 red onion, finely chopped
- 1/2 cup fresh parsley, chopped
- 1/4 cup feta cheese, crumbled
- Salt and pepper to taste
Instructions
- Prepare the Quinoa
- Rinse the quinoa under cold water.
- In a saucepan, combine quinoa and water. Bring to a boil, then reduce the heat to low, cover, and simmer for about 15-20 minutes or until the quinoa is cooked and water is absorbed. Fluff the quinoa with a fork and let it cool.
- Make the Citrus Vinaigrette
- In a small bowl, whisk together the lemon juice, lime juice, lemon zest, lime zest, olive oil, honey, minced garlic, salt, and pepper. Set aside.
- Assemble the Salad
- In a large mixing bowl, combine the cooked quinoa, chickpeas, cherry tomatoes, cucumber, red bell pepper, red onion, and fresh parsley.
- Add the Citrus Vinaigrette
- Pour the citrus vinaigrette over the salad and toss gently to combine, ensuring all the ingredients are well coated.
- Season and Garnish
- Season the salad with salt and pepper to taste. Top with crumbled feta cheese for a burst of flavor and a hint of creaminess.
- Serve
- Transfer the salad to a serving platter or individual bowls. Serve immediately and enjoy this nutritious, refreshing quinoa salad!
Estimated Nutrition Per Serving (approximate values)
- Calories: 330 kcal
- Protein: 12g
- Carbohydrates: 54g
- Total Fat: 7g
- Saturated Fat: 1.5g
- Fiber: 9g
- Sugar: 6g
- Sodium: 420mg
Please note that the nutritional values are approximate and can vary based on specific ingredients used and portion sizes. Always refer to specific product labels or consult a nutritionist for precise nutritional information.
2. Sunday night TV is worth watching for the first time since the season finales of Dexter and Homeland!
Shameless, House of Lies, and Girls are all shows I’ve come to follow and enjoy… though I typically watch them via On Demand in the days following their original air date.
While on the topic of Girls, if you’re a fan – heck, even if you’re not – you’ll get a kick out of this.
3. John’s big Christmas present for me was a gorgeous set of David Yurman bracelets featuring Lily’s birthstone, (yep, he’s a keeper!), but he also gifted me with some potted herb seeds:

So far the cilantro is taking the lead, though it doesn’t look like the cilantro I’m familiar with quite yet. It’s going to be so nice to have freshly picked herbs in the dead of a New England winter!4. I very rarely buy novels, much preferring to take them out of the library for free. I was on the wait list for this book for months but the wait was SO worth it! I’m halfway through, and completely hooked. Best book I’ve read in a while! No spoilers, please ;).
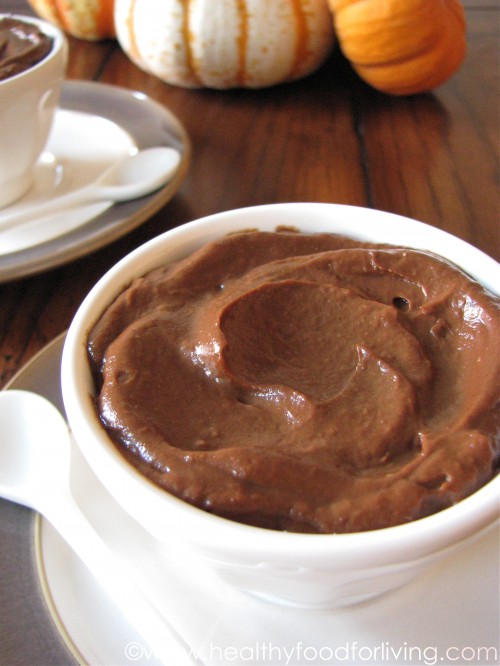
Pumpkin Chocolate Pudding
I love every recipe I post on HFFL, (they’re my little food babies), but every once in a while I come up with something that is really special; something that I know I will make over and over again.
One such recipe was my Chocolate Ganache Pudding that I posted back in July. Rich & chocolatey, lusciously smooth & thick, fudgey pudding.
SO. Good.

I’ve made that pudding several times over the past three months, but decided to put an autumnal spin on the base recipe in celebration of my favorite seasonal ingredient: yep, pumpkin.

Half of the avocado called for in the original recipe is swapped out for pumpkin puree, a generous amount of pumpkin pie spice takes the place of the espresso powder & some of the cocoa powder, and maple extract joins the vanilla extract for an extra boost of flavor.

The resulting pudding is just as silky (though a bit lighter) as its predecessor, but with the added flavor kick of warm pumpkin pie spices.
If you’ve never experienced the revelatory taste sensation of chocolate paired with pumpkin, then perhaps this pudding will tempt you to give it a whirl.

You can thank me later.

But I might be face planted in a bowl of this decadent vegan pudding, rendering a reply unlikely ;).

| Attribute | Value |
|---|---|
| Name | Pumpkin Chocolate Pudding |
| Cuisine | Mixed |
| Prep Time | 15 minutes |
| Cooking Time | 15 minutes |
| Total Time | 30 minutes |
| Servings | 4 servings |
| Yield | Approximately 2 cups of pudding |
Ingredients
- 1 medium-sized ripe Hass avocado, (it should have dark green/black skin & yield slightly when gently squeezed), peeled & pitted
- 3/4 cup pure pumpkin puree
- 1/4 cup + 2 Tbsp pure maple syrup
- 2 Tbsp chocolate coconut butter, such as Artisana Cacao Bliss
- 1 tsp pure vanilla extract
- 1/4 tsp pure maple extract
- 1/3 cup unsweetened cocoa powder
- 2 1/2 tsp pumpkin pie spice
- tiny pinch salt
Directions
In the bowl of a food processor, place the avocado, pumpkin puree, maple syrup, coconut butter, vanilla extract, and maple extract. Process until no lumps remain, scraping down the sides of the food processor bowl as necessary.
Add in the cocoa powder, pumpkin pie spice, & salt; process until smooth. Evenly divide pudding amongst 4 individual cups.
Serve immediately or chill in the refrigerator.
Nutritional Information per serving
- Calories: 210
- Total Fat: 4g
- Saturated Fat: 2.5g
- Cholesterol: 10mg
- Sodium: 150mg
- Total Carbohydrates: 40g
- Dietary Fiber: 3g
- Sugars: 30g
- Protein: 5g

Please adjust the nutrition values based on the specific ingredients and brands you use. Let me know if there’s anything else you’d like to add or modify!
Monday Musings + Mardis Gras Mac & Cheese
1. I ate this for breakfast last Thursday morning, and though it was as delicious as the first couple of times I made it, I had to wrap myself in a blanket before I got halfway through the cold & creamy parfait.
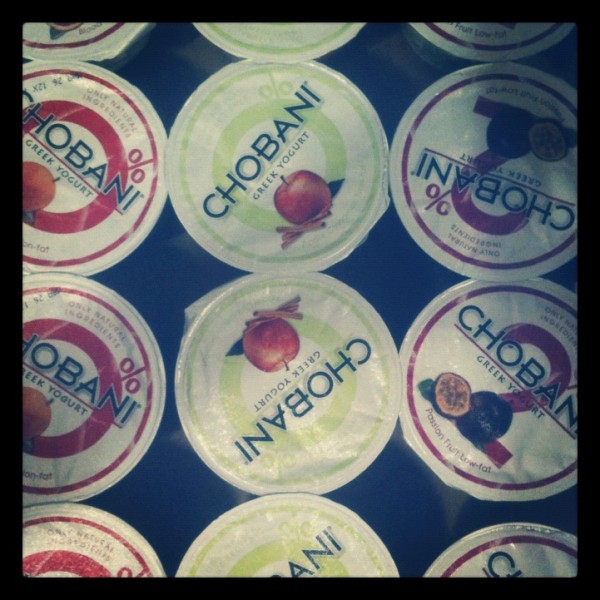
2. Lindsay from Chobani saw my desperate plea on Twitter for the new yogurt flavors to grace Boston area supermarket shelves, and thoughtfully offered to send me a variety pack + 2 large containers of my beloved plain yogurt.
Thank you, Lindsay & Chobani!!!
3. Speaking of thoughtful gifts, the hubs surprised me with this beautiful necklace on Valentine’s Day.
From the David Yurman watch he bought me for my birthday 5 years ago… to the Da Beers solitaire engagement ring he proposed to me with 4 years ago… to this Links of London necklace (and everything in between), I must say the man has great taste in jewelry ;).
4. We’re celebrating Fat Tuesday a day early with this Stovetop Mardis Gras Mac & Cheese. Check it out on The Back Burner!


